
CT13R32E User Guide
Page 2
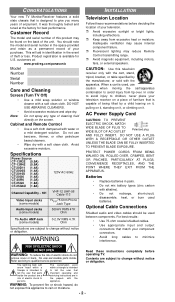
..., or external speakers. PROTECT POWER CORDS FROM BEING WALKED ON, ROLLED OVER, CRIMPED, BENT OR PINCHED, PARTICULARLY AT PLUGS, CONVENIENCE RECEPTACLES, AND THE POINT WHERE THEY EXIT FROM THE APPARATUS. Optional Cable Connections Shielded audio and video cables should note the model and serial number in the event of enjoyment. No user-serviceable parts inside the product are subject to qualified service personnel. Refer servicing to change without notice...
..., or external speakers. PROTECT POWER CORDS FROM BEING WALKED ON, ROLLED OVER, CRIMPED, BENT OR PINCHED, PARTICULARLY AT PLUGS, CONVENIENCE RECEPTACLES, AND THE POINT WHERE THEY EXIT FROM THE APPARATUS. Optional Cable Connections Shielded audio and video cables should note the model and serial number in the event of enjoyment. No user-serviceable parts inside the product are subject to qualified service personnel. Refer servicing to change without notice...
CT13R32E User Guide
Page 3
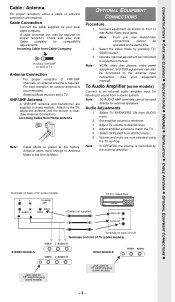
Cable Connection Connect the cable supplied by pressing TV/ VIDEO button. 3. Incoming Cable from AUDIO menu. 2. Select the Video mode by your local cable company. Set amplifier volume to the TV, adjust the antenna until the picture is clear. (See Antenna Connection). R MONO MODELS VIDEO AUDIO Jack used for 1/8" earphone plug (some models) Jack used directly for external speakers. Attach to minimum. 3. Incoming Cable from Home Antenna Note: Cable Mode is required. Operate optional equipment as shown to Antenna Mode in equipment manual. Audio Adjustments 1. ...
Cable Connection Connect the cable supplied by pressing TV/ VIDEO button. 3. Incoming Cable from AUDIO menu. 2. Select the Video mode by your local cable company. Set amplifier volume to the TV, adjust the antenna until the picture is clear. (See Antenna Connection). R MONO MODELS VIDEO AUDIO Jack used for 1/8" earphone plug (some models) Jack used directly for external speakers. Attach to minimum. 3. Incoming Cable from Home Antenna Note: Cable Mode is required. Operate optional equipment as shown to Antenna Mode in equipment manual. Audio Adjustments 1. ...
CT13R32E User Guide
Page 4
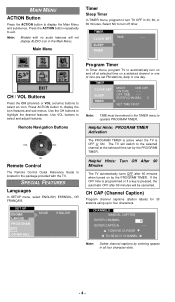
... OTHER ADJ. MAIN MENU ACTION Button Press the ACTION button to select an icon. Main Menu Timer Sleep Timer In TIMER menu, program to the selected channel at selected time on by the PROGRAM TIMER. TIMER CLOCK SET TIME --:-- SLEEP u TIMER CH / VOL Buttons Press the CH (channel) or VOL (volume) buttons to display the Main Menu and submenus. SLEEP SLEEP OOFFFF TTIIMMEE ----:-:--- Helpful Hints: Turn Off After 90 Minutes The TV automatically turns OFF after 90 minutes will not display AUDIO icon in 30, 60...
... OTHER ADJ. MAIN MENU ACTION Button Press the ACTION button to select an icon. Main Menu Timer Sleep Timer In TIMER menu, program to the selected channel at selected time on by the PROGRAM TIMER. TIMER CLOCK SET TIME --:-- SLEEP u TIMER CH / VOL Buttons Press the CH (channel) or VOL (volume) buttons to display the Main Menu and submenus. SLEEP SLEEP OOFFFF TTIIMMEE ----:-:--- Helpful Hints: Turn Off After 90 Minutes The TV automatically turns OFF after 90 minutes will not display AUDIO icon in 30, 60...
CT13R32E User Guide
Page 5
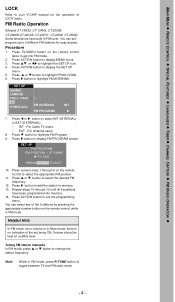
... TV/VIDEO button on the remote control, while in FM tuner. pq tu 2. p q Press or button to exit the programming menu. Volume shoud be kept at no indication of LOCK menu. For Cable TV users. 8. 9. • EXT - u Press button to display FM PROGRAM screen. Note: While in Mute mode, there is no volume or in FM mode, press R-TUNE button to 9 different FM stations for the operation of the set being ON. FM Radio Operation (Models CT...
... TV/VIDEO button on the remote control, while in FM tuner. pq tu 2. p q Press or button to exit the programming menu. Volume shoud be kept at no indication of LOCK menu. For Cable TV users. 8. 9. • EXT - u Press button to display FM PROGRAM screen. Note: While in Mute mode, there is no volume or in FM mode, press R-TUNE button to 9 different FM stations for the operation of the set being ON. FM Radio Operation (Models CT...


