Operating Instructions
Page 2
... 12 Setting a Folder to Save Recorded Images 12 Setting a Proxy Server 17 2 Software Operation 19 2.1 2.1.1 2.1.2 2.2 2.2.1 2.3 2.3.1 2.3.2 2.4 2.4.1 2.4.2 2.4.3 2.4.4 2.4.5 2.5 2.5.1 2.5.2 2.5.3 2.5.4 2.6 2.6.1 2.6.2 2.6.3 2.6.4 2.6.5 2.7 2.7.1 2.7.2 Registering the Camera 19 Creating New Camera 19 Setting Cameras 23 Network Camera Recorder Window 37 About the Application Windows 37 Monitoring the Camera 49 Multi-Monitoring Page 49 Using the Camera Operation Bar 52 Recording the Image 55 Recording Method 55 Manually Recording the...
... 12 Setting a Folder to Save Recorded Images 12 Setting a Proxy Server 17 2 Software Operation 19 2.1 2.1.1 2.1.2 2.2 2.2.1 2.3 2.3.1 2.3.2 2.4 2.4.1 2.4.2 2.4.3 2.4.4 2.4.5 2.5 2.5.1 2.5.2 2.5.3 2.5.4 2.6 2.6.1 2.6.2 2.6.3 2.6.4 2.6.5 2.7 2.7.1 2.7.2 Registering the Camera 19 Creating New Camera 19 Setting Cameras 23 Network Camera Recorder Window 37 About the Application Windows 37 Monitoring the Camera 49 Multi-Monitoring Page 49 Using the Camera Operation Bar 52 Recording the Image 55 Recording Method 55 Manually Recording the...
Operating Instructions
Page 4
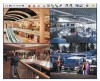
... Instructions Main Features Full Screen Display (see page 78 and 82) You can register up to 64 cameras. Convert in Several Image Formats (see page 117) Using this software, you can view the recorded images from the chart. In addition, alarm mode*, which starts recording...you can view the list of 4 cameras. Customize the Camera Screen-layout (see page 37) New full-screen display function. Remote Access (see page 65) You can transmit audio to be checked from a Panasonic Network Camera connected to a PC (remote server) registered with Windows® Media® Player. You ...
... Instructions Main Features Full Screen Display (see page 78 and 82) You can register up to 64 cameras. Convert in Several Image Formats (see page 117) Using this software, you can view the recorded images from the chart. In addition, alarm mode*, which starts recording...you can view the list of 4 cameras. Customize the Camera Screen-layout (see page 37) New full-screen display function. Remote Access (see page 65) You can transmit audio to be checked from a Panasonic Network Camera connected to a PC (remote server) registered with Windows® Media® Player. You ...

Operating Instructions
Page 5
... are trademarks or registered trademarks of their respective owners. 5 The screens displayed when using a different operating system may differ slightly. Trademarks • Microsoft, Windows, Windows Vista, Internet Explorer, and Windows Media are either registered trademarks or trademarks of Microsoft Corporation in the United States and/or other countries. • Adobe Reader is trademark...; All other countries. • Intel, Pentium and Intel Core are the property of Intel Corporation or its subsidiaries in this document were taken running this software on Windows XP.
... are trademarks or registered trademarks of their respective owners. 5 The screens displayed when using a different operating system may differ slightly. Trademarks • Microsoft, Windows, Windows Vista, Internet Explorer, and Windows Media are either registered trademarks or trademarks of Microsoft Corporation in the United States and/or other countries. • Adobe Reader is trademark...; All other countries. • Intel, Pentium and Intel Core are the property of Intel Corporation or its subsidiaries in this document were taken running this software on Windows XP.
Operating Instructions
Page 6
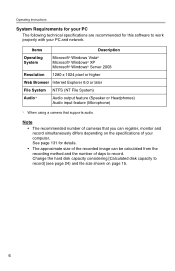
... of your PC and network. Change the hard disk capacity considering [Calculated disk capacity to record] (see page 24) and file size shown on the specifications of days to work properly with your computer. See page 131 for this software to record. Note • The recommended number of cameras that supports audio. Operating...
... of your PC and network. Change the hard disk capacity considering [Calculated disk capacity to record] (see page 24) and file size shown on the specifications of days to work properly with your computer. See page 131 for this software to record. Note • The recommended number of cameras that supports audio. Operating...
Operating Instructions
Page 8
... license key] will be displayed. Use only a software. • To use this software is displayed. Follow the steps on the desktop to start the operation window through the following procedures. • From the [Start] menu, select [All Programs] → [Network Camera Recorder with Viewer Software] → [Network Camera Recorder with Viewer Software]. • From Explorer, double-click [ncr3.exe...
... license key] will be displayed. Use only a software. • To use this software is displayed. Follow the steps on the desktop to start the operation window through the following procedures. • From the [Start] menu, select [All Programs] → [Network Camera Recorder with Viewer Software] → [Network Camera Recorder with Viewer Software]. • From Explorer, double-click [ncr3.exe...

Operating Instructions
Page 9
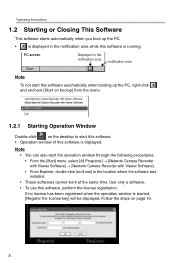
... timers that you exit this software, will not be removed from the notification area. • When you have set stop operating. 9 will be removed from the When is displayed in the notification area and select [Exit]. 2. 1.2.2 Closing Operation Window Click [File] [Exit] on... the menu bar or select Operating Instructions on the toolbar. Note Even when the operation window is operating. 1.2.3 Closing This Software 1.
... timers that you exit this software, will not be removed from the notification area. • When you have set stop operating. 9 will be removed from the When is displayed in the notification area and select [Exit]. 2. 1.2.2 Closing Operation Window Click [File] [Exit] on... the menu bar or select Operating Instructions on the toolbar. Note Even when the operation window is operating. 1.2.3 Closing This Software 1.

Operating Instructions
Page 10
Click [OK]. Select [Help] [License Registration] on the attached registration code stickers. Characters are shown on the menu bar. 2. Operating Instructions 1.3 Performing License Registration If no license has been registered when the operation window is started, [Register the license key] will be displayed. Enter the registration code and license key, and click [OK]. 3. Follow the steps below. 1.3.1 Registering a New License 1. Note The registration code and license key are case sensitive, so enter them exactly as printed. 10
Click [OK]. Select [Help] [License Registration] on the attached registration code stickers. Characters are shown on the menu bar. 2. Operating Instructions 1.3 Performing License Registration If no license has been registered when the operation window is started, [Register the license key] will be displayed. Enter the registration code and license key, and click [OK]. 3. Follow the steps below. 1.3.1 Registering a New License 1. Note The registration code and license key are case sensitive, so enter them exactly as printed. 10

Operating Instructions
Page 11
Lost codes and keys cannot be reissued. 11 Note • If the following window is displayed, the registration code or license key is grayed out. Confirm them, and enter them again. • Keep the registration code and license key in a safe place where you will not lose them. Operating Instructions Note If the registration is complete, [License Registration] on the menu bar is incorrect.
Lost codes and keys cannot be reissued. 11 Note • If the following window is displayed, the registration code or license key is grayed out. Confirm them, and enter them again. • Keep the registration code and license key in a safe place where you will not lose them. Operating Instructions Note If the registration is complete, [License Registration] on the menu bar is incorrect.

Operating Instructions
Page 12
Select [Window] [Settings] on your PC. Configure the settings in the folder where this software is displayed on the icon for details on the settings icons. 12 Note When you change the destination folder to the hard disk on the ... folder, the recorded images will be changed . Click [Preferences]. The setting is displayed. 3. Operating Instructions 1.4 Setting Recording Environment 1.4.1 Setting a Folder to Save Recorded Images This software records camera images to another folder or external hard disk drives. 1. After you click [OK] or [Apply].
Select [Window] [Settings] on your PC. Configure the settings in the folder where this software is displayed on the icon for details on the settings icons. 12 Note When you change the destination folder to the hard disk on the ... folder, the recorded images will be changed . Click [Preferences]. The setting is displayed. 3. Operating Instructions 1.4 Setting Recording Environment 1.4.1 Setting a Folder to Save Recorded Images This software records camera images to another folder or external hard disk drives. 1. After you click [OK] or [Apply].

Operating Instructions
Page 14
...images are deleted.) • You can also limit the recording capacity of individual cameras (see page 13). 2. When [Limit the recording capacity] is set, the following window is disabled by lowering the maximum bandwidth of the camera, reducing the image resolution, or lowering the image quality. Change the destination folder... the [Basic Settings] page (see page 26). [Limit the destination recording capacity] (preferences setting) and [Limit the recording capacity] (individual camera setting) cannot be reduced by clicking [OK]. • Audio interruption may be used simultaneously.
...images are deleted.) • You can also limit the recording capacity of individual cameras (see page 13). 2. When [Limit the recording capacity] is set, the following window is disabled by lowering the maximum bandwidth of the camera, reducing the image resolution, or lowering the image quality. Change the destination folder... the [Basic Settings] page (see page 26). [Limit the destination recording capacity] (preferences setting) and [Limit the recording capacity] (individual camera setting) cannot be reduced by clicking [OK]. • Audio interruption may be used simultaneously.

Operating Instructions
Page 17
... [Use a proxy server] on the menu bar. 2. Select [Window] [Settings] on the [Proxy Server Settings] page. Click [Yes]. • If you click [Yes], the [Use a proxy server] setting in the [Camera Settings] page for all registered cameras is not required. 1. Click [Proxy Server Settings]. Check [Use ... 17 Operating Instructions 1.4.2 Setting a Proxy Server You need to set the following confirmation window will not be displayed for cameras registered with an IPv6 address.) Click [No] if you want to the camera without the proxy settings.) If you do not use a proxy server, this setting ...
... [Use a proxy server] on the menu bar. 2. Select [Window] [Settings] on the [Proxy Server Settings] page. Click [Yes]. • If you click [Yes], the [Use a proxy server] setting in the [Camera Settings] page for all registered cameras is not required. 1. Click [Proxy Server Settings]. Check [Use ... 17 Operating Instructions 1.4.2 Setting a Proxy Server You need to set the following confirmation window will not be displayed for cameras registered with an IPv6 address.) Click [No] if you want to the camera without the proxy settings.) If you do not use a proxy server, this setting ...
Operating Instructions
Page 19
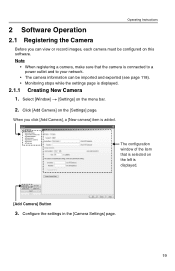
... the menu bar. 2. Note • When registering a camera, make sure that is selected on this software. When you can be configured on the left is displayed. [Add Camera] Button 3. The configuration window of the item that the camera is connected to a power outlet and to your network. • The camera information can view or record images, each...
... the menu bar. 2. Note • When registering a camera, make sure that is selected on this software. When you can be configured on the left is displayed. [Add Camera] Button 3. The configuration window of the item that the camera is connected to a power outlet and to your network. • The camera information can view or record images, each...

Operating Instructions
Page 20
...Cancel] buttons. • The default camera name is generated automatically. Default values are displayed. The number is "New camera", followed by a number. Confirm the camera's connection, IP address, port number, user name and password. 5. If the camera does not support the set values, ... you want to the camera and confirm the resolution and data format. Operating Instructions 4. Click [Camera Function Check]. • When the check has finished, [Confirmed] is displayed. • The software will close. If you cannot access the camera, the following windows are used for the...
...Cancel] buttons. • The default camera name is generated automatically. Default values are displayed. The number is "New camera", followed by a number. Confirm the camera's connection, IP address, port number, user name and password. 5. If the camera does not support the set values, ... you want to the camera and confirm the resolution and data format. Operating Instructions 4. Click [Camera Function Check]. • When the check has finished, [Confirmed] is displayed. • The software will close. If you cannot access the camera, the following windows are used for the...

Operating Instructions
Page 21
... [Preferences] → [Multi-Monitoring] (see page 76). • If you enable the camera, timer recording starts again. • You can play recorded images even from disabled cameras. You can enable or disable cameras. If you disable the camera, the monitoring window for that camera is not displayed and manual recording and timer recording cannot be operated...
... [Preferences] → [Multi-Monitoring] (see page 76). • If you enable the camera, timer recording starts again. • You can play recorded images even from disabled cameras. You can enable or disable cameras. If you disable the camera, the monitoring window for that camera is not displayed and manual recording and timer recording cannot be operated...

Operating Instructions
Page 23
Setting the image data information Configure the settings for registered cameras individually. 1. Image Settings Page 23 Operating Instructions 2.1.2 Setting Cameras You configure the settings for image data information. Select [Window] [Settings] on the menu bar. 2. Configure the settings for the individual cameras and click [OK] or [Apply]. • If you want to configure other settings, click [Apply]. If you click [OK], settings page will close.
Setting the image data information Configure the settings for registered cameras individually. 1. Image Settings Page 23 Operating Instructions 2.1.2 Setting Cameras You configure the settings for image data information. Select [Window] [Settings] on the menu bar. 2. Configure the settings for the individual cameras and click [OK] or [Apply]. • If you want to configure other settings, click [Apply]. If you click [OK], settings page will close.

Operating Instructions
Page 24
... images at specified interval)] If you record images as they are available depend on the camera and data format. To reduce CPU usage, select [Specify the frame rate] from [...Description Select the data format for the camera. [JPEG (Default), MPEG-4]. (If the camera does not support the MPEG-4 format, this option will ...be disabled.) Select the image quality for the camera when using the JPEG format. [Favor Clarity, Standard (Default...days of the image. Select the resolution of recorded that are set on the camera, set the frame rate to a low value. • If you want to...
... images at specified interval)] If you record images as they are available depend on the camera and data format. To reduce CPU usage, select [Specify the frame rate] from [...Description Select the data format for the camera. [JPEG (Default), MPEG-4]. (If the camera does not support the MPEG-4 format, this option will ...be disabled.) Select the image quality for the camera when using the JPEG format. [Favor Clarity, Standard (Default...days of the image. Select the resolution of recorded that are set on the camera, set the frame rate to a low value. • If you want to...

Operating Instructions
Page 25
...If you have set the recorded frequency or the alarm recording, the following window will be higher. • If the camera disables setting changes, resolution or image quality settings may not work properly. • Due to the network environment, you may not record images at the specified recording frequency. bandwidth.... if bandwidth is a limit to the number of connections that can be made to the same camera with this case, set the recorded frequency to the same camera. In this software (including BBHNP11). If you select the JPEG format, frame rate will be reduced, but image ...
...If you have set the recorded frequency or the alarm recording, the following window will be higher. • If the camera disables setting changes, resolution or image quality settings may not work properly. • Due to the network environment, you may not record images at the specified recording frequency. bandwidth.... if bandwidth is a limit to the number of connections that can be made to the same camera with this case, set the recorded frequency to the same camera. In this software (including BBHNP11). If you select the JPEG format, frame rate will be reduced, but image ...

Operating Instructions
Page 27
When [Limit the destination recording capacity] is set, the following window is displayed. [Limit the destination recording capacity] in the basic settings page (see page 13). [Limit the destination recording capacity] and [Limit the recording capacity] (individual camera setting) cannot be used simultaneously. Operating Instructions • You can also limit the recording capacity in the basic settings page is disabled by clicking [OK]. 27
When [Limit the destination recording capacity] is set, the following window is displayed. [Limit the destination recording capacity] in the basic settings page (see page 13). [Limit the destination recording capacity] and [Limit the recording capacity] (individual camera setting) cannot be used simultaneously. Operating Instructions • You can also limit the recording capacity in the basic settings page is disabled by clicking [OK]. 27

Operating Instructions
Page 28
...window You can set the level at which to JPEG (see page 24). Analysis Frequency By increasing the interval, you can better detect fast-moving objects, and by decreasing the interval, you check the box, the motion is not detected during the pan, Detection Operation tilt or zoom operation of the camera.... (If the camera does not support the MPEG-4 format, this is displayed in a cell. 28 If the number of cells that detect motion exceeds the ...
...window You can set the level at which to JPEG (see page 24). Analysis Frequency By increasing the interval, you can better detect fast-moving objects, and by decreasing the interval, you check the box, the motion is not detected during the pan, Detection Operation tilt or zoom operation of the camera.... (If the camera does not support the MPEG-4 format, this is displayed in a cell. 28 If the number of cells that detect motion exceeds the ...

Operating Instructions
Page 29
You can configure commands in the motion detection monitoring window (see page 33). You can center the camera image on the desired point by right-clicking in [Detection Commands] page (see page 51). 29 Note • Check motion detection by using the motion detection monitoring window, and adjust the settings accordingly. • You can specify commands that execute for Detection Description Specify the number of seconds to record before and after the motion is detected. Operating Instructions Setting Before or After Detection Executing Commands for motion detection.
You can configure commands in the motion detection monitoring window (see page 33). You can center the camera image on the desired point by right-clicking in [Detection Commands] page (see page 51). 29 Note • Check motion detection by using the motion detection monitoring window, and adjust the settings accordingly. • You can specify commands that execute for Detection Description Specify the number of seconds to record before and after the motion is detected. Operating Instructions Setting Before or After Detection Executing Commands for motion detection.