

Manual
Page 1
DLP® Projector User manual
DLP® Projector User manual
Manual
Page 2
......11 Keypad...12 Remote control...13 SETUP AND INSTALLATION 14 Installing the projector...14 Connecting sources to the projector 16 Adjusting the projector image...17 Remote setup...18 USING THE PROJECTOR 20 Powering on / off the projector 20 Selecting an input source...21 Projector settings menu (OSD 22 OSD Menu tree...23 Display menu...29 Audio...
......11 Keypad...12 Remote control...13 SETUP AND INSTALLATION 14 Installing the projector...14 Connecting sources to the projector 16 Adjusting the projector image...17 Remote setup...18 USING THE PROJECTOR 20 Powering on / off the projector 20 Selecting an input source...21 Projector settings menu (OSD 22 OSD Menu tree...23 Display menu...29 Audio...

Manual
Page 3
ADDITIONAL INFORMATION 40 Compatible resolutions...40 Image size and projection distance 45 Projector dimensions and ceiling mount installation 46 Remote control codes...47 Troubleshooting...49 Warning indicators...50 Specifications...53 Optoma global offices...54 English 3
ADDITIONAL INFORMATION 40 Compatible resolutions...40 Image size and projection distance 45 Projector dimensions and ceiling mount installation 46 Remote control codes...47 Troubleshooting...49 Warning indicators...50 Specifications...53 Optoma global offices...54 English 3

Manual
Page 4
... case or a cabinet that restricts air flow. ‡‡ To reduce the risk of fire and/or electric shock, do not place the projector on an unstable surface. Do not install near heat sources such as amplifiers that may touch dangerous voltage points and short out parts that could...to constitute a risk of electric shock to persons. They may be properly grounded (earthed). To ensure reliable operation of the projector and to protect from over resulting in injury or the projector may fall over heating, it is 10% ~ 85% ±± In areas susceptible to excessive dust and dirt....
... case or a cabinet that restricts air flow. ‡‡ To reduce the risk of fire and/or electric shock, do not place the projector on an unstable surface. Do not install near heat sources such as amplifiers that may touch dangerous voltage points and short out parts that could...to constitute a risk of electric shock to persons. They may be properly grounded (earthed). To ensure reliable operation of the projector and to protect from over resulting in injury or the projector may fall over heating, it is 10% ~ 85% ±± In areas susceptible to excessive dust and dirt....
Manual
Page 5
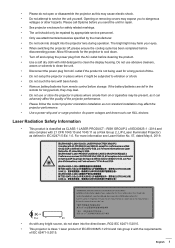
... to vibration or shock. ‡‡ Do not touch the lens with any bright source, do not open or disassemble the projector as defined in places where it can KILL devices. Do not use attachments/accessories specified by appropriate service personnel. ‡‡ ...the unit for repair. ‡‡ See projector enclosure for a long period of IEC 62471-5:2015. English 5 ‡‡ Please do not stare into the projector lens during operation. Please call Optoma before storage. Opening or removing covers may affect the projector performance. ‡‡ Use a power ...
... to vibration or shock. ‡‡ Do not touch the lens with any bright source, do not open or disassemble the projector as defined in places where it can KILL devices. Do not use attachments/accessories specified by appropriate service personnel. ‡‡ ...the unit for repair. ‡‡ See projector enclosure for a long period of IEC 62471-5:2015. English 5 ‡‡ Please do not stare into the projector lens during operation. Please call Optoma before storage. Opening or removing covers may affect the projector performance. ‡‡ Use a power ...

Manual
Page 6
...the lens, be more susceptible to the eyes. ‡‡ Any operation or adjustment not specifically instructed by the exposure of the projector. This may experience an epileptic seizure or stroke when exposed to excessive heat inside the beam. ‡‡ When turning on . ... a medical specialist: (1) altered vision; (2) light-headedness; (3) dizziness; (4) involuntary movements 6 English Warning: Do not clean the lens if the projector is warming up as this may cause damage by the user's guide creates the risk of hazardous laser radiation exposure. ‡‡ Do not open...
...the lens, be more susceptible to the eyes. ‡‡ Any operation or adjustment not specifically instructed by the exposure of the projector. This may experience an epileptic seizure or stroke when exposed to excessive heat inside the beam. ‡‡ When turning on . ... a medical specialist: (1) altered vision; (2) light-headedness; (3) dizziness; (4) involuntary movements 6 English Warning: Do not clean the lens if the projector is warming up as this may cause damage by the user's guide creates the risk of hazardous laser radiation exposure. ‡‡ Do not open...

Manual
Page 7
... changes from time to the contents hereof and specifically disclaims any implied warranties of fatigue or dryness or if you and may weaken your 3D PROJECTOR near open stairwells, cables, balconies, or other purpose (as eye or muscle twitching; (5) confusion; (6) nausea; (7) loss of such revision or changes. registered trademark of ACCO...
... changes from time to the contents hereof and specifically disclaims any implied warranties of fatigue or dryness or if you and may weaken your 3D PROJECTOR near open stairwells, cables, balconies, or other purpose (as eye or muscle twitching; (5) confusion; (6) nausea; (7) loss of such revision or changes. registered trademark of ACCO...

Manual
Page 8
.... ‡‡ Connect the device into the trash when discarding. Caution Changes or modifications not expressly approved by the Federal Communications Commission, to operate this projector. This device may cause undesired operation. Operation is granted by the manufacturer could void the user's authority, which the receiver is no guarantee that may...
.... ‡‡ Connect the device into the trash when discarding. Caution Changes or modifications not expressly approved by the Federal Communications Commission, to operate this projector. This device may cause undesired operation. Operation is granted by the manufacturer could void the user's authority, which the receiver is no guarantee that may...
Manual
Page 9
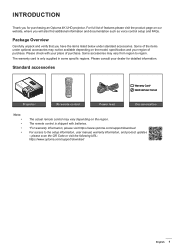
... visit the product page on the model, specification and your dealer for purchasing an Optoma 4K UHD projector. please scan the QR Code or visit the following URL: https://www.optoma.com/support/download English 9 For full list of purchase. Some accessories may vary .... Please check with batteries. *For warranty Information, please visit https://www.optoma.com/support/download For access to region. Standard accessories Warranty Card* Quick start user manual Projector IR remote control Power lead Documentation Note The actual remote control may vary...
... visit the product page on the model, specification and your dealer for purchasing an Optoma 4K UHD projector. please scan the QR Code or visit the following URL: https://www.optoma.com/support/download English 9 For full list of purchase. Some accessories may vary .... Please check with batteries. *For warranty Information, please visit https://www.optoma.com/support/download For access to region. Standard accessories Warranty Card* Quick start user manual Projector IR remote control Power lead Documentation Note The actual remote control may vary...

Manual
Page 10
... 10 9 5 8 7 Minimum 100mm 2 3 6 5 Minimum 100mm 4 Minimum 100mm Minimum 300mm Minimum 300mm Minimum 100mm Note: ‡‡ ‡‡ Do not block projector intake and exhaust vents. When operating the projector in an enclosed space, allow at least 30 cm clearance around the intake and exhaust vents. Kensington™ Lock Port 5. IR Receiver...
... 10 9 5 8 7 Minimum 100mm 2 3 6 5 Minimum 100mm 4 Minimum 100mm Minimum 300mm Minimum 300mm Minimum 100mm Note: ‡‡ ‡‡ Do not block projector intake and exhaust vents. When operating the projector in an enclosed space, allow at least 30 cm clearance around the intake and exhaust vents. Kensington™ Lock Port 5. IR Receiver...

Manual
Page 14
... determine screen size for a given distance, please refer to distance table on page 45. SETUP AND INSTALLATION Installing the projector Your projector is placed from the screen the projected image size increases and vertical offset also increases proportionally. IMPORTANT! For non-standard ...installation advice please contact Optoma. 14 English Table mount front Ceiling mount front Table mount rear Ceiling mount rear Projector should be horizontal and not tilted either forwards/ backwards or left/right. The projector should be installed in any orientation ...
... determine screen size for a given distance, please refer to distance table on page 45. SETUP AND INSTALLATION Installing the projector Your projector is placed from the screen the projected image size increases and vertical offset also increases proportionally. IMPORTANT! For non-standard ...installation advice please contact Optoma. 14 English Table mount front Ceiling mount front Table mount rear Ceiling mount rear Projector should be horizontal and not tilted either forwards/ backwards or left/right. The projector should be installed in any orientation ...

Manual
Page 15
...100mm (3.94 inches) ‡‡ Ensure that the intake vents do not recycle hot air from the exhaust vent. ‡‡ When operating the projector in an enclosed space, ensure that the surrounding air temperature within the enclosure does not exceed operation temperature while the..., and the air intake and exhaust vents are unobstructed. ‡‡ All enclosures should pass a certified thermal evaluation to ensure that the projector does not recycle exhaust air, as this may cause the device to shutdown even if the enclosure temperature is with the acceptable operation temperature range...
...100mm (3.94 inches) ‡‡ Ensure that the intake vents do not recycle hot air from the exhaust vent. ‡‡ When operating the projector in an enclosed space, ensure that the surrounding air temperature within the enclosure does not exceed operation temperature while the..., and the air intake and exhaust vents are unobstructed. ‡‡ All enclosures should pass a certified thermal evaluation to ensure that the projector does not recycle exhaust air, as this may cause the device to shutdown even if the enclosure temperature is with the acceptable operation temperature range...

Manual
Page 16
HDMI Dongle 3. Audio Out Cable No Item 7. Power Cord Note: To ensure the best image quality and avoid connection errors, we strongly recommend using Active Fiber HDMI cables. 16 English S/PDIF Out Cable 8. RS-232 Cable 9. HDMI Cable 2. USB Power Cable No Item 4. 12V DC Jack 5. 3D Emitter Cable 6. For the cable lengths longer than 20-25 feet, we recommend the use of Premium HDMI cables. SETUP AND INSTALLATION Connecting sources to the projector 1 3 2 4 5 6 9 8 7 No Item 1.
HDMI Dongle 3. Audio Out Cable No Item 7. Power Cord Note: To ensure the best image quality and avoid connection errors, we strongly recommend using Active Fiber HDMI cables. 16 English S/PDIF Out Cable 8. RS-232 Cable 9. HDMI Cable 2. USB Power Cable No Item 4. 12V DC Jack 5. 3D Emitter Cable 6. For the cable lengths longer than 20-25 feet, we recommend the use of Premium HDMI cables. SETUP AND INSTALLATION Connecting sources to the projector 1 3 2 4 5 6 9 8 7 No Item 1.

Manual
Page 17
... on the underside of 1.2m to 9.9m. SETUP AND INSTALLATION Adjusting the projector image Image height The projector is sharp and legible. Zoom Lever Focus Ring Note: The projector will focus at a distance of the projector. 2. Tilt-Adjustment Feet Tilt-Adjustment Ring Zoom and focus ‡‡ ...To adjust the image size turn the zoom lever clockwise or counterclockwise to raise or lower the projector. English 17 Rotate the adjustable foot clockwise or counterclockwise to increase or decrease the projected image size. ‡‡ To adjust the...
... on the underside of 1.2m to 9.9m. SETUP AND INSTALLATION Adjusting the projector image Image height The projector is sharp and legible. Zoom Lever Focus Ring Note: The projector will focus at a distance of the projector. 2. Tilt-Adjustment Feet Tilt-Adjustment Ring Zoom and focus ‡‡ ...To adjust the image size turn the zoom lever clockwise or counterclockwise to raise or lower the projector. English 17 Rotate the adjustable foot clockwise or counterclockwise to increase or decrease the projected image size. ‡‡ To adjust the...

Manual
Page 19
...; If the remote control is close to Inverter-Type fluorescent lamps, it might become ineffective intermittently. ‡‡ If the remote control and the projector are no obstacles between the remote control and the sensor should not be longer than 6 meters (~19 feet). Approx. ±15° Approx... on directly by sunlight or fluorescent lamps. ‡‡ Please keep the remote control at an angle within 30° perpendicular to the projector's top or front IR remote control sensor to screens. However, the effective range might obstruct the infra-red beam. ‡‡ Make ...
...; If the remote control is close to Inverter-Type fluorescent lamps, it might become ineffective intermittently. ‡‡ If the remote control and the projector are no obstacles between the remote control and the sensor should not be longer than 6 meters (~19 feet). Approx. ±15° Approx... on directly by sunlight or fluorescent lamps. ‡‡ Please keep the remote control at an angle within 30° perpendicular to the projector's top or front IR remote control sensor to screens. However, the effective range might obstruct the infra-red beam. ‡‡ Make ...

Manual
Page 20
Turn on the projector by pressing the " " button on 1. When connected, the On/Standby LED will be prompted to select the preferred language, projection orientation, and other settings. 20 English Note: The first time the projector is turned on, you will be flashing blue. A start up screen will display in approximately 10 seconds and the On/Standby LED will turn red. 2. USING THE PROJECTOR Powering on / off the projector or Powering on the projector keypad or the remote control. 3. Securely connect the power lead and signal/source cable.
Turn on the projector by pressing the " " button on 1. When connected, the On/Standby LED will be prompted to select the preferred language, projection orientation, and other settings. 20 English Note: The first time the projector is turned on, you will be flashing blue. A start up screen will display in approximately 10 seconds and the On/Standby LED will turn red. 2. USING THE PROJECTOR Powering on / off the projector or Powering on the projector keypad or the remote control. 3. Securely connect the power lead and signal/source cable.

Manual
Page 21
...Selecting an input source Turn on the connected source that the projector is in standby mode, simply press the " " button again to turn the projector back on the projector keypad or the remote control to turn on the projector. 5. or English 21 When you must wait until the ...: Power Off Power Off? Disconnect the power lead from the electrical outlet and the projector. The following message will shut down. 4. USING THE PROJECTOR Powering off the projector by pressing the " " button on the projector keypad or the remote control. 2. Turn off 1. The cooling fans will continue to...
...Selecting an input source Turn on the connected source that the projector is in standby mode, simply press the " " button again to turn the projector back on the projector keypad or the remote control to turn on the projector. 5. or English 21 When you must wait until the ...: Power Off Power Off? Disconnect the power lead from the electrical outlet and the projector. The following message will shut down. 4. USING THE PROJECTOR Powering off the projector by pressing the " " button on the projector keypad or the remote control. 2. Turn off 1. The cooling fans will continue to...

Manual
Page 22
... Then press " " on the keypad or " " on the remote control to select the desired menu item. The OSD menu will close and the projector will automatically save the new settings. 22 English When OSD is displayed, use the "Up" and "Down" navigation buttons to adjust a value. 5. Press... item in the main menu. To exit, press " " (repeatedly if necessary). USING THE PROJECTOR Projector settings menu (OSD) Press " " on the remote control, select the OSD menu " " to review projector information or manage various settings related to select the desired item in the sub menu. 4. General...
... Then press " " on the keypad or " " on the remote control to select the desired menu item. The OSD menu will close and the projector will automatically save the new settings. 22 English When OSD is displayed, use the "Up" and "Down" navigation buttons to adjust a value. 5. Press... item in the main menu. To exit, press " " (repeatedly if necessary). USING THE PROJECTOR Projector settings menu (OSD) Press " " on the remote control, select the OSD menu " " to review projector information or manage various settings related to select the desired item in the sub menu. 4. General...
Manual
Page 23
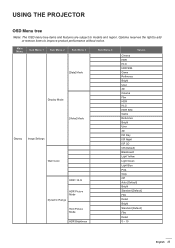
... Yellow Light Green Light Blue Pink Gray Off Auto [Default] Bright Standard [Default] Film Detail Bright Standard [Default] Film Detail 0 ~ 10 English 23 USING THE PROJECTOR OSD Menu tree Note: The OSD menu tree items and features are subject to improve product performance without notice. Game Reference Bright User 3D Cinema...
... Yellow Light Green Light Blue Pink Gray Off Auto [Default] Bright Standard [Default] Film Detail Bright Standard [Default] Film Detail 0 ~ 10 English 23 USING THE PROJECTOR OSD Menu tree Note: The OSD menu tree items and features are subject to improve product performance without notice. Game Reference Bright User 3D Cinema...

Manual
Page 24
USING THE PROJECTOR Main Menu Sub Menu 1 Sub Menu 2 Brightness Contrast Sharpness Color Tint Gamma Sub Menu 3 Film Video Graphics Standard(2.2) 1.8 2.0 2.4 BrilliantColor™ Color Temperature Sub Menu 4 Color ...
USING THE PROJECTOR Main Menu Sub Menu 1 Sub Menu 2 Brightness Contrast Sharpness Color Tint Gamma Sub Menu 3 Film Video Graphics Standard(2.2) 1.8 2.0 2.4 BrilliantColor™ Color Temperature Sub Menu 4 Color ...


