
User Manual
Page 1
...Flexible Angle Setting 6 Introduction 7 Package Overview 7 Product Overview 8 Main Unit 8 Input/Output Connections 9 Remote Control 10 Installation 11 Connecting the Projector 11 Connect to Computer/Notebook......... 11 Connect to Video Sources 12 Connect to 3D Video Devices............13 Using the 3D glasses 15 Powering On/Off...Protocol Function List 56 RS232 Pin Assignments 56 RS232 Protocol Function List 57 Ceiling Mount Installation 60 Optoma Global Offices 61 Regulation & Safety Notices 63 FCC Notice 63 Declaration of Conformity for EU countries 64 Trademarks 65 1 ...
...Flexible Angle Setting 6 Introduction 7 Package Overview 7 Product Overview 8 Main Unit 8 Input/Output Connections 9 Remote Control 10 Installation 11 Connecting the Projector 11 Connect to Computer/Notebook......... 11 Connect to Video Sources 12 Connect to 3D Video Devices............13 Using the 3D glasses 15 Powering On/Off...Protocol Function List 56 RS232 Pin Assignments 56 RS232 Protocol Function List 57 Ceiling Mount Installation 60 Optoma Global Offices 61 Regulation & Safety Notices 63 FCC Notice 63 Declaration of Conformity for EU countries 64 Trademarks 65 1 ...

User Manual
Page 2
... service personnel. Physical damage/ abuse would be repaired by the manufacturer. 6. Power supply cord or plug has been damaged. -- Please call Optoma before you to rain or moisture. 3. See projector enclosure for repair. 7. DANGEROUS HIGH VOLTAGES ARE PRESENT INSIDE THE ENCLOSURE. Do not install near water or moisture. Clean only with arrow...
... service personnel. Physical damage/ abuse would be repaired by the manufacturer. 6. Power supply cord or plug has been damaged. -- Please call Optoma before you to rain or moisture. 3. See projector enclosure for repair. 7. DANGEROUS HIGH VOLTAGES ARE PRESENT INSIDE THE ENCLOSURE. Do not install near water or moisture. Clean only with arrow...

User Manual
Page 3
..., please ensure the cooling cycle has been completed before disconnecting power. Do not use lens cap when projector is on the top, sides, and rear of the projector cabinet is to cool down. Allow 10 seconds for proper air circulation and cooling of fire or electric shock, do not ...open or disassemble the projector as recommended in operation. Please do not expose this may hurt your eyes. If the projector is critical for the projector to be built into the projector's lens when the LED is in this user's guide. ▀■...
..., please ensure the cooling cycle has been completed before disconnecting power. Do not use lens cap when projector is on the top, sides, and rear of the projector cabinet is to cool down. Allow 10 seconds for proper air circulation and cooling of fire or electric shock, do not ...open or disassemble the projector as recommended in operation. Please do not expose this may hurt your eyes. If the projector is critical for the projector to be built into the projector's lens when the LED is in this user's guide. ▀■...

User Manual
Page 4
... not: ™™ Block the slots and openings on the unit provided for a long period of epilepsy or strokes, please consult with viewing in certain Projector pictures or video games. Viewing 3D projection using the 3D function. ™™ Even those without a personal or family history of serious medical condi- Warning...
... not: ™™ Block the slots and openings on the unit provided for a long period of epilepsy or strokes, please consult with viewing in certain Projector pictures or video games. Viewing 3D projection using the 3D function. ™™ Even those without a personal or family history of serious medical condi- Warning...

User Manual
Page 5
... stability. If your eyes show signs of fatigue or dryness or if you experience any of awareness; (8) convulsions; (9) cramps; Accordingly, DO NOT place your 3D PROJECTOR near open stairwells, cables, balconies, or other purpose (as eye or muscle twitching; (5) confusion; (6) nausea; (7) loss of the following symptoms, stop viewing the 3D projection...
... stability. If your eyes show signs of fatigue or dryness or if you experience any of awareness; (8) convulsions; (9) cramps; Accordingly, DO NOT place your 3D PROJECTOR near open stairwells, cables, balconies, or other purpose (as eye or muscle twitching; (5) confusion; (6) nausea; (7) loss of the following symptoms, stop viewing the 3D projection...

User Manual
Page 6
Flexible Angle Setting ▀■ Available angle in vertial direction 360° ▀■ Available angle in a classroom, adequately supervise students when they are asked to point out something on the screen. ▀■ In order to minimize the lamp power, use room blinds to reduce ambient light levels. Keep your back to the beam as much as possible. ▀■ When projector is used in horizontal direction 90° English 6 Usage Notice Eye Safety Warnings ▀■ Avoid staring/facing directly into the projector beam at all times.
Flexible Angle Setting ▀■ Available angle in vertial direction 360° ▀■ Available angle in a classroom, adequately supervise students when they are asked to point out something on the screen. ▀■ In order to minimize the lamp power, use room blinds to reduce ambient light levels. Keep your back to the beam as much as possible. ▀■ When projector is used in horizontal direction 90° English 6 Usage Notice Eye Safety Warnings ▀■ Avoid staring/facing directly into the projector beam at all times.

User Manual
Page 7
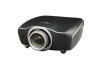
Projector with lens cap Power Cord LED Brightness HDMI Link Menu 16:9 Letter-Box Pure Engine Mode 4:3 Native 2D/3D 3D Format ™™ Due to ... www.optomaeurope.com 7 English Introduction Package Overview Unpack and inspect the box contents to different applications in the box. If something is missing, please contact Optoma customer service.
Projector with lens cap Power Cord LED Brightness HDMI Link Menu 16:9 Letter-Box Pure Engine Mode 4:3 Native 2D/3D 3D Format ™™ Due to ... www.optomaeurope.com 7 English Introduction Package Overview Unpack and inspect the box contents to different applications in the box. If something is missing, please contact Optoma customer service.

User Manual
Page 8
Temp LED 3. Source Button 4. Ventilation (outlet) 7. Focus Ring 9. IR Receivers 6. Zoom Ring 8. Power Socket Power Button / Power LED 2. Tilt-Adjustment Feet 12. Lens Cap 11. Lens 10. Input / Output Connections 13. Ventilation (inlet) 5. Introduction Product Overview Main Unit 4 1 5 23 78 5 6 9 11 12 10 ™™ The interface is subject to model's specifications. ™™ Do not block projector in/out air 11 vents. 13 3D SYNC Out (5V) 5V PWR Out (6W) 11 English 8 1.
Temp LED 3. Source Button 4. Ventilation (outlet) 7. Focus Ring 9. IR Receivers 6. Zoom Ring 8. Power Socket Power Button / Power LED 2. Tilt-Adjustment Feet 12. Lens Cap 11. Lens 10. Input / Output Connections 13. Ventilation (inlet) 5. Introduction Product Overview Main Unit 4 1 5 23 78 5 6 9 11 12 10 ™™ The interface is subject to model's specifications. ™™ Do not block projector in/out air 11 vents. 13 3D SYNC Out (5V) 5V PWR Out (6W) 11 English 8 1.

User Manual
Page 11
Installation Connecting the Projector Connect to Computer/Notebook 2 3 MOLEX 45 molex ™™ Due to the 1 difference in applications for each country, some regions may have different accessories. ™™ (*) Optional accessory R E62405SP 3D SYNC Out (5V) 5V PWR Out (6W) 67 +12V Output 3D Glasses 1...Power Cord 2 HDMI Cable 3 VGA Cable 4...*USB Cable 5 RS232 Cable 6 12V DC Jack 7 3D Emitter cable 11 English
Installation Connecting the Projector Connect to Computer/Notebook 2 3 MOLEX 45 molex ™™ Due to the 1 difference in applications for each country, some regions may have different accessories. ™™ (*) Optional accessory R E62405SP 3D SYNC Out (5V) 5V PWR Out (6W) 67 +12V Output 3D Glasses 1...Power Cord 2 HDMI Cable 3 VGA Cable 4...*USB Cable 5 RS232 Cable 6 12V DC Jack 7 3D Emitter cable 11 English

User Manual
Page 13
... can download games (and 3D updates) via the PlayStation® network. The option is located in the diagram, you have updated your console to 3D Projector. -- NOTE ™™ If input video is normal 2D, please press "3D Format" and switch to "AUTO". ™™ If "SBS Mode" is located in... the "DISPLAY" section of the projector OSD menu. 3D Device (e.g. 3D DV/DC) with 2D 1080i side by -side output to the latest software ver- SKY 3D, DirecTV) yy Contact your...
... can download games (and 3D updates) via the PlayStation® network. The option is located in the diagram, you have updated your console to 3D Projector. -- NOTE ™™ If input video is normal 2D, please press "3D Format" and switch to "AUTO". ™™ If "SBS Mode" is located in... the "DISPLAY" section of the projector OSD menu. 3D Device (e.g. 3D DV/DC) with 2D 1080i side by -side output to the latest software ver- SKY 3D, DirecTV) yy Contact your...

User Manual
Page 14
Installation 3D Broadcast 3D Blu-ray™ Disc 3D Console Games SKY+HD, cable/satellite box 3D Blu-ray™ Player PlayStation® 3 3D Glasses Full 3D 1080p DLP® Projector English 14
Installation 3D Broadcast 3D Blu-ray™ Disc 3D Console Games SKY+HD, cable/satellite box 3D Blu-ray™ Player PlayStation® 3 3D Glasses Full 3D 1080p DLP® Projector English 14

User Manual
Page 15
... to use 3D mode. 2. The option is located in 3D, please check 3D device set up cor- To turn on the "3D Mode" of the projector OSD menu. 7. To turn ON 3D glasses: Press the "Power" button and the LED will flash one time indicating the glasses are ready to the... projector and signal is 2D 1080i side-by-side and repeat previous steps 1 ~ 4. 6. For more detailed information, please refer to the 3D glasses user's guide, or ...
... to use 3D mode. 2. The option is located in 3D, please check 3D device set up cor- To turn on the "3D Mode" of the projector OSD menu. 7. To turn ON 3D glasses: Press the "Power" button and the LED will flash one time indicating the glasses are ready to the... projector and signal is 2D 1080i side-by-side and repeat previous steps 1 ~ 4. 6. For more detailed information, please refer to the 3D glasses user's guide, or ...

User Manual
Page 16
... 16:9 Mode 4:3 If not, push menu button and go to switch between inputs. ™™ Turn on the remote. The first time you use the projector, you will turn blue. The startup screen will detect the source automatically. Remove the lens cap. 2. When connected, the Power LED will be...". Turn on and connect the source that the "Source Lock" has been set to "Off". If you want to select the preferred language. 4. The projector will display in approximately 10 seconds. Securely connect the power cord and signal cable. Installation Powering On/Off the...
... 16:9 Mode 4:3 If not, push menu button and go to switch between inputs. ™™ Turn on the remote. The first time you use the projector, you will turn blue. The startup screen will detect the source automatically. Remove the lens cap. 2. When connected, the Power LED will be...". Turn on and connect the source that the "Source Lock" has been set to "Off". If you want to select the preferred language. 4. The projector will display in approximately 10 seconds. Securely connect the power cord and signal cable. Installation Powering On/Off the...

User Manual
Page 17
... the remote control or " " button on , you must wait until the projector has completed the cooling cycle and has entered standby mode. When you wish to turn the projector back on the side of the projector two times with one second interval to operate for about 10 seconds for the...standby mode, simply press " " button to confirm otherwise the message will be displayed on the projector immediately following message will disappear after 15 seconds. When the Power LED lights solid red, the projector has entered standby mode. If you press the " " button for cooling cycle and the Power ...
... the remote control or " " button on , you must wait until the projector has completed the cooling cycle and has entered standby mode. When you wish to turn the projector back on the side of the projector two times with one second interval to operate for about 10 seconds for the...standby mode, simply press " " button to confirm otherwise the message will be displayed on the projector immediately following message will disappear after 15 seconds. When the Power LED lights solid red, the projector has entered standby mode. If you press the " " button for cooling cycle and the Power ...

User Manual
Page 18
...the warning indicator light up again, please contact your nearest service center for 30 seconds and try again. English 18 This indicates the projector has overheated. Installation Warning Indicator When the warning indicators (see below) come on . "TEMP" LED indicator flashes red ...and if "Power" LED indicator flashes red. Under normal conditions, the projector can be switched back on , the projector will automatically shutdown: ™™ Contact the nearest service center if the projector displays these symptoms. See pages 61-62 for more information. "Power...
...the warning indicator light up again, please contact your nearest service center for 30 seconds and try again. English 18 This indicates the projector has overheated. Installation Warning Indicator When the warning indicators (see below) come on . "TEMP" LED indicator flashes red ...and if "Power" LED indicator flashes red. Under normal conditions, the projector can be switched back on , the projector will automatically shutdown: ™™ Contact the nearest service center if the projector displays these symptoms. See pages 61-62 for more information. "Power...

User Manual
Page 19
Installation Adjusting the Projected Image Adjusting the Projector's Height The projector is equipped with the remaining feet as needed. Repeat with elevator feet for adjusting the image height. 1. Locate the adjustable foot you wish to lower it. Tilt-Adjustment Feet Tilt-Adjustment Ring 19 English Rotate the adjustable ring clockwise to raise the projector or counter clockwise to modify on the underside of the projector. 2.
Installation Adjusting the Projected Image Adjusting the Projector's Height The projector is equipped with the remaining feet as needed. Repeat with elevator feet for adjusting the image height. 1. Locate the adjustable foot you wish to lower it. Tilt-Adjustment Feet Tilt-Adjustment Ring 19 English Rotate the adjustable ring clockwise to raise the projector or counter clockwise to modify on the underside of the projector. 2.

User Manual
Page 20
Horizontal Lens Shift Lever 60%H Height (H) 60%H Width(W) 10%W 10%W Zoom Ring Focus Ring Vertical Lens Shift Lever English 20 Installation Adjusting the Projector's Position To determine where to position the projector, consider the size and shape of your screen, the location of your power outlets, and the distance between the projector and the rest of your equipment.
Horizontal Lens Shift Lever 60%H Height (H) 60%H Width(W) 10%W 10%W Zoom Ring Focus Ring Vertical Lens Shift Lever English 20 Installation Adjusting the Projector's Position To determine where to position the projector, consider the size and shape of your screen, the location of your power outlets, and the distance between the projector and the rest of your equipment.

User Manual
Page 22
English 22 User Controls Control Panel & Remote Control Control Panel Using the Control Panel Power Button / Power LED Refer to select an input signal. SOURCE Press "SOURCE" to the "Power On/Off the Projector" section on pages 16-17. Indicate the projector's status. Temp LED Indicate the projector's temperature status.
English 22 User Controls Control Panel & Remote Control Control Panel Using the Control Panel Power Button / Power LED Refer to select an input signal. SOURCE Press "SOURCE" to the "Power On/Off the Projector" section on pages 16-17. Indicate the projector's status. Temp LED Indicate the projector's temperature status.

User Manual
Page 23
Press "YPbPr" to the input source. Enables and disables the HDMI link function. Automatically synchronizes the projector to choose source from YPbPr connector. 23 English Press "Video" to page 28) Scale the image at a 4:3 (1440x1080) aspect ratio. The input source will be ... HDMI Link Menu 16:9 Letter-Box Pure Engine Mode 4:3 Native 2D/3D 3D Format Remote Control Using the Remote Control Power On Turn on the projector. Display or exit the "IMAGE | Advanced" menu. Use directional select keys to select items or make adjustments to your 3D content. Power Off Gamma HDMI...
Press "YPbPr" to the input source. Enables and disables the HDMI link function. Automatically synchronizes the projector to choose source from YPbPr connector. 23 English Press "Video" to page 28) Scale the image at a 4:3 (1440x1080) aspect ratio. The input source will be ... HDMI Link Menu 16:9 Letter-Box Pure Engine Mode 4:3 Native 2D/3D 3D Format Remote Control Using the Remote Control Power On Turn on the projector. Display or exit the "IMAGE | Advanced" menu. Use directional select keys to select items or make adjustments to your 3D content. Power Off Gamma HDMI...

User Manual
Page 24
... image processing technologies that enhances the quality of the colors (R/G/B/ C/M/Y) to choose source from HDMI 1 connector. Display or exit the on-screen display menus for projector. Adjust the brightness of the letterboxed nonanamorphically enhanced movie at a 16:9 (1920x1080) aspect ratio. LBX Enable the viewing of the image.
... image processing technologies that enhances the quality of the colors (R/G/B/ C/M/Y) to choose source from HDMI 1 connector. Display or exit the on-screen display menus for projector. Adjust the brightness of the letterboxed nonanamorphically enhanced movie at a 16:9 (1920x1080) aspect ratio. LBX Enable the viewing of the image.


