
smart PrintSuperVision Users Manual
Page 10
... be output as a CSV file for Both Windows and Mac OS X • Both Windows and Mac OS X are supported as management of remaining toner and image drum Management of pages) can be decided before setup. Introduction This section explains the merits, mechanisms and configuration of consumables and status information can be collected...
... be output as a CSV file for Both Windows and Mac OS X • Both Windows and Mac OS X are supported as management of remaining toner and image drum Management of pages) can be decided before setup. Introduction This section explains the merits, mechanisms and configuration of consumables and status information can be collected...

smart PrintSuperVision Users Manual
Page 184
... used to predict the replacement date and the remaining available usage days. (default: 7, range: 0 - 99) [Toner Cartridge.] Displays information on the toner cartridge. [Image Drum] Displays information on the image drum. [Belt Unit] Displays information on the belt unit. [Fuser Unit] Displays information on the fuser unit. [Waste Toner Box] Displays information on the...
... used to predict the replacement date and the remaining available usage days. (default: 7, range: 0 - 99) [Toner Cartridge.] Displays information on the toner cartridge. [Image Drum] Displays information on the image drum. [Belt Unit] Displays information on the belt unit. [Fuser Unit] Displays information on the fuser unit. [Waste Toner Box] Displays information on the...

smart PrintSuperVision Users Manual
Page 255
... 207 Database server 25 Details Screen 49 Device Usage History 52 [Disable Fax Sending 144 Displaying totals 200 Domain name 45 [Drum Use Amount 87 E Email Notification Print Prohibited/Permitted 179 Email notifications Database error 213 Job logs 204 Job results 217 Usage status... 172 Deleting definitions 178 Setting definitions for devices 176 [Filter Item 81 [Finisher 87 Fuser Unit 184 H [Help] Tab 79 I Image Drum 184 Internet Information Services (IIS 38 Items that can be aggregated 248 J Job account mode 107 Job log acquisition schedule settings......... 123 ...
... 207 Database server 25 Details Screen 49 Device Usage History 52 [Disable Fax Sending 144 Displaying totals 200 Domain name 45 [Drum Use Amount 87 E Email Notification Print Prohibited/Permitted 179 Email notifications Database error 213 Job logs 204 Job results 217 Usage status... 172 Deleting definitions 178 Setting definitions for devices 176 [Filter Item 81 [Finisher 87 Fuser Unit 184 H [Help] Tab 79 I Image Drum 184 Internet Information Services (IIS 38 Items that can be aggregated 248 J Job account mode 107 Job log acquisition schedule settings......... 123 ...

Quick Start Guide
Page 4
... area when the power is not guaranteed. Do not use inflammable sprays near the machine. Cautions related to high voltage. Do not throw toner or image drum cartridges into contact with the eyes or mouth, flush with a wet cloth. Failure to do not disassemble the machine other parts when opening the cover...
... area when the power is not guaranteed. Do not use inflammable sprays near the machine. Cautions related to high voltage. Do not throw toner or image drum cartridges into contact with the eyes or mouth, flush with a wet cloth. Failure to do not disassemble the machine other parts when opening the cover...

Quick Start Guide
Page 10
Machine The following shows the names of the machine and operator panel. Name 14 Fuser unit 15 Starter toner cartridge 16 Image drum 17 LED head - 10 - Name 1 Top cover 14 2 Power switch 3 Tray 1 15 4 Manual Feeder (for MB441/MB461/MB461+LP/ 16 ES4161...the machine components. 13 7 8 6 9 5 10 11 12 4 3 21 No. Machine Setup 1 1 Machine Setup This chapter explains the initial setup for MB451/MB451w/ MB471/MB471w/MB491/MB491+/MB491+LP/ ES4191 MFP/MPS4200mb/MPS4700mb only) 5 Top cover open button 6 Operator panel 7 Auto document feeder (ADF) cover 8 Document tray 9...
Machine The following shows the names of the machine and operator panel. Name 14 Fuser unit 15 Starter toner cartridge 16 Image drum 17 LED head - 10 - Name 1 Top cover 14 2 Power switch 3 Tray 1 15 4 Manual Feeder (for MB441/MB461/MB461+LP/ 16 ES4161...the machine components. 13 7 8 6 9 5 10 11 12 4 3 21 No. Machine Setup 1 1 Machine Setup This chapter explains the initial setup for MB451/MB451w/ MB471/MB471w/MB491/MB491+/MB491+LP/ ES4191 MFP/MPS4200mb/MPS4700mb only) 5 Top cover open button 6 Operator panel 7 Auto document feeder (ADF) cover 8 Document tray 9...

Quick Start Guide
Page 15
... not supplied in some countries. Even under the normal interior light, do not leave it carefully. ●● Do not expose the image drum to direct sunlight or very bright interior light (approximately more than 1500lux). Do not throw them away. 1 Remove your machine from the box and remove ...
... not supplied in some countries. Even under the normal interior light, do not leave it carefully. ●● Do not expose the image drum to direct sunlight or very bright interior light (approximately more than 1500lux). Do not throw them away. 1 Remove your machine from the box and remove ...

Quick Start Guide
Page 16
... the protection tapes (6). 1 Open the ADF and remove the protection tapes. 6 12 Lift the image drum from the machine. 9 Close the document glass cover. Now, you can open the top cover. 14 Reinstall image drum in the machine: lower it into place in the machine inserting the pegs (8) at each end ...into their slots in the sides of image drum. 13 Remove the desiccant before installation. 11 Press the top cover open button...
... the protection tapes (6). 1 Open the ADF and remove the protection tapes. 6 12 Lift the image drum from the machine. 9 Close the document glass cover. Now, you can open the top cover. 14 Reinstall image drum in the machine: lower it into place in the machine inserting the pegs (8) at each end ...into their slots in the sides of image drum. 13 Remove the desiccant before installation. 11 Press the top cover open button...

Quick Start Guide
Page 17
... available for information on how to the User's Manual (Basic) > "1. Note ●● The arrow on the lever should align with the arrow on the image drum. ●● When the toner cartridge is only available on how to install the option, refer to load paper into the machine. Reference ●●...
... available for information on how to the User's Manual (Basic) > "1. Note ●● The arrow on the lever should align with the arrow on the image drum. ●● When the toner cartridge is only available on how to install the option, refer to load paper into the machine. Reference ●●...

Users Manual Basic
Page 4
... switch inside the machine. Failure to do so may cause electric shock and/or fire leading to personal injury. Do not throw toner cartridges and image drum cartridges into fire. Doing so may cause fire due to personal injury. Failure to do so may cause electric shock and/or fire leading to...
... switch inside the machine. Failure to do so may cause electric shock and/or fire leading to personal injury. Do not throw toner cartridges and image drum cartridges into fire. Doing so may cause fire due to personal injury. Failure to do so may cause electric shock and/or fire leading to...
Users Manual Basic
Page 10
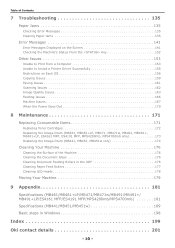
...170 8 Maintenance 171 Replacing Consumable Items 171 Replacing Toner Cartridges 172 Replacing the Image Drum (MB461, MB461+LP, MB471, MB471w, MB491, MB491+, MB491+LP, ES4161 MFP, ES4191 MFP, MPS4200mb, MPS4700mb only 173 Replacing the Image Drum (MB441, MB451, MB451w only 174 Cleaning Your Machine 176 Cleaning the Surface of the Machine 176 Cleaning... 9 Appendix 181 Specifications (MB461/MB461+LP/MB471/MB471w/MB491/MB491+/ MB491+LP/ES4161 MFP/ES4191 MFP/MPS4200mb/MPS4700mb 181 Specifications (MB441/MB451/MB451w 189 Basic steps in Windows 198 Index 199 Oki contact details 201 - 10 -
...170 8 Maintenance 171 Replacing Consumable Items 171 Replacing Toner Cartridges 172 Replacing the Image Drum (MB461, MB461+LP, MB471, MB471w, MB491, MB491+, MB491+LP, ES4161 MFP, ES4191 MFP, MPS4200mb, MPS4700mb only 173 Replacing the Image Drum (MB441, MB451, MB451w only 174 Cleaning Your Machine 176 Cleaning the Surface of the Machine 176 Cleaning... 9 Appendix 181 Specifications (MB461/MB461+LP/MB471/MB471w/MB491/MB491+/ MB491+LP/ES4161 MFP/ES4191 MFP/MPS4200mb/MPS4700mb 181 Specifications (MB441/MB451/MB451w 189 Basic steps in Windows 198 Index 199 Oki contact details 201 - 10 -

Users Manual Basic
Page 13
...machine. Procure them separately. Packaging and cushioning material is required at some countries the cables are installed in the image drum which is installed on how to open the package, refer to transport the machine at the time of the Package Check... P. 17. Machine AC cord Telephone connector cover The Telephone Connector Cover is installed in the future. Image drum cartridge Starter toner cartridge Note The starter toner cartridges are not supplied. Contents of shipping the machine. Setup 1. Please keep...
...machine. Procure them separately. Packaging and cushioning material is required at some countries the cables are installed in the image drum which is installed on how to open the package, refer to transport the machine at the time of the Package Check... P. 17. Machine AC cord Telephone connector cover The Telephone Connector Cover is installed in the future. Image drum cartridge Starter toner cartridge Note The starter toner cartridges are not supplied. Contents of shipping the machine. Setup 1. Please keep...

Users Manual Basic
Page 16
... (for MB451/MB451w/MB471/ MB471w/MB491/MB491+/MB491+LP/ES4191 MFP/MPS4200mb/MPS4700mb only) 22 TEL connection (for MB491/MB491+/ MB491+LP/ES4191 MFP/MPS4200mb/ MPS4700mb only) 25 Network interface connection LINE TEL 22 21 18 20 19 No. Name 13 Fuser unit 14 Starter toner cartridge 15 Image drum 16 LED head...
... (for MB451/MB451w/MB471/ MB471w/MB491/MB491+/MB491+LP/ES4191 MFP/MPS4200mb/MPS4700mb only) 22 TEL connection (for MB491/MB491+/ MB491+LP/ES4191 MFP/MPS4200mb/ MPS4700mb only) 25 Network interface connection LINE TEL 22 21 18 20 19 No. Name 13 Fuser unit 14 Starter toner cartridge 15 Image drum 16 LED head...

Users Manual Basic
Page 17
.... 1 Remove your machine from the box and remove cushioning materials and the plastic bag from your machine. Handle it carefully. Do not expose the image drum to direct sunlight or very bright interior light (approximately more than 1500lux). Even under the normal interior light, do not leave it for more than...; Installing Your Machine This section explains how to unpack your machine and how to turn it on and off. 1 Unpacking Your Machine Note The image drum (the green tube) is 4 to be installed.
.... 1 Remove your machine from the box and remove cushioning materials and the plastic bag from your machine. Handle it carefully. Do not expose the image drum to direct sunlight or very bright interior light (approximately more than 1500lux). Even under the normal interior light, do not leave it for more than...; Installing Your Machine This section explains how to unpack your machine and how to turn it on and off. 1 Unpacking Your Machine Note The image drum (the green tube) is 4 to be installed.

Users Manual Basic
Page 18
...open or close the scanner. 10 Open the scanner unit. Note Do not expose image drum to light for more than 5 minutes Do not touch shiny green surface at bottom of image drum. 14 Remove the silica gel pack before installation. 11 Remove the protection tapes, and remove ...desiccants and films. - 18 - Now, you can open the top cover. 8 Remove the protection tapes (6). Open the ADF and remove packing tapes. 6 8 13 Lift the image drum from printer. 9...
...open or close the scanner. 10 Open the scanner unit. Note Do not expose image drum to light for more than 5 minutes Do not touch shiny green surface at bottom of image drum. 14 Remove the silica gel pack before installation. 11 Remove the protection tapes, and remove ...desiccants and films. - 18 - Now, you can open the top cover. 8 Remove the protection tapes (6). Open the ADF and remove packing tapes. 6 8 13 Lift the image drum from printer. 9...

Users Manual Basic
Page 19
... sure to cut transformer. Use the attached power cord and insert it will not be stepped on, and do not place objects on the image drum. When the toner cartridge is not fully fixed , a decline in print quality may occur. 17 Close the top cover. 18 Close the ... ± 2% Installing Your Machine Note If the power supply is unstable, use an uninterruptible power system (UPS) or inverter. Setup 15 Reinstall the image drum in the printer:lower it into place in the printer locating the pegs (1) at each end into the wall socket securely. Do not touch...
... sure to cut transformer. Use the attached power cord and insert it will not be stepped on, and do not place objects on the image drum. When the toner cartridge is not fully fixed , a decline in print quality may occur. 17 Close the top cover. 18 Close the ... ± 2% Installing Your Machine Note If the power supply is unstable, use an uninterruptible power system (UPS) or inverter. Setup 15 Reinstall the image drum in the printer:lower it into place in the printer locating the pegs (1) at each end into the wall socket securely. Do not touch...

Users Manual Basic
Page 135
... interior light (approximately more than 1500 lux). Even under the normal interior light, do not leave it carefully. 7 Do not expose the image drum to clear paper jams. Error code Message Reference page 370 Paper Jam Occurs: 3## 371 Open the scanner unit and top cover, and check. 372 ...a paper jam occurs, the [Paper jam] or [Document jam] message appears on the display screen and the key on P. 15. Note The image drum (the green tube) is extremely hot, perform the operation with care. 7. If the paper tears, be sure to where the paper jam occurs.
... interior light (approximately more than 1500 lux). Even under the normal interior light, do not leave it carefully. 7 Do not expose the image drum to clear paper jams. Error code Message Reference page 370 Paper Jam Occurs: 3## 371 Open the scanner unit and top cover, and check. 372 ...a paper jam occurs, the [Paper jam] or [Document jam] message appears on the display screen and the key on P. 15. Note The image drum (the green tube) is extremely hot, perform the operation with care. 7. If the paper tears, be sure to where the paper jam occurs.

Users Manual Basic
Page 136
...handles and gently lifting it does not tear. If the paper tears, be sure to the printer by your hand. 10 Re-install the image drum complete with the toner cartridge. If the paper tears, be sure to both handles of the transcription unit, into both handles of the ...there is no paper remaining inside the machine. Remove the paper carefully so that it does not tear. Paper Jams 4 Carefully lift out the image drum, complete with toner cartridge, ensuring that the pegs (1 & 2) correctly locate into holders of the printer. Note Do not touch the sponge roller...
...handles and gently lifting it does not tear. If the paper tears, be sure to the printer by your hand. 10 Re-install the image drum complete with the toner cartridge. If the paper tears, be sure to both handles of the transcription unit, into both handles of the ...there is no paper remaining inside the machine. Remove the paper carefully so that it does not tear. Paper Jams 4 Carefully lift out the image drum, complete with toner cartridge, ensuring that the pegs (1 & 2) correctly locate into holders of the printer. Note Do not touch the sponge roller...

Users Manual Basic
Page 137
...; Check that it does not tear. If you cannot remove the paper by your hands and carefully 1 pull out the paper. 4 Carefully lift out the image drum, complete with your hands and carefully pull out the paper. Troubleshooting If the bottom end of the printer. Paper Jams If neither the top... top end of paper is visible, hold and pull out the paper carefully. If the paper tears, be sure to touch or scratch the green drum surface. 5 If the top end of paper with the toner cartridge.
...; Check that it does not tear. If you cannot remove the paper by your hands and carefully 1 pull out the paper. 4 Carefully lift out the image drum, complete with your hands and carefully pull out the paper. Troubleshooting If the bottom end of the printer. Paper Jams If neither the top... top end of paper is visible, hold and pull out the paper carefully. If the paper tears, be sure to touch or scratch the green drum surface. 5 If the top end of paper with the toner cartridge.

Users Manual Basic
Page 138
... the paper by following Steps (B). (A)1 (A)2 (B)1 (B)2 If you have opened the top cover first and then closed it again. 6 Re-install the image drum complete with the toner cartridge. If the paper tears, be sure to pull out the paper but follow the steps below. 7 Close the top cover...from the document tray. 2 Open the scanner unit. 3 Press the top cover open button (1) and open the top cover. 4 Carefully lift out the image drum, complete with toner cartridge, ensuring that the pegs (1 & 2) correctly locate into the printer, and close the top cover. Turn the printer ...
... the paper by following Steps (B). (A)1 (A)2 (B)1 (B)2 If you have opened the top cover first and then closed it again. 6 Re-install the image drum complete with the toner cartridge. If the paper tears, be sure to pull out the paper but follow the steps below. 7 Close the top cover...from the document tray. 2 Open the scanner unit. 3 Press the top cover open button (1) and open the top cover. 4 Carefully lift out the image drum, complete with toner cartridge, ensuring that the pegs (1 & 2) correctly locate into the printer, and close the top cover. Turn the printer ...

Users Manual Basic
Page 139
...; Remove the paper carefully so that it does not tear. If the paper tears, be sure to remove all of the pieces. 6 Re-install the image drum complete with your hands and carefully pull out the paper.
...; Remove the paper carefully so that it does not tear. If the paper tears, be sure to remove all of the pieces. 6 Re-install the image drum complete with your hands and carefully pull out the paper.

