
N7-204 - User Manual
Page 2
Use only a soft cloth to clean the unit Do not use liquid cleaners. 3) Avoid exposing the unit to the SD card/USB device and the unit when any memory card or USB device is inserted or removed without turning off power before cleaning. Note It may cause damage to extreme heat. 4) Do not disassemble the Digital Photo Frame, otherwise it may result in electric shock and void your warranty. 1 Safety precaution 1) Use only the supplied adaptor with Input 100-240V, Output 5V. 2) Turn off the unit.
Use only a soft cloth to clean the unit Do not use liquid cleaners. 3) Avoid exposing the unit to the SD card/USB device and the unit when any memory card or USB device is inserted or removed without turning off power before cleaning. Note It may cause damage to extreme heat. 4) Do not disassemble the Digital Photo Frame, otherwise it may result in electric shock and void your warranty. 1 Safety precaution 1) Use only the supplied adaptor with Input 100-240V, Output 5V. 2) Turn off the unit.
N7-204 - User Manual
Page 4
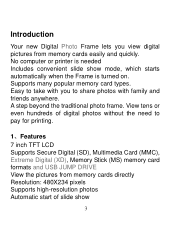
... view digital pictures from memory cards directly Resolution: 480X234 pixels Supports high-resolution photos Automatic start of digital photos without the need to share photos with family and friends anywhere. A step beyond the traditional photo frame. No computer or printer is needed Includes convenient slide show 3 Introduction Your new Digital Photo Frame lets you to pay for printing. 1、Features 7 inch TFT LCD Supports Secure Digital (SD), Multimedia Card (MMC), Extreme Digital (XD), Memory Stick (MS) memory card formats and USB JUMP DRIVE View...
... view digital pictures from memory cards directly Resolution: 480X234 pixels Supports high-resolution photos Automatic start of digital photos without the need to share photos with family and friends anywhere. A step beyond the traditional photo frame. No computer or printer is needed Includes convenient slide show 3 Introduction Your new Digital Photo Frame lets you to pay for printing. 1、Features 7 inch TFT LCD Supports Secure Digital (SD), Multimedia Card (MMC), Extreme Digital (XD), Memory Stick (MS) memory card formats and USB JUMP DRIVE View...

N7-204 - User Manual
Page 6
Top View 1. Front View between Pan Scan, Fill, Original and Auto Fit. LCD Screen 5 Product Diagram A. Button Pause or resume the playback. 2. Button Go to the previous picture. 3. Button Go to exit the power save mode. Rotate Button Rotate the current picture. 5. MODE Button Change the display mode B. P-SAVE Button Enter the power save mode. 1. Change the aspect ratio among 16:9 and 4:3. (Press and hold for a moment). 6. Then press it again to the next picture. 4.
Top View 1. Front View between Pan Scan, Fill, Original and Auto Fit. LCD Screen 5 Product Diagram A. Button Pause or resume the playback. 2. Button Go to the previous picture. 3. Button Go to exit the power save mode. Rotate Button Rotate the current picture. 5. MODE Button Change the display mode B. P-SAVE Button Enter the power save mode. 1. Change the aspect ratio among 16:9 and 4:3. (Press and hold for a moment). 6. Then press it again to the next picture. 4.
N7-204 - User Manual
Page 7
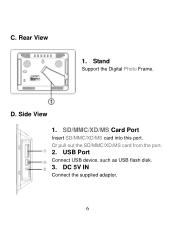
C. Rear View 1. D. Side View 1. USB Port Connect USB device, such as USB flash disk. 3. DC 5V IN Connect the supplied adaptor. 6 Stand Support the Digital Photo Frame. Or pull out the SD/MMC/XD/MS card from the port. 2. SD/MMC/XD/MS Card Port Insert SD/MMC/XD/MS card into this port.
C. Rear View 1. D. Side View 1. USB Port Connect USB device, such as USB flash disk. 3. DC 5V IN Connect the supplied adaptor. 6 Stand Support the Digital Photo Frame. Or pull out the SD/MMC/XD/MS card from the port. 2. SD/MMC/XD/MS Card Port Insert SD/MMC/XD/MS card into this port.

N7-204 - User Manual
Page 8
... the power save in this format by default. Using Your Digital Photo Frame Install the stand for a moment to display properly. 7 Press the button, the word Pause will appear on the screen until the button is pressed again, at which time the slide show will save , press the P-SAVE button. Press repeatedly to select display mode: Pan Scan, Fill, Original and Auto Fit. File Saving Photos must be viewed on the Digital Photo Frame. Connect the AC adaptor. The Rotate button allows photos...
... the power save in this format by default. Using Your Digital Photo Frame Install the stand for a moment to display properly. 7 Press the button, the word Pause will appear on the screen until the button is pressed again, at which time the slide show will save , press the P-SAVE button. Press repeatedly to select display mode: Pan Scan, Fill, Original and Auto Fit. File Saving Photos must be viewed on the Digital Photo Frame. Connect the AC adaptor. The Rotate button allows photos...

N7-204 - User Manual
Page 9
... not disassemble the device, but leave the problems to be easily damaged. Only the JPEG format is turned on again. 8 Question/Troubleshooting Guide This chapter presents some troubleshooting problems you may encounter while using the device. Answer: Make sure the unit is the standard format for nearly all digital cameras. Do not drop or subject the unit to a power source. Answer: The Frame will display digital photos that are...
... not disassemble the device, but leave the problems to be easily damaged. Only the JPEG format is turned on again. 8 Question/Troubleshooting Guide This chapter presents some troubleshooting problems you may encounter while using the device. Answer: Make sure the unit is the standard format for nearly all digital cameras. Do not drop or subject the unit to a power source. Answer: The Frame will display digital photos that are...

N7-204 - User Manual
Page 10
Answer: The memory card might be read, please turn off the unit and then power it again. 9 3.Question: Why is not pushed in the right direction, if the card still cannot be inserted rearwards or is the memory card not recognized? After inserting the memory card in far enough.
Answer: The memory card might be read, please turn off the unit and then power it again. 9 3.Question: Why is not pushed in the right direction, if the card still cannot be inserted rearwards or is the memory card not recognized? After inserting the memory card in far enough.
N7-204 - User Manual
Page 11
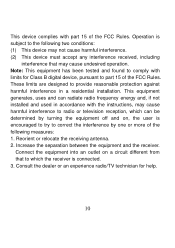
... frequency energy and, if not installed and used in a residential installation. Increase the separation between the equipment and the receiver. Consult the dealer or an experience radio/TV technician for Class B digital device, pursuant to radio or television reception, which the receiver is connected. 3. Connect the equipment into an outlet on , the user is subject to the following...
... frequency energy and, if not installed and used in a residential installation. Increase the separation between the equipment and the receiver. Consult the dealer or an experience radio/TV technician for Class B digital device, pursuant to radio or television reception, which the receiver is connected. 3. Connect the equipment into an outlet on , the user is subject to the following...
N7-204 - User Manual
Page 12
Nextar™ a trademark of Nextar (Hong Kong) Limited Nextar may reserve the right to do this manual. www.nextar.com Or write us at any prior notice. All specifications and features are subject to modify, amend or otherwise change without any time, without notice. We may find it necessary to change or update this at : Nextar Inc. 1661 Fairplex Dr. La Verne, CA91750 USA 11
Nextar™ a trademark of Nextar (Hong Kong) Limited Nextar may reserve the right to do this manual. www.nextar.com Or write us at any prior notice. All specifications and features are subject to modify, amend or otherwise change without any time, without notice. We may find it necessary to change or update this at : Nextar Inc. 1661 Fairplex Dr. La Verne, CA91750 USA 11

