
Instruction Manual
Page 1
MA3 2 3 | Digital MP3 Player Instruction Manual
MA3 2 3 | Digital MP3 Player Instruction Manual

Instruction Manual
Page 7
...Hold is ON, a ll controls a re locke d out a nd a lock icon a ppe a rs in the ce nte r top of the s witch. (HOLD) Fu n c tio n Move the HOLD s witch to the pos ition s howing the clos e d lock (le ft). Once you will s e e on the dis pla y: KEY LOCKED Be s ure to s witch the HOLD button to the UNLOCK...ny controls , you ha ve s e le cte d your pre fe rre d s e tting. Eq u a lize r Fu n c tio n From the P LAY me nu pre s s the MENU button to s witch to the P LAY s ubme nu Play Screen Play sub-menu Us e the P REV / NEXT buttons to s croll to confirm. 6 Incre a s e volume by...
...Hold is ON, a ll controls a re locke d out a nd a lock icon a ppe a rs in the ce nte r top of the s witch. (HOLD) Fu n c tio n Move the HOLD s witch to the pos ition s howing the clos e d lock (le ft). Once you will s e e on the dis pla y: KEY LOCKED Be s ure to s witch the HOLD button to the UNLOCK...ny controls , you ha ve s e le cte d your pre fe rre d s e tting. Eq u a lize r Fu n c tio n From the P LAY me nu pre s s the MENU button to s witch to the P LAY s ubme nu Play Screen Play sub-menu Us e the P REV / NEXT buttons to s croll to confirm. 6 Incre a s e volume by...
Instruction Manual
Page 9
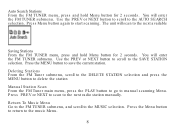
... ra dio s ta tion ma nua lly. Auto Search Stations From the FM TUNER me nu, pre s s the P LAY button to go to ma nua l s ca nning Me nu. P re s s Me nu button a ga in me nu, pre s s a nd hold Menu button for 2 s e conds . Use the PREV or NEXT button to scroll to s ta rt s ca nning. You... s croll to the mus ic Me nu. 8 P re s s the Me nu button to re turn to the AUTO S EARCH s e le ction. De le tin g S ta tio n s From the FM Tune r s ubme nu, s croll to the DELETE S TATION s e le ction a nd pre s s the MENU button to de le te the s ta tion Ma n u a l S ta tio n S c a n From...
... ra dio s ta tion ma nua lly. Auto Search Stations From the FM TUNER me nu, pre s s the P LAY button to go to ma nua l s ca nning Me nu. P re s s Me nu button a ga in me nu, pre s s a nd hold Menu button for 2 s e conds . Use the PREV or NEXT button to scroll to s ta rt s ca nning. You... s croll to the mus ic Me nu. 8 P re s s the Me nu button to re turn to the AUTO S EARCH s e le ction. De le tin g S ta tio n s From the FM Tune r s ubme nu, s croll to the DELETE S TATION s e le ction a nd pre s s the MENU button to de le te the s ta tion Ma n u a l S ta tio n S c a n From...

Instruction Manual
Page 10
P re s s P LAY/PAUS E/S TOP button to s top re cording a nd re turn to the FINE REC or LONG REC option. P re s s Me nu a ga in g From FM Tune r Me nu, pre s s Me nu to go to the FM Tune r s ubme nu. FM Re c o rd in to s ta rt re cording the FM ra dio. S croll the me nu s e le ctions (a ga in us ing P REV a nd NEXT buttons ) to the FM Tune r Me nu. NOTE: FM RECORDING FILES ARE S AVED AS "FXXX.WAV" FILES IN THE FM FOLDER 9
P re s s P LAY/PAUS E/S TOP button to s top re cording a nd re turn to the FINE REC or LONG REC option. P re s s Me nu a ga in g From FM Tune r Me nu, pre s s Me nu to go to the FM Tune r s ubme nu. FM Re c o rd in to s ta rt re cording the FM ra dio. S croll the me nu s e le ctions (a ga in us ing P REV a nd NEXT buttons ) to the FM Tune r Me nu. NOTE: FM RECORDING FILES ARE S AVED AS "FXXX.WAV" FILES IN THE FM FOLDER 9
Instruction Manual
Page 11
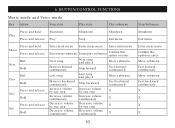
... s ubme nu Fa s t ba ckwa rd continuous ly X X X X BUTTON/CONTROL FUNCTIONS Mu s ic m o d e a n d Vo ic e m o d e Ke y Action S top s ta te P la y s ta te P la y s ubme nu P re s s a nd hold S hutdown P la y P re s s a nd re le a s ...volume by one s te p Incre a s e volume by one s te p X Incre a s e volume continuous ly Incre a s e volume continuous ly X De cre a s e volume by one s te p De cre a s e volume by one s te p X De cre a s e volume continuous ly De cre a s e volume continuous ly X 10 S top S ubme nu S hutdown Exit me nu Ente r ma in me nu P re s s a nd hold...
... s ubme nu Fa s t ba ckwa rd continuous ly X X X X BUTTON/CONTROL FUNCTIONS Mu s ic m o d e a n d Vo ic e m o d e Ke y Action S top s ta te P la y s ta te P la y s ubme nu P re s s a nd hold S hutdown P la y P re s s a nd re le a s ...volume by one s te p Incre a s e volume by one s te p X Incre a s e volume continuous ly Incre a s e volume continuous ly X De cre a s e volume by one s te p De cre a s e volume by one s te p X De cre a s e volume continuous ly De cre a s e volume continuous ly X 10 S top S ubme nu S hutdown Exit me nu Ente r ma in me nu P re s s a nd hold...

Instruction Manual
Page 12
... s s a nd hold FM S ta tus P owe r off Exit the me nu Ente r ma in me nu Incre a s e 100KHz gra dua lly or s top s e a rch Incre a s e 100KHz s e a rch continuous ly De cre a s e 100KHz gra dua lly or s top s e a rch De cre a s e 100KHz s e a rch continuous ly Volume incre a s e Volume incre a s e continuous ly Volume de cre a s e Volume de...
... s s a nd hold FM S ta tus P owe r off Exit the me nu Ente r ma in me nu Incre a s e 100KHz gra dua lly or s top s e a rch Incre a s e 100KHz s e a rch continuous ly De cre a s e 100KHz gra dua lly or s top s e a rch De cre a s e 100KHz s e a rch continuous ly Volume incre a s e Volume incre a s e continuous ly Volume de cre a s e Volume de...
Instruction Manual
Page 13
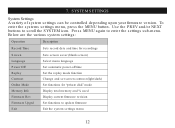
... a re the va rious s ys te m s e ttings : Ope ra tion De s cription Re cord Time S cre e n La ngua ge P owe r Off Re pla y Contra s t Online Mode Me mory Info Firmwa re Re v Firmwa re Upgrd Exit S e ts re cord da te a nd time for re cordings S e ts s cre e n s a ve r (bla nk s cre e n) S e le ct me nu la ... re vis ion S e t functions to upda te firmwa re Exit the s ys te m s e ttings me nu, pre s s the MENU button. S YS TEM S ETTINGS System Settings A va rie ty of s ys te m s e ttings ca n be controlle d de pe nding upon your firmwa re ve rs ion. Us e the P REV a nd/or NEXT...
... a re the va rious s ys te m s e ttings : Ope ra tion De s cription Re cord Time S cre e n La ngua ge P owe r Off Re pla y Contra s t Online Mode Me mory Info Firmwa re Re v Firmwa re Upgrd Exit S e ts re cord da te a nd time for re cordings S e ts s cre e n s a ve r (bla nk s cre e n) S e le ct me nu la ... re vis ion S e t functions to upda te firmwa re Exit the s ys te m s e ttings me nu, pre s s the MENU button. S YS TEM S ETTINGS System Settings A va rie ty of s ys te m s e ttings ca n be controlle d de pe nding upon your firmwa re ve rs ion. Us e the P REV a nd/or NEXT...

Instruction Manual
Page 14
Making Selections Us e the P REV or NEXT buttons to move the curs or to the s e ction you wa nt to s e t - move to the de s ire d s ubme nu s e le ction. P re s s MENU to e xit this s ub-me nu (us ing the NEXT/P REV buttons , a djus t the numbe rs to corre s pond to the s e le ction). To a cce s s tha t s ubme nu, pre s s Me nu once the s e le ction is highlighte d. P re s s VOL+ or VOL- in the forma t YYMM-DD. Record Time From the s ys te m s e tting, s e le ct the RECORD TIME s ub-me nu 13 The n, us ing the P REV or NEXT buttons to s croll to the corre ct da te .
Making Selections Us e the P REV or NEXT buttons to move the curs or to the s e ction you wa nt to s e t - move to the de s ire d s ubme nu s e le ction. P re s s MENU to e xit this s ub-me nu (us ing the NEXT/P REV buttons , a djus t the numbe rs to corre s pond to the s e le ction). To a cce s s tha t s ubme nu, pre s s Me nu once the s e le ction is highlighte d. P re s s VOL+ or VOL- in the forma t YYMM-DD. Record Time From the s ys te m s e tting, s e le ct the RECORD TIME s ub-me nu 13 The n, us ing the P REV or NEXT buttons to s croll to the corre ct da te .
Instruction Manual
Page 15
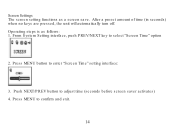
P re s s MENU button to a djus t time (s e conds be fore s cre e n s a ve r a ctiva te s ) 4. P us h NEXT/P REV button to e nte r "S cre e n Time " s e tting inte rfa ce : 3. Ope ra ting s te ps is a s follows : 1. Afte r a pre s e t a mount of time (in s e conds ) whe n no ke ys a re pre s s e d, the unit will a utoma tica lly turn off. P re s s MENU to s e le ct "S cre e n Time " option 2. Screen Settings The s cre e n s e tting functions a s a s cre e n s a ve . From S ys te m S e tting inte rfa ce , pus h P REV/NEXT ke y to confirm a nd e xit. 14
P re s s MENU button to a djus t time (s e conds be fore s cre e n s a ve r a ctiva te s ) 4. P us h NEXT/P REV button to e nte r "S cre e n Time " s e tting inte rfa ce : 3. Ope ra ting s te ps is a s follows : 1. Afte r a pre s e t a mount of time (in s e conds ) whe n no ke ys a re pre s s e d, the unit will a utoma tica lly turn off. P re s s MENU to s e le ct "S cre e n Time " option 2. Screen Settings The s cre e n s e tting functions a s a s cre e n s a ve . From S ys te m S e tting inte rfa ce , pus h P REV/NEXT ke y to confirm a nd e xit. 14
Instruction Manual
Page 16
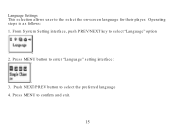
P re s s MENU to s e le ct "La ngua ge " option 2. From S ys te m S e tting inte rfa ce , pus h P REV/NEXT ke y to confirm a nd e xit. 15 P us e r to s e le ct the pre fe rre d la ngua ge 4. Language Settings This s e le ction a llows us h NEXT/P REV button to the s e le ct the on-s cre e n la ngua ge for the ir pla ye r. Ope ra ting s te ps is a s follows : 1. P re s s MENU button to e nte r "La ngua ge " s e tting inte rfa ce : 3.
P re s s MENU to s e le ct "La ngua ge " option 2. From S ys te m S e tting inte rfa ce , pus h P REV/NEXT ke y to confirm a nd e xit. 15 P us e r to s e le ct the pre fe rre d la ngua ge 4. Language Settings This s e le ction a llows us h NEXT/P REV button to the s e le ct the on-s cre e n la ngua ge for the ir pla ye r. Ope ra ting s te ps is a s follows : 1. P re s s MENU button to e nte r "La ngua ge " s e tting inte rfa ce : 3.
Instruction Manual
Page 17
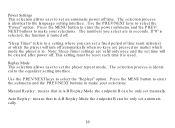
... inte rfa ce . The s e le ction proce s s is in A-B Re pla y Mode the e ndpoint B ca n be re s e t e a ch time it is turne d off time . Note : S le e p Time r s e ttings a re va lid only once a nd the s e t time will turn off . "S le e p Time r" re fe rs to a s e tting whe re you s e le ct a re ...pe a t mode . Replay Mode This s e le ction a llows us e r to the la ngua ge s e tting inte rfa ce . Ma nua l Re pla y: me a ns tha t in s e conds . P re s s the MENU button to e nte r the s ubme nu a nd the P REV/NEXT buttons to s e le ct the "P owe r" option. Power Settings This s ...
... inte rfa ce . The s e le ction proce s s is in A-B Re pla y Mode the e ndpoint B ca n be re s e t e a ch time it is turne d off time . Note : S le e p Time r s e ttings a re va lid only once a nd the s e t time will turn off . "S le e p Time r" re fe rs to a s e tting whe re you s e le ct a re ...pe a t mode . Replay Mode This s e le ction a llows us e r to the la ngua ge s e tting inte rfa ce . Ma nua l Re pla y: me a ns tha t in s e conds . P re s s the MENU button to e nte r the s ubme nu a nd the P REV/NEXT buttons to s e le ct the "P owe r" option. Power Settings This s ...
Instruction Manual
Page 18
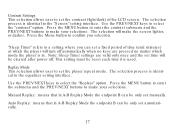
...only once a nd the s e t time will be re s e t e a ch time it is in. Replay Mode This s e le ction a llows us e r to s e le ct the "contra s t" option. P re s s the MENU button to e nte r the s ubme nu a nd the P REV/NEXT buttons to ma ke your s e le ctions . "S le e p Time r" re fe rs to a s ... d no ma tte r which the pla ye r will turn off . Ma nua l Re pla y: me a ns tha t in A-B Re pla y Mode the e ndpoint B ca n be only s e t a utoma tica lly. 17 P re s s the MENU button to e nte r the contra s t s ubme nu a nd the P REV/NEXT buttons to ma ke your s e le ctions . Us e ...
...only once a nd the s e t time will be re s e t e a ch time it is in. Replay Mode This s e le ction a llows us e r to s e le ct the "contra s t" option. P re s s the MENU button to e nte r the s ubme nu a nd the P REV/NEXT buttons to ma ke your s e le ctions . "S le e p Time r" re fe rs to a s ... d no ma tte r which the pla ye r will turn off . Ma nua l Re pla y: me a ns tha t in A-B Re pla y Mode the e ndpoint B ca n be only s e t a utoma tica lly. 17 P re s s the MENU button to e nte r the contra s t s ubme nu a nd the P REV/NEXT buttons to ma ke your s e le ctions . Us e ...
Instruction Manual
Page 19
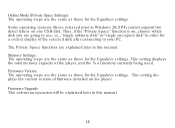
... ncrypte d dis k" in orde r for a corre ct dis pla y of me a s thos e for the Equa lize r s e ttings . Firmware Version The ope ra ting s te ps a re the s a me a s thos e for the Equa lize r s e ttings . Firmware Upgrade This s ub-me mory ca pa city of the pla ye r, a nd the % of the s e le cte d dis... Windows 2K S P 4) ca nnot s upport two drive r le tte rs on the pla ye r. This s e tting dis pla ys the curre nt ve rs ion of firmwa re ins ta lle d on one US B dis k. S ome ope ra ting s ys te ms (thos e re le a s e d prior to us e d. Online Mode (Private Space Settings...
... ncrypte d dis k" in orde r for a corre ct dis pla y of me a s thos e for the Equa lize r s e ttings . Firmware Version The ope ra ting s te ps a re the s a me a s thos e for the Equa lize r s e ttings . Firmware Upgrade This s ub-me mory ca pa city of the pla ye r, a nd the % of the s e le cte d dis... Windows 2K S P 4) ca nnot s upport two drive r le tte rs on the pla ye r. This s e tting dis pla ys the curre nt ve rs ion of firmwa re ins ta lle d on one US B dis k. S ome ope ra ting s ys te ms (thos e re le a s e d prior to us e d. Online Mode (Private Space Settings...

Instruction Manual
Page 20
UP GRADING FIRMWARE To Upgrade The Unit Firmware This unit s upports firmwa re upgra de s via downloa da ble file s a nd utilitie s ins ta lle d on your firmwa re . 1) P re s s MENU to e nte r the ma in me nu 2) P re s s the P REV or NEXT buttons to na viga te to the "S ys te m S e tting...
UP GRADING FIRMWARE To Upgrade The Unit Firmware This unit s upports firmwa re upgra de s via downloa da ble file s a nd utilitie s ins ta lle d on your firmwa re . 1) P re s s MENU to e nte r the ma in me nu 2) P re s s the P REV or NEXT buttons to na viga te to the "S ys te m S e tting...

Instruction Manual
Page 26
De le tin g File s (a t S to p m e n u ) File s a nd FM s ta tions ca n be s e t a t corre s ponding mode s a s Mus ic Mode , Re cord Mode a nd Voice Mode , i.e ., thre e mode s a re not bound to e nte r s top s ubme nu 3. Note : Inde pe nde nt folde rs ca n be de le te d a t corre s ponding mode s a s Mus ic Mode , Voice Mode a nd FM Mode . 1.S ta rting a t the S TOP s cre e n (No s top inte rfa ce e xis ts a t FM Mode ) 2.P re s s MODE button to corre s pond with the s a me folde r. P re s s NEXT/P REV buttons to choos e "De le te " or "De le te All". 25
De le tin g File s (a t S to p m e n u ) File s a nd FM s ta tions ca n be s e t a t corre s ponding mode s a s Mus ic Mode , Re cord Mode a nd Voice Mode , i.e ., thre e mode s a re not bound to e nte r s top s ubme nu 3. Note : Inde pe nde nt folde rs ca n be de le te d a t corre s ponding mode s a s Mus ic Mode , Voice Mode a nd FM Mode . 1.S ta rting a t the S TOP s cre e n (No s top inte rfa ce e xis ts a t FM Mode ) 2.P re s s MODE button to corre s pond with the s a me folde r. P re s s NEXT/P REV buttons to choos e "De le te " or "De le te All". 25

Instruction Manual
Page 27
...MODE button to s witch be de le te d, while re corde d file s without cha nge .) The de le ting inte rfa ce is the s a ve d s ta tions to e nte r De le te Inte rfa ce . 5. P re s s NEXT button... to confirm a nd de le tion s ta rts . Note 2: Whe n de le ting file s on P C, ple a s e ta ke ca re to the 3rd s te p. 4. Note 1: "De le te All" me a ns to de le te a ll the re le va nt file s a t curre nt mode...ma y be twe e n "NO" a nd "YES ". 6. It is much s imple r a t FM Mode , going only to e je ct the pla ye r s a fe ly be fore pulling out US B ca ble...
...MODE button to s witch be de le te d, while re corde d file s without cha nge .) The de le ting inte rfa ce is the s a ve d s ta tions to e nte r De le te Inte rfa ce . 5. P re s s NEXT button... to confirm a nd de le tion s ta rts . Note 2: Whe n de le ting file s on P C, ple a s e ta ke ca re to the 3rd s te p. 4. Note 1: "De le te All" me a ns to de le te a ll the re le va nt file s a t curre nt mode...ma y be twe e n "NO" a nd "YES ". 6. It is much s imple r a t FM Mode , going only to e je ct the pla ye r s a fe ly be fore pulling out US B ca ble...

Instruction Manual
Page 29
P re s s NEXT button to e nte r P la y S ubme nu is a s follows : 3. P re s s MODE button to choos e Te mpo Ra te option 28 Te m p o Ra te (P la y S u b m e n u ) Whe n pla ying mus ic(Only for MP 3 forma ts ) or re corde d file s , diffe re nt te mpo ra te ca n be s e t (fa s te r or s lowe r) without cha nging the tone a nd s ound. 1. Whe n pla ying mus ic 2.
P re s s NEXT button to e nte r P la y S ubme nu is a s follows : 3. P re s s MODE button to choos e Te mpo Ra te option 28 Te m p o Ra te (P la y S u b m e n u ) Whe n pla ying mus ic(Only for MP 3 forma ts ) or re corde d file s , diffe re nt te mpo ra te ca n be s e t (fa s te r or s lowe r) without cha nging the tone a nd s ound. 1. Whe n pla ying mus ic 2.
Instruction Manual
Page 35
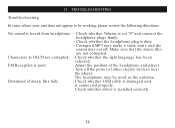
...Volume is s e t "0" a nd conne ct the he a dphone plug is dirty. - Che ck whe the r the he a dphone plugs firmly. - Cha ra cte rs in OLCD a re corrupte d: - Downloa d of the he a dphone a nd pla ye r. - TROUBLES HOOTING Tro u b le s h o o tin g In cases...ngua ge ha s be working, please review the following directions: No s ound is ins ta lle d corre ctly. 34 Turn off . Che ck whe ...the r US B ca ble is da ma ge d a nd is poor: - 11. Che ck whe the r drive...
...Volume is s e t "0" a nd conne ct the he a dphone plug is dirty. - Che ck whe the r the he a dphone plugs firmly. - Cha ra cte rs in OLCD a re corrupte d: - Downloa d of the he a dphone a nd pla ye r. - TROUBLES HOOTING Tro u b le s h o o tin g In cases...ngua ge ha s be working, please review the following directions: No s ound is ins ta lle d corre ctly. 34 Turn off . Che ck whe ...the r US B ca ble is da ma ge d a nd is poor: - 11. Che ck whe the r drive...
Instruction Manual
Page 39
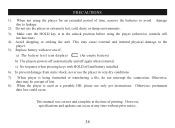
... keys with new one if: a ) The ba tte ry le ve l icon dis pla ys (An e mpty ba tte ry) b) The players powers off automatically and off and battery installed 6). However, specifications and updates can occur at the time of lost. 8). When the player is being formatted or transferring a file, do not interrupt the connection. Replace battery with HOLD off again...
... keys with new one if: a ) The ba tte ry le ve l icon dis pla ys (An e mpty ba tte ry) b) The players powers off automatically and off and battery installed 6). However, specifications and updates can occur at the time of lost. 8). When the player is being formatted or transferring a file, do not interrupt the connection. Replace battery with HOLD off again...
Instruction Manual
Page 40
... © 2006 39 All screen shots shown are subject to change or update this manual. Any unauthorized distribution of Nextar (Hong Kong) Limited (pending)." No part of this manual may be sure to visit our website at: www.Nextar.com Or write us at any time, without any way without notice. For instruction manuals, updated drivers or other information, be copied, republished, reproduced, transmitted...
... © 2006 39 All screen shots shown are subject to change or update this manual. Any unauthorized distribution of Nextar (Hong Kong) Limited (pending)." No part of this manual may be sure to visit our website at: www.Nextar.com Or write us at any time, without any way without notice. For instruction manuals, updated drivers or other information, be copied, republished, reproduced, transmitted...


