
ReadyDATA OS 1.4 Software Manual
Page 12
... have difficulty accessing the ReadyDATA Dashboard, or if you want to use the ReadyDATA with your system. LED status information and the boot menu are explained in the installation guide that a DHCP server can reach the ReadyDATA. For more information, see Automatic Private IP Addressing ...Addressing (APIPA). If you notice unexpected behavior, try using another browser. Connect the ReadyDATA to receive an IPv4 IP address from booting after you complete an initial set-up procedure, see Appendix A, Factory Default Settings. Note: For information about the default system settings...
... have difficulty accessing the ReadyDATA Dashboard, or if you want to use the ReadyDATA with your system. LED status information and the boot menu are explained in the installation guide that a DHCP server can reach the ReadyDATA. For more information, see Automatic Private IP Addressing ...Addressing (APIPA). If you notice unexpected behavior, try using another browser. Connect the ReadyDATA to receive an IPv4 IP address from booting after you complete an initial set-up procedure, see Appendix A, Factory Default Settings. Note: For information about the default system settings...

Hardware Manual
Page 3
Table of Contents Chapter 1 Getting Started Front Panel 5 Rear Panel 7 Status and Shutdown 7 Boot Menu 9 Factory Settings 11 Technical Specifications 12 Chapter 2 Expansion Disk Arrays Front Panel 14 Rear Panel 16 Status Information 17 Technical Specifications 17 Chapter 3 Maintenance Front ...
Table of Contents Chapter 1 Getting Started Front Panel 5 Rear Panel 7 Status and Shutdown 7 Boot Menu 9 Factory Settings 11 Technical Specifications 12 Chapter 2 Expansion Disk Arrays Front Panel 14 Rear Panel 16 Status Information 17 Technical Specifications 17 Chapter 3 Maintenance Front ...
Hardware Manual
Page 4
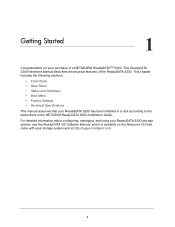
... that your ReadyDATA 5200 has been installed in a rack according to the instructions in the NETGEAR ReadyDATA 5200 Installation Guide. This chapter includes the following sections: • Front Panel • Rear Panel • Status and Shutdown • Boot Menu • Factory Settings • Technical Specifications This manual assumes that came with your purchase...
... that your ReadyDATA 5200 has been installed in a rack according to the instructions in the NETGEAR ReadyDATA 5200 Installation Guide. This chapter includes the following sections: • Front Panel • Rear Panel • Status and Shutdown • Boot Menu • Factory Settings • Technical Specifications This manual assumes that came with your purchase...
Hardware Manual
Page 9
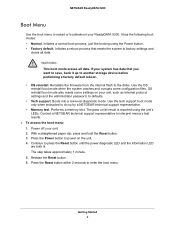
... using the Power button. • Factory default. WARNING: This boot mode erases all data. Getting Started 9 Reinstalls the firmware from the internal flash to enter the boot menu. Continue to restart or troubleshoot your unit. 2. Release the Reset button. 6. NETGEAR ReadyDATA 5200 Boot Menu Use the boot menu to press the Reset button until the power diagnostic LED...
... using the Power button. • Factory default. WARNING: This boot mode erases all data. Getting Started 9 Reinstalls the firmware from the internal flash to enter the boot menu. Continue to restart or troubleshoot your unit. 2. Release the Reset button. 6. NETGEAR ReadyDATA 5200 Boot Menu Use the boot menu to press the Reset button until the power diagnostic LED...
Hardware Manual
Page 10
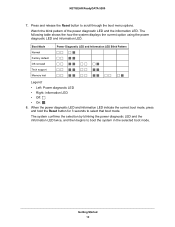
Getting Started 10 NETGEAR ReadyDATA 5200 7. Boot Mode Normal Factory default OS reinstall Tech support Memory test Power Diagnostic LED and Information LED Blink Pattern Legend: • Left: Power diagnostic LED • ... and the information LED. Press and release the Reset button to boot the system in the selected boot mode. The system confirms the selection by blinking the power diagnostic LED and the information LED twice, and then begins to scroll through the boot menu options. When the power diagnostic LED and information LED indicate...
Getting Started 10 NETGEAR ReadyDATA 5200 7. Boot Mode Normal Factory default OS reinstall Tech support Memory test Power Diagnostic LED and Information LED Blink Pattern Legend: • Left: Power diagnostic LED • ... and the information LED. Press and release the Reset button to boot the system in the selected boot mode. The system confirms the selection by blinking the power diagnostic LED and the information LED twice, and then begins to scroll through the boot menu options. When the power diagnostic LED and information LED indicate...