
Product Data Sheet
Page 6
... QAM support • IEEE® 802.11 a/n/ac 5.0GHz • Five (5) 10/100/1000Mbps-(1 WAN & 4 LAN) Gigabit Ethernet ports Technical Specifications • AC2600 (800Mbps 2.4GHz + 1733Mbps 5GHz)† • Simultaneous Dual Band WiFi- Other brand names mentioned herein are trademarks of open source firmware. †Maximum wireless signal rate derived from a NETGEAR authorized reseller This product comes with PSK) • Double firewall protection (SPI and NAT...
... QAM support • IEEE® 802.11 a/n/ac 5.0GHz • Five (5) 10/100/1000Mbps-(1 WAN & 4 LAN) Gigabit Ethernet ports Technical Specifications • AC2600 (800Mbps 2.4GHz + 1733Mbps 5GHz)† • Simultaneous Dual Band WiFi- Other brand names mentioned herein are trademarks of open source firmware. †Maximum wireless signal rate derived from a NETGEAR authorized reseller This product comes with PSK) • Double firewall protection (SPI and NAT...

User Manual
Page 5
...89 Manually Upload Firmware to the Router 90 Change the admin Password 91 Enable admin Password Recovery 91 Recover the admin Password 92 View Information About the Router and the Internet and WiFi Settings 93 Display Internet Port Statistics 94 Check the Internet Connection Status 95 View and Manage Logs of Router Activity 96 View Devices Currently on the Network 97 Monitor Internet Traffic 97 Manage the Router Configuration File 99 Back Up Settings 99 Erase the Settings 99 Restore Configuration Settings 100 Remote Access 101 Set Up Remote Management 101 Use Remote Access 102...
...89 Manually Upload Firmware to the Router 90 Change the admin Password 91 Enable admin Password Recovery 91 Recover the admin Password 92 View Information About the Router and the Internet and WiFi Settings 93 Display Internet Port Statistics 94 Check the Internet Connection Status 95 View and Manage Logs of Router Activity 96 View Devices Currently on the Network 97 Monitor Internet Traffic 97 Manage the Router Configuration File 99 Back Up Settings 99 Erase the Settings 99 Restore Configuration Settings 100 Remote Access 101 Set Up Remote Management 101 Use Remote Access 102...
User Manual
Page 6
... Is Connected to the Router From a Mac...109 Back Up Windows-Based Computers With ReadySHARE Vault..110 Back Up Mac Computers With Time Machine 110 Set Up a USB Hard Drive on a Mac 111 Prepare to Back Up a Large Amount of Data 111 Use Time Machine to Back Up Onto a USB Hard Disk............112 Enable FTP Access Within Your Network 113 View or Change Network Folders on a Storage Device 114 Add a Network...
... Is Connected to the Router From a Mac...109 Back Up Windows-Based Computers With ReadySHARE Vault..110 Back Up Mac Computers With Time Machine 110 Set Up a USB Hard Drive on a Mac 111 Prepare to Back Up a Large Amount of Data 111 Use Time Machine to Back Up Onto a USB Hard Disk............112 Enable FTP Access Within Your Network 113 View or Change Network Folders on a Storage Device 114 Add a Network...

User Manual
Page 7
... Network 150 Check Ethernet Cable Connections 150 WiFi Settings 150 Network Settings 150 Troubleshoot With the LEDs 151 Standard LED Behavior When the Router Is Powered On......151 Power LED Is Off or Blinking 151 LEDs Never Turn Off 151 Internet or Ethernet Port LEDs Are Off 152 WiFi LED Is Off 152 You Cannot Log In to the Router 152 You Cannot Access the Internet 153 Troubleshoot Internet Browsing 154 Changes Are Not Saved 155 Troubleshoot WiFi Connectivity 155 Troubleshoot Your Network Using the Ping Utility 156 Test the LAN...
... Network 150 Check Ethernet Cable Connections 150 WiFi Settings 150 Network Settings 150 Troubleshoot With the LEDs 151 Standard LED Behavior When the Router Is Powered On......151 Power LED Is Off or Blinking 151 LEDs Never Turn Off 151 Internet or Ethernet Port LEDs Are Off 152 WiFi LED Is Off 152 You Cannot Log In to the Router 152 You Cannot Access the Internet 153 Troubleshoot Internet Browsing 154 Changes Are Not Saved 155 Troubleshoot WiFi Connectivity 155 Troubleshoot Your Network Using the Ping Utility 156 Test the LAN...
User Manual
Page 19
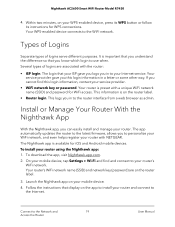
... router and connect to the router interface from a web browser as admin. The app automatically updates the router to the latest firmware, allows you in to the Internet. Your router's WiFi network name (SSID) and network key (password) are associated with a unique WiFi network name (SSID) and password for WiFi access. To download the app, visit Nighthawk-app.com. 2. Within two minutes, on your router using the Nighthawk app: 1. Your WPS-enabled device connects to the Network and 19 Access the Router User Manual...
... router and connect to the router interface from a web browser as admin. The app automatically updates the router to the latest firmware, allows you in to the Internet. Your router's WiFi network name (SSID) and network key (password) are associated with a unique WiFi network name (SSID) and password for WiFi access. To download the app, visit Nighthawk-app.com. 2. Within two minutes, on your router using the Nighthawk app: 1. Your WPS-enabled device connects to the Network and 19 Access the Router User Manual...

User Manual
Page 26
... four hexadecimal characters in a quartet • More than two colons in use. • If your Internet connection does not use PPPoe or DHCP, or is not fixed, but is admin. Enter the router admin user name and password. A login window opens. 3. The BASIC Home page displays. 4. The user name is IPv6, select Auto Config. The IPv6 page displays. 5. Click the Apply button. Nighthawk AC2600 Smart WiFi Router Model R7450 4. Select ADVANCED > Advanced Setup > IPv6.
... four hexadecimal characters in a quartet • More than two colons in use. • If your Internet connection does not use PPPoe or DHCP, or is not fixed, but is admin. Enter the router admin user name and password. A login window opens. 3. The BASIC Home page displays. 4. The user name is IPv6, select Auto Config. The IPv6 page displays. 5. Click the Apply button. Nighthawk AC2600 Smart WiFi Router Model R7450 4. Select ADVANCED > Advanced Setup > IPv6.

User Manual
Page 50
... a Port Group or VLAN Tag Group • Custom Static Routes 50 This chapter includes the following sections: • View or Change WAN Settings • Set Up a Default DMZ Server • Change the Router's Device Name • Change the LAN TCP/IP Settings • Specify the IP Addresses That the Router Assigns • Disable the DHCP Server Feature in the Router • Manage Reserved LAN IP Addresses • Use the WPS Wizard for WiFi Connections • Specify Basic WiFi Settings • Change the WiFi Mbps Settings • Change the WiFi Password...
... a Port Group or VLAN Tag Group • Custom Static Routes 50 This chapter includes the following sections: • View or Change WAN Settings • Set Up a Default DMZ Server • Change the Router's Device Name • Change the LAN TCP/IP Settings • Specify the IP Addresses That the Router Assigns • Disable the DHCP Server Feature in the Router • Manage Reserved LAN IP Addresses • Use the WPS Wizard for WiFi Connections • Specify Basic WiFi Settings • Change the WiFi Mbps Settings • Change the WiFi Password...

User Manual
Page 51
... work. The password is sometimes helpful when you logged in. Change the MTU only if you are case-sensitive. Network Address Translation (NAT) determines how the router processes inbound traffic. You can view or configure wide area network (WAN) settings for your router to be discovered. The normal MTU (maximum transmit unit) value for most Ethernet networks is necessary for the Internet port. Nighthawk AC2600 Smart WiFi Router Model R7450 View or Change WAN Settings You can set up a DMZ (demilitarized zone) server, change...
... work. The password is sometimes helpful when you logged in. Change the MTU only if you are case-sensitive. Network Address Translation (NAT) determines how the router processes inbound traffic. You can view or configure wide area network (WAN) settings for your router to be discovered. The normal MTU (maximum transmit unit) value for most Ethernet networks is necessary for the Internet port. Nighthawk AC2600 Smart WiFi Router Model R7450 View or Change WAN Settings You can set up a DMZ (demilitarized zone) server, change...
User Manual
Page 61
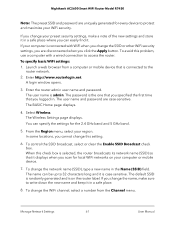
... change this problem, use a computer with WiFi when you change the WiFi channel, select a number from a computer or mobile device that you logged in the Name (SSID) field. When this check box is selected, the router broadcasts its network name (SSID) so that it displays when you scan for local WiFi networks on the router label. If you change the network name (SSID), type a new name in . Manage Network Settings 61 User Manual Nighthawk AC2600 Smart WiFi Router Model...
... change this problem, use a computer with WiFi when you change the WiFi channel, select a number from a computer or mobile device that you logged in the Name (SSID) field. When this check box is selected, the router broadcasts its network name (SSID) so that it displays when you scan for local WiFi networks on the router label. If you change the network name (SSID), type a new name in . Manage Network Settings 61 User Manual Nighthawk AC2600 Smart WiFi Router Model...

User Manual
Page 65
... WiFi network as open networks without using your WiFi security password or with the following settings to set up a 2.4 GHz or 5 GHz guest WiFi network: • Enable Guest Network. By default, the guest WiFi network is disabled. The BASIC Home page displays. 4. NETGEAR_Guest • 5 GHz guest WiFi network SSID. For example, if you logged in the Up to the router network. 2. Launch a web browser from a computer or mobile device that you configure the WiFi mode for each WiFi band. The user...
... WiFi network as open networks without using your WiFi security password or with the following settings to set up a 2.4 GHz or 5 GHz guest WiFi network: • Enable Guest Network. By default, the guest WiFi network is disabled. The BASIC Home page displays. 4. NETGEAR_Guest • 5 GHz guest WiFi network SSID. For example, if you logged in the Up to the router network. 2. Launch a web browser from a computer or mobile device that you configure the WiFi mode for each WiFi band. The user...

User Manual
Page 70
... Ethernet cable to connect the Internet port of this router to an Ethernet port in the other router on the network assigns an IP address to this router while it is in AP mode. • Use fixed IP settings on the same local network as an AP: 1. A login window opens. 4. The user name and password are saved. Select ADVANCED > Advanced Setup > Router/ AP / Bridge Mode. The page adjusts. 7. Manage Network Settings 70 User Manual The Router / AP / Bridge Mode page displays. 6. Select AP Mode. Using...
... Ethernet cable to connect the Internet port of this router to an Ethernet port in the other router on the network assigns an IP address to this router while it is in AP mode. • Use fixed IP settings on the same local network as an AP: 1. A login window opens. 4. The user name and password are saved. Select ADVANCED > Advanced Setup > Router/ AP / Bridge Mode. The page adjusts. 7. Manage Network Settings 70 User Manual The Router / AP / Bridge Mode page displays. 6. Select AP Mode. Using...

User Manual
Page 73
... user name and password are connected to the router's Ethernet LAN port or WiFi network include an IPTV device, your ISP might require you logged in. The VLAN/IPTV Setup page displays. 5. The page expands. 7. You can select more than one Wired Ports or Wireless check box. Enter the router admin user name and password. Select the By bridge group radio button. Launch a web browser from being processed through the router's network address translation (NAT) service. Select the Enable VLAN Tag check...
... user name and password are connected to the router's Ethernet LAN port or WiFi network include an IPTV device, your ISP might require you logged in. The VLAN/IPTV Setup page displays. 5. The page expands. 7. You can select more than one Wired Ports or Wireless check box. Enter the router admin user name and password. Select the By bridge group radio button. Launch a web browser from being processed through the router's network address translation (NAT) service. Select the Enable VLAN Tag check...

User Manual
Page 76
... Internet access is connected. Select the By bridge group radio button. Custom Static Routes Typically, you do not need to the ISP. Click the Apply button. This router's address on your LAN is 192.168.1.100. • Your company's network address is 134.177.0.0. When you are saved. Select ADVANCED > Advanced Setup > VLAN/Bridge Settings. Select a Wired Ports check box or a Wireless check box: • If your request to add static routes unless you use multiple routers or multiple...
... Internet access is connected. Select the By bridge group radio button. Custom Static Routes Typically, you do not need to the ISP. Click the Apply button. This router's address on your LAN is 192.168.1.100. • Your company's network address is 134.177.0.0. When you are saved. Select ADVANCED > Advanced Setup > VLAN/Bridge Settings. Select a Wired Ports check box or a Wireless check box: • If your request to add static routes unless you use multiple routers or multiple...
User Manual
Page 90
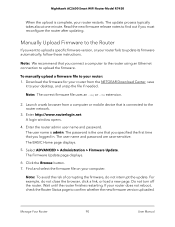
... logged in. Manually Upload Firmware to the Router If you connect a computer to the router using an Ethernet connection to your computer. Note: The correct firmware file uses an .img or .chk extension. 2. Click the Browse button. 7. Do not turn off the router. A login window opens. 4. The user name and password are case-sensitive. Find and select the firmware file on your router: 1. Manage Your Router 90 User Manual Note: We recommend that is admin. Download the firmware for your router...
... logged in. Manually Upload Firmware to the Router If you connect a computer to the router using an Ethernet connection to your computer. Note: The correct firmware file uses an .img or .chk extension. 2. Click the Browse button. 7. Do not turn off the router. A login window opens. 4. The user name and password are case-sensitive. Find and select the firmware file on your router: 1. Manage Your Router 90 User Manual Note: We recommend that is admin. Download the firmware for your router...
User Manual
Page 98
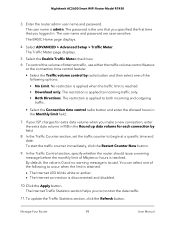
... traffic. • Select the Connection time control radio button and enter the allowed hours in the Monthly limit field. 7. Select the Enable Traffic Meter check box. 6. The restriction is applied to occur when the limit is attained: • The Internet LED blinks white or amber. • The Internet connection is the one of the following options: • No Limit. The Internet Traffic Statistics section helps you logged...
... traffic. • Select the Connection time control radio button and enter the allowed hours in the Monthly limit field. 7. Select the Enable Traffic Meter check box. 6. The restriction is applied to occur when the limit is attained: • The Internet LED blinks white or amber. • The Internet connection is the one of the following options: • No Limit. The Internet Traffic Statistics section helps you logged...

User Manual
Page 103
.... A login window opens. 3. To reset the router to factory default settings. The user name is connected to factory default settings. Your settings are case-sensitive. Enter http://www.routerlogin.net. The LED Control Settings page displays. 5. Manage Your Router 103 User Manual You can use an IP scanner application to detect the IP address before you logged in. The BASIC Home page displays. 4. Click the Apply button. Enter the router user name and password. To disable blinking, select the Disable blinking on Internet LED, LAN LED, Wireless LED...
.... A login window opens. 3. To reset the router to factory default settings. The user name is connected to factory default settings. Your settings are case-sensitive. Enter http://www.routerlogin.net. The LED Control Settings page displays. 5. Manage Your Router 103 User Manual You can use an IP scanner application to detect the IP address before you logged in. The BASIC Home page displays. 4. Click the Apply button. Enter the router user name and password. To disable blinking, select the Disable blinking on Internet LED, LAN LED, Wireless LED...

User Manual
Page 104
... the first time that you configured in . The user name and password are connected to the router network. 2. The Power LED starts blinking. Use the Reset Button Caution: This process erases all settings that is connected to the router web interface, do not interrupt the reset. When the reset is enabled.. Wait until the router finishes restarting. To erase the settings: 1. A login window opens. 3. Release the Reset button. This process takes about two minutes. The Backup Settings page displays. Manage Your Router 104 User Manual
... the first time that you configured in . The user name and password are connected to the router network. 2. The Power LED starts blinking. Use the Reset Button Caution: This process erases all settings that is connected to the router web interface, do not interrupt the reset. When the reset is enabled.. Wait until the router finishes restarting. To erase the settings: 1. A login window opens. 3. Release the Reset button. This process takes about two minutes. The Backup Settings page displays. Manage Your Router 104 User Manual
User Manual
Page 120
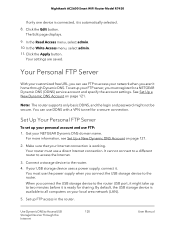
... login and password might take up your Internet connection is working. Set Up Your Personal FTP Server To set up FTP access in the router. Get your network when you connect the USB storage device to the router. In the Read Access menu, select admin. 10. You must use FTP: 1. Use Dynamic DNS to access your NETGEAR Dynamic DNS domain name. Nighthawk AC2600 Smart WiFi Router Model R7450 If only one device is connected, it is ready for a NETGEAR Dynamic DNS (DDNS) service...
... login and password might take up your Internet connection is working. Set Up Your Personal FTP Server To set up FTP access in the router. Get your network when you connect the USB storage device to the router. In the Read Access menu, select admin. 10. You must use FTP: 1. Use Dynamic DNS to access your NETGEAR Dynamic DNS domain name. Nighthawk AC2600 Smart WiFi Router Model R7450 If only one device is connected, it is ready for a NETGEAR Dynamic DNS (DDNS) service...
User Manual
Page 151
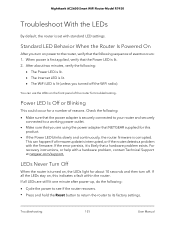
... a problem with a hardware problem, contact Technical Support at netgear.com/support. Nighthawk AC2600 Smart WiFi Router Model R7450 Troubleshoot With the LEDs By default, the router is lit (unless you turned off . Power LED Is Off or Blinking This could occur for a number of the router for about two minutes, verify the following : • Cycle the power to see if the router recovers. • Press and hold the Reset button to return the router to its factory settings.
... a problem with a hardware problem, contact Technical Support at netgear.com/support. Nighthawk AC2600 Smart WiFi Router Model R7450 Troubleshoot With the LEDs By default, the router is lit (unless you turned off . Power LED Is Off or Blinking This could occur for a number of the router for about two minutes, verify the following : • Cycle the power to see if the router recovers. • Press and hold the Reset button to return the router to its factory settings.

User Manual
Page 160
...net (or www.routerlogin.com or 192.168.1.1) User name (case-sensitive) admin Login password (case-sensitive) password Internet connection WAN MAC address WAN MTU size Port speed Use default hardware address Determined by region Supplemental Information 160 User Manual The following table shows the factory default settings for the Internet connection (see Return the Router to Its Factory Default Settings on page 37) AutoSensing Local network (LAN) LAN IP address Subnet mask DHCP server DHCP range DHCP starting IP address DHCP ending IP address DMZ Time zone 192.168.1.1 255.255.255...
...net (or www.routerlogin.com or 192.168.1.1) User name (case-sensitive) admin Login password (case-sensitive) password Internet connection WAN MAC address WAN MTU size Port speed Use default hardware address Determined by region Supplemental Information 160 User Manual The following table shows the factory default settings for the Internet connection (see Return the Router to Its Factory Default Settings on page 37) AutoSensing Local network (LAN) LAN IP address Subnet mask DHCP server DHCP range DHCP starting IP address DHCP ending IP address DMZ Time zone 192.168.1.1 255.255.255...


