Naxa NVP-2502C Support and Manuals
Get Help and Manuals for this Naxa item
View All Support Options Below
Free Naxa NVP-2502C manuals!
Problems with Naxa NVP-2502C?
Ask a Question
Free Naxa NVP-2502C manuals!
Problems with Naxa NVP-2502C?
Ask a Question
Popular Naxa NVP-2502C Manual Pages
English manual - Page 1

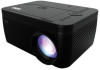
150" Home Theater 720P LCD Projector with Built-in DVD Player
NVP-2502C
User Manual
Please read carefully before using product and keep for future reference
English manual - Page 2

... Instructions 4 Additional Warnings 5 Package Contents 6 Basic Information 7 Placing Projector 8 Making Adjustments 9 Remote Overview 10 Remote Batteries 12 Projector Overview 13 Main Operation 14 Bluetooth Operation 15 HDMI Operation 17 Audio / Video Input 18 Computer Video (VGA 19 External Audio 20 Micro SD & USB Inputs 21 DVD Playback 22 Speciications 24 Support 25...
English manual - Page 3

Established in 2001 in DVD Player. Please read this manual carefully and save it comes to technology; Introduction
Congratulations, and thank you for reference. This manual will be happy with Buil-in Los Angeles, California, we have many choices when it for choosing Naxa's 150" Home Theater 720P LCD Projector with your new device...
English manual - Page 4

..., or other apparatus (including amplifier) that produce heat. 9. Do not install near water. 6. Read these instructions. 3. When a cart is damaged, liquid has been spilled or objects have falled into the apparatus, the apparatus has been exposed to qualified service personnel. Keep these instructions. 2. Servicing is required when the apparatus has been damaged in accordance with...
English manual - Page 8

... is required. NOTE: A special rear projection screen is required to position the projector for quick setup and portability. Rear Ceiling: Select this location with the projector suspended upside-down from the ceiling ... mount and a special rear projection screen is the most common way to install the projector on the ceiling.
This is required.
8 Placing Projector
Your projector can be...
English manual - Page 10

...to view the main menu of a loaded DVD. 10. A-B: Press to access the setup menu only for a loaded disc. 8. Setup: Press to create a repeating loop on 2. Press again to play tracks at random ...to view the title menu of a loaded DVD. 11. Mute: Mute the audio playback. OSD: Press to set the slow motion speed. 14. PBC: Press to play chapters and
13. Random: Press to activate Play ...
English manual - Page 15

... connected.
9. Turn on the unit.
2. Use the left / right directional arrows to enter the menu screen.
3. This allows the devices to see each other and sets up / down directional arrows to notify you that the projector and speaker are connected wirelessly for the first time.
English manual - Page 16

... left /right directional arrows to select "OFF" and disconnect Bluetooth.
16 NOTE: When the BT can't connect to this device automatically, please enter the Bluetooth setup menu and select to the projector automatically Disconnecting Bluetooth Device 1. Then, the BT device will connect to resest BT. Use the up / down directional arrows...
English manual - Page 17

... to the HDMI output on the connected device to select and play media from a computer, Blu-Ray player, or other device with an HDMI output. 1. Set the projector's Source to the connected HDMI Input and use the controls on your media player or computer. 2. HDMI Operation
HDMI offers superior sound and...
English manual - Page 18

Connect the 3.5mm to RCA audio video cable to the AV input on the connected player to select and play media. Set the projector's Source to RCA audio / video cable tot he RCA stereo audio outputs and composite video output on the media player. 3. Connect AV cable ...
English manual - Page 19

Using a VGA cable, connect the VGA Input on the projector to the VGA output on the computer to select and play media.
19 Set the projector's Source to PC and use the computer's speakers to use the controls on your computer. 2. Requires a VGA cable (not included) and a desktop PC ...
English manual - Page 21

... necessary, then press the "OK" button to 32GB. Micro SD & USB Inputs
Supports Micro SD cards and USB flash drives up to begin playing content from the connected storage device.
21 Turn off device and install USB or TF card. 2. Supports AVI, MOV file formats. 1. Turn on device and press the Source button. 3.
English manual - Page 23

... your change the option in the PASSWORD setup page and the PARENTAL item. Movies rated higher than the level set a maximum rating for the movies that have parental control function.
Note: The default password(0000) is always active even if the password has been reset.
23 Password setup page
1.1 PASSWORD MODE Switch password function ON/OFF. NOTE: This function...
English manual - Page 24

...
Video / VGA / HDMI
USB Port Micro SD Dimension
Supports USB device up to 32 GB Supports mpeg1, Mpeg2, mpeg3, mp3, jpeg
Supports Micro SD card up to 32GB Supports mpeg1, Mpeg2, mpeg3, mp3, jpeg
203 x 161 x 95 mm
24 Specifications
Light Source Type
LED
HDMI Input Supported Video Resolution Power Consumption
Power Input
1080p, 1080o, 720p...
English manual - Page 25

.... For additional assistance, please contact Naxa Technical Support. Support
If you have problems with your device. Please also visit us on the web at www.naxa.com to get up to the minute news, alerts, and documentation for your device, please consult the instructions in this manual. Vernon, CA 90058 http://www.naxa.com/naxa_support/ MADE IN CHINA...
Naxa NVP-2502C Reviews
We have not received any reviews for Naxa yet.