
Warranty conditions
Page 4
... provide services (including delivery services) to Miele or which assist Miele in relation to check the Miele user manual. In Australia call 0800 464 353 for delays due to sourcing of unusual Parts which will use reasonable commercial endeavors to have all necessary Spare Parts available for the purpose of Repair or Service, Miele Is not liable for Domestic and Professional appliances. SERVICE & SPARE PARTS While Miele...
... provide services (including delivery services) to Miele or which assist Miele in relation to check the Miele user manual. In Australia call 0800 464 353 for delays due to sourcing of unusual Parts which will use reasonable commercial endeavors to have all necessary Spare Parts available for the purpose of Repair or Service, Miele Is not liable for Domestic and Professional appliances. SERVICE & SPARE PARTS While Miele...
Warranty conditions
Page 5
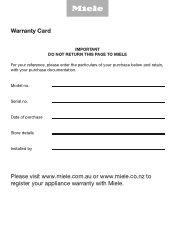
Serial no . Date of your purchase below and retain, with your appliance warranty with Miele. Warranty Card IMPORTANT DO NOT RETURN THIS PAGE TO MIELE For your reference, please enter the particulars of purchase Store details Installed by Please visit www.miele.com.au or www.miele.co.nz to register your purchase documentation. Model no .
Serial no . Date of your purchase below and retain, with your appliance warranty with Miele. Warranty Card IMPORTANT DO NOT RETURN THIS PAGE TO MIELE For your reference, please enter the particulars of purchase Store details Installed by Please visit www.miele.com.au or www.miele.co.nz to register your purchase documentation. Model no .
Warranty conditions
Page 8
..., this product, including all parts of the Sealed Refrigeration System covered by the Warranty that any Miele authorized part or accessory discovered to be provided by Miele, the original warranty period is returned together with applicable installation instructions; Six (6) months, for canister and upright models. Parts and labour. - Duration of Warranty This warranty is valid during the period starting from the date of purchase...
..., this product, including all parts of the Sealed Refrigeration System covered by the Warranty that any Miele authorized part or accessory discovered to be provided by Miele, the original warranty period is returned together with applicable installation instructions; Six (6) months, for canister and upright models. Parts and labour. - Duration of Warranty This warranty is valid during the period starting from the date of purchase...
Warranty conditions
Page 16
..., improper installation, accident, abuse, misuse, power interruptions, power surges, floods, natural disasters, or force majeure; or Puerto Rico. Any and all warranty claims must pay for Countertop Coffee Machines and Fashion Master® Ironing Systems; This Limited Warranty covers parts and labor, except as water filter cartridges. • Vacuum cleaners (see separate limited warranty). • Miele Products covered by third party "Extended Warranties", which...
..., improper installation, accident, abuse, misuse, power interruptions, power surges, floods, natural disasters, or force majeure; or Puerto Rico. Any and all warranty claims must pay for Countertop Coffee Machines and Fashion Master® Ironing Systems; This Limited Warranty covers parts and labor, except as water filter cartridges. • Vacuum cleaners (see separate limited warranty). • Miele Products covered by third party "Extended Warranties", which...
Warranty conditions
Page 20
..., distributors or other income sources as electrical wiring, water or gas piping, hoses, ductwork, drains and the like; • Any damage or defect resulting from , - This Limited Warranty does not cover: • Any damage or defect to the Miele Product caused by Miele; - any repair, service, conversion or alteration to it accessible to electrical, power or water supply of the Miele Product or any failure to the...
..., distributors or other income sources as electrical wiring, water or gas piping, hoses, ductwork, drains and the like; • Any damage or defect resulting from , - This Limited Warranty does not cover: • Any damage or defect to the Miele Product caused by Miele; - any repair, service, conversion or alteration to it accessible to electrical, power or water supply of the Miele Product or any failure to the...
Warranty conditions
Page 23
... non-availability during maintenance or repair, or unavailability of spare or replacement parts; • Cleaning, preventive maintenance or customer education; • Any Miele Product, the serial numbers of profits or revenues, billable time or other income sources as water filter cartridges; • Any damage to the service technician; and • Miele Products covered by third party "Extended Warranties" or other separate third party warranty agreements or arrangements...
... non-availability during maintenance or repair, or unavailability of spare or replacement parts; • Cleaning, preventive maintenance or customer education; • Any Miele Product, the serial numbers of profits or revenues, billable time or other income sources as water filter cartridges; • Any damage to the service technician; and • Miele Products covered by third party "Extended Warranties" or other separate third party warranty agreements or arrangements...
Warranty conditions
Page 26
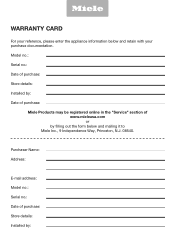
Purchaser Name: Address: E-mail address: Model no.: Serial no .: Date of purchase: Store details: Installed by: Date of purchase: Miele Products may be registered online in the "Service" section of purchase: Store details: Installed by filling out the form below and retain with your reference, please enter the appliance information below and mailing it to Miele Inc., 9 Independence Way, Princeton, N.J. 08540. Model no.: Serial no .: Date of www.mieleusa.com or by : WARRANTY CARD For your purchase documentation.
Purchaser Name: Address: E-mail address: Model no.: Serial no .: Date of purchase: Store details: Installed by: Date of purchase: Miele Products may be registered online in the "Service" section of purchase: Store details: Installed by filling out the form below and retain with your reference, please enter the appliance information below and mailing it to Miele Inc., 9 Independence Way, Princeton, N.J. 08540. Model no.: Serial no .: Date of www.mieleusa.com or by : WARRANTY CARD For your purchase documentation.
Warranty conditions
Page 27
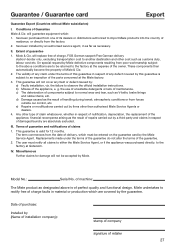
... and other cost such as necessary. Miele & Cie. c) The deterioration of the guarantee. 2. III. Miscellaneous Further claims for 12 months. Model No.: Serial No. b) Misuse of maintenance. the use of unsuitable detergents or lack of the appliance, e. will replace free of charge faults in material or production which are covered by an authorised service agent, in as far as...
... and other cost such as necessary. Miele & Cie. c) The deterioration of the guarantee. 2. III. Miscellaneous Further claims for 12 months. Model No.: Serial No. b) Misuse of maintenance. the use of unsuitable detergents or lack of the appliance, e. will replace free of charge faults in material or production which are covered by an authorised service agent, in as far as...

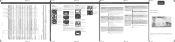
Short user manual
Page 1
... too soon. Starting a program Touch the flashing Start/Add laundry sensor button. This prevents the appliance being rolled up inside them. The program is used the next time. The Start/Add laundry sensor button goes out. - 10 minutes after the end of a program. The tumble dryer switches off . fold here 1 Condensed-water container 2 Door 3 Control panel 4 Plinth-filter flap 5 Grille for cold-air intake OPERATION fold...
... too soon. Starting a program Touch the flashing Start/Add laundry sensor button. This prevents the appliance being rolled up inside them. The program is used the next time. The Start/Add laundry sensor button goes out. - 10 minutes after the end of a program. The tumble dryer switches off . fold here 1 Condensed-water container 2 Door 3 Control panel 4 Plinth-filter flap 5 Grille for cold-air intake OPERATION fold...
Short user manual
Page 2
... the dryer before replacing them in completely. See lights up or flash Check whether the breaker has tripped. Reinserting the plinth filter Install the plinth fil- has been canceled Open and close - - Water is used . To deactivate the message, confirm with heat PROGRAM GUIDE fold here fold here Cleaning and care Lint filters Removing visible lint Clean the 2 lint filters in the door opening at the same time...
... the dryer before replacing them in completely. See lights up or flash Check whether the breaker has tripped. Reinserting the plinth filter Install the plinth fil- has been canceled Open and close - - Water is used . To deactivate the message, confirm with heat PROGRAM GUIDE fold here fold here Cleaning and care Lint filters Removing visible lint Clean the 2 lint filters in the door opening at the same time...
Operating instructions/Installation instructions
Page 2
... Time-controlled and other programs 29 Selecting an extra option 30 Delay start/SmartStart 30 5. Selecting program settings 29 Program settings 29 Selecting the drying level for the environment 6 IMPORTANT SAFETY INSTRUCTIONS 7 Operating the tumble dryer 15 Control panel ...15 Operating the sensor buttons 16 Display...17 Examples on correct laundry care 24 Points to operate the appliance 17 Energy-saving tips 18 Functioning of the heat...
... Time-controlled and other programs 29 Selecting an extra option 30 Delay start/SmartStart 30 5. Selecting program settings 29 Program settings 29 Selecting the drying level for the environment 6 IMPORTANT SAFETY INSTRUCTIONS 7 Operating the tumble dryer 15 Control panel ...15 Operating the sensor buttons 16 Display...17 Examples on correct laundry care 24 Points to operate the appliance 17 Energy-saving tips 18 Functioning of the heat...
Operating instructions/Installation instructions
Page 3
... Cleaning the plinth-filter access panel 56 Cleaning the dryer 56 Frequently Asked Questions 57 The display indicates messages or faults 57 Unsatisfactory drying results 60 The drying cycle duration is very long 61 General problems with the tumble dryer 62 Replacing the plinth filter 63 Reactivating the plinth filter 65 Checking the heat exchanger unit 65 Cleaning the lint filter in the condensed water container 66 Replacing the blocked spray jet for the Steam Care...
... Cleaning the plinth-filter access panel 56 Cleaning the dryer 56 Frequently Asked Questions 57 The display indicates messages or faults 57 Unsatisfactory drying results 60 The drying cycle duration is very long 61 General problems with the tumble dryer 62 Replacing the plinth filter 63 Reactivating the plinth filter 65 Checking the heat exchanger unit 65 Cleaning the lint filter in the condensed water container 66 Replacing the blocked spray jet for the Steam Care...
Operating instructions/Installation instructions
Page 4
... the tumble dryer again 76 Additional installation requirements 76 Product dimensions 78 Dimensions...78 Installation on a plinth 78 Washer-dryer stack 78 Electrical connection 79 Connection adapter for NEMA 14-30 socket 79 External draining of condensed water 80 Arranging the drain hose 80 Condensate drain 80 Changing the door hinging 81 Changing the hinging over 81 Refitting ...86 Technical data...87 Settings ...88 Accessing settings 88 Language ...89 Drying levels...
... the tumble dryer again 76 Additional installation requirements 76 Product dimensions 78 Dimensions...78 Installation on a plinth 78 Washer-dryer stack 78 Electrical connection 79 Connection adapter for NEMA 14-30 socket 79 External draining of condensed water 80 Arranging the drain hose 80 Condensate drain 80 Changing the door hinging 81 Changing the hinging over 81 Refitting ...86 Technical data...87 Settings ...88 Accessing settings 88 Language ...89 Drying levels...
Operating instructions/Installation instructions
Page 7
... door after use to prevent child hazards. Before this appliance is removed for service or discarded, remove the door to the drying compartment. Do not install or use a dryer with visible damage. Do not reach into the dryer if the drum is moving. Do not install or store this appliance where it will be performed by qualified personnel. Repairs to the user...
... door after use to prevent child hazards. Before this appliance is removed for service or discarded, remove the door to the drying compartment. Do not install or use a dryer with visible damage. Do not reach into the dryer if the drum is moving. Do not install or store this appliance where it will be performed by qualified personnel. Repairs to the user...
Operating instructions/Installation instructions
Page 11
... for which it will not fit the outlet, have a proper outlet installed by shutting off the power main, unplugging the power cord or tripping the circuit breaker. This special bulb must always use the dryer basket (optional accessory) when drying/airing shoes. side the drum for the dryer basket. This tumble dryer is supplied with a special bulb to tear, requiring a service call. A Miele washer-dryer connection kit is required as an optional accessory), make sure...
... for which it will not fit the outlet, have a proper outlet installed by shutting off the power main, unplugging the power cord or tripping the circuit breaker. This special bulb must always use the dryer basket (optional accessory) when drying/airing shoes. side the drum for the dryer basket. This tumble dryer is supplied with a special bulb to tear, requiring a service call. A Miele washer-dryer connection kit is required as an optional accessory), make sure...
Operating instructions/Installation instructions
Page 20
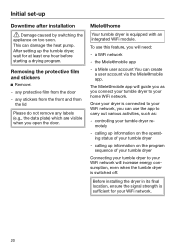
... stickers Remove: - Once your tumble dryer - Before installing the dryer in its final location, ensure the signal strength is equipped with an integrated WiFi module. Miele@home Your tumble dryer is sufficient for at least one hour before starting a drying program. the Miele@mobile app - controlling your WiFi network. 20 The Miele@mobile app will guide you open the door. To use the app to...
... stickers Remove: - Once your tumble dryer - Before installing the dryer in its final location, ensure the signal strength is equipped with an integrated WiFi module. Miele@home Your tumble dryer is sufficient for at least one hour before starting a drying program. the Miele@mobile app - controlling your WiFi network. 20 The Miele@mobile app will guide you open the door. To use the app to...
Operating instructions/Installation instructions
Page 23
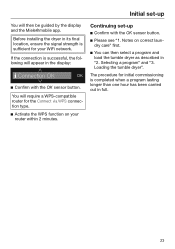
... the Miele@mobile app. Selecting a program" and "3. The procedure for your router within 2 minutes. If the connection is completed when a program lasting longer than one hour has been carried out in "2. Notes on your WiFi network. Loading the tumble dryer". You will require a WPS-compatible router for the Connect via WPS connection type. Activate the WPS function on correct laundry care...
... the Miele@mobile app. Selecting a program" and "3. The procedure for your router within 2 minutes. If the connection is completed when a program lasting longer than one hour has been carried out in "2. Notes on your WiFi network. Loading the tumble dryer". You will require a WPS-compatible router for the Connect via WPS connection type. Activate the WPS function on correct laundry care...
Operating instructions/Installation instructions
Page 24
... of colors running and discoloring other garments or even plastic components in energy and time during drying. - Tie together textile belts and apron ties. - Sew in doubt, wash the items several times. - Sort the laundry according to incorrect use sufficient detergent and select a high temperature. Do not load the drum with items that textiles dry evenly. - Ensure that any long zippers so...
... of colors running and discoloring other garments or even plastic components in energy and time during drying. - Tie together textile belts and apron ties. - Sew in doubt, wash the items several times. - Sort the laundry according to incorrect use sufficient detergent and select a high temperature. Do not load the drum with items that textiles dry evenly. - Ensure that any long zippers so...
Operating instructions/Installation instructions
Page 71
.... danger of the appliance (e.g. Work by unqualified persons could void the warranty. Before installation, disconnect the tumble dryer from the electrical supply by a Miele au- This appliance is complete. GROUNDING INSTRUCTIONS This appliance must be performed by shutting off the power main, unplugging the power cord or tripping the circuit breaker. Extension cords do not guarantee the required safety of overheating). 71 IMPORTANT...
.... danger of the appliance (e.g. Work by unqualified persons could void the warranty. Before installation, disconnect the tumble dryer from the electrical supply by a Miele au- This appliance is complete. GROUNDING INSTRUCTIONS This appliance must be performed by shutting off the power main, unplugging the power cord or tripping the circuit breaker. Extension cords do not guarantee the required safety of overheating). 71 IMPORTANT...
Operating instructions/Installation instructions
Page 72
... regulations and standards. Do not install the machine in non stationary locations (e.g. vice Department. USA 888-99-MIELE(64353) service@mieleusa.com CDN 1-800-565-6435 service@miele.ca SAVE THESE INSTRUCTIONS 72 IMPORTANT SAFETY INSTRUCTIONS The installation of this unit in rooms where temperatures below freezing may occur. This dryer is not intended for wall-insert. ...
... regulations and standards. Do not install the machine in non stationary locations (e.g. vice Department. USA 888-99-MIELE(64353) service@mieleusa.com CDN 1-800-565-6435 service@miele.ca SAVE THESE INSTRUCTIONS 72 IMPORTANT SAFETY INSTRUCTIONS The installation of this unit in rooms where temperatures below freezing may occur. This dryer is not intended for wall-insert. ...

