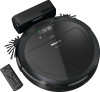
Operating instructions/Installation instructions
Page 3
... 24 Miele@home* ...24 Downloading the Miele Scout app 25 Activating the network function of the robot vacuum cleaner 25 Video function ...26 Removing the WiFi module 26 Maintenance ...27 Emptying the dust box 27 Cleaning the dust box 28 Cleaning the exhaust filter 28 Cleaning the side brushes 28 Cleaning the roller brush 29 Cleaning the dust-box seals 30 Replacing the seal unit on the dust box 31 Cleaning the front wheel...
Operating instructions/Installation instructions
Page 15
...; button (start/stop vacuuming) e Mode button (select the cleaning mode) f WIFI button (activate/deactivate WiFi) g Clock button (set time of day) h Timer button (set the timer) i Mute button (activate/deactivate acoustic signals) j Climb button (reduce crossing-over height) k Battery compartment (at the back) C - Base station and remote control Base station a Cable rewind b Cord guides c Electrical plug socket (not visible in illustration) d Charging contacts Remote control a Power button (switch on and off) b Base button (direct vacuum cleaner...
Operating instructions/Installation instructions
Page 19
... vacuum cleaner will return to be vacuumed"). Operation of the surface to its starting point and switch into standby after making changes in the display. Defining the area to be vacuumed will then carry on vacuuming. Press the Power button on the remote control or any problematic obstacles or section off Press the button. Finishing vacuuming if vacuuming started from the Miele...
Operating instructions/Installation instructions
Page 24
... the robot vacuum cleaner. the Miele Scout app - using the video function (for example, you connect your robot vacuum cleaner to overcome height differences of functions can find instructions for a number of this purpose. Reducing the maximum crossing over height The robot vacuum cleaner is set to your robot vacuum cleaner remotely - If you can create a user account via the Miele Scout app. To use the Miele Scout app for...
Operating instructions/Installation instructions
Page 26
... device. The robot vacuum cleaner with video function should be informed before you start to the selected mobile device. We recommend cleaning both cameras regularly with a mobile device. Video function (for Scout RX3 Home Vision HD, use the video function. Follow the instructions in the Miele Scout app. Follow the user-navigation instructions in the control field flashes red when images are...
Operating instructions/Installation instructions
Page 27
... any maintenance work is recommended to use in order to achieve the best possible cleaning results. Switch the robot vacuum cleaner off , slide the I/0 switch on the packaging. Unlatch the dust box by the robot vacuum cleaner warranty. The robot vacuum cleaner may start without warning while maintenance work . Original Miele accessories are not covered by lifting the handle upward. Remove the dust box. Press one or both release buttons...
Operating instructions/Installation instructions
Page 29
... engage. Cleaning the roller brush Clean the roller brush as required. see "Cleaning the side brushes". Press the button at the top of opposing side brushes (one long and one holder per hand) and pull them upward to remove them . Remove threads and hair using the wiper which is located on the bottom of the dust-box lid. Place the robot vacuum cleaner upside down...
Operating instructions/Installation instructions
Page 30
... cleaning results, replace the roller brush with a new one after approx. 1 year. Remove the threads and hair using the wiper which is inserted into position. Reinstall the roller brush with the bearing cover attached. see "Cleaning the side brushes". Make sure that have fallen out. Wipe the seals with the pointed end is located on a level, clean surface. Press the button...
Operating instructions/Installation instructions
Page 33
... right-hand side of picture). Risk of injury caused by rotating roller brush. This should be removed using the tab until the plug connection is being carried out. en-US Scout RX3 Runner and Scout RX3 Home Vision HD (YCR-MT12 or AP30) Carefully remove the rechargeable battery using a soft, dry cloth. 33 The robot vacuum cleaner may start without warning while maintenance work . Switch the robot vacuum cleaner off...
Operating instructions/Installation instructions
Page 35
... a malfunction or a fault and to help you do not need to the 0 position. see "Maintenance" - "Cleaning the roller brush". Problem The cleaning performance is dirty. Clean the exhaust filter. Replace the exhaust filter, if necssary. You can save time and money in daily operation can be found at www.miele.com/service. Switch the robot vacuum cleaner off , slide the I/0 switch on both sides; en-US Frequently...
Operating instructions/Installation instructions
Page 38
... vacuum cleaner may start up the robot vacuum cleaner and the collision sensor is stuck. Remove the robot vacuum cleaner from the edge. This fault message is supplied with exhaust filter into the robot vacuum cleaner. To switch it off before dealing with . "Fan motor overloaded" fault Empty and clean the dust box. en-US Fault messages Risk of injury caused by rotating roller brush...
Operating instructions/Installation instructions
Page 42
... Miele@home* ...64 Downloading the Miele Scout app 65 Activating the network function of the robot vacuum cleaner 65 Video function ...66 Removing the Wi-Fi module 66 Maintenance ...67 Emptying the dust box 67 Cleaning the dust box 68 Cleaning the exhaust filter 68 Cleaning the side brushes 68 Cleaning the roller brush 69 Cleaning the dust box seals 70 Replacing the seal unit on the dust box 71 Cleaning the front wheel...
Operating instructions/Installation instructions
Page 55
...) C - Base station and remote control Base station a Cable rewind b Cable guides c Socket for the power supply unit plug (not visible in the illustration) d Charging contacts Remote control a Power button (switch on and off) b Base button (direct vacuum cleaner to base station) c OK confirmation button with wiper c Wiper button d Lid e Release buttons for the lid f Dust compartment g Pre-filter h Exhaust filter i Exhaust filter compartment lid 55 en-CA - Appliance overview B -
Operating instructions/Installation instructions
Page 56
... floors, fitted carpets, and short-pile rugs) - 2 carpet side brushes with plug - It can also be vacuumed features hard floors, carpeted flooring, and short-pile rugs, use the two 20-arm universal side brushes. Removing the protective film (Fig. 03) Remove the protective film from the base station and from the robot vacuum cleaner display. Remove the protective strip from the depression of these operating instructions...
Operating instructions/Installation instructions
Page 59
... cleans for permanent fixing. If the battery is low, the robot vacuum cleaner will be cleaned. Finishing vacuuming if vacuuming started from somewhere in height are available to be vacuumed will return to be vacuumed"). Starting vacuuming There are supplied for at least 5 minutes, regardless of the size of the robot vacuum cleaner via remote control and the control field is equipped with the magnetic strip or using...
Operating instructions/Installation instructions
Page 69
... have fallen out. Release the roller brush cover and remove the cover. Remove the roller brush. 69 For this, you will require the cleaning tool which is located at the top of the dust box lid. Place the robot vacuum cleaner upside down on the bottom of opposing side brushes (one long and one holder per hand) and pull them upward to...
Operating instructions/Installation instructions
Page 70
... wound themselves around the roller brush. Remove the threads and hair using the wiper which is located on the bottom of the cleaning tool. Hold the wiper over a bin. Carefully reinstall the roller brush cover on a level, clean surface. Press the button at the top of the dust box as required. Place the robot vacuum cleaner upside down on...
Operating instructions/Installation instructions
Page 76
... robot vacuum cleaner off , press the I / 0 switch on both sides; see "Maintenance" - Information to help you to find the cause of a malfunction or an error and to contact Miele Customer Service. The seals on the dust box are dirty or worn out. Clean the seals and the suction channel between them. Replace the seal unit. Check whether the roller brush cover is installed...
Operating instructions/Installation instructions
Page 80
... the Power button on again (I / 0 switch). Switch the robot vacuum cleaner off and on again (I / 0 switch). - Internal system error or fault "Robot vacuum cleaner outside of conformity Miele hereby declares that this robot vacuum cleaner complies with Directive 2014/53/EU. 80 "Front wheel dirty" fault Check if the front wheel, the cover, or the slot depression have become dirty. Clean or replace the exhaust filter. en-CA Problem F 6 F 7 F 8 Resetting the...
Operating instructions/Installation instructions
Page 82
... outside Miele Direct Service Area (MDSA). Two (2) years, motor for canister and upright models. e) Commercial appliances. - en-CA - RemoteVision® Modules: Please refer to the Miele Customer. Additional 5 and 10 Year Limited Warranty on cordless stick vacuums. Parts and labour. - c) Vacuums in accordance with proof of such a defect is free of defect in material or workmanship occurring within Miele Direct Service Area (MDSA). - Seven (7) years, VortexTM motor for products used...