Miele K 1811 Vi Support and Manuals
Get Help and Manuals for this Miele item
View All Support Options Below
Free Miele K 1811 Vi manuals!
Problems with Miele K 1811 Vi?
Ask a Question
Free Miele K 1811 Vi manuals!
Problems with Miele K 1811 Vi?
Ask a Question
Popular Miele K 1811 Vi Manual Pages
Operating and Installation manual - Page 1
en - US, CA
M.-Nr. 09 169 670
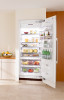
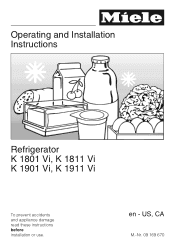
Operating and Installation Instructions
Refrigerator K 1801 Vi, K 1811 Vi K 1901 Vi, K 1911 Vi
To prevent accidents and appliance damage read these instructions before installation or use.
Operating and Installation manual - Page 2
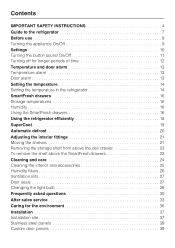
Contents
IMPORTANT SAFETY INSTRUCTIONS 4 Guide to the refrigerator 7 Before use 9 Turning the appliance On/Off 9 Settings 10 Turning the button sound On/Off 11 Turning off for longer periods of time 12 Temperature and door alarm 13 Temperature alarm 13 Door alarm 13 Setting the temperature 14 Setting the temperature in the refrigerator 14 SmartFresh drawers 16 Storage...
Operating and Installation manual - Page 4
... to
connect this Operating manual. Electrical Safety
~ Before installation, make sure that this appliance continuity must correspond to personal injury and material damage.
To guarantee the electrical safety of overheating).
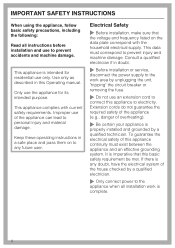
~ Be certain your appliance is intended for its intended purpose. If there is any future user. IMPORTANT SAFETY INSTRUCTIONS
When using the appliance...
Operating and Installation manual - Page 5

... required temperature. Keep the door closed until the appliance is completely installed and secured per the installation instructions.
~ This appliance must be installed
and connected in compliance with the installation instructions.
~ Installation and repair work environments
- on a ship).
~ Do not install the refrigerator in a
room with too low an ambient temperature, e.g., a garage, as this...
Operating and Installation manual - Page 10
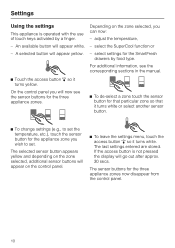
... button will appear yellow. - A selected button will appear white. - select settings for the three appliance zones now disappear from the control panel.
10 On the...manual.
^ Touch the access button "p" so it turns white. Depending on the control panel.
^ To leave the settings menu, touch the access button "p" so it turns yellow.
adjust the temperature,
- Settings
Using the settings...
Operating and Installation manual - Page 30
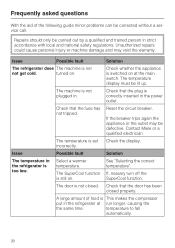
... following guide minor problems can be carried out by a qualified and trained person in the power outlet.
If the breaker trips again the appliance or the outlet may void the warranty. Issue
Possible fault
Solution
The temperature in the refrigerator at the main switch.
Check that the fuse has not tripped. Unauthorized repairs could...
Operating and Installation manual - Page 33
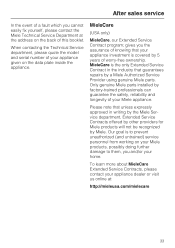
... approved in the industry that guarantees repairs by factory-trained professionals can guarantee the safety, reliability and longevity of your Miele appliance.
Our goal is covered by Miele. Only genuine Miele parts installed by a Miele Authorized Service Provider using genuine Miele parts.
MieleCare
(USA only)
MieleCare, our Extended Service Contract program; gives you and/or...
Operating and Installation manual - Page 38
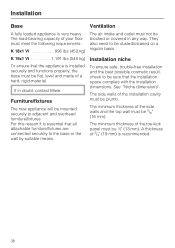
...or covered in doubt, contact Miele. The minimum thickness of the installation cavity must be 5/8" (16 mm).
Installation niche
To ensure safe, trouble-free installation and the best possible cosmetic ...a hard, rigid material. K 19x1 Vi 1,191 lbs (540 kg)
To ensure that the installation space complies with the installation dimensions. Furniture/fixtures
The new appliance will be ½"...
Operating and Installation manual - Page 39
.... These are available from Miele.
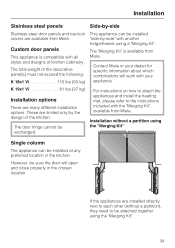
Installation
Stainless steel panels
Side-by-side
Stainless steel door panels and toe-kick covers are limited only by -side" with your dealer for specific information about which combinations will open and close properly in the kitchen.
Installation without a partition), they need to the instructions included with all styles and...
Operating and Installation manual - Page 47
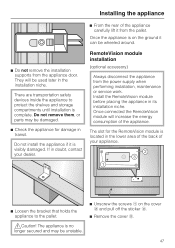
... the appliance to the pallet.
,Caution! Do not remove them, or parts may be unstable.
^ Unscrew the screws a on the ground it can be used later in transit. Once connected the RemoteVision module will be wheeled around.
^ Do not remove the installation supports from the appliance door. The slot for damage in the...
Operating and Installation manual - Page 62
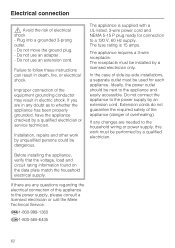
...and easily accessible.
Installation, repairs and other work must be performed by -side installations, a separate outlet must be installed by unqualified persons could...). If you are needed to follow these instructions can result in any changes are in death..., please consult a licensed electrician or call the Miele Technical Service.
Plug into a grounded 3-prong outlet. - Do...
Operating and Installation manual - Page 63
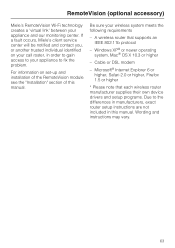
...; Internet Explorer 6 or higher, Safari 2.0 or higher, Firefox 1.5 or higher
* Please note that supports an IEEE 802.11b protocol
- A wireless router that each wireless router manufacturer supplies their own device drivers and setup programs. Due to fix the problem. Wording and instructions may vary.
63 For information on your call roster, in order to gain...
Operating and Installation manual - Page 64
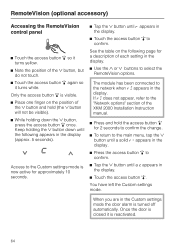
...in the display. appears in the display.
^ Press the access button "p" to the Custom settings mode is now active for approximately 10 seconds.
^ Tap the X button until the following ... "p". If ; # does not appear, refer to the "Network options" section of the XKM 2000 Installation Instruction manual.
^ Press and hold (the X button will not be visible). ^ While holding the X button down...
Side by Side Merging Kit Installation Manual - Page 3
...
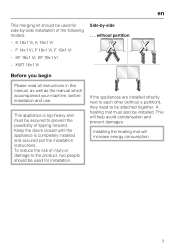
Before you begin
Please read all instructions in this manual, as well as the manual which accompanied your machine, before installation and use.
F 14x1 Vi, F 18x1 Vi, F 19x1 Vi
- If the appliances are installed directly next to prevent the possibility of tipping forward. KF 18x1 Vi, KF 19x1 Vi
- K 18x1 Vi, K 19x1 Vi
- KWT 16x1 Vi
Side-by -side installation of injury or damage to be...
Vi Refrigerators (30 inch) - Page 1
... 9" above finished floor
Notes
• All Installations must be done in accordance with local codes • Sides of adjoining cabinets should be filled (flush to frame) to
insure proper fit and finish
1 1/4"
4 1/8"
6 5/8" - 8 1/2"
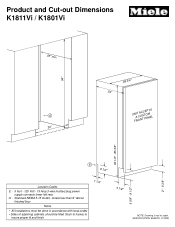
NOTE: Drawing is not to scale. O - SPECIFICATION SHEETS 011208
2" - 8 3/8"
Product and Cut-out Dimensions K1811Vi / K1801Vi
25" min. Standard NEMA 5-15 Outlet...
Miele K 1811 Vi Reviews
We have not received any reviews for Miele yet.