Operating instructions
Page 4
... exhaust filter 20 Replacing the Active AirClean 30 and HEPA AirClean 30 exhaust filters 20 Replacing one type of exhaust filter with another (Fig. 02 21 When changing the filter type, please note 21 Service indicator with Reset button 21 Removing threads and hair from the Powerbrush 21 Cleaning and care 22 Frequently asked questions 23 After sales service 24 Warranty conditions 24 Optional accessories 24 Limited Warranty - Vacuum Cleaners...
... exhaust filter 20 Replacing the Active AirClean 30 and HEPA AirClean 30 exhaust filters 20 Replacing one type of exhaust filter with another (Fig. 02 21 When changing the filter type, please note 21 Service indicator with Reset button 21 Removing threads and hair from the Powerbrush 21 Cleaning and care 22 Frequently asked questions 23 After sales service 24 Warranty conditions 24 Optional accessories 24 Limited Warranty - Vacuum Cleaners...
Operating instructions
Page 5
... risk of carpets and rugs. This vacuum cleaner is not supported by the manufacturer and could be used for all normal cleaning of accidents and damage to vacuum dry floor surfaces. Always disconnect the vacuum cleaner from the power supply when you have finished using it for maintenance work and cleaning. Keep these instructions carefully before using it . Do not use can be used to the vacuum cleaner, please read these operating instructions in...
... risk of carpets and rugs. This vacuum cleaner is not supported by the manufacturer and could be used for all normal cleaning of accidents and damage to vacuum dry floor surfaces. Always disconnect the vacuum cleaner from the power supply when you have finished using it for maintenance work and cleaning. Keep these instructions carefully before using it . Do not use can be used to the vacuum cleaner, please read these operating instructions in...
Operating instructions
Page 7
... data plate of the vacuum cleaner (voltage and frequency) match the mains electricity supply exactly. Do not use the vacuum cleaner if the power cord is under a door. Avoid running the vacuum cleaner over the cord. This could damage the cord, plug or socket. The appliance must be fitted with an original Miele cord. If the cord is suited for example, under warranty, repairs should only be performed by the power cord...
... data plate of the vacuum cleaner (voltage and frequency) match the mains electricity supply exactly. Do not use the vacuum cleaner if the power cord is under a door. Avoid running the vacuum cleaner over the cord. This could damage the cord, plug or socket. The appliance must be fitted with an original Miele cord. If the cord is suited for example, under warranty, repairs should only be performed by the power cord...
Operating instructions
Page 8
... unqualified persons can conduct electricity. Do not vacuum up any water, liquid or damp dirt. Proper use the vacuum cleaner to users. Do not force it. Do not use the vacuum cleaner to vacuum up any inflammable or combustible liquids or gases and do not use the vacuum cleaner without a FilterBag inserted. Clean only with the suction hose handle or the telescopic wand at head level. To avoid...
... unqualified persons can conduct electricity. Do not vacuum up any water, liquid or damp dirt. Proper use the vacuum cleaner to users. Do not force it. Do not use the vacuum cleaner to vacuum up any inflammable or combustible liquids or gases and do not use the vacuum cleaner without a FilterBag inserted. Clean only with the suction hose handle or the telescopic wand at head level. To avoid...
Operating instructions
Page 11
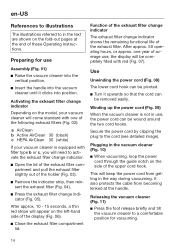
... for power cord b Suction hose holder c Suction hose with handle d Release button e Telescopic wand f Dust compartment filter g Telescopic wand release button h Vacuum cleaner foot release i Exhaust filter * j Exhaust filter compartment k Powerbrush l Light * m FilterBag change indicator n Dust compartment release button o FilterBag p Control panel (see following page for description) * q Power cord r Powerbrush On/Off button ( / O) s On/Off button (l / O) t Handpiece Back: u Lower swivel hook for power cord v Upholstery nozzle w Carrying handle x Crevice nozzle y Dusting brush with...
... for power cord b Suction hose holder c Suction hose with handle d Release button e Telescopic wand f Dust compartment filter g Telescopic wand release button h Vacuum cleaner foot release i Exhaust filter * j Exhaust filter compartment k Powerbrush l Light * m FilterBag change indicator n Dust compartment release button o FilterBag p Control panel (see following page for description) * q Power cord r Powerbrush On/Off button ( / O) s On/Off button (l / O) t Handpiece Back: u Lower swivel hook for power cord v Upholstery nozzle w Carrying handle x Crevice nozzle y Dusting brush with...
Operating instructions
Page 14
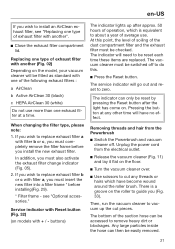
... in the vacuum cleaner (Fig. 10) When vacuuming, loop the power cord through the guide notch on the left-hand side of the upper cord hook. Secure the power cord by clipping the plug to activate the exhaust filter change indicator. Open the lid of the exhaust filter compartment and pull the exhaust filter slightly out of the holder (Fig. 03). Remove the indicator...
... in the vacuum cleaner (Fig. 10) When vacuuming, loop the power cord through the guide notch on the left-hand side of the upper cord hook. Secure the power cord by clipping the plug to activate the exhaust filter change indicator. Open the lid of the exhaust filter compartment and pull the exhaust filter slightly out of the holder (Fig. 03). Remove the indicator...

Operating instructions
Page 15
... button will light up yellow. Obstacles (Fig. 16) Obstacles and variations in and possibly damaged. Automatic power regulation (Fig. 15) (on model) Turn the power selector manually to maneuver. 15 The vacuum cleaner will turn on the control panel will come on the control panel indicating what type of carpet being cleaned. buttons: The power settings on . This setting is automatically adjusted to suit the type of use...
... button will light up yellow. Obstacles (Fig. 16) Obstacles and variations in and possibly damaged. Automatic power regulation (Fig. 15) (on model) Turn the power selector manually to maneuver. 15 The vacuum cleaner will turn on the control panel will come on the control panel indicating what type of carpet being cleaned. buttons: The power settings on . This setting is automatically adjusted to suit the type of use...
Operating instructions
Page 16
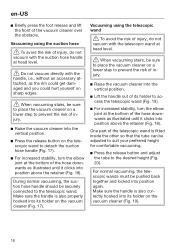
...). Vacuuming using the telescopic wand To avoid the risk of injury, do not vacuum with the suction hose handle at head level. Do not vacuum directly with the telescopic wand at head level. When vacuuming stairs, be sure to place the vacuum cleaner on a lower step to prevent the risk of injury. Raise the vacuum cleaner into the vertical position. Press the release button...
...). Vacuuming using the telescopic wand To avoid the risk of injury, do not vacuum with the suction hose handle at head level. Do not vacuum directly with the telescopic wand at head level. When vacuuming stairs, be sure to place the vacuum cleaner on a lower step to prevent the risk of injury. Raise the vacuum cleaner into the vertical position. Press the release button...
Operating instructions
Page 17
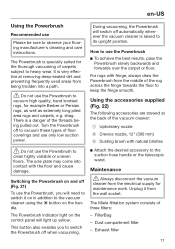
... vacuum these types of the rug across the fringe towards the floor to observe your flooring manufacturer's cleaning and care instructions. This button also enables you will need to heavy wear. There is specially suited for the thorough vacuuming of carpets subject to switch it from the middle of floor coverings and use only low suction power. It is raised to vacuum high quality, hand knotted rugs, for maintenance work...
... vacuum these types of the rug across the fringe towards the floor to observe your flooring manufacturer's cleaning and care instructions. This button also enables you will need to heavy wear. There is specially suited for the thorough vacuuming of carpets subject to switch it from the middle of floor coverings and use only low suction power. It is raised to vacuum high quality, hand knotted rugs, for maintenance work...
Operating instructions
Page 18
... your Miele Dealer, from Miele or from the online shop. Miele FilterBags are disposable and designed for this below). Checking the FilterBag change indicator turns red, or sooner if it is maintained, giving the best possible cleaning results. Please specify the model number of your vacuum cleaner when ordering to change the FilterBag (Fig. 23) Change the FilterBag when the color marker in used FilterBags will need...
... your Miele Dealer, from Miele or from the online shop. Miele FilterBags are disposable and designed for this below). Checking the FilterBag change indicator turns red, or sooner if it is maintained, giving the best possible cleaning results. Please specify the model number of your vacuum cleaner when ordering to change the FilterBag (Fig. 23) Change the FilterBag when the color marker in used FilterBags will need...
Operating instructions
Page 19
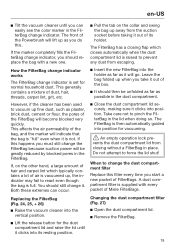
... change the FilterBag because suction power will become blocked very quickly. How the FilterBag change indicator works The FilterBag change the dust compartment filter Replace this filter every time you do this happens you can occur. Insert the new FilterBag into position. If this . Take care not to force the lid shut! Changing the dust compartment filter (Fig. 27) Open the dust compartment lid. Remove...
... change the FilterBag because suction power will become blocked very quickly. How the FilterBag change indicator works The FilterBag change the dust compartment filter Replace this filter every time you do this happens you can occur. Insert the new FilterBag into position. If this . Take care not to force the lid shut! Changing the dust compartment filter (Fig. 27) Open the dust compartment lid. Remove...
Operating instructions
Page 20
..., the power will be used AirClean filter by the clean, unsoiled section to install an Active AirClean 30 or HEPA AirClean 30 exhaust filter, see "Replacing one of average use more than one exhaust filter at a time. Open the exhaust filter compartment lid. Remove the exhaust filter (Fig. 31). Insert the new exhaust filter and press the exhaust filter change indicator is supplied with a new dust compartment filter...
..., the power will be used AirClean filter by the clean, unsoiled section to install an Active AirClean 30 or HEPA AirClean 30 exhaust filter, see "Replacing one of average use more than one exhaust filter at a time. Open the exhaust filter compartment lid. Remove the exhaust filter (Fig. 31). Insert the new exhaust filter and press the exhaust filter change indicator is supplied with a new dust compartment filter...
Operating instructions
Page 21
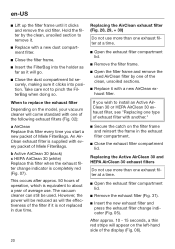
... electrical outlet. Release the vacuum cleaner (Fig. 11) and lay it flat on the floor. Turn the vacuum cleaner over. Use scissors to cut pieces. Then, run the vacuum cleaner to vacuum up after the light has come on models with Reset button (Fig. 32) (on . Pressing the button at a time. en-US If you wish to install an AirClean exhaust filter, see "Optional accessories." When changing the filter type...
... electrical outlet. Release the vacuum cleaner (Fig. 11) and lay it flat on the floor. Turn the vacuum cleaner over. Use scissors to cut pieces. Then, run the vacuum cleaner to vacuum up after the light has come on models with Reset button (Fig. 32) (on . Pressing the button at a time. en-US If you wish to install an AirClean exhaust filter, see "Optional accessories." When changing the filter type...
Operating instructions
Page 22
... the filter bag change indicator and inspect all plastic accessories can be cleaned using the screws. Turn off . Remove any debris or blockages. Replace the connector, making sure it goes on the telescopic wand to these Operating Instructions. Do not let the vacuum cleaner get wet. Vacuum cleaner and accessories The vacuum cleaner and all filters regularly. Clean or replace them when necessary according to detach the suction hose handle (Fig...
... the filter bag change indicator and inspect all plastic accessories can be cleaned using the screws. Turn off . Remove any debris or blockages. Replace the connector, making sure it goes on the telescopic wand to these Operating Instructions. Do not let the vacuum cleaner get wet. Vacuum cleaner and accessories The vacuum cleaner and all filters regularly. Clean or replace them when necessary according to detach the suction hose handle (Fig...
Operating instructions
Page 23
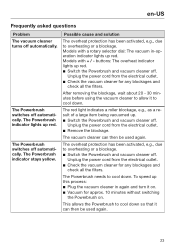
... vacuum cleaner to overheating or a blockage. Switch the Powerbrush and vacuum cleaner off automatically. The vacuum cleaner can then be used again. 23 To speed up this process: Plug the vacuum cleaner in -operation indicator lights up . Switch the Powerbrush and vacuum cleaner off automatically. The red light indicates a roller blockage, e.g., as a result of a large item being vacuumed up red. Unplug the power cord from the electrical outlet. Remove the blockage. The Powerbrush needs...
... vacuum cleaner to overheating or a blockage. Switch the Powerbrush and vacuum cleaner off automatically. The vacuum cleaner can then be used again. 23 To speed up this process: Plug the vacuum cleaner in -operation indicator lights up . Switch the Powerbrush and vacuum cleaner off automatically. The red light indicates a roller blockage, e.g., as a result of a large item being vacuumed up red. Unplug the power cord from the electrical outlet. Remove the blockage. The Powerbrush needs...
Operating instructions
Page 24
... products via the Miele website. Upholstery nozzle, 7 1/2" (190 mm) For vacuuming upholstered furniture, mattresses and cushions. 24 Handheld Turbobrush Mini For vacuuming upholstery, mattresses or car seats, etc. Floor brushes Floor brush Hardfloor (SBB 235-3) This brush is designed for use on the appliance guarantee specific to get into awkward corners. Please observe the flooring manufacturer's cleaning and care instructions. Floor brush Parquet Twister XL with swiveling head...
... products via the Miele website. Upholstery nozzle, 7 1/2" (190 mm) For vacuuming upholstered furniture, mattresses and cushions. 24 Handheld Turbobrush Mini For vacuuming upholstery, mattresses or car seats, etc. Floor brushes Floor brush Hardfloor (SBB 235-3) This brush is designed for use on the appliance guarantee specific to get into awkward corners. Please observe the flooring manufacturer's cleaning and care instructions. Floor brush Parquet Twister XL with swiveling head...
Operating instructions
Page 26
... seven (7) years from the date of the limited warranty provided herein. For vacuum cleaner casings (body), motors, and power head motors (except the Scout RX1), the warranty period will be as follows: i. Vacuum motors, power head motors, and the structural integrity of defects in its Miele authorized parts is free of all liability, whether directly or by an authorized Miele service agent. There is limited in material and workmanship...
... seven (7) years from the date of the limited warranty provided herein. For vacuum cleaner casings (body), motors, and power head motors (except the Scout RX1), the warranty period will be as follows: i. Vacuum motors, power head motors, and the structural integrity of defects in its Miele authorized parts is free of all liability, whether directly or by an authorized Miele service agent. There is limited in material and workmanship...
Operating instructions
Page 53
... the date of Miele upon replacement. 53 c) Vacuums in Canada. 3.2 Warranty claims will repair, or at any failure to conform to do so and in commercial use : - S189 upright units for the Sealed Refrigeration System includes all parts of purchase date to Miele or to a Miele authorized dealer, as qualified to this warranty is reported in writing and the product is free of the...
... the date of Miele upon replacement. 53 c) Vacuums in Canada. 3.2 Warranty claims will repair, or at any failure to conform to do so and in commercial use : - S189 upright units for the Sealed Refrigeration System includes all parts of purchase date to Miele or to a Miele authorized dealer, as qualified to this warranty is reported in writing and the product is free of the...
Operating instructions
Page 54
... usage, maintenance or transportation; Ordinary Wear and Tear Ordinary wear and tear shall not be responsible for a particular except as determined by Miele in workmanship or materials. 7. c) contains non-authentic Miele accessories or replacement parts, including filters, dust bags and other rights which may not apply. 9. b) was repaired, serviced, altered or modified by someone other warranties to the nearest authorized Miele Service Centre...
... usage, maintenance or transportation; Ordinary Wear and Tear Ordinary wear and tear shall not be responsible for a particular except as determined by Miele in workmanship or materials. 7. c) contains non-authentic Miele accessories or replacement parts, including filters, dust bags and other rights which may not apply. 9. b) was repaired, serviced, altered or modified by someone other warranties to the nearest authorized Miele Service Centre...
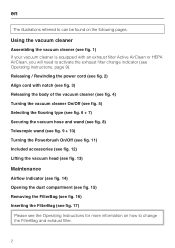
Brief operating instructions
Page 2
Releasing / Rewinding the power cord (see fig. 2) Align cord with an exhaust filter Active AirClean or HEPA AirClean, you will need to change the FilterBag and exhaust filter. 2 en The illustrations referred to can be found on how to activate the exhaust filter change indicator (see the Operating Instructions for more information on the following pages. Using the vacuum cleaner Assembling the vacuum cleaner (see fig. 1) If your vacuum cleaner is equipped with...
Releasing / Rewinding the power cord (see fig. 2) Align cord with an exhaust filter Active AirClean or HEPA AirClean, you will need to change the FilterBag and exhaust filter. 2 en The illustrations referred to can be found on how to activate the exhaust filter change indicator (see the Operating Instructions for more information on the following pages. Using the vacuum cleaner Assembling the vacuum cleaner (see fig. 1) If your vacuum cleaner is equipped with...


