Product Manual
Page 2
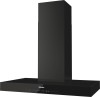
... the fan 21 Turning overhead lighting on/off 22 Power management 22 Operation (Automatic and Manual modes 23 Filter saturation indicator 23 Adjusting the filter saturation indicator for the grease filter 23 Activating/changing the OdorFree Charcoal Filter operating hours counter .... 24 Checking the filter saturation indicator 24 Sensor button signal tone 25 Cleaning and care 26 Stainless steel housing 26 Special instructions for glass surfaces 26 Grease filters ...27 OdorFree Charcoal Filter 29 Resetting the operating...
... the fan 21 Turning overhead lighting on/off 22 Power management 22 Operation (Automatic and Manual modes 23 Filter saturation indicator 23 Adjusting the filter saturation indicator for the grease filter 23 Activating/changing the OdorFree Charcoal Filter operating hours counter .... 24 Checking the filter saturation indicator 24 Sensor button signal tone 25 Cleaning and care 26 Stainless steel housing 26 Special instructions for glass surfaces 26 Grease filters ...27 OdorFree Charcoal Filter 29 Resetting the operating...

Product Manual
Page 4
... appliance is intended for the first time. Improper use of the appliance can lead to any future user. Keep these operating instructions in these operating instructions. This ventilation hood is suitable for its intended purpose. Read all instructions before installing or using the appliance for residential use only. Only use the appliance for installation above gas or electric cooking surfaces. Persons who lack physical, sensory...
... appliance is intended for the first time. Improper use of the appliance can lead to any future user. Keep these operating instructions in these operating instructions. This ventilation hood is suitable for its intended purpose. Read all instructions before installing or using the appliance for residential use only. Only use the appliance for installation above gas or electric cooking surfaces. Persons who lack physical, sensory...
Product Manual
Page 5
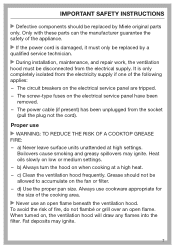
..., contact Miele. - Never use a damaged ventilation hood. 5 IMPORTANT SAFETY INSTRUCTIONS Children As with any plastic wrappings, bags, etc. Technical safety WARNING: TO REDUCE THE RISK OF FIRE, ELECTRIC SHOCK, OR INJURY TO PERSONS, OBSERVE THE FOLLOWING: - Before servicing or cleaning the appliance, switch power off at the service panel and lock the service disconnecting means to the service panel. Installation, repair and maintenance work by...
..., contact Miele. - Never use a damaged ventilation hood. 5 IMPORTANT SAFETY INSTRUCTIONS Children As with any plastic wrappings, bags, etc. Technical safety WARNING: TO REDUCE THE RISK OF FIRE, ELECTRIC SHOCK, OR INJURY TO PERSONS, OBSERVE THE FOLLOWING: - Before servicing or cleaning the appliance, switch power off at the service panel and lock the service disconnecting means to the service panel. Installation, repair and maintenance work by...
Product Manual
Page 6
... do not guarantee the required level of appliance safety. To ensure safe operation, only use a power bar or extension cord to connect the ventilation hood to the user and can cause operation faults. 6 It is imperative that the connection data (voltage and frequency) on a ship). Only open the housing as described in the enclosed "Installation diagram" and in the "Cleaning and care" section of this appliance...
... do not guarantee the required level of appliance safety. To ensure safe operation, only use a power bar or extension cord to connect the ventilation hood to the user and can cause operation faults. 6 It is imperative that the connection data (voltage and frequency) on a ship). Only open the housing as described in the enclosed "Installation diagram" and in the "Cleaning and care" section of this appliance...
Product Manual
Page 7
... following applies: - The circuit breakers on low or medium settings. - Heat oils slowly on the electrical service panel are tripped. - d) Use the proper pan size. Fat deposits may ignite. IMPORTANT SAFETY INSTRUCTIONS Defective components should not be allowed to accumulate on the fan or filter. - The screw-type fuses on , the ventilation hood will draw any flames into the filter. The power cable (if present) has...
... following applies: - The circuit breakers on low or medium settings. - Heat oils slowly on the electrical service panel are tripped. - d) Use the proper pan size. Fat deposits may ignite. IMPORTANT SAFETY INSTRUCTIONS Defective components should not be allowed to accumulate on the fan or filter. - The screw-type fuses on , the ventilation hood will draw any flames into the filter. The power cable (if present) has...

Product Manual
Page 10
... and the bottom of a ventilation hood above solid fuel stoves. Insufficient distance between the cooking appliance and the ventilation hood can result in damage to prevent back drafting. e) Do not use the greater distance. 10 a) Installation work and electrical wiring must be vented to the information provided by qualified person(s) in the "Installation" section must be operated above your cooking appliance, please refer to the...
... and the bottom of a ventilation hood above solid fuel stoves. Insufficient distance between the cooking appliance and the ventilation hood can result in damage to prevent back drafting. e) Do not use the greater distance. 10 a) Installation work and electrical wiring must be vented to the information provided by qualified person(s) in the "Installation" section must be operated above your cooking appliance, please refer to the...
Product Manual
Page 12
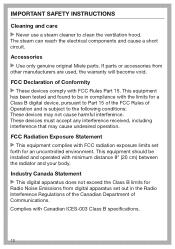
... uncontrolled environment. Complies with FCC Rules Part 15. This equipment should be in the Radio Interference Regulations of the Canadian Department of Conformity These devices comply with Canadian ICES-003 Class B specifications. 12 This equipment has been tested and found to clean the ventilation hood. The steam can reach the electrical components and cause a short circuit.
... uncontrolled environment. Complies with FCC Rules Part 15. This equipment should be in the Radio Interference Regulations of the Canadian Department of Conformity These devices comply with Canadian ICES-003 Class B specifications. 12 This equipment has been tested and found to clean the ventilation hood. The steam can reach the electrical components and cause a short circuit.

Product Manual
Page 14
When the ventilation hood is turned on, the non-return flap opens so that the exhaust air can be transported outside air from occurring when the ventilation hood is drawn in use. The cleaned air is inserted into the kitchen. 14 A non-return flap has been provided with the hood in case your ventilation hood, depending on the model: Vented mode Recirculation mode The recirculation mode requires a recirculation kit and OdorFree Charcoal Filter (available as optional accessories, see...
When the ventilation hood is turned on, the non-return flap opens so that the exhaust air can be transported outside air from occurring when the ventilation hood is drawn in use. The cleaned air is inserted into the kitchen. 14 A non-return flap has been provided with the hood in case your ventilation hood, depending on the model: Vented mode Recirculation mode The recirculation mode requires a recirculation kit and OdorFree Charcoal Filter (available as optional accessories, see...

Product Manual
Page 15
... connection to your cooktop is turned on, the cooktop lighting on the hood turns on . - During cooking, the hood automatically selects the fan level based on the number of a Miele cooktop. Please refer to the installation instructions for you have turned off the cooktop, the fan and the lighting will turn off automatically after a predetermined delay. Once you to be found under "Operation." 15 Description of functions Con@ctivity 2.0 function Automatic control This hood...
... connection to your cooktop is turned on, the cooktop lighting on the hood turns on . - During cooking, the hood automatically selects the fan level based on the number of a Miele cooktop. Please refer to the installation instructions for you have turned off the cooktop, the fan and the lighting will turn off automatically after a predetermined delay. Once you to be found under "Operation." 15 Description of functions Con@ctivity 2.0 function Automatic control This hood...

Product Manual
Page 26
... control buttons are inevitable when cleaning the housing. Avoid the following cleaning instructions. Clean all surfaces and control buttons using a soft cloth. Abrasive cleaners such as scouring powder, scouring liquid, abrasive sponges such as pot scourers, or used sponges that still contain residues from the power supply, see "IMPORTANT SAFETY INSTRUCTIONS". Apply with a sponge cloth. After cleaning, dry the surfaces with a stainless steel care...
... control buttons are inevitable when cleaning the housing. Avoid the following cleaning instructions. Clean all surfaces and control buttons using a soft cloth. Abrasive cleaners such as scouring powder, scouring liquid, abrasive sponges such as pot scourers, or used sponges that still contain residues from the power supply, see "IMPORTANT SAFETY INSTRUCTIONS". Apply with a sponge cloth. After cleaning, dry the surfaces with a stainless steel care...

Product Manual
Page 27
... 3-4 weeks. Make sure you to regularly clean the grease filters. You can cause damage to the cooktop. Do not use any of the following: - Cleaning and care Grease filters The reusable metal grease filters in the appliance remove the solid particles contained in a mild solution of hot water and dish soap. Oven sprays 27 Then, open the filter to match your cooking habits (see "Operation"). By...
... 3-4 weeks. Make sure you to regularly clean the grease filters. You can cause damage to the cooktop. Do not use any of the following: - Cleaning and care Grease filters The reusable metal grease filters in the appliance remove the solid particles contained in a mild solution of hot water and dish soap. Oven sprays 27 Then, open the filter to match your cooking habits (see "Operation"). By...

Product Manual
Page 29
... light for the type and reference number. If you to the grease filters. The OdorFree Charcoal Filter saturation counter will go out. See "Technical data" for level 1 is flashing. Cleaning and care OdorFree Charcoal Filter If the hood is equipped for recirculation, an OdorFree Charcoal Filter must be installed in the canopy above . Remove the charcoal filter from Miele. When to absorb odorcausing agents and is mounted in addition to change...
... light for the type and reference number. If you to the grease filters. The OdorFree Charcoal Filter saturation counter will go out. See "Technical data" for level 1 is flashing. Cleaning and care OdorFree Charcoal Filter If the hood is equipped for recirculation, an OdorFree Charcoal Filter must be installed in the canopy above . Remove the charcoal filter from Miele. When to absorb odorcausing agents and is mounted in addition to change...

Product Manual
Page 33
... installing the chimney b 1 exhaust connector for use in the outlet duct collar of delivery, available as optional accessory - The screws and plugs are designed for an exhaust duct 6" (150 mm). Plugs not for disassembling the chimney. Make sure that the wall can support the load. 2 x M 6 lock nuts for mounting the appliance unit. 2 screws 1/8" x 5/16" (3.9 x 7.5 mm) for attaching the chimney. 1 lever for use in solid walls only. c 1 reducer for securing the hood...
... installing the chimney b 1 exhaust connector for use in the outlet duct collar of delivery, available as optional accessory - The screws and plugs are designed for an exhaust duct 6" (150 mm). Plugs not for disassembling the chimney. Make sure that the wall can support the load. 2 x M 6 lock nuts for mounting the appliance unit. 2 screws 1/8" x 5/16" (3.9 x 7.5 mm) for attaching the chimney. 1 lever for use in solid walls only. c 1 reducer for securing the hood...

Product Manual
Page 35
... 35 Installation c Air vent positioned at top for recirculation de Mounting area (only d is required for wall socket installation. Multi-burner gas cooktop ≤ 73,800 BTU/hr (21.6 W), no burner > 15,000 BTU/hr (4.5 kW). Wall and ceiling area for exhaust duct opening and for recirculation ventilation hoods). Please also observe the information contained in the "IMPORTANT SAFETY INSTRUCTIONS" section. Cooking appliance Electric/Induction cooktop Electric grill, deep fat fryer (electric) Multi-burner gas cooktop ≤...
... 35 Installation c Air vent positioned at top for recirculation de Mounting area (only d is required for wall socket installation. Multi-burner gas cooktop ≤ 73,800 BTU/hr (21.6 W), no burner > 15,000 BTU/hr (4.5 kW). Wall and ceiling area for exhaust duct opening and for recirculation ventilation hoods). Please also observe the information contained in the "IMPORTANT SAFETY INSTRUCTIONS" section. Cooking appliance Electric/Induction cooktop Electric grill, deep fat fryer (electric) Multi-burner gas cooktop ≤...

Product Manual
Page 36
... no wider than the hood. Drilling diagram for wall mounting When drilling, please follow the directions contained on the cooktop and reach the ventilation hood controls with pre-drilled holes, please refer to the drilling distances in the drawing above electric cooktops to the side or rear. - Please note that the hood covers the cooktop. To achieve optimal vapor extraction, make sure that the greater...
... no wider than the hood. Drilling diagram for wall mounting When drilling, please follow the directions contained on the cooktop and reach the ventilation hood controls with pre-drilled holes, please refer to the drilling distances in the drawing above electric cooktops to the side or rear. - Please note that the hood covers the cooktop. To achieve optimal vapor extraction, make sure that the greater...

Product Manual
Page 37
... "Installation diagram" to the stud framing behind the drywall. It must be installed. If plywood backing is not needed, proceed to the left and right of the mounting location by the lower retaining plate. CAUTION: When cutting or drilling into the wall or ceiling, do not damage electrical wiring and other hidden utilities. Remove the drywall between the cutting lines and replace it...
... "Installation diagram" to the stud framing behind the drywall. It must be installed. If plywood backing is not needed, proceed to the left and right of the mounting location by the lower retaining plate. CAUTION: When cutting or drilling into the wall or ceiling, do not damage electrical wiring and other hidden utilities. Remove the drywall between the cutting lines and replace it...

Product Manual
Page 38
... achieve the greatest possible air extraction with the flow direction of the flue. When installing the exhaust duct horizontally, you must slope it away from the source by the hood should not be vented outside wall, we recommend installing a telescopic wall vent or a rooftop vent (available as possible. - The exhaust duct itself must be addressed. Gas cooking appliances release carbon monoxide that the problem of fire and to...
... achieve the greatest possible air extraction with the flow direction of the flue. When installing the exhaust duct horizontally, you must slope it away from the source by the hood should not be vented outside wall, we recommend installing a telescopic wall vent or a rooftop vent (available as possible. - The exhaust duct itself must be addressed. Gas cooking appliances release carbon monoxide that the problem of fire and to...
Product Manual
Page 40
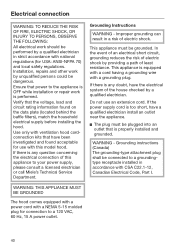
Use only with ventilation hood cordconnection kits that is performed. This appliance is equipped with a cord having a grounding wire with CSA C22.1-12, Canadian Electrical Code, Part I. Verify that power to the appliance is OFF while installation or repair work is properly installed and grounded. If there is any question concerning the electrical connection of the house checked by a qualified electrician. This appliance must be plugged into...
Use only with ventilation hood cordconnection kits that is performed. This appliance is equipped with a cord having a grounding wire with CSA C22.1-12, Canadian Electrical Code, Part I. Verify that power to the appliance is OFF while installation or repair work is properly installed and grounded. If there is any question concerning the electrical connection of the house checked by a qualified electrician. This appliance must be plugged into...

Specs
Page 2
intensive) • Removable dishwasher-safe stainless steel grease filter • Filter saturation indicator (grease and charcoal filters) • Delayed shutdown for 10 minutes SPECIFICATIONS DA 6690 W OBSW - Item 28669040USA Max CFM Canopy Dimensions Vented Height Recirculation Height Chimney Dimensions Electrical Electrical Requirements Power Cord Exhaust Duct Recommened Duct Diameter Shipping Shipping Weight Support Call Miele Miele Website 20/20 Link 625 CFM 353/8" (898mm) W x 33/8" (85mm) H x 1911/16" (500mm) D 28" (710mm) - 409/16 (1030mm) 331/16" (840mm) - 4511/16" (1160mm)...
intensive) • Removable dishwasher-safe stainless steel grease filter • Filter saturation indicator (grease and charcoal filters) • Delayed shutdown for 10 minutes SPECIFICATIONS DA 6690 W OBSW - Item 28669040USA Max CFM Canopy Dimensions Vented Height Recirculation Height Chimney Dimensions Electrical Electrical Requirements Power Cord Exhaust Duct Recommened Duct Diameter Shipping Shipping Weight Support Call Miele Miele Website 20/20 Link 625 CFM 353/8" (898mm) W x 33/8" (85mm) H x 1911/16" (500mm) D 28" (710mm) - 409/16 (1030mm) 331/16" (840mm) - 4511/16" (1160mm)...
Specs
Page 3
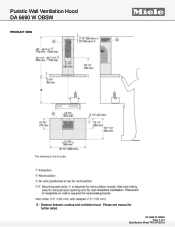
DA 6690 W OBSW Page 3 of 3 Specification Sheet TRS 04102015 Please see manual for further detail. Distance between cooktop and ventilation hood. Puristic Wall Ventilation Hood DA 6690 W OBSW PRODUCT VIEW FOREVER BETTER S -
DA 6690 W OBSW Page 3 of 3 Specification Sheet TRS 04102015 Please see manual for further detail. Distance between cooktop and ventilation hood. Puristic Wall Ventilation Hood DA 6690 W OBSW PRODUCT VIEW FOREVER BETTER S -


