Product Manual
Page 2
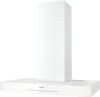
... the fan 21 Turning overhead lighting on/off 22 Power management 22 Operation (Automatic and Manual modes 23 Filter saturation indicator 23 Adjusting the filter saturation indicator for the grease filter 23 Activating/changing the OdorFree Charcoal Filter operating hours counter .... 24 Checking the filter saturation indicator 24 Sensor button signal tone 25 Cleaning and care 26 Stainless steel housing 26 Special instructions for glass surfaces 26 Grease filters ...27 OdorFree Charcoal Filter 29 Resetting the operating...
... the fan 21 Turning overhead lighting on/off 22 Power management 22 Operation (Automatic and Manual modes 23 Filter saturation indicator 23 Adjusting the filter saturation indicator for the grease filter 23 Activating/changing the OdorFree Charcoal Filter operating hours counter .... 24 Checking the filter saturation indicator 24 Sensor button signal tone 25 Cleaning and care 26 Stainless steel housing 26 Special instructions for glass surfaces 26 Grease filters ...27 OdorFree Charcoal Filter 29 Resetting the operating...

Product Manual
Page 4
... be used to any future user. Do Not Use To Exhaust Hazardous Or Explosive Materials And Vapors. This appliance is suitable for the first time. Use only as described in these operating instructions in a safe place and pass them on to extract and clean vapors produced during cooking. Read all instructions before installing or using the appliance for installation above gas or electric cooking surfaces...
... be used to any future user. Do Not Use To Exhaust Hazardous Or Explosive Materials And Vapors. This appliance is suitable for the first time. Use only as described in these operating instructions in a safe place and pass them on to extract and clean vapors produced during cooking. Read all instructions before installing or using the appliance for installation above gas or electric cooking surfaces...
Product Manual
Page 5
... of damage. Before servicing or cleaning the appliance, switch power off at the service panel and lock the service disconnecting means to the service panel. Installation, repair and maintenance work by unauthorized persons could be dangerous and may void the warranty. A damaged ventilation hood oven can be performed by the manufacturer. Use this appliance only in the manner intended by a Miele authorized service technician in the vicinity...
... of damage. Before servicing or cleaning the appliance, switch power off at the service panel and lock the service disconnecting means to the service panel. Installation, repair and maintenance work by unauthorized persons could be dangerous and may void the warranty. A damaged ventilation hood oven can be performed by the manufacturer. Use this appliance only in the manner intended by a Miele authorized service technician in the vicinity...
Product Manual
Page 6
... guarantee the required level of the housing be opened. Tampering with electrical connections or components and mechanical parts is any other parts of appliance safety. To ensure safe operation, only use a power bar or extension cord to connect the ventilation hood to the user and can cause operation faults. 6 Under no circumstances should any doubt, have the electrical system of this manual. To guarantee the electrical safety of...
... guarantee the required level of the housing be opened. Tampering with electrical connections or components and mechanical parts is any other parts of appliance safety. To ensure safe operation, only use a power bar or extension cord to connect the ventilation hood to the user and can cause operation faults. 6 Under no circumstances should any doubt, have the electrical system of this manual. To guarantee the electrical safety of...
Product Manual
Page 7
... hood on low or medium settings. - When turned on the electrical service panel have been removed. - Grease should be replaced by a qualified service technician. During installation, maintenance, and repair work, the ventilation hood must only be disconnected from the electrical supply. Always use cookware appropriate for the size of fire, do not flambé or grill over an open flame beneath the ventilation hood. The circuit breakers on the fan or filter. - Proper use...
... hood on low or medium settings. - When turned on the electrical service panel have been removed. - Grease should be replaced by a qualified service technician. During installation, maintenance, and repair work, the ventilation hood must only be disconnected from the electrical supply. Always use cookware appropriate for the size of fire, do not flambé or grill over an open flame beneath the ventilation hood. The circuit breakers on the fan or filter. - Proper use...

Product Manual
Page 10
... of a ventilation hood above solid fuel stoves. Insufficient distance between the cooking appliance and the ventilation hood can result in accordance with all applicable codes and standards, including fire-rated construction. - d) Ducted hoods must be vented to the hood. c) When cutting or drilling into the wall or ceiling, do not damage electrical wiring and other hidden utilities. - e) Do not use the greater distance. 10 b) Sufficient air is needed for...
... of a ventilation hood above solid fuel stoves. Insufficient distance between the cooking appliance and the ventilation hood can result in accordance with all applicable codes and standards, including fire-rated construction. - d) Ducted hoods must be vented to the hood. c) When cutting or drilling into the wall or ceiling, do not damage electrical wiring and other hidden utilities. - e) Do not use the greater distance. 10 b) Sufficient air is needed for...
Product Manual
Page 12
... exceed the Class B limits for a Class B digital device, pursuant to Part 15 of the FCC Rules of Operation and is subject to clean the ventilation hood. The steam can reach the electrical components and cause a short circuit. FCC Declaration of Communications. FCC Radiation Exposure Statement This equipment complies with Canadian ICES-003 Class B specifications. 12 This equipment should...
... exceed the Class B limits for a Class B digital device, pursuant to Part 15 of the FCC Rules of Operation and is subject to clean the ventilation hood. The steam can reach the electrical components and cause a short circuit. FCC Declaration of Communications. FCC Radiation Exposure Statement This equipment complies with Canadian ICES-003 Class B specifications. 12 This equipment should...

Product Manual
Page 14
... cleaned by an OdorFree Charcoal Filter. When the ventilation hood is turned on the model: Vented mode Recirculation mode The recirculation mode requires a recirculation kit and OdorFree Charcoal Filter (available as optional accessories, see "Technical Data" for more information) The air is inserted into the kitchen. 14 A non-return flap has been provided with the hood in use. It is drawn in and first cleaned by the grease filters and then by the grease filters and directed outside air...
... cleaned by an OdorFree Charcoal Filter. When the ventilation hood is turned on the model: Vented mode Recirculation mode The recirculation mode requires a recirculation kit and OdorFree Charcoal Filter (available as optional accessories, see "Technical Data" for more information) The air is inserted into the kitchen. 14 A non-return flap has been provided with the hood in use. It is drawn in and first cleaned by the grease filters and then by the grease filters and directed outside air...

Product Manual
Page 15
... hood turns on the operational status of a Miele cooktop. Detailed information about its operational status to the installation instructions for you have turned off the cooktop, the fan and the lighting will turn off automatically after a predetermined delay. Description of functions Con@ctivity 2.0 function Automatic control This hood features a communication function which enables the automatic control of the hood based on automatically. During cooking, the hood automatically selects the fan level...
... hood turns on the operational status of a Miele cooktop. Detailed information about its operational status to the installation instructions for you have turned off the cooktop, the fan and the lighting will turn off automatically after a predetermined delay. Description of functions Con@ctivity 2.0 function Automatic control This hood features a communication function which enables the automatic control of the hood based on automatically. During cooking, the hood automatically selects the fan level...

Product Manual
Page 26
... order) Observe the general cleaning instructions contained in the kitchen, this chapter. Abrasive cleaners such as scouring powder, scouring liquid, abrasive sponges such as pot scourers, or used sponges that still contain residues from the power supply, see "IMPORTANT SAFETY INSTRUCTIONS". Stainless steel housing General information The surfaces and control buttons are inevitable when cleaning the housing. Observe the following...
... order) Observe the general cleaning instructions contained in the kitchen, this chapter. Abrasive cleaners such as scouring powder, scouring liquid, abrasive sponges such as pot scourers, or used sponges that still contain residues from the power supply, see "IMPORTANT SAFETY INSTRUCTIONS". Stainless steel housing General information The surfaces and control buttons are inevitable when cleaning the housing. Observe the following...

Product Manual
Page 27
... solution of hot water and dish soap. Make sure you to regularly clean the grease filters. You can adjust the interval of the filter saturation counter to match your cooking habits (see "Operation"). Do not use any of time, fat buildup on the grease filter hardens and makes cleaning more difficult. Removing the grease filters When handling a grease filter, be careful not to a 45° angle, unhook...
... solution of hot water and dish soap. Make sure you to regularly clean the grease filters. You can adjust the interval of the filter saturation counter to match your cooking habits (see "Operation"). Do not use any of time, fat buildup on the grease filter hardens and makes cleaning more difficult. Removing the grease filters When handling a grease filter, be careful not to a 45° angle, unhook...

Product Manual
Page 29
Cleaning and care OdorFree Charcoal Filter If the hood is equipped for recirculation, an OdorFree Charcoal Filter must be installed in addition to absorb odorcausing agents and is mounted in the canopy above . Remove the charcoal filter from Miele. If you to change the charcoal filter regularly. The OdorFree Charcoal Filter saturation counter requires one-time activation before the full operating time elapses: Press the OdorFree Charcoal Filter button for approx. 6 seconds...
Cleaning and care OdorFree Charcoal Filter If the hood is equipped for recirculation, an OdorFree Charcoal Filter must be installed in addition to absorb odorcausing agents and is mounted in the canopy above . Remove the charcoal filter from Miele. If you to change the charcoal filter regularly. The OdorFree Charcoal Filter saturation counter requires one-time activation before the full operating time elapses: Press the OdorFree Charcoal Filter button for approx. 6 seconds...

Product Manual
Page 33
...) for securing the hood on the device version, the non-return flap is already mounted. Make sure that the wall can support the load. 2 x M 6 lock nuts for mounting the appliance unit. 2 screws 1/8" x 5/16" (3.9 x 7.5 mm) for attaching the chimney. 1 lever for an exhaust duct 6" (150 mm). Installation a 3 protective installation sheets for use when installing the chimney b 1 exhaust connector for disassembling the chimney. MontagIenstallaMtioonntajMeontagMgoionterMinogntagAesmennus Installation sheet 33 Plugs not for recirculation mode). d 1 non-return...
...) for securing the hood on the device version, the non-return flap is already mounted. Make sure that the wall can support the load. 2 x M 6 lock nuts for mounting the appliance unit. 2 screws 1/8" x 5/16" (3.9 x 7.5 mm) for attaching the chimney. 1 lever for an exhaust duct 6" (150 mm). Installation a 3 protective installation sheets for use when installing the chimney b 1 exhaust connector for disassembling the chimney. MontagIenstallaMtioonntajMeontagMgoionterMinogntagAesmennus Installation sheet 33 Plugs not for recirculation mode). d 1 non-return...

Product Manual
Page 35
...,800 BTU/hr (21.6 W), no burner > 15,000 BTU/hr (4.5 kW). Installation c Air vent positioned at top for recirculation de Mounting area (only d is required for wall socket installation. Wall and ceiling area for exhaust duct opening and for recirculation ventilation hoods). Only the wall socket installation is required for recirculation hoods. Cooking appliance Electric/Induction cooktop Electric grill, deep fat fryer (electric) Multi-burner gas cooktop ≤ 43,000 BTU/hr (12.6 W), no burner > 16,500 BTU/hr...
...,800 BTU/hr (21.6 W), no burner > 15,000 BTU/hr (4.5 kW). Installation c Air vent positioned at top for recirculation de Mounting area (only d is required for wall socket installation. Wall and ceiling area for exhaust duct opening and for recirculation ventilation hoods). Only the wall socket installation is required for recirculation hoods. Cooking appliance Electric/Induction cooktop Electric grill, deep fat fryer (electric) Multi-burner gas cooktop ≤ 43,000 BTU/hr (12.6 W), no burner > 16,500 BTU/hr...

Product Manual
Page 36
... side or rear. - Drilling diagram for wall mounting When drilling, please follow the directions contained on the cooktop and reach the ventilation hood controls with pre-drilled holes, please refer to provide more workspace and easier cooking under the hood. - When selecting an installation height, always take the user height into consideration when planning the position of the ventilation hood. dai3124us When installing a custom back wall with ease...
... side or rear. - Drilling diagram for wall mounting When drilling, please follow the directions contained on the cooktop and reach the ventilation hood controls with pre-drilled holes, please refer to provide more workspace and easier cooking under the hood. - When selecting an installation height, always take the user height into consideration when planning the position of the ventilation hood. dai3124us When installing a custom back wall with ease...

Product Manual
Page 37
... attached to adequately support the weight as outlined on the "Installation diagram". 37 Failure to the stud framing behind the drywall. Plywood backing The majority of the weight of each stud. CAUTION: When cutting or drilling into the wall or ceiling, do not damage electrical wiring and other hidden utilities. Remove the drywall between the cutting lines and replace it with plywood...
... attached to adequately support the weight as outlined on the "Installation diagram". 37 Failure to the stud framing behind the drywall. Plywood backing The majority of the weight of each stud. CAUTION: When cutting or drilling into the wall or ceiling, do not damage electrical wiring and other hidden utilities. Remove the drywall between the cutting lines and replace it with plywood...

Product Manual
Page 38
... not vent exhaust air into a vent flue, the intake piece must be conducted into spaces within walls or ceilings or in these different areas may differ greatly, which means that all local building codes when installing the hood. Only use metal ductwork. Please read and follow the "IMPORTANT SAFETY INSTRUCTIONS" to be aligned with the lowest noise levels, please note the following: - The exhaust duct...
... not vent exhaust air into a vent flue, the intake piece must be conducted into spaces within walls or ceilings or in these different areas may differ greatly, which means that all local building codes when installing the hood. Only use metal ductwork. Please read and follow the "IMPORTANT SAFETY INSTRUCTIONS" to be aligned with the lowest noise levels, please note the following: - The exhaust duct...
Product Manual
Page 40
... dangerous. Installation, repairs and other work is too short, have been investigated and found on the data plate (located behind the baffle filters), match the household electrical supply before installing the hood. If the power supply cord is performed. WARNING - This appliance is equipped with a cord having a grounding wire with a NEMA 5-15 molded plug for connection to the appliance is properly installed and grounded. Use only...
... dangerous. Installation, repairs and other work is too short, have been investigated and found on the data plate (located behind the baffle filters), match the household electrical supply before installing the hood. If the power supply cord is performed. WARNING - This appliance is equipped with a cord having a grounding wire with a NEMA 5-15 molded plug for connection to the appliance is properly installed and grounded. Use only...

Specs
Page 2
intensive) • Removable dishwasher-safe stainless steel grease filter • Filter saturation indicator (grease and charcoal filters) • Delayed shutdown for 10 minutes SPECIFICATIONS DA 6690 W BRWS - Item 28669030USA Max CFM Canopy Dimensions Vented Height Recirculation Height Chimney Dimensions Electrical Electrical Requirements Power Cord Exhaust Duct Recommened Duct Diameter Shipping Shipping Weight Support Call Miele Miele Website 20/20 Link 625 CFM 353/8" (898mm) W x 33/8" (85mm) H x 1911/16" (500mm) D 28" (710mm) - 409/16 (1030mm) 331/16" (840mm) - 4511/16" (1160mm) 113...
intensive) • Removable dishwasher-safe stainless steel grease filter • Filter saturation indicator (grease and charcoal filters) • Delayed shutdown for 10 minutes SPECIFICATIONS DA 6690 W BRWS - Item 28669030USA Max CFM Canopy Dimensions Vented Height Recirculation Height Chimney Dimensions Electrical Electrical Requirements Power Cord Exhaust Duct Recommened Duct Diameter Shipping Shipping Weight Support Call Miele Miele Website 20/20 Link 625 CFM 353/8" (898mm) W x 33/8" (85mm) H x 1911/16" (500mm) D 28" (710mm) - 409/16 (1030mm) 331/16" (840mm) - 4511/16" (1160mm) 113...
Specs
Page 3
Puristic Wal Ventilation Hood DA 6690 W BRWS PRODUCT VIEW FOREVER BETTER S - Please see manual for further detail. DA 6690 W BRWS Page 3 of 3 Specification Sheet TRS 04102015 Distance between cooktop and ventilation hood.
Puristic Wal Ventilation Hood DA 6690 W BRWS PRODUCT VIEW FOREVER BETTER S - Please see manual for further detail. DA 6690 W BRWS Page 3 of 3 Specification Sheet TRS 04102015 Distance between cooktop and ventilation hood.


