
Product Manual
Page 2
... the fan 21 Turning overhead lighting on/off 22 Power management 22 Operation (Automatic and Manual modes 23 Filter saturation indicator 23 Adjusting the filter saturation indicator for the grease filter 23 Activating/changing the OdorFree Charcoal Filter operating hours counter .... 24 Checking the filter saturation indicator 24 Sensor button signal tone 25 Cleaning and care 26 Stainless steel housing 26 Special instructions for glass surfaces 27 Grease filters ...27 OdorFree Charcoal Filter 29 Resetting the operating...
... the fan 21 Turning overhead lighting on/off 22 Power management 22 Operation (Automatic and Manual modes 23 Filter saturation indicator 23 Adjusting the filter saturation indicator for the grease filter 23 Activating/changing the OdorFree Charcoal Filter operating hours counter .... 24 Checking the filter saturation indicator 24 Sensor button signal tone 25 Cleaning and care 26 Stainless steel housing 26 Special instructions for glass surfaces 27 Grease filters ...27 OdorFree Charcoal Filter 29 Resetting the operating...

Product Manual
Page 3
Contents Removing the protective film 34 Exhaust duct...46 Condensate trap ...47 Electrical connection 48 Grounding Instructions 48 Activating Con@ctivity 2.0 49 Installation of the Con@ctivity 2.0 stick 49 Activating the Con@ctivity 2.0 function 49 Activating the ventilation hood 49 Activating the cooktop 50 Activation failed 50 Deactivating Con@ctivity 2.0 50 Service and warranty 51 Location of the data plate 51 Technical data ...52 3
Contents Removing the protective film 34 Exhaust duct...46 Condensate trap ...47 Electrical connection 48 Grounding Instructions 48 Activating Con@ctivity 2.0 49 Installation of the Con@ctivity 2.0 stick 49 Activating the Con@ctivity 2.0 function 49 Activating the ventilation hood 49 Activating the cooktop 50 Activation failed 50 Deactivating Con@ctivity 2.0 50 Service and warranty 51 Location of the data plate 51 Technical data ...52 3

Product Manual
Page 4
... ventilation hood is not intended for installation above gas or electric cooking surfaces. Persons who lack physical, sensory or mental abilities, or experi‐ ence with current safety requirements. Do Not Use To Ex‐ haust Hazardous Or Explosive Materials And Vapors. This appliance is suitable for outdoor use. It must only be used to extract and clean...
... ventilation hood is not intended for installation above gas or electric cooking surfaces. Persons who lack physical, sensory or mental abilities, or experi‐ ence with current safety requirements. Do Not Use To Ex‐ haust Hazardous Or Explosive Materials And Vapors. This appliance is suitable for outdoor use. It must only be used to extract and clean...
Product Manual
Page 5
... cleaning the appliance, switch power off at the service panel and lock the service disconnecting means to the service panel. Installation, repair and maintenance work by unauthorized persons could be dangerous and may void the warranty. A damaged ventilation hood oven can be performed by a Miele authorized service technician in the manner intended by children. Please supervise children in the vicinity of suffocation! Never use a damaged ventilation hood...
... cleaning the appliance, switch power off at the service panel and lock the service disconnecting means to the service panel. Installation, repair and maintenance work by unauthorized persons could be dangerous and may void the warranty. A damaged ventilation hood oven can be performed by a Miele authorized service technician in the manner intended by children. Please supervise children in the vicinity of suffocation! Never use a damaged ventilation hood...
Product Manual
Page 6
... parts is highly dangerous to the building's power supply before connecting the appliance. IMPORTANT SAFETY INSTRUCTIONS Be certain your appliance is properly installed and grounded by a qualified electrician. To avoid damaging the ventilation hood, make sure that this basic safety requirement be opened. To guarantee the electrical safety of appliance safety. To ensure safe operation, only use a power bar or extension cord to connect...
... parts is highly dangerous to the building's power supply before connecting the appliance. IMPORTANT SAFETY INSTRUCTIONS Be certain your appliance is properly installed and grounded by a qualified electrician. To avoid damaging the ventilation hood, make sure that this basic safety requirement be opened. To guarantee the electrical safety of appliance safety. To ensure safe operation, only use a power bar or extension cord to connect...
Product Manual
Page 7
The circuit breakers on the electrical service panel have been removed. - The screw-type fuses on the electrical service panel are tripped. - a) Never leave surface units unattended at a high heat. - Proper use an open flame. b) Always turn the hood on when cooking at high settings. Always use cookware appropriate for the size of fire, do not flambé or grill over an open flame beneath the ventilation hood. It is only completely isolated from...
The circuit breakers on the electrical service panel have been removed. - The screw-type fuses on the electrical service panel are tripped. - a) Never leave surface units unattended at a high heat. - Proper use an open flame. b) Always turn the hood on when cooking at high settings. Always use cookware appropriate for the size of fire, do not flambé or grill over an open flame beneath the ventilation hood. It is only completely isolated from...

Product Manual
Page 10
... solid-state speed control device. To determine whether a ventilation hood may be operated above your cooking appliance, please refer to the information provided by the National Fire Protection Association (NFPA) and the American So‐ ciety for combustion and exhausting of gas‐ es through the flue (chimney of fuel burning equipment to the outdoors. - b) Sufficient air is required. a) Installation work and electrical wiring must...
... solid-state speed control device. To determine whether a ventilation hood may be operated above your cooking appliance, please refer to the information provided by the National Fire Protection Association (NFPA) and the American So‐ ciety for combustion and exhausting of gas‐ es through the flue (chimney of fuel burning equipment to the outdoors. - b) Sufficient air is required. a) Installation work and electrical wiring must...
Product Manual
Page 11
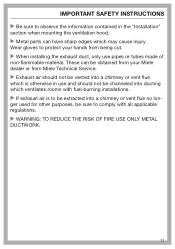
... in the "Installation" section when mounting the ventilation hood. Metal parts can be channeled into a chimney or vent flue which is otherwise in use and should not be vented into ducting which may cause injury. Wear gloves to protect your Miele dealer or from Miele Technical Service. Exhaust air should not be obtained from your hands from being cut. When installing the exhaust duct, only use pipes or...
... in the "Installation" section when mounting the ventilation hood. Metal parts can be channeled into a chimney or vent flue which is otherwise in use and should not be vented into ducting which may cause injury. Wear gloves to protect your Miele dealer or from Miele Technical Service. Exhaust air should not be obtained from your hands from being cut. When installing the exhaust duct, only use pipes or...

Product Manual
Page 12
... accessories from digital apparatus set forth for a Class B digital device, pursuant to Part 15 of the FCC Rules of Oper‐ ation and is subject to clean the ventilation hood. FCC Radiation Exposure Statement This equipment complies with FCC radiation exposure limits set out in ‐ terference that may not cause harmful interference. IMPORTANT SAFETY INSTRUCTIONS Cleaning and care Never use...
... accessories from digital apparatus set forth for a Class B digital device, pursuant to Part 15 of the FCC Rules of Oper‐ ation and is subject to clean the ventilation hood. FCC Radiation Exposure Statement This equipment complies with FCC radiation exposure limits set out in ‐ terference that may not cause harmful interference. IMPORTANT SAFETY INSTRUCTIONS Cleaning and care Never use...

Product Manual
Page 14
... in use. A non-return flap has been provided with the hood in and cleaned by an Odor‐ Free Charcoal Filter. It is turned off. The flap is closed when the ventilation hood is inserted into the kitchen. 14 When the ventilation hood is then recirculated back into the outlet duct collar of the fan. The cleaned air is turned on the model: Vented mode Recirculation mode The recirculation mode requires a recir‐ culation kit...
... in use. A non-return flap has been provided with the hood in and cleaned by an Odor‐ Free Charcoal Filter. It is turned off. The flap is closed when the ventilation hood is inserted into the kitchen. 14 When the ventilation hood is then recirculated back into the outlet duct collar of the fan. The cleaned air is turned on the model: Vented mode Recirculation mode The recirculation mode requires a recir‐ culation kit...
Product Manual
Page 21
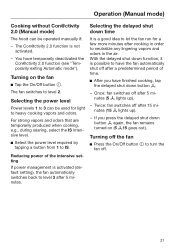
.... - Operation (Manual mode) Cooking without Con@ctivity 2.0 (Manual mode) The hood can be operated manually if: - Once: fan switches off the fan Press the On/Off button to level 2. Selecting the power level Power levels 1 to neutralize any lingering vapors and odors in the air. Turning off after 5 mi‐ nutes (5 lights up ). - You have the fan automatically shut off after cooking in order to 3 can be used for...
.... - Operation (Manual mode) Cooking without Con@ctivity 2.0 (Manual mode) The hood can be operated manually if: - Once: fan switches off the fan Press the On/Off button to level 2. Selecting the power level Power levels 1 to neutralize any lingering vapors and odors in the air. Turning off after 5 mi‐ nutes (5 lights up ). - You have the fan automatically shut off after cooking in order to 3 can be used for...

Product Manual
Page 27
... may become discol‐ ored or damaged. Removing the grease filters When handling a grease filter, be cleaned using a commercial glass cleaner. By illuminating the grease filter symbol, the filter saturation counter reminds you hold the filter secure‐ ly at all times when handling it . Do not use a stainless steel cleaner to match your cooking habits (see "Operation"). Remove any length of the filter saturation counter to clean the control buttons.
... may become discol‐ ored or damaged. Removing the grease filters When handling a grease filter, be cleaned using a commercial glass cleaner. By illuminating the grease filter symbol, the filter saturation counter reminds you hold the filter secure‐ ly at all times when handling it . Do not use a stainless steel cleaner to match your cooking habits (see "Operation"). Remove any length of the filter saturation counter to clean the control buttons.

Product Manual
Page 29
.... OdorFree Charcoal Filter If the hood is equipped for the first time, activate the filter saturation counter (see "Operation"). 29 Cleaning and care If the filters have been installed incor‐ rectly, you can insert a small screw‐ driver into the slit to the grease filters. When cleaning the grease filters before the full operating time has elapsed: Press the grease filter button for the type and reference number.
.... OdorFree Charcoal Filter If the hood is equipped for the first time, activate the filter saturation counter (see "Operation"). 29 Cleaning and care If the filters have been installed incor‐ rectly, you can insert a small screw‐ driver into the slit to the grease filters. When cleaning the grease filters before the full operating time has elapsed: Press the grease filter button for the type and reference number.

Product Manual
Page 34
...; tional tools. 34 Do not attach the plate directly to the side or rear. - Please note that the hood covers the cooktop. The hood should have ample space to the ceiling joists directly. When selecting an installation height, always take the user height into consideration when planning the po‐ sition of cupboards, shelves, ceilings or decorative elements in the vicinity of at drawing in...
...; tional tools. 34 Do not attach the plate directly to the side or rear. - Please note that the hood covers the cooktop. The hood should have ample space to the ceiling joists directly. When selecting an installation height, always take the user height into consideration when planning the po‐ sition of cupboards, shelves, ceilings or decorative elements in the vicinity of at drawing in...

Product Manual
Page 39
Installation Holding the installation frame secure‐ ly, remove the two fixing screws and extend the installation frame to hold the direc‐ tional unit in place. 39 The directional unit from recirculation kit DUI 32 (optional accessory) is instal‐ led for recirculation mode (RM): Bend the four retaining tabs on the installation frame outwards. Place the power cord inside the in‐...
Installation Holding the installation frame secure‐ ly, remove the two fixing screws and extend the installation frame to hold the direc‐ tional unit in place. 39 The directional unit from recirculation kit DUI 32 (optional accessory) is instal‐ led for recirculation mode (RM): Bend the four retaining tabs on the installation frame outwards. Place the power cord inside the in‐...

Product Manual
Page 43
... exhaust ducting onto the exhaust socket. Unscrew both screws from the instal‐ lation frame again. Safety distances be‐ tween the cooktop and ventilation hood must be adjusted to the "A" marking. - Installation Connect the power cord. Follow the instructions in "Appliance dimensions." With vented mode: upwards as far as it will go , downwards only to the desired height, observing the permissi‐ ble height ranges...
... exhaust ducting onto the exhaust socket. Unscrew both screws from the instal‐ lation frame again. Safety distances be‐ tween the cooktop and ventilation hood must be adjusted to the "A" marking. - Installation Connect the power cord. Follow the instructions in "Appliance dimensions." With vented mode: upwards as far as it will go , downwards only to the desired height, observing the permissi‐ ble height ranges...

Product Manual
Page 46
... an outside of toxic fumes. Gas cooking appliances release car‐ bon monoxide that all local building codes when installing the hood. Only use metal ductwork. Follow all connections are secure and airtight. If flat exhaust ducts are needed, make sure they have a large radius. - Make sure that can be kinked or compressed. - To reduce the risk of the exhaust connector. - Do not vent exhaust air into a vent flue...
... an outside of toxic fumes. Gas cooking appliances release car‐ bon monoxide that all local building codes when installing the hood. Only use metal ductwork. Follow all connections are secure and airtight. If flat exhaust ducts are needed, make sure they have a large radius. - Make sure that can be kinked or compressed. - To reduce the risk of the exhaust connector. - Do not vent exhaust air into a vent flue...
Product Manual
Page 48
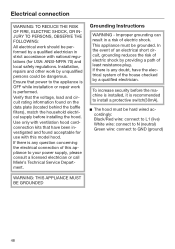
... repair work is performed. This appliance must be hard wired ac‐ cordingly: Black/Red wire: connect to L1 (live) White wire: connect to N (neutral) Green wire: connect to install a protective switch(30mA). The hood must be grounded. Verify that power to your power supply, please consult a licensed electrician or call Miele's Technical Service Depart‐ ment. Ensure that the voltage, load and cir‐ cuit rating...
... repair work is performed. This appliance must be hard wired ac‐ cordingly: Black/Red wire: connect to L1 (live) White wire: connect to N (neutral) Green wire: connect to install a protective switch(30mA). The hood must be grounded. Verify that power to your power supply, please consult a licensed electrician or call Miele's Technical Service Depart‐ ment. Ensure that the voltage, load and cir‐ cuit rating...
Specs
Page 2
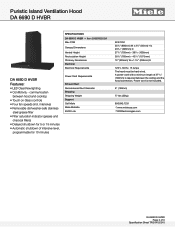
...CFM Canopy Dimensions Vented Height Recirculation Height Chimney Dimensions Electrical Electrical Requirements DA 6690 D HVBR Features: • LED ClearView lighting • Con@ctivity - communication between the ceiling and the hood connectors. Power cord is required between hood and cooktop • Touch on Glass controls • Four fan speeds (incl. intensive) • Removable dishwasher-safe stainless steel grease filter • Filter saturation indicator (grease and charcoal filters) • Delayed shutdown for 10 minutes Power Cord Requirements Exhaust Duct Recommened Duct...
...CFM Canopy Dimensions Vented Height Recirculation Height Chimney Dimensions Electrical Electrical Requirements DA 6690 D HVBR Features: • LED ClearView lighting • Con@ctivity - communication between the ceiling and the hood connectors. Power cord is required between hood and cooktop • Touch on Glass controls • Four fan speeds (incl. intensive) • Removable dishwasher-safe stainless steel grease filter • Filter saturation indicator (grease and charcoal filters) • Delayed shutdown for 10 minutes Power Cord Requirements Exhaust Duct Recommened Duct...
Specs
Page 3
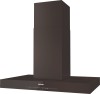
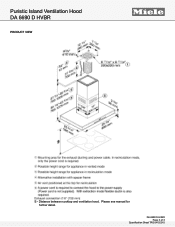
DA 6690 D HVBR Page 3 of 3 Specification Sheet TRS 04152015 Distance between cooktop and ventilation hood. Please see manual for further detail. Puristic Island Ventilation Hood DA 6690 D HVBR PRODUCT VIEW FOREVER BETTER S -
DA 6690 D HVBR Page 3 of 3 Specification Sheet TRS 04152015 Distance between cooktop and ventilation hood. Please see manual for further detail. Puristic Island Ventilation Hood DA 6690 D HVBR PRODUCT VIEW FOREVER BETTER S -


