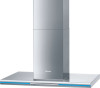
Specs
Page 2
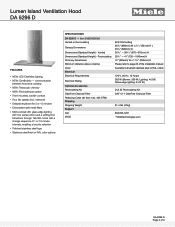
... through 196,000 colors with a change sequence of the installation manual Available in brushed stainless steel or RAL colors 120 V, 60 Hz, 15 Amps 382 W (Blower: 350 W; Lighting: 4x3 W; Item 28629655USA Vented or Recirculating Canopy Dimensions Dimensions (Standard Height) - Recirculating Chimney Dimensions Minimum distance above cooktop Color Electrical Electrical Requirements Electrical Rating Optional Accessories Recirculating Kit OdorFree Charcoal Filter Reducing Collar (air flow max. 400 CFM) Shipping Shipping Weight Support Call 20/20 625 CFM setting 353/8" (898mm) W x 21/16...
... through 196,000 colors with a change sequence of the installation manual Available in brushed stainless steel or RAL colors 120 V, 60 Hz, 15 Amps 382 W (Blower: 350 W; Lighting: 4x3 W; Item 28629655USA Vented or Recirculating Canopy Dimensions Dimensions (Standard Height) - Recirculating Chimney Dimensions Minimum distance above cooktop Color Electrical Electrical Requirements Electrical Rating Optional Accessories Recirculating Kit OdorFree Charcoal Filter Reducing Collar (air flow max. 400 CFM) Shipping Shipping Weight Support Call 20/20 625 CFM setting 353/8" (898mm) W x 21/16...

Product Manual
Page 2
... a color 23 Turning off the glass edge lighting 23 Filter saturation indicator 24 Adjusting the filter saturation indicator for grease filters 24 Activating/changing the grease filter saturation counter 25 Checking the elapsed operating time 25 Cleaning and care 26 Stainless steel housing 26 Special instructions for the glass edge 27 Grease filters ...27 OdorFree Charcoal Filter 29 Resetting the filter saturation counter for the filter 30 Disposing of the OdorFree Charcoal Filter 30 2
... a color 23 Turning off the glass edge lighting 23 Filter saturation indicator 24 Adjusting the filter saturation indicator for grease filters 24 Activating/changing the grease filter saturation counter 25 Checking the elapsed operating time 25 Cleaning and care 26 Stainless steel housing 26 Special instructions for the glass edge 27 Grease filters ...27 OdorFree Charcoal Filter 29 Resetting the filter saturation counter for the filter 30 Disposing of the OdorFree Charcoal Filter 30 2

Product Manual
Page 3
... dimensions 32 Distance between cooktop and ventilation hood (S 33 Installation recommendations 34 Structural support 34 Removing the protective film 34 Exhaust duct...46 Condensate trap ...47 Electrical connection 48 Grounding Instructions 48 Activating Con@ctivity 2.0 49 Installation of the Con@ctivity 2.0 stick 49 Activating the Con@ctivity 2.0 function 49 Activating the ventilation hood 49 Activating the cooktop 50 Activation failed 50 Deactivating Con@ctivity 2.0 50 Service and warranty...
... dimensions 32 Distance between cooktop and ventilation hood (S 33 Installation recommendations 34 Structural support 34 Removing the protective film 34 Exhaust duct...46 Condensate trap ...47 Electrical connection 48 Grounding Instructions 48 Activating Con@ctivity 2.0 49 Installation of the Con@ctivity 2.0 stick 49 Activating the Con@ctivity 2.0 function 49 Activating the ventilation hood 49 Activating the cooktop 50 Activation failed 50 Deactivating Con@ctivity 2.0 50 Service and warranty...

Product Manual
Page 4
.... This appliance is intended for its intended purpose. Keep these operating instructions. This ventilation hood is designed for domestic use and for installation above gas or electric cooking surfaces. Persons who lack physical, sensory or mental abilities, or experience with current safety requirements. Do Not Use To Exhaust Hazardous Or Explosive Materials And Vapors. This appliance is suitable for...
.... This appliance is intended for its intended purpose. Keep these operating instructions. This ventilation hood is designed for domestic use and for installation above gas or electric cooking surfaces. Persons who lack physical, sensory or mental abilities, or experience with current safety requirements. Do Not Use To Exhaust Hazardous Or Explosive Materials And Vapors. This appliance is suitable for...

Product Manual
Page 5
... servicing or cleaning the appliance, switch power off at the service panel and lock the service disconnecting means to the service panel. Installation, repair and maintenance work by unauthorized persons could be dangerous and may void the warranty. A damaged ventilation hood oven can be locked, securely fasten a prominent warning device, such as a tag, to prevent power from being switched on accidentally. Never use a damaged ventilation hood. 5 IMPORTANT SAFETY INSTRUCTIONS Children...
... servicing or cleaning the appliance, switch power off at the service panel and lock the service disconnecting means to the service panel. Installation, repair and maintenance work by unauthorized persons could be dangerous and may void the warranty. A damaged ventilation hood oven can be locked, securely fasten a prominent warning device, such as a tag, to prevent power from being switched on accidentally. Never use a damaged ventilation hood. 5 IMPORTANT SAFETY INSTRUCTIONS Children...
Product Manual
Page 6
... in the enclosed "Installation diagram" and in the "Cleaning and care" section of the house checked by a qualified technician. It is highly dangerous to electricity. When in non-stationary locations (e.g. These are a fire hazard and do not guarantee the required level of appliance safety. To ensure safe operation, only use a power bar or extension cord to connect the ventilation hood to the user and can cause...
... in the enclosed "Installation diagram" and in the "Cleaning and care" section of the house checked by a qualified technician. It is highly dangerous to electricity. When in non-stationary locations (e.g. These are a fire hazard and do not guarantee the required level of appliance safety. To ensure safe operation, only use a power bar or extension cord to connect the ventilation hood to the user and can cause...
Product Manual
Page 7
... electrical service panel are tripped. - Grease should be allowed to accumulate on when cooking at high settings. d) Use the proper pan size. The circuit breakers on low or medium settings. - c) Clean the ventilation hood frequently. Always use cookware appropriate for the size of the following applies: - Fat deposits may ignite. IMPORTANT SAFETY INSTRUCTIONS Defective components should not be replaced by Miele original parts only. a) Never leave surface units unattended at a high...
... electrical service panel are tripped. - Grease should be allowed to accumulate on when cooking at high settings. d) Use the proper pan size. The circuit breakers on low or medium settings. - c) Clean the ventilation hood frequently. Always use cookware appropriate for the size of the following applies: - Fat deposits may ignite. IMPORTANT SAFETY INSTRUCTIONS Defective components should not be replaced by Miele original parts only. a) Never leave surface units unattended at a high...

Product Manual
Page 10
...(s) in accordance with any solid-state speed control device. To determine whether a ventilation hood may be vented to the hood. IMPORTANT SAFETY INSTRUCTIONS Proper installation WARNING: TO REDUCE THE RISK OF FIRE, ELECTRIC SHOCK, OR INJURY TO PERSONS, OBSERVE THE FOLLOWING: - b) Sufficient air is required. e) Do not use the greater distance. 10 a) Installation work and electrical wiring must be done by the National Fire...
...(s) in accordance with any solid-state speed control device. To determine whether a ventilation hood may be vented to the hood. IMPORTANT SAFETY INSTRUCTIONS Proper installation WARNING: TO REDUCE THE RISK OF FIRE, ELECTRIC SHOCK, OR INJURY TO PERSONS, OBSERVE THE FOLLOWING: - b) Sufficient air is required. e) Do not use the greater distance. 10 a) Installation work and electrical wiring must be done by the National Fire...

Product Manual
Page 11
... cut. When installing the exhaust duct, only use and should not be channeled into ducting which ventilates rooms with fuel-burning installations. If exhaust air is otherwise in the "Installation" section when mounting the ventilation hood. Metal parts can be obtained from your hands from Miele Technical Service. Exhaust air should not be sure to be extracted into a chimney or vent flue no longer used for other purposes, be vented...
... cut. When installing the exhaust duct, only use and should not be channeled into ducting which ventilates rooms with fuel-burning installations. If exhaust air is otherwise in the "Installation" section when mounting the ventilation hood. Metal parts can be obtained from your hands from Miele Technical Service. Exhaust air should not be sure to be extracted into a chimney or vent flue no longer used for other purposes, be vented...

Product Manual
Page 12
... This digital apparatus does not exceed the Class B limits for an uncontrolled environment. If parts or accessories from digital apparatus set forth for Radio Noise Emissions from other manufacturers are used, the warranty will become void. The steam can reach the electrical components and cause a short circuit. Complies with minimum distance 8" (20 cm) between the radiator and your...
... This digital apparatus does not exceed the Class B limits for an uncontrolled environment. If parts or accessories from digital apparatus set forth for Radio Noise Emissions from other manufacturers are used, the warranty will become void. The steam can reach the electrical components and cause a short circuit. Complies with minimum distance 8" (20 cm) between the radiator and your...

Product Manual
Page 14
... inside and outside air from occurring when the ventilation hood is drawn in use. The air is not in and first cleaned by the grease filters and then by the grease filters and directed outside without any obstruction. When the ventilation hood is turned on the model: Vented mode Recirculation mode The recirculation mode requires a recirculation kit and OdorFree Charcoal Filter (available as optional accessories, see "Technical Data" for more information) The air is inserted into the kitchen. 14...
... inside and outside air from occurring when the ventilation hood is drawn in use. The air is not in and first cleaned by the grease filters and then by the grease filters and directed outside without any obstruction. When the ventilation hood is turned on the model: Vented mode Recirculation mode The recirculation mode requires a recirculation kit and OdorFree Charcoal Filter (available as optional accessories, see "Technical Data" for more information) The air is inserted into the kitchen. 14...

Product Manual
Page 15
...;. During cooking, the hood automatically selects the fan level based on the operational status of burners in operation and their power levels. - Description of functions Con@ctivity 2.0 function Automatic control This hood features a communication function which enables the automatic control of the hood based on the number of a Miele cooktop. Please refer to the installation instructions for you have turned off the cooktop, the fan and the lighting will turn off automatically...
...;. During cooking, the hood automatically selects the fan level based on the operational status of burners in operation and their power levels. - Description of functions Con@ctivity 2.0 function Automatic control This hood features a communication function which enables the automatic control of the hood based on the number of a Miele cooktop. Please refer to the installation instructions for you have turned off the cooktop, the fan and the lighting will turn off automatically...

Product Manual
Page 17
... chimney b Chimney c Canopy d Control panel e Glass edge lighting f Grease filter g Spacer frame The spacer frame creates a shadow gap between the chimney and the ceiling. The hood can be installed with or without the spacer frame. h Recirculation vent (only for recirculation mode) i Cooktop lighting j OdorFree Charcoal Filter Optional accessory for recirculation mode k On/Off button for glass edge lighting l Button for cooktop lighting m On/Off button for fan n Buttons for setting the fan power o Button for the delayed shut-down function p Operating hours button q Color change button...
... chimney b Chimney c Canopy d Control panel e Glass edge lighting f Grease filter g Spacer frame The spacer frame creates a shadow gap between the chimney and the ceiling. The hood can be installed with or without the spacer frame. h Recirculation vent (only for recirculation mode) i Cooktop lighting j OdorFree Charcoal Filter Optional accessory for recirculation mode k On/Off button for glass edge lighting l Button for cooktop lighting m On/Off button for fan n Buttons for setting the fan power o Button for the delayed shut-down function p Operating hours button q Color change button...
Product Manual
Page 21
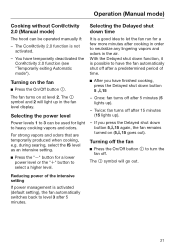
... setting), the fan automatically switches back to level 3 after cooking in order to neutralize any lingering vapors and odors in the fan level display. If you have temporarily deactivated the Con@ctivity 2.0 function (see "Temporarily exiting Automatic mode"). Turning off the fan Press the On/Off button to turn the fan off after 15 minutes (15 lights up in the air. Operation (Manual mode) Cooking...
... setting), the fan automatically switches back to level 3 after cooking in order to neutralize any lingering vapors and odors in the fan level display. If you have temporarily deactivated the Con@ctivity 2.0 function (see "Temporarily exiting Automatic mode"). Turning off the fan Press the On/Off button to turn the fan off after 15 minutes (15 lights up in the air. Operation (Manual mode) Cooking...

Product Manual
Page 26
... power supply, see "IMPORTANT SAFETY INSTRUCTIONS". Abrasive cleaners such as scouring powder, scouring liquid, abrasive sponges such as pot scourers, or used sponges that no water gets into the interior of the hood. Special instructions for RAL color finish housing (special order) Observe the general cleaning instructions contained in the control panel area. Stainless steel housing General The surfaces and control buttons...
... power supply, see "IMPORTANT SAFETY INSTRUCTIONS". Abrasive cleaners such as scouring powder, scouring liquid, abrasive sponges such as pot scourers, or used sponges that no water gets into the interior of the hood. Special instructions for RAL color finish housing (special order) Observe the general cleaning instructions contained in the control panel area. Stainless steel housing General The surfaces and control buttons...

Product Manual
Page 27
... to match your cooking habits (see "Operation"). Remove any length of the filter saturation counter to drop it . 27 Do not use a stainless steel cleaner to regularly clean the grease filters. You can result in this chapter. Make sure you to clean the control buttons. Otherwise they may become discolored or damaged. This can adjust the interval of time. Cleaning and care Special instructions for control buttons Do not...
... to match your cooking habits (see "Operation"). Remove any length of the filter saturation counter to drop it . 27 Do not use a stainless steel cleaner to regularly clean the grease filters. You can result in this chapter. Make sure you to clean the control buttons. Otherwise they may become discolored or damaged. This can adjust the interval of time. Cleaning and care Special instructions for control buttons Do not...

Product Manual
Page 29
... reference number. Resetting the filter saturation counter for the grease filters Once cleaning is complete, the filter saturation counter must be installed in the canopy above . Remove the OdorFree Charcoal Filter from Miele. Cleaning and care If the filters have been installed incorrectly, you can insert a small screwdriver into the frame. Reinstall the grease filters. When installing the filter for the first time, activate the filter saturation counter (see "Operation...
... reference number. Resetting the filter saturation counter for the grease filters Once cleaning is complete, the filter saturation counter must be installed in the canopy above . Remove the OdorFree Charcoal Filter from Miele. Cleaning and care If the filters have been installed incorrectly, you can insert a small screwdriver into the frame. Reinstall the grease filters. When installing the filter for the first time, activate the filter saturation counter (see "Operation...

Product Manual
Page 33
... ceiling. Cooking appliance Electric/Induction cooktop Electric grill, deep fat fryer (electric) Multi-burner gas cooktop ≤ 43,000 BTU/hr (12.6 W), no burner > 16,500 BTU/hr (4.8 kW) Multi-burner gas cooktop > 73,800 BTU/hr (21.6 W), or one of the hood. Installation f A power cord is not given by the manufacturer of the cooktop, follow the minimum safety distances between cooktop and ventilation hood (S) Provided a larger distance is required to connect...
... ceiling. Cooking appliance Electric/Induction cooktop Electric grill, deep fat fryer (electric) Multi-burner gas cooktop ≤ 43,000 BTU/hr (12.6 W), no burner > 16,500 BTU/hr (4.8 kW) Multi-burner gas cooktop > 73,800 BTU/hr (21.6 W), or one of the hood. Installation f A power cord is not given by the manufacturer of the cooktop, follow the minimum safety distances between cooktop and ventilation hood (S) Provided a larger distance is required to connect...

Product Manual
Page 43
... "U", downwards as far as it will go . The canopy can now be observed. 43 Follow the instructions in "Appliance dimensions." See "Electrical connection." Place the exhaust ducting onto the exhaust socket. Unscrew both screws from the installation frame again. With vented mode: upwards as far as it will go , downwards only to the desired height, observing the permissible height ranges: - Installation Connect the power cord.
... "U", downwards as far as it will go . The canopy can now be observed. 43 Follow the instructions in "Appliance dimensions." See "Electrical connection." Place the exhaust ducting onto the exhaust socket. Unscrew both screws from the installation frame again. With vented mode: upwards as far as it will go , downwards only to the desired height, observing the permissible height ranges: - Installation Connect the power cord.
Product Manual
Page 48
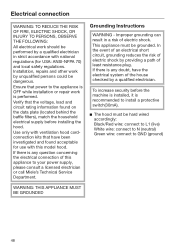
Use only with ventilation hood cordconnection kits that the voltage, load and circuit rating information found on the data plate (located behind the baffle filters), match the household electrical supply before the machine is installed, it is any doubt, have been investigated and found acceptable for use with national regulations (for USA: ANSI-NFPA 70) and local safety regulations. If there is recommended...
Use only with ventilation hood cordconnection kits that the voltage, load and circuit rating information found on the data plate (located behind the baffle filters), match the household electrical supply before the machine is installed, it is any doubt, have been investigated and found acceptable for use with national regulations (for USA: ANSI-NFPA 70) and local safety regulations. If there is recommended...


