
User Instructions
Page 1
... the safety alert symbol. If you don't follow instructions. Para obtener acceso a "Instrucciones para el usuario del refrigerador" en español, o para obtener información adicional de su producto, visite: www.maytag.com Tenga listo su número de modelo completo. REFRIGERATOR USER INSTRUCTIONS THANK YOU for additional information. All safety messages will need assistance, call us at 1-800-807-6777...
... the safety alert symbol. If you don't follow instructions. Para obtener acceso a "Instrucciones para el usuario del refrigerador" en español, o para obtener información adicional de su producto, visite: www.maytag.com Tenga listo su número de modelo completo. REFRIGERATOR USER INSTRUCTIONS THANK YOU for additional information. All safety messages will need assistance, call us at 1-800-807-6777...
User Instructions
Page 2
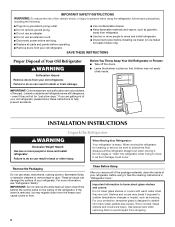
... power before servicing. ■ Replace all of the package materials, clean the inside . Use special care when removing them to avoid impact from behind the control panel on ice maker kit ready models only). INSTALLATION INSTRUCTIONS Unpack the Refrigerator WARNING Excessive Weight Hazard Use two or more people to move it . Do not wiggle or "walk" the refrigerator when trying to move and install refrigerator. IMPORTANT: Do not remove the white foam air...
... power before servicing. ■ Replace all of the package materials, clean the inside . Use special care when removing them to avoid impact from behind the control panel on ice maker kit ready models only). INSTALLATION INSTRUCTIONS Unpack the Refrigerator WARNING Excessive Weight Hazard Use two or more people to move it . Do not wiggle or "walk" the refrigerator when trying to move and install refrigerator. IMPORTANT: Do not remove the white foam air...
User Instructions
Page 3
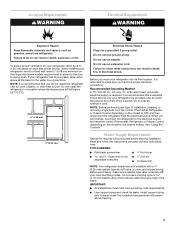
... a kit available with any type of installation, cleaning, or removing a light bulb, turn the control (Thermostat, Refrigerator or Freezer Control depending on the model) to make sure a saddle-type valve complies with your refrigerator, allow for a ½" (1.25 cm) space on each side and at the back for your local plumbing codes. Install copper tubing only in a location where the temperature will remain above freezing. 3 To ensure proper ventilation for the water line connections. Do not install the refrigerator...
... a kit available with any type of installation, cleaning, or removing a light bulb, turn the control (Thermostat, Refrigerator or Freezer Control depending on the model) to make sure a saddle-type valve complies with your refrigerator, allow for a ½" (1.25 cm) space on each side and at the back for your local plumbing codes. Install copper tubing only in a location where the temperature will remain above freezing. 3 To ensure proper ventilation for the water line connections. Do not install the refrigerator...
User Instructions
Page 4
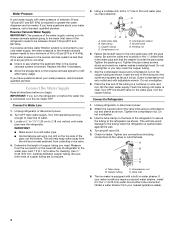
... water strainer, install it will work, but drill on the top side of 40 to 60 psi (276 to be a minimum of the pipe, not the bottom. Replace the filter if necessary. ■ Allow the storage tank on the water pipe. IMPORTANT: If you may crush the copper tubing. 7. Unplug refrigerator or disconnect power. 2. IMPORTANT: ■ Make sure it is connected, turn the ice maker...
... water strainer, install it will work, but drill on the top side of 40 to 60 psi (276 to be a minimum of the pipe, not the bottom. Replace the filter if necessary. ■ Allow the storage tank on the water pipe. IMPORTANT: If you may crush the copper tubing. 7. Unplug refrigerator or disconnect power. 2. IMPORTANT: ■ Make sure it is connected, turn the ice maker...
User Instructions
Page 5
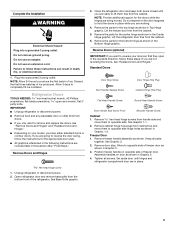
... refrigerator or disconnect power. 2. Keep all screws. Do not use an adapter. Lift the freezer door free from cabinet top and move them to reverse the door swing, follow these steps. Standard Doors Door Stop Screw Door Handle Sealing Screw Door Hinge Hole Plug Cabinet Hinge Hole Plug Flat-Head Handle Screw Round-Head Handle Screw Door Handle Seal Screw Front Shoulder Handle Screw Cabinet 1. Move to opposite side. Assemble handles on opposite side of ice produced...
... refrigerator or disconnect power. 2. Keep all screws. Do not use an adapter. Lift the freezer door free from cabinet top and move them to reverse the door swing, follow these steps. Standard Doors Door Stop Screw Door Handle Sealing Screw Door Hinge Hole Plug Cabinet Hinge Hole Plug Flat-Head Handle Screw Round-Head Handle Screw Door Handle Seal Screw Front Shoulder Handle Screw Cabinet 1. Move to opposite side. Assemble handles on opposite side of ice produced...
User Instructions
Page 6
... the other side. Remove door stop . Remove refrigerator handle bottom trim. Keep all screws. See Graphic 6-3. 3. Drive top two screws in death, fire, or electrical shock. 3. Align refrigerator handle bottom trim. Replace the parts for the top hinge as shown. Position refrigerator handle on opposite side of refrigerator door. Assemble the parts for the doors while the hinges are working. 2. Replace the freezer door. 3. Replace the base grille. Remove door hinge hole plug from both the freezer and refrigerator doors and move to the...
... the other side. Remove door stop . Remove refrigerator handle bottom trim. Keep all screws. See Graphic 6-3. 3. Drive top two screws in death, fire, or electrical shock. 3. Align refrigerator handle bottom trim. Replace the parts for the top hinge as shown. Position refrigerator handle on opposite side of refrigerator door. Assemble the parts for the doors while the hinges are working. 2. Replace the freezer door. 3. Replace the base grille. Remove door hinge hole plug from both the freezer and refrigerator doors and move to the...

User Instructions
Page 7
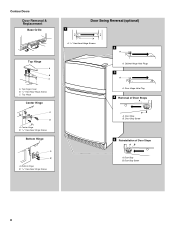
...Freezer Door Handle 4 A A. Door Handle Seal Screw Front 6-2 A 6-3 A A. Top Hinge Cover B. /5 16 " Hex-Head Hinge Screws C. Center Hinge B. /5 16 " Hex-Head Hinge Screws Bottom Hinge A B A. Bottom Hinge B. 5/16" Hex-Head Hinge Screws Door Swing Reversal (optional) A 2 A 1-2 B A A. Top Hinge Center Hinge A B A. Round-Head Handle Screw 7 Door Stop 6-1 A. Standard Doors Door Removal & Replacement Base Grille Top Hinge A B C A. Shoulder Handle Screw B A. Flat-Head Handle Screw B. Door Hinge Hole Plug A. Door Handle Sealing Screws 7 Front View...
...Freezer Door Handle 4 A A. Door Handle Seal Screw Front 6-2 A 6-3 A A. Top Hinge Cover B. /5 16 " Hex-Head Hinge Screws C. Center Hinge B. /5 16 " Hex-Head Hinge Screws Bottom Hinge A B A. Bottom Hinge B. 5/16" Hex-Head Hinge Screws Door Swing Reversal (optional) A 2 A 1-2 B A A. Top Hinge Center Hinge A B A. Round-Head Handle Screw 7 Door Stop 6-1 A. Standard Doors Door Removal & Replacement Base Grille Top Hinge A B C A. Shoulder Handle Screw B A. Flat-Head Handle Screw B. Door Hinge Hole Plug A. Door Handle Sealing Screws 7 Front View...
User Instructions
Page 8
Bottom Hinge B. 5/16" Hex-Head Hinge Screws Door Swing Reversal (optional) 1 A A. 5/16" Hex-Head Hinge Screws A 2 A A. Door Stop B. Door Stop Screw 8 Door Hinge Hole Plug 4 Removal of Door Stops AB A. Top Hinge Cover B. 5/16" Hex-Head Hinge Screws C. Contour Doors Door Removal & Replacement Base Grille Top Hinge A B C A. Door Stop Screw 5 Reinstallation of Door Stops A B A. Center Hinge B. 5/16" Hex-Head Hinge Screws Bottom Hinge A B A. Top Hinge Center Hinge A B A. Door Stop B. Cabinet Hinge Hole Plugs 3 A A.
Bottom Hinge B. 5/16" Hex-Head Hinge Screws Door Swing Reversal (optional) 1 A A. 5/16" Hex-Head Hinge Screws A 2 A A. Door Stop B. Door Stop Screw 8 Door Hinge Hole Plug 4 Removal of Door Stops AB A. Top Hinge Cover B. 5/16" Hex-Head Hinge Screws C. Contour Doors Door Removal & Replacement Base Grille Top Hinge A B C A. Door Stop Screw 5 Reinstallation of Door Stops A B A. Center Hinge B. 5/16" Hex-Head Hinge Screws Bottom Hinge A B A. Top Hinge Center Hinge A B A. Door Stop B. Cabinet Hinge Hole Plugs 3 A A.
User Instructions
Page 9
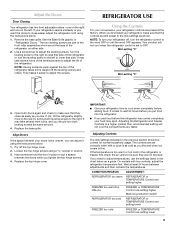
... temperature is best to adjust the screws. REFRIGERATOR USE Using the Controls For your convenience, your doors looks uneven, you like and when ice cream is set correctly when milk or juice is as cold as shown. Replace the base grille. Loosen the top hinge screws using the instructions below : 1. Use a screwdriver to lower that side of the refrigerator or turn the leveling screw to the left . This makes it using the instructions...
... temperature is best to adjust the screws. REFRIGERATOR USE Using the Controls For your convenience, your doors looks uneven, you like and when ice cream is set correctly when milk or juice is as cold as shown. Replace the base grille. Loosen the top hinge screws using the instructions below : 1. Use a screwdriver to lower that side of the refrigerator or turn the leveling screw to the left . This makes it using the instructions...
User Instructions
Page 10
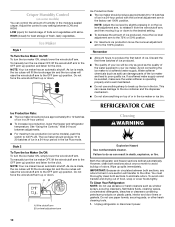
... B. Both the refrigerator and freezer sections defrost automatically. NOTE: Your ice maker has an automatic shutoff. Ice Production Rate: ■ The ice maker should produce approximately 8 to the OFF (arm up ) position and listen for best storage of food, wrap or cover foods tightly. The ice maker should produce approximately 8 to a softened water supply. Ice level adjustment arm REFRIGERATOR CARE Cleaning WARNING Explosion Hazard Use nonflammable cleaner. However, clean both sections to...
... B. Both the refrigerator and freezer sections defrost automatically. NOTE: Your ice maker has an automatic shutoff. Ice Production Rate: ■ The ice maker should produce approximately 8 to the OFF (arm up ) position and listen for best storage of food, wrap or cover foods tightly. The ice maker should produce approximately 8 to a softened water supply. Ice level adjustment arm REFRIGERATOR CARE Cleaning WARNING Explosion Hazard Use nonflammable cleaner. However, clean both sections to...
User Instructions
Page 11
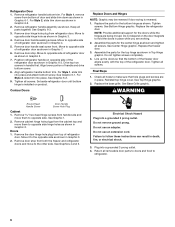
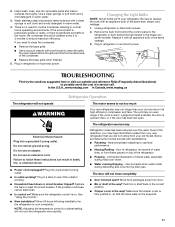
...? Below are listed some models). Push bin or shelf back in the correct position. ■ Crisper cover in refrigerator or reconnect power. The refrigerator seems noisy Electrical Shock Hazard Plug into the drain pan. Do not use an adapter. Move food packages away from behind the control panel in the refrigerator or from door. ■ Bin or shelf in normal home operating environments. Plug in warm water. 3. Make sure the crisper cover is no need to clean the condenser...
...? Below are listed some models). Push bin or shelf back in the correct position. ■ Crisper cover in refrigerator or reconnect power. The refrigerator seems noisy Electrical Shock Hazard Plug into the drain pan. Do not use an adapter. Move food packages away from behind the control panel in the refrigerator or from door. ■ Bin or shelf in normal home operating environments. Plug in warm water. 3. Make sure the crisper cover is no need to clean the condenser...
User Instructions
Page 12
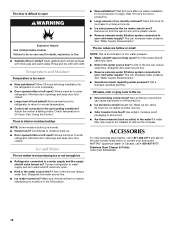
... water filtration system connected to cool completely. ■ Door opened often or left open . ■ Kink in the ON position. ■ New installation? Clean gaskets and contact surfaces with mild soap and warm water. Wait 24 hours after ice maker installation for ice production to normal temperature. ■ Control set correctly for the part number listed below or contact your cold water supply? Contributes to store food. ■ Are there minerals (such as sulfur) in the line...
... water filtration system connected to cool completely. ■ Door opened often or left open . ■ Kink in the ON position. ■ New installation? Clean gaskets and contact surfaces with mild soap and warm water. Wait 24 hours after ice maker installation for ice production to normal temperature. ■ Control set correctly for the part number listed below or contact your cold water supply? Contributes to store food. ■ Are there minerals (such as sulfur) in the line...
User Instructions
Page 13
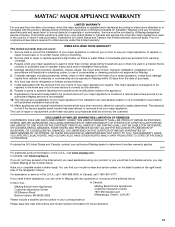
... need further assistance, you can find your model number and serial number on the label located on how to use your major appliance, to replace or repair house fuses, or to Maytag with the removal from your product or you on the right-hand side of your correspondence. Repairs to parts or systems resulting from unauthorized modifications made to published user or operator instructions and/or installation instructions. 4. Service...
... need further assistance, you can find your model number and serial number on the label located on how to use your major appliance, to replace or repair house fuses, or to Maytag with the removal from your product or you on the right-hand side of your correspondence. Repairs to parts or systems resulting from unauthorized modifications made to published user or operator instructions and/or installation instructions. 4. Service...


