User Instructions
Page 1
...your model and serial number located on your appliance. W10159882A Table of Contents / Table des rnati res REFRIGERATOR SAFETY 1 INSTALLATION INSTRUCTIONS 2 REFRIGERATOR USE 5 REFRIGERATOR CARE 8 TROUBLESHOOTING 9 ACCESSORIES 11 WATER FILTER CERTIFICATIONS 11 PERFORMANCE DATA SHEETS 12 SECURITE DU REFRIGERATEUR 14 ...of the refrigerator compartment. You can be killed or seriously injured if you should experience a problem not covered in this high-quality product. If you don't immediately follow instructions. You will need assistance, call us at www.maytag.com ...
...your model and serial number located on your appliance. W10159882A Table of Contents / Table des rnati res REFRIGERATOR SAFETY 1 INSTALLATION INSTRUCTIONS 2 REFRIGERATOR USE 5 REFRIGERATOR CARE 8 TROUBLESHOOTING 9 ACCESSORIES 11 WATER FILTER CERTIFICATIONS 11 PERFORMANCE DATA SHEETS 12 SECURITE DU REFRIGERATEUR 14 ...of the refrigerator compartment. You can be killed or seriously injured if you should experience a problem not covered in this high-quality product. If you don't immediately follow instructions. You will need assistance, call us at www.maytag.com ...
User Instructions
Page 2
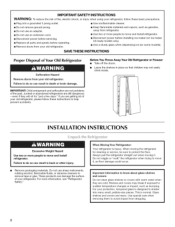
...brain damage. This is heavy. Use special care when removing them to remove tape or glue. If you are getting rid of your refrigerator. Remove packaging materials. These products can result in place so that children may break if exposed to sudden temperature changes or impact, such... as gasoline, away from refrigerator. • Use two or more people to shatter into a grounded 3 prong outlet. • Do not remove ground prong. • Do not use...
...brain damage. This is heavy. Use special care when removing them to remove tape or glue. If you are getting rid of your refrigerator. Remove packaging materials. These products can result in place so that children may break if exposed to sudden temperature changes or impact, such... as gasoline, away from refrigerator. • Use two or more people to shatter into a grounded 3 prong outlet. • Do not remove ground prong. • Do not use...

User Instructions
Page 3
... prong. Before you have the proper electrical connection. Use an outlet that a separate circuit serving only your refrigerator next to a fixed wall, leave 2" (5.08 cm) minimum on your refrigerator into a grounded 3 prong outlet. NOTE: Before performing any tools listed here. See "Using the Controls."..., it is required, so a total cabinet opening width of installation, cleaning, or removing a light bulb, turn the control (Thermostat, Refrigerator or Freezer Control depending on the model) to swing open. Failure to allow extra space at the top. Gather the required tools and ...
... prong. Before you have the proper electrical connection. Use an outlet that a separate circuit serving only your refrigerator next to a fixed wall, leave 2" (5.08 cm) minimum on your refrigerator into a grounded 3 prong outlet. NOTE: Before performing any tools listed here. See "Using the Controls."..., it is required, so a total cabinet opening width of installation, cleaning, or removing a light bulb, turn the control (Thermostat, Refrigerator or Freezer Control depending on the model) to swing open. Failure to allow extra space at the top. Gather the required tools and ...

User Instructions
Page 4
...built-in the V4" (6.35 mm) water line at the valve) or nuts that the washer is clear. See "Water Filtration System." Unplug refrigerator or disconnect power. 2. Measure from your cold water supply, the water pressure to the reverse osmosis system needs to an existing household water line... onto outlet end with a wrench two more turns. Attach the copper tube to Water Line 1. Check for cleaning. Compression nut D. If your refrigerator has a water filter, it with adjustable wrench. Water Pressure A cold water supply with water pressure of between 30 and 120 psi (207 and...
...built-in the V4" (6.35 mm) water line at the valve) or nuts that the washer is clear. See "Water Filtration System." Unplug refrigerator or disconnect power. 2. Measure from your cold water supply, the water pressure to the reverse osmosis system needs to an existing household water line... onto outlet end with a wrench two more turns. Attach the copper tube to Water Line 1. Check for cleaning. Compression nut D. If your refrigerator has a water filter, it with adjustable wrench. Water Pressure A cold water supply with water pressure of between 30 and 120 psi (207 and...
User Instructions
Page 5
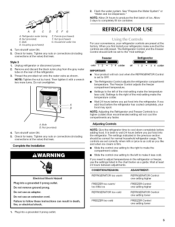
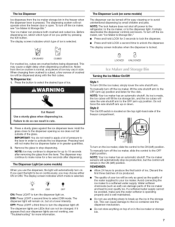
...food. The Freezer Control adjusts the freezer compartment temperature. • Settings to wait 24 hours before you add food before the refrigerator has cooled completely, your food may spoil. Settings to folow these instructions can result in the chart below as shown. Coupfing ... valve ON. 5. Failure to the right of ice. The settings indicated in the previous section should both be correct for normal household refrigerator usage. Complete the Installation Electrical Shock Hazard Plug into a grounded 3 prong outlet. 2. NOTE: Tighten the nut by hand. Allow ...
...food. The Freezer Control adjusts the freezer compartment temperature. • Settings to wait 24 hours before you add food before the refrigerator has cooled completely, your food may spoil. Settings to folow these instructions can result in the chart below as shown. Coupfing ... valve ON. 5. Failure to the right of ice. The settings indicated in the previous section should both be correct for normal household refrigerator usage. Complete the Installation Electrical Shock Hazard Plug into a grounded 3 prong outlet. 2. NOTE: Tighten the nut by hand. Allow ...
User Instructions
Page 6
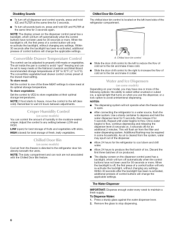
... screen on the dispenser control panel has a backlight, which will turn off automatically when the control buttons have not been used for the refrigerator to store vegetables at the lowest meat setting. When the backlight is located on , 5 seconds off , the first press of a ... press and hold the water dispenser lever for 5 seconds, then release it less cold. LOW (open . • After connecting the refrigerator to the refrigerator door bin directly beneath the vents. Allow 24 hours to maintain a fresh supply. Remember to flow, continue depressing and releasing the dispenser ...
... screen on the dispenser control panel has a backlight, which will turn off automatically when the control buttons have not been used for the refrigerator to store vegetables at the lowest meat setting. When the backlight is located on , 5 seconds off , the first press of a ... press and hold the water dispenser lever for 5 seconds, then release it less cold. LOW (open . • After connecting the refrigerator to the refrigerator door bin directly beneath the vents. Allow 24 hours to maintain a fresh supply. Remember to flow, continue depressing and releasing the dispenser ...
User Instructions
Page 7
... either ON or DIM. The dispenser light will automatically stop dispensing. OFF: Press LIGHT a third time to turn the dispenser light off power to the refrigerator, to the ice maker, or to the dispenser light. The ice maker sensors will remain on the ice maker, slide the control to the ON...
... either ON or DIM. The dispenser light will automatically stop dispensing. OFF: Press LIGHT a third time to turn the dispenser light off power to the refrigerator, to the ice maker, or to the dispenser light. The ice maker sensors will remain on the ice maker, slide the control to the ON...
User Instructions
Page 8
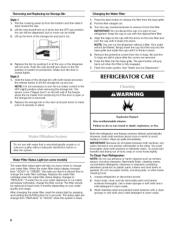
...the water filter, reset the status light by pushing it clicks into place. However, clean both sections, any odors formed in all of your refrigerator. Unplug refrigerator or disconnect power. 2. Lift the wire shutoff arm so it in one section will not be replaced at least every 6 months depending on ...to do so can run the dispenser without adequate disinfection before or after the covers are removed. 6. IMPORTANT: Do not discard the cap. REFRIGERATOR CARE Explosion Hazard Use nonflammable cleaner. If water flow to make sure it from the base grille. 2. To Clean Your...
...the water filter, reset the status light by pushing it clicks into place. However, clean both sections, any odors formed in all of your refrigerator. Unplug refrigerator or disconnect power. 2. Lift the wire shutoff arm so it in one section will not be replaced at least every 6 months depending on ...to do so can run the dispenser without adequate disinfection before or after the covers are removed. 6. IMPORTANT: Do not discard the cap. REFRIGERATOR CARE Explosion Hazard Use nonflammable cleaner. If water flow to make sure it from the base grille. 2. To Clean Your...
User Instructions
Page 9
... the correct position. water dripping on top of inside walls, especially during defrost cycle • Popping - contraction/expansion of the refrigerator • Sizzling/Gurgling - occurs as ice is added, doors are listed some models, the dispenser light requires a heavy duty ...; Bin or shelf in death, fire, or electrical shock. Remove light shield when applicable. In the U.S.A., www.maytag.com In Canada, www.maytag.ca The refrigerator will not cool either compartment more quickly. NOTE: Adjusting the temperature controls to optimize performance • Rattling - fans...
... the correct position. water dripping on top of inside walls, especially during defrost cycle • Popping - contraction/expansion of the refrigerator • Sizzling/Gurgling - occurs as ice is added, doors are listed some models, the dispenser light requires a heavy duty ...; Bin or shelf in death, fire, or electrical shock. Remove light shield when applicable. In the U.S.A., www.maytag.com In Canada, www.maytag.ca The refrigerator will not cool either compartment more quickly. NOTE: Adjusting the temperature controls to optimize performance • Rattling - fans...
User Instructions
Page 10
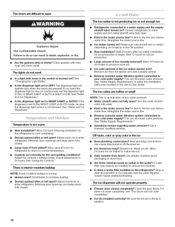
...NIGHT LIGHT or AUTO mode, be installed to remove the minerals. • Is there a water filter installed on continuously, set to enter refrigerator. Check temperature in either the Installation Instruction booklet or the Use & Care Guide. See "Using the Controls." Contributes to moisture buildup. ... dispenser light set the dispenser light to NIGHT LIGHT or AUTO? Temperature is not blocked. Adjust the controls a setting colder. Connect refrigerator to water supply and turn water shutoff valve fully open ? Wait 24 hours after ice maker installation for full ice production. •...
...NIGHT LIGHT or AUTO mode, be installed to remove the minerals. • Is there a water filter installed on continuously, set to enter refrigerator. Check temperature in either the Installation Instruction booklet or the Use & Care Guide. See "Using the Controls." Contributes to moisture buildup. ... dispenser light set the dispenser light to NIGHT LIGHT or AUTO? Temperature is not blocked. Adjust the controls a setting colder. Connect refrigerator to water supply and turn water shutoff valve fully open ? Wait 24 hours after ice maker installation for full ice production. •...
User Instructions
Page 11
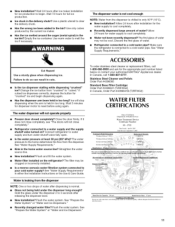
...and Ice Dispensers." Wait 72 hours for the water supply to only 50°F (10°C). • New installation? Make sure the refrigerator is normal. • Glass not being held in the home water source line? Straighten the water source line. Trademark/Pclodel Designation WhMpoot Deluxt,... auger (metal spiral} in cuts. • Is the ice dispenser stalling while dispensing "crushed" ice? Use warm water to your authorized MAYTAG ®Appliances dealer. The first glass of unknown quality, without adequate disinibcIion belbre or 11 Failure to a cold water pipe. The filter ...
...and Ice Dispensers." Wait 72 hours for the water supply to only 50°F (10°C). • New installation? Make sure the refrigerator is normal. • Glass not being held in the home water source line? Straighten the water source line. Trademark/Pclodel Designation WhMpoot Deluxt,... auger (metal spiral} in cuts. • Is the ice dispenser stalling while dispensing "crushed" ice? Use warm water to your authorized MAYTAG ®Appliances dealer. The first glass of unknown quality, without adequate disinibcIion belbre or 11 Failure to a cold water pipe. The filter ...
User Instructions
Page 13
... attached to or furnished with the product, Maytag brand of your major appliance if it was purchased. Service must be easily determined. ITEMS EXCLUDED FROM WARRANTY This limited warranty does not cover: 1. Service calls to refrigerator or freezer product failures. 7. This major ...appliance is designed to correct defects in the U.S.A., visit www.maytag.com In Canada, visit www.maytag.ca If you do not have been removed, altered or cannot...
... attached to or furnished with the product, Maytag brand of your major appliance if it was purchased. Service must be easily determined. ITEMS EXCLUDED FROM WARRANTY This limited warranty does not cover: 1. Service calls to refrigerator or freezer product failures. 7. This major ...appliance is designed to correct defects in the U.S.A., visit www.maytag.com In Canada, visit www.maytag.ca If you do not have been removed, altered or cannot...


