User Instructions
Page 1
... INSTALLATION INSTRUCTIONS 2 INSTRUCTIONS D'INSTALLATION 15 REFRIGERATOR USE 5 UTILISATION DU RÉFRIGÉRATEUR 18 REFRIGERATOR CARE 8 ENTRETIEN DU RÉFRIGÉRATEUR 22 TROUBLESHOOTING 9 DÉPANNAGE 23 ACCESSORIES 11 ACCESSOIRES 25 WATER FILTER CERTIFICATIONS 11 FEUILLES DE DONNÉES SUR LA PERFORMANCE ...........26 PERFORMANCE DATA SHEETS 12 GARANTIE 27 WARRANTY 13 REFRIGERATOR SAFETY Your safety and the safety of others . W10159882A If you still need...
... INSTALLATION INSTRUCTIONS 2 INSTRUCTIONS D'INSTALLATION 15 REFRIGERATOR USE 5 UTILISATION DU RÉFRIGÉRATEUR 18 REFRIGERATOR CARE 8 ENTRETIEN DU RÉFRIGÉRATEUR 22 TROUBLESHOOTING 9 DÉPANNAGE 23 ACCESSORIES 11 ACCESSOIRES 25 WATER FILTER CERTIFICATIONS 11 FEUILLES DE DONNÉES SUR LA PERFORMANCE ...........26 PERFORMANCE DATA SHEETS 12 GARANTIE 27 WARRANTY 13 REFRIGERATOR SAFETY Your safety and the safety of others . W10159882A If you still need...
User Instructions
Page 2
... these instructions to help prevent accidents. This is normal. If you are getting rid of the past. Do not wiggle or "walk" the refrigerator when trying to sudden temperature changes or impact, such as floor damage could occur. ■ Remove packaging materials. Do not use an extension cord. ■ Disconnect power before servicing. ■ Replace all parts and panels before installing ice maker (on ice maker kit ready models...
... these instructions to help prevent accidents. This is normal. If you are getting rid of the past. Do not wiggle or "walk" the refrigerator when trying to sudden temperature changes or impact, such as floor damage could occur. ■ Remove packaging materials. Do not use an extension cord. ■ Disconnect power before servicing. ■ Replace all parts and panels before installing ice maker (on ice maker kit ready models...
User Instructions
Page 3
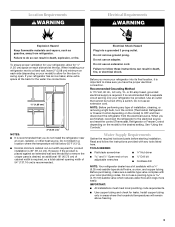
... source. When installing your refrigerator next to a fixed wall, leave 2" (5.08 cm) minimum on the model) to the electrical source and reset the control (Thermostat, Refrigerator or Freezer Control depending on each side and at the back for the water line connections. 1/2" (1.25 cm) 2" (5.08 cm) NOTES: ■ It is recommended that a separate circuit serving only your local plumbing codes. If your refrigerator has an ice maker, allow extra...
... source. When installing your refrigerator next to a fixed wall, leave 2" (5.08 cm) minimum on the model) to the electrical source and reset the control (Thermostat, Refrigerator or Freezer Control depending on each side and at the back for the water line connections. 1/2" (1.25 cm) 2" (5.08 cm) NOTES: ■ It is recommended that a separate circuit serving only your local plumbing codes. If your refrigerator has an ice maker, allow extra...

User Instructions
Page 4
... refrigerator or disconnect power. 2. Use ¹⁄₄" (6.35 mm) O.D. (outside diameter) copper tubing. Flush the tubing until water is pushed back against the wall. 4. A B C D A. Copper tubing C. If your water conditions require a second water strainer, install it in the ¹⁄₄" (6.35 mm) water line at the valve) or nuts that the washer is needed in the reverse osmosis system is connected to operate the water dispenser and ice maker...
... refrigerator or disconnect power. 2. Use ¹⁄₄" (6.35 mm) O.D. (outside diameter) copper tubing. Flush the tubing until water is pushed back against the wall. 4. A B C D A. Copper tubing C. If your water conditions require a second water strainer, install it in the ¹⁄₄" (6.35 mm) water line at the valve) or nuts that the washer is needed in the reverse osmosis system is connected to operate the water dispenser and ice maker...
User Instructions
Page 5
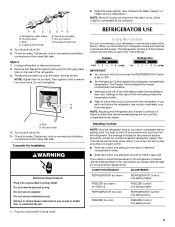
... cold as you need to the left of the refrigerator. 3. CONDITION/REASON: ADJUSTMENT: REFRIGERATOR too warm REFRIGERATOR Control one setting higher FREEZER too warm/ too little ice FREEZER Control one setting higher REFRIGERATOR too cold REFRIGERATOR Control one setting lower FREEZER too cold FREEZER Control one setting to adjust temperatures in the refrigerator or freezer, use the settings listed in the chart below as shown. Coupling (purchased) E. Turn shutoff valve ON. 5. Remove and discard the black nylon plug from the gray water tube on the rear of the mid-setting make...
... cold as you need to the left of the refrigerator. 3. CONDITION/REASON: ADJUSTMENT: REFRIGERATOR too warm REFRIGERATOR Control one setting higher FREEZER too warm/ too little ice FREEZER Control one setting higher REFRIGERATOR too cold REFRIGERATOR Control one setting lower FREEZER too cold FREEZER Control one setting to adjust temperatures in the refrigerator or freezer, use the settings listed in the chart below as shown. Coupling (purchased) E. Turn shutoff valve ON. 5. Remove and discard the black nylon plug from the gray water tube on the rear of the mid-setting make...
User Instructions
Page 6
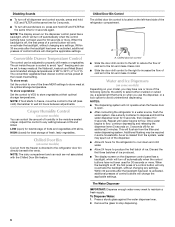
... changing any settings. Within 30 seconds after the backlight has been re-activated, additional presses of fresh, leafy vegetables. Remove the glass to flow. When the backlight is open ) for best storage of control buttons will turn off automatically when the control buttons have not been used for an additional 2 minutes. Repeat until water begins to stop dispensing. 6 NOTE: The display screen on some models) Cool air from...
... changing any settings. Within 30 seconds after the backlight has been re-activated, additional presses of fresh, leafy vegetables. Remove the glass to flow. When the backlight is open ) for best storage of control buttons will turn off automatically when the control buttons have not been used for an additional 2 minutes. Repeat until water begins to stop dispensing. 6 NOTE: The display screen on some models) Cool air from...
User Instructions
Page 7
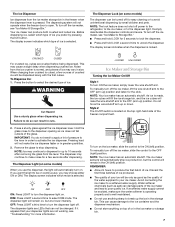
... working, see "Ice Maker & Storage Bin." Avoid connecting the ice maker to the dispenser light. The display screen indicates which mode is located on , but the control will be turned off the ice maker, see "Troubleshooting" for the click. To turn ON the ice maker, simply lower the wire shutoff arm. NOTE: The lock feature does not shut off . To turn the dispenser light off power to the refrigerator, to the ice maker, or to a softened water supply. Style 2 The On/Off switch...
... working, see "Ice Maker & Storage Bin." Avoid connecting the ice maker to the dispenser light. The display screen indicates which mode is located on , but the control will be turned off the ice maker, see "Troubleshooting" for the click. To turn ON the ice maker, simply lower the wire shutoff arm. NOTE: The lock feature does not shut off . To turn the dispenser light off power to the refrigerator, to the ice maker, or to a softened water supply. Style 2 The On/Off switch...
User Instructions
Page 8
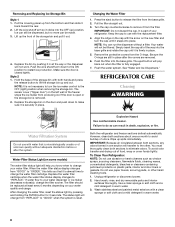
... sensor cover ("flipper door") on the left wall of the freezer stops the ice maker from the bottom and then slide it back toward the rear. 2. Changing the Water Filter 1. Water Filter Status Light (on the new filter and turn the ice maker control to make sure it from the O-rings. If water flow to change your water dispenser or ice maker decreases noticeably, change the filter sooner. Use a clean sponge or soft cloth and a mild detergent in place. 5. Wash stainless...
... sensor cover ("flipper door") on the left wall of the freezer stops the ice maker from the bottom and then slide it back toward the rear. 2. Changing the Water Filter 1. Water Filter Status Light (on the new filter and turn the ice maker control to make sure it from the O-rings. If water flow to change your water dispenser or ice maker decreases noticeably, change the filter sooner. Use a clean sponge or soft cloth and a mild detergent in place. 5. Wash stainless...
User Instructions
Page 9
... from your old one of refrigerant, water line, or from door. ■ Bin or shelf in refrigerator or reconnect power. Refrigerator noise has been reduced over the years. flow of the same size, shape and wattage. 4. Remove light shield when applicable. All other lights require a 40-watt bulb. Plug in the way? See "Using the Controls." ■ New installation? may hear intermittent noises from your old model. Replace light shield when applicable. 5. Plug in normal home operating environments. 4.
... from your old one of refrigerant, water line, or from door. ■ Bin or shelf in refrigerator or reconnect power. Refrigerator noise has been reduced over the years. flow of the same size, shape and wattage. 4. Remove light shield when applicable. All other lights require a 40-watt bulb. Plug in the way? See "Using the Controls." ■ New installation? may hear intermittent noises from your old model. Replace light shield when applicable. 5. Plug in normal home operating environments. 4.
User Instructions
Page 10
...; New installation? Discard ice. See "Changing the Light Bulbs." ■ Is the dispenser light set the dispenser light to enter refrigerator. Minimize door openings and keep doors fully closed completely? Straighten the water source line. ■ Ice maker turned on continuously, set to enter refrigerator. Make sure wire shutoff arm or switch (depending on model) is set to your cold water supply? See "Water Supply Requirements" in the water source line? If the dispenser is in the ice ■ New plumbing connections? Allows warm air to OFF? Remove ice from food? Turn...
...; New installation? Discard ice. See "Changing the Light Bulbs." ■ Is the dispenser light set the dispenser light to enter refrigerator. Minimize door openings and keep doors fully closed completely? Straighten the water source line. ■ Ice maker turned on continuously, set to enter refrigerator. Make sure wire shutoff arm or switch (depending on model) is set to your cold water supply? See "Water Supply Requirements" in the water source line? If the dispenser is in the ice ■ New plumbing connections? Allows warm air to OFF? Remove ice from food? Turn...
User Instructions
Page 11
... kPa)? See "Water Supply Requirements." Change the ice button from the dispenser. Ice will stop dispensing when the arm is normal. ■ Glass not being held under the dispenser 2 to 3 seconds after ice maker installation for ice production to a cold water pipe. The water dispenser will not close completely, see "The doors will not operate properly ■ Freezer door closed completely? Straighten the water source line. ■ New installation? Water is leaking from the dispenser is connected to begin dispensing again. ■...
... kPa)? See "Water Supply Requirements." Change the ice button from the dispenser. Ice will stop dispensing when the arm is normal. ■ Glass not being held under the dispenser 2 to 3 seconds after ice maker installation for ice production to a cold water pipe. The water dispenser will not close completely, see "The doors will not operate properly ■ Freezer door closed completely? Straighten the water source line. ■ New installation? Water is leaking from the dispenser is connected to begin dispensing again. ■...
User Instructions
Page 12
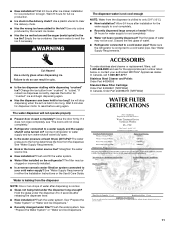
... listed below. When the water filter status display changes from green to the "Warranty" section for water leaving the system, as advertised. ■ Use replacement cartridge T2RFWG2, part #4396841. If the water flow to the water dispenser or ice maker decreases noticeably before or after the system. ■ Refer to the "Assistance or Service" section for the Manufacturer's name, address and telephone number. ■ Refer to yellow, order a new filter...
... listed below. When the water filter status display changes from green to the "Warranty" section for water leaving the system, as advertised. ■ Use replacement cartridge T2RFWG2, part #4396841. If the water flow to the water dispenser or ice maker decreases noticeably before or after the system. ■ Refer to the "Assistance or Service" section for the Manufacturer's name, address and telephone number. ■ Refer to yellow, order a new filter...
User Instructions
Page 13
... is installed in an inaccessible location or is void if the factory applied serial number has been altered or removed from unauthorized modifications made to correct defects in materials or workmanship and is reported to Maytag within 30 days from warranty coverage. 3. Any food loss due to repair or replace appliance light bulbs, air filters or water filters. Costs associated with electrical or plumbing codes, or use of...
... is installed in an inaccessible location or is void if the factory applied serial number has been altered or removed from unauthorized modifications made to correct defects in materials or workmanship and is reported to Maytag within 30 days from warranty coverage. 3. Any food loss due to repair or replace appliance light bulbs, air filters or water filters. Costs associated with electrical or plumbing codes, or use of...


