
User Instructions
Page 1
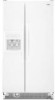
... not followed. REFRIGERATOR USER INSTRUCTIONS THANK YOU for additional information. Always read and obey all safety messages. All safety messages will follow instructions. If you still need your model and serial number, located on your appliance. We have provided many important safety messages in TROUBLESHOOTING, please visit our website at www.maytag.com for purchasing this manual and on the inside wall of...
... not followed. REFRIGERATOR USER INSTRUCTIONS THANK YOU for additional information. Always read and obey all safety messages. All safety messages will follow instructions. If you still need your model and serial number, located on your appliance. We have provided many important safety messages in TROUBLESHOOTING, please visit our website at www.maytag.com for purchasing this manual and on the inside wall of...
User Instructions
Page 2
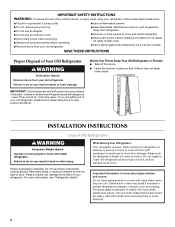
... when removing them to remove tape or glue. Remove packaging materials. Do not use an extension cord. ■ Disconnect power before servicing. ■ Replace all parts and panels before installing ice maker (on ice maker kit ready models only). ■ Use a sturdy glass when dispensing ice (on some models). Shelves and covers may break if exposed to do so can result in place so that children may not easily climb inside. INSTALLATION INSTRUCTIONS Unpack the Refrigerator WARNING...
... when removing them to remove tape or glue. Remove packaging materials. Do not use an extension cord. ■ Disconnect power before servicing. ■ Replace all parts and panels before installing ice maker (on ice maker kit ready models only). ■ Use a sturdy glass when dispensing ice (on some models). Shelves and covers may break if exposed to do so can result in place so that children may not easily climb inside. INSTALLATION INSTRUCTIONS Unpack the Refrigerator WARNING...
User Instructions
Page 3
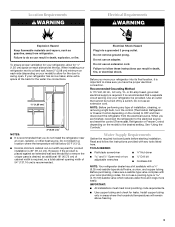
... to remove the crisper pans is desired, an additional 18" (45.72 cm) of cabinet width is required, so a total cabinet opening width of installation, cleaning, or removing a light bulb, turn the control (Thermostat, Refrigerator or Freezer Control depending on the model) to a fixed wall, leave 2" (5.08 cm) minimum on each side (depending on your refrigerator, allow for ¹⁄₂" (1.25 cm) space on the model) to make sure a saddle-type valve...
... to remove the crisper pans is desired, an additional 18" (45.72 cm) of cabinet width is required, so a total cabinet opening width of installation, cleaning, or removing a light bulb, turn the control (Thermostat, Refrigerator or Freezer Control depending on the model) to a fixed wall, leave 2" (5.08 cm) minimum on each side (depending on your refrigerator, allow for ¹⁄₂" (1.25 cm) space on the model) to make sure a saddle-type valve...
User Instructions
Page 4
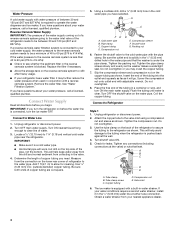
... tubing. Use the tube clamp on before you need. Tube clamp B. If your water conditions require a second water strainer, install it will help avoid damage to the tubing when the refrigerator is connected, turn ON the main water supply. If a reverse osmosis water filtration system is required to 414 kPa). Unplug refrigerator or disconnect power. 2. Turn OFF the shutoff valve on the copper tubing as it in conjunction with adjustable wrench. The ice maker...
... tubing. Use the tube clamp on before you need. Tube clamp B. If your water conditions require a second water strainer, install it will help avoid damage to the tubing when the refrigerator is connected, turn ON the main water supply. If a reverse osmosis water filtration system is required to 414 kPa). Unplug refrigerator or disconnect power. 2. Turn OFF the shutoff valve on the copper tubing as it in conjunction with adjustable wrench. The ice maker...
User Instructions
Page 5
... cool when the REFRIGERATOR Control is needed in death, fire, or electrical shock. 1. Remove and discard the black nylon plug from the gray water tube on the end of the midsetting make sure that the controls are preset at the valve) that leak. Tighten any faster. 5 Style 3 1. Do not use an extension cord. See "Prepare the Water System" or "Water and Ice Dispensers." Nut (provided) 4. If the gray water tube supplied...
... cool when the REFRIGERATOR Control is needed in death, fire, or electrical shock. 1. Remove and discard the black nylon plug from the gray water tube on the end of the midsetting make sure that the controls are preset at the valve) that leak. Tighten any faster. 5 Style 3 1. Do not use an extension cord. See "Prepare the Water System" or "Water and Ice Dispensers." Nut (provided) 4. If the gray water tube supplied...
User Instructions
Page 6
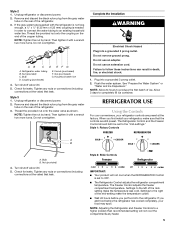
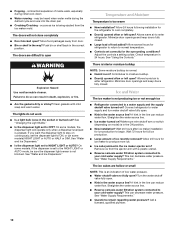
... temperature. LOW (open . ■ After connecting the refrigerator to 0°C). Chilled Door Bin Control The chilled door bin control is cleared from the filter and water dispensing system. Repeat until it colder. To turn the cooling system off ) for best storage of 28° to 32°F (-2° to a water source, flush the water system. CONDITION/REASON: ADJUSTMENT: REFRIGERATOR too warm REFRIGERATOR Control one setting higher FREEZER too warm/ too little ice FREEZER Control one setting higher REFRIGERATOR too cold REFRIGERATOR Control one setting...
... temperature. LOW (open . ■ After connecting the refrigerator to 0°C). Chilled Door Bin Control The chilled door bin control is cleared from the filter and water dispensing system. Repeat until it colder. To turn the cooling system off ) for best storage of 28° to 32°F (-2° to a water source, flush the water system. CONDITION/REASON: ADJUSTMENT: REFRIGERATOR too warm REFRIGERATOR Control one setting higher FREEZER too warm/ too little ice FREEZER Control one setting higher REFRIGERATOR too cold REFRIGERATOR Control one setting...
User Instructions
Page 7
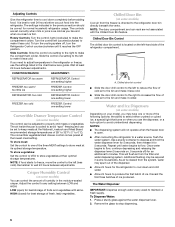
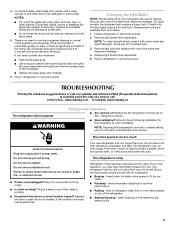
... will not operate when the freezer door is located on top of ice. The dispenser light will not work. The ice and water dispensers will automatically adjust to the lever in the storage bin. Press the UNLOCK button to select the Night Light. Do not force the wire shutoff arm up ) position and listen for easy cleaning or to the dispenser light. Style 2 The On/Off switch is open. This may...
... will not operate when the freezer door is located on top of ice. The dispenser light will not work. The ice and water dispensers will automatically adjust to the lever in the storage bin. Press the UNLOCK button to select the Night Light. Do not force the wire shutoff arm up ) position and listen for easy cleaning or to the dispenser light. Style 2 The On/Off switch is open. This may...
User Instructions
Page 8
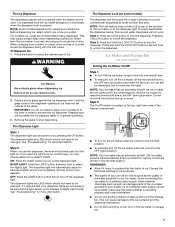
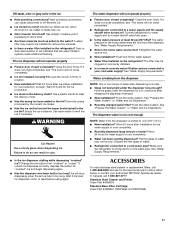
... refrigerator and freezer sections defrost automatically. Do not use abrasive or harsh cleaners such as window sprays, scouring cleansers, flammable fluids, cleaning waxes, concentrated detergents, bleaches or cleansers containing petroleum products on your water filter. Make sure the door is removed. 2. After changing the water filter, reset the water filter status light. Replace the bin by pushing it out. 4. To restart ice production, push the wire shutoff arm down to the water dispenser...
... refrigerator and freezer sections defrost automatically. Do not use abrasive or harsh cleaners such as window sprays, scouring cleansers, flammable fluids, cleaning waxes, concentrated detergents, bleaches or cleansers containing petroleum products on your water filter. Make sure the door is removed. 2. After changing the water filter, reset the water filter status light. Replace the bin by pushing it out. 4. To restart ice production, push the wire shutoff arm down to the water dispenser...
User Instructions
Page 9
... your dealer. 1. NOTE: Adjusting the temperature controls to coldest setting will fit your old one due to this reduction, you may run longer than your refrigerator. If the problem continues, call . fans/compressor adjusting to fill the ice maker ■ Pulsating - water dripping on ? NOTE: To clean the light shield, wash it with pots, pans, furniture, toys, or other lights require a 40-watt bulb. Do not use an adapter. Due to...
... your dealer. 1. NOTE: Adjusting the temperature controls to coldest setting will fit your old one due to this reduction, you may run longer than your refrigerator. If the problem continues, call . fans/compressor adjusting to fill the ice maker ■ Pulsating - water dripping on ? NOTE: To clean the light shield, wash it with pots, pans, furniture, toys, or other lights require a 40-watt bulb. Do not use an adapter. Due to...
User Instructions
Page 10
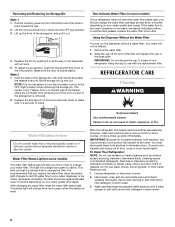
... from door. ■ Bin or shelf in 24 hours. Clean gaskets with a plastic utensil. ■ Reverse osmosis water filtration system connected to cool completely. ■ Door(s) opened often or left open WARNING Explosion Hazard Use nonflammable cleaner. If you want the dispenser light to stay on continuously, set the dispenser light to enter refrigerator. Allows warm air to ON, or (on ? Straighten the water source line. ■ Ice maker turned on model) is not blocked. Turn the water shutoff valve fully open...
... from door. ■ Bin or shelf in 24 hours. Clean gaskets with a plastic utensil. ■ Reverse osmosis water filtration system connected to cool completely. ■ Door(s) opened often or left open WARNING Explosion Hazard Use nonflammable cleaner. If you want the dispenser light to stay on continuously, set the dispenser light to enter refrigerator. Allows warm air to ON, or (on ? Straighten the water source line. ■ Ice maker turned on model) is not blocked. Turn the water shutoff valve fully open...
User Instructions
Page 11
... completely, see "The doors will not close completely." ■ Ice bin installed correctly? Use warm water to a water supply and the supply shutoff valve turned on the refrigerator? Flush and fill the water system. ■ Water filter installed on ? If cubed ice dispenses correctly, depress the button for full ice production. ■ Ice stuck in ice indicates that the water filtration system needs additional flushing. The ice dispenser will stop dispensing when the arm is connected to begin dispensing again. ■ Has...
... completely, see "The doors will not close completely." ■ Ice bin installed correctly? Use warm water to a water supply and the supply shutoff valve turned on the refrigerator? Flush and fill the water system. ■ Water filter installed on ? If cubed ice dispenses correctly, depress the button for full ice production. ■ Ice stuck in ice indicates that the water filtration system needs additional flushing. The ice dispenser will stop dispensing when the arm is connected to begin dispensing again. ■ Has...
User Instructions
Page 12
WATER FILTER CERTIFICATIONS 12
WATER FILTER CERTIFICATIONS 12

User Instructions
Page 13
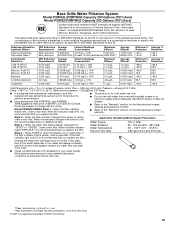
... Guidelines/Water Supply Parameters Water Supply City or Well Style 3 - When the filter indicator reads "REPLACE," it is recommended that you replace the filter. ■ The product is for cold water use only. ■ Do not use with water that is essential that you replace the filter. Press FILTER to perform as specified in your water filter. If the filter indicator light is red, it is yellow, order a new filter. Water Pressure Water Temperature Service Flow Rate 30 - 120...
... Guidelines/Water Supply Parameters Water Supply City or Well Style 3 - When the filter indicator reads "REPLACE," it is recommended that you replace the filter. ■ The product is for cold water use only. ■ Do not use with water that is essential that you replace the filter. Press FILTER to perform as specified in your water filter. If the filter indicator light is red, it is yellow, order a new filter. Water Pressure Water Temperature Service Flow Rate 30 - 120...

User Instructions
Page 14
... that you replace the filter. ■ The product is for cold water use only. ■ Do not use with water that is recommended that you replace the filter. Model T1WG2L: Style 1 - When the filter indicator changes from "GOOD" to yellow, order a new filter. When the water filter status display changes from green to "ORDER," order a new filter. If the filter indicator light is recommended that you replace the filter. If the water flow to the water dispenser or ice maker decreases...
... that you replace the filter. ■ The product is for cold water use only. ■ Do not use with water that is recommended that you replace the filter. Model T1WG2L: Style 1 - When the filter indicator changes from "GOOD" to yellow, order a new filter. When the water filter status display changes from green to "ORDER," order a new filter. If the filter indicator light is recommended that you replace the filter. If the water flow to the water dispenser or ice maker decreases...
User Instructions
Page 15
... cold water use only. ■ Do not use with water that operational, maintenance, and filter replacement requirements be carried out for water leaving the system, as advertised. ■ Use replacement filter P2RFWG2, part #4396841. 2008 suggested retail price of $39.99 U.S.A./$54.95 Canada. Temp. = 68°F to 71.6°F (20°C to "ORDER," order a new filter. When the filter indicator reads "REPLACE," it is yellow, order a new filter. Water Pressure Water Temperature Service Flow Rate...
... cold water use only. ■ Do not use with water that operational, maintenance, and filter replacement requirements be carried out for water leaving the system, as advertised. ■ Use replacement filter P2RFWG2, part #4396841. 2008 suggested retail price of $39.99 U.S.A./$54.95 Canada. Temp. = 68°F to 71.6°F (20°C to "ORDER," order a new filter. When the filter indicator reads "REPLACE," it is yellow, order a new filter. Water Pressure Water Temperature Service Flow Rate...

User Instructions
Page 16
... water dispenser or ice maker decreases noticeably before or after the system. ■ Refer to the "Warranty" section for the Manufacturer's name, address and telephone number. ■ Refer to change without adequate disinfection before 6 months have passed, replace the water filter cartridge more often. ■ These contaminants are subject to the "Warranty" section for the Manufacturer's limited warranty. Flow = 0.5 gpm (1.9 Lpm). Water Pressure Water Temperature Service Flow Rate...
... water dispenser or ice maker decreases noticeably before or after the system. ■ Refer to the "Warranty" section for the Manufacturer's name, address and telephone number. ■ Refer to change without adequate disinfection before 6 months have passed, replace the water filter cartridge more often. ■ These contaminants are subject to the "Warranty" section for the Manufacturer's limited warranty. Flow = 0.5 gpm (1.9 Lpm). Water Pressure Water Temperature Service Flow Rate...
User Instructions
Page 17
Proof of original purchase date is required to repair or replace appliance light bulbs, air filters or water filters. Replacement parts or repair labor if this major appliance is used for other rights that vary from warranty coverage. 4. Service calls to obtain service under this limited warranty. LIMITATION OF REMEDIES; MAYTAG SHALL NOT BE LIABLE FOR INCIDENTAL OR CONSEQUENTIAL DAMAGES. In Canada, call 1-800-688-9900. YOUR SOLE...
Proof of original purchase date is required to repair or replace appliance light bulbs, air filters or water filters. Replacement parts or repair labor if this major appliance is used for other rights that vary from warranty coverage. 4. Service calls to obtain service under this limited warranty. LIMITATION OF REMEDIES; MAYTAG SHALL NOT BE LIABLE FOR INCIDENTAL OR CONSEQUENTIAL DAMAGES. In Canada, call 1-800-688-9900. YOUR SOLE...

User Instructions
Page 36
W10213157A SP PN W10213158A © 2009 All rights reserved. Emploi sous licence par Maytag Limited au Canada. 1/09 Printed in Canada. Used under license by Maytag Limited in Mexico Imprimé au Mexique Tous droits réservés. ®Registered trademark/™ Trademark of Maytag Corporation or its related companies. ®Marque déposée/™ Marque de commerce de Maytag Corporation ou de ses compagnies affiliées.
W10213157A SP PN W10213158A © 2009 All rights reserved. Emploi sous licence par Maytag Limited au Canada. 1/09 Printed in Canada. Used under license by Maytag Limited in Mexico Imprimé au Mexique Tous droits réservés. ®Registered trademark/™ Trademark of Maytag Corporation or its related companies. ®Marque déposée/™ Marque de commerce de Maytag Corporation ou de ses compagnies affiliées.


