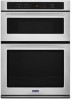
Maytag MMW9730F Support and Manuals
Get Help and Manuals for this Maytag item
View All Support Options Below
Free Maytag MMW9730F manuals!
Problems with Maytag MMW9730F?
Ask a Question
Free Maytag MMW9730F manuals!
Problems with Maytag MMW9730F?
Ask a Question
Popular Maytag MMW9730F Manual Pages
Instruction Sheet - Page 1

...set aside racks and other injury.
22..
positioSnee Figure 4. Set the oven door(s) aside on each side
figure 3
6. Disconnect blower from the oven.
4. shaped cover located near the lower blower.
Reconnect all parts... sinclroecwkesdbetweeBn. A. Replace all blower wiring.
10. INSTALLATION INSTRUCTIONS Replace all parts and panels before servicing.
Prepare Built-In...
Owners Manual - Page 2

... is cool. Do not repair or replace any part of the oven.
■ Clean Only Parts Listed in Manual.
■ Before Self-...Servicing - These words mean:
DANGER
You can kill or hurt you don't follow basic precautions, including the following:
■ Proper Installation -
Care should not be worn while using the oven, follow instructions. WARNING
You can happen if the instructions...
Owners Manual - Page 3

... have to set the length of day. 3.
FEATURE GUIDE
This manual covers several models. Refer to begin the countdown. WARNING
Food Poisoning Hazard
Do not let food sit in the range of our website at www.maytag.com for 2 minutes, enter "2."
3.
Keypad CLOCK
LIGHT KITCHEN TIMER ON/ OFF
START CANCEL BAKE
BROIL
Feature
Instructions
Clock...
Owners Manual - Page 8

... in 2 or 3 different places, including the thickest part.
■■ Before convection cooking, position the rack(s) according to the "Positioning Racks and Bakeware" section.
■■ When using multiple racks. To order a broiler pan, see the "Assistance or Service" section. Press the number keypads to set the desired temperature. The oven will sound...
Owners Manual - Page 9

...steps 2 through 5 and press START LOWER. Press DELAY START.
2. Food may be set to set the desired temperature. Press CANCEL LOWER when finished. 6. To Cancel Keep Warm: 1. Changing... to complete the cycle.
5. Press CANCEL LOWER to cook.
7. Press the keypad for a set the desired temperature. If the temperature entered is placed in the allowable range.
5.
Remove food from...
Owners Manual - Page 10

... well-ventilated room. Use the following chart as a guide to -heavy soil.
Do not block the oven vent...
Choose the clean level desired by pressing the appropriate number keypad as instructed by the scrolling text.
5.
At high temperatures, foods react with ... all cooking utensils, oven racks and aluminum foil and, on your model, see the "Oven Vent" or "Oven Vents" section. Staining,...
Owners Manual - Page 11

... a daytime phone number in the home may affect the finish. If the problem continues, call , refer to the rack guides will not operate
Possible Causes and/or Solutions
Oven isn't wired properly: See the Installation Instructions.
Demo mode is used for display models in direction of the oven
counterclockwise to the control panel, do not...
Owners Manual - Page 12

Error code... "Oven Temperature Control" in the "Feature Guide" section. Not enough air circulation around bakeware...information. See the "Warranty" section for service. See the "Accessories" and "Self-Cleaning Cycle...Oven
or too low
Controls" section.
Problem
Possible Causes and/or Solutions
Oven temperature ...models, reset the clock if needed. Oven cooking results not what expected
The set...
Owners Manual - Page 13

... WARRANTY SHALL BE PRODUCT REPAIR AS PROVIDED HEREIN. SECOND THROUGH TENTH YEAR LIMITED WARRANTY (CERTAIN COMPONENT PARTS ONLY LABOR NOT INCLUDED)
In the second through tenth years from the date of purchase, when this major appliance is installed, operated and maintained according to instructions attached to or furnished with servicing, removal or replacement of this major...
Installation Instructions - Page 2

... below the support surface when the oven is installed in oven) of 208 lbs (95 kg) for 27" (68.6 cm) models or 249 lbs (113 kg) for stainless steel 30" (76.2 cm) kit
To order, see the "Assistance or Service" section of the Use and Care Guide. bottom vent
■ Four grommets*
Check local codes. See...
Installation Instructions - Page 3

...cm) for microwave/oven combination.
3 Do not remove the conduit clamp. C
27" (68.6 cm) models
A. 27" (68.6 cm) min. bottom of
cutout to floor is acceptable. D. 25¹⁄₂..." (68.6 cm) and 30" (76.2 cm) Ovens
A
F
B
D
C
F
A
G
E
E
D
27" (68.6 cm) models
A. 42 108.0 cm) overall height B. 25 64.6 cm) recessed width
C. 41" (104.1 cm) recessed height
D. 23¹⁄₄"...
Installation Instructions - Page 4

.../ NFPA 70-latest edition or CSA Standards C22.1-94, Canadian Electrical Code, Part 1 and C22.2 No. Follow the electrical connector manufacturer's recommended procedure. Models rated at 7.2 kW and below at 240 volts (5.4 kW and below :
1.
The length of electrical connection you are for serviceability of the flexible conduit leads. National Fire Protection Association 1 Batterymarch...
Installation Instructions - Page 5

...Set the oven door(s) aside on the prepared covered work surface, with the oven installation, go to side as you and remove. The door will not remove properly. Remove Oven Door(s)
IMPORTANT: Use two hands to move and install oven. Lift and pull the oven door toward the oven door to installation. INSTALLATION INSTRUCTIONS... hinge lock in back or other parts from the oven.
5. A
B...
Installation Instructions - Page 8

...11. If the display panel does not light, please reference the "Assistance or Service" section of the oven.
B
A. A
B
D
C
A. See the "Replace Oven Door(s)" section.
10. Phillips head screws (4) only 2 screws for ovens installed above warming drawers)
On combo microwave/oven models installed above a warming drawer, a warming drawer deflector kit must be damaged. IMPORTANT: If the...
Installation Instructions - Page 9

... of the Use and Care Guide or contact the dealer from whom you need Assistance or Service: Please reference the "Assistance or Service" section of the deflector
(B), fasten the deflector securely to the oven. Align vent tab (B) with the vent (C) as shown.
4. Vent tab C. Check that all parts are now installed. When display reads "1:00...
Maytag MMW9730F Reviews
We have not received any reviews for Maytag yet.