Owners Manual
Page 3
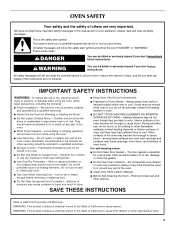
... flammable materials contact heating elements or interior surfaces of oven until they are not followed. Care should not be used in or around any part of the oven unless specifically recommended in color. No commercial oven cleaner or oven liner protective coating of any... part of the oven. ■ Wear Proper Apparel - Do not repair or replace any part of the oven. ■ Clean Only Parts Listed in burns from steam. OVEN SAFETY Your safety and the safety of others . ...
... flammable materials contact heating elements or interior surfaces of oven until they are not followed. Care should not be used in or around any part of the oven unless specifically recommended in color. No commercial oven cleaner or oven liner protective coating of any... part of the oven. ■ Wear Proper Apparel - Do not repair or replace any part of the oven. ■ Clean Only Parts Listed in burns from steam. OVEN SAFETY Your safety and the safety of others . ...

Owners Manual
Page 7
... turning or removing food. It is not necessary to preheat the oven before putting food in use a broiler pan and grid. Follow manufacturer's directions for Part Number W10123240. ■ For proper draining, do not cover the grid with Precise Bake (on ; Oven vent C. Do not set between 300°F and 500...
... turning or removing food. It is not necessary to preheat the oven before putting food in use a broiler pan and grid. Follow manufacturer's directions for Part Number W10123240. ■ For proper draining, do not cover the grid with Precise Bake (on ; Oven vent C. Do not set between 300°F and 500...

Owners Manual
Page 10
... slide. At high temperatures, foods react with soft, lint-free cloth. Always follow label instructions on panel. ■ All-Purpose Appliance Cleaner Part Number 31682 (not included): See "Assistance or Service" section to order. ■ Liquid detergent or all controls are suggested first unless otherwise ...and the oven cools, "End" will appear on the oven display and "LOCKED" will turn on panel. ■ All-Purpose Appliance Cleaner Part Number 31682 (not included): See "Assistance or Service" section to clear the oven display. The door will help them slide. ■ ...
... slide. At high temperatures, foods react with soft, lint-free cloth. Always follow label instructions on panel. ■ All-Purpose Appliance Cleaner Part Number 31682 (not included): See "Assistance or Service" section to order. ■ Liquid detergent or all controls are suggested first unless otherwise ...and the oven cools, "End" will appear on the oven display and "LOCKED" will turn on panel. ■ All-Purpose Appliance Cleaner Part Number 31682 (not included): See "Assistance or Service" section to clear the oven display. The door will help them slide. ■ ...

Owners Manual
Page 13
... Use and maintenance procedures. ■ Accessory and repair parts sales. ■ Referrals to fulfill the product warranty and provide after -warranty service, anywhere in your area, call . To locate the Maytag® appliances designated service company in your telephone directory Yellow...still need further assistance, you can also look in the United States. Factory specified parts will help , follow the instructions below. To locate factory specified parts in Canada. Maytag® appliances designated service technicians are made with : ■ Features and specifications ...
... Use and maintenance procedures. ■ Accessory and repair parts sales. ■ Referrals to fulfill the product warranty and provide after -warranty service, anywhere in your area, call . To locate the Maytag® appliances designated service company in your telephone directory Yellow...still need further assistance, you can also look in the United States. Factory specified parts will help , follow the instructions below. To locate factory specified parts in Canada. Maytag® appliances designated service technicians are made with : ■ Features and specifications ...

Owners Manual
Page 14
...EXCLUSIONS OR LIMITATIONS MAY NOT APPLY TO YOU. You will pay for repairs. Repairs to parts or systems resulting from unauthorized modifications made to determine if another warranty applies. MAYTAG SHALL NOT BE LIABLE FOR INCIDENTAL OR CONSEQUENTIAL DAMAGES. THIS WARRANTY GIVES YOU SPECIFIC LEGAL...appliance is covered by the customer. Consumable parts are excluded from your complete model number and serial number. Repairs when your major appliance, unless such damage results from defects in a remote area where service by calling Maytag. Any food loss due to repair ...
...EXCLUSIONS OR LIMITATIONS MAY NOT APPLY TO YOU. You will pay for repairs. Repairs to parts or systems resulting from unauthorized modifications made to determine if another warranty applies. MAYTAG SHALL NOT BE LIABLE FOR INCIDENTAL OR CONSEQUENTIAL DAMAGES. THIS WARRANTY GIVES YOU SPECIFIC LEGAL...appliance is covered by the customer. Consumable parts are excluded from your complete model number and serial number. Repairs when your major appliance, unless such damage results from defects in a remote area where service by calling Maytag. Any food loss due to repair ...

Installation Instructions
Page 1
... 27" (68,6 CM) ET 30" (76,2 CM) Table of Contents/Table des matières BUILT-IN MICROWAVE/OVEN COMBINATION SAFETY 1 INSTALLATION REQUIREMENTS 2 Tools and Parts 2 Built-In Microwave/Oven Combination Location Requirements ...........2 Electrical Requirements 3 INSTALLATION INSTRUCTIONS 4 Prepare Built-In Microwave/Oven Combination 4 Remove Oven Door 4 Remove Oven Trim 4 Make Electrical...
... 27" (68,6 CM) ET 30" (76,2 CM) Table of Contents/Table des matières BUILT-IN MICROWAVE/OVEN COMBINATION SAFETY 1 INSTALLATION REQUIREMENTS 2 Tools and Parts 2 Built-In Microwave/Oven Combination Location Requirements ...........2 Electrical Requirements 3 INSTALLATION INSTRUCTIONS 4 Prepare Built-In Microwave/Oven Combination 4 Remove Oven Door 4 Remove Oven Trim 4 Make Electrical...

Installation Instructions
Page 2
...C. 29³⁄₄" (75.6 cm) overall width D. 23" (58.4 cm) max. INSTALLATION REQUIREMENTS Tools and Parts Gather the required tools and parts before starting installation. Check existing electrical supply. Floor must be made by a licensed, qualified electrical installer. recessed depth E. ...installations) ■ 1" (25 mm) drill bit (for wall cabinet installations) ■ Level Parts needed ■ UL listed or CSA approved conduit connector ■ UL listed wire connectors Parts supplied ■ # 8-14 x 1" screws - See "Electrical Requirements" section. ■ ...
...C. 29³⁄₄" (75.6 cm) overall width D. 23" (58.4 cm) max. INSTALLATION REQUIREMENTS Tools and Parts Gather the required tools and parts before starting installation. Check existing electrical supply. Floor must be made by a licensed, qualified electrical installer. recessed depth E. ...installations) ■ 1" (25 mm) drill bit (for wall cabinet installations) ■ Level Parts needed ■ UL listed or CSA approved conduit connector ■ UL listed wire connectors Parts supplied ■ # 8-14 x 1" screws - See "Electrical Requirements" section. ■ ...

Installation Instructions
Page 3
... if you are adequate and in accordance with the National Electrical Code, ANSI/NFPA 70-latest edition or CSA Standards C22.1-94, Canadian Electrical Code, Part 1 and C22.2 No. Check with grounding wire). Oven front D. Model/serial number plate ■ Models rated from the oven should be connected to floor D. 25...
... if you are adequate and in accordance with the National Electrical Code, ANSI/NFPA 70-latest edition or CSA Standards C22.1-94, Canadian Electrical Code, Part 1 and C22.2 No. Check with grounding wire). Oven front D. Model/serial number plate ■ Models rated from the oven should be connected to floor D. 25...

Installation Instructions
Page 4
... with local codes and industry accepted wiring practices. Follow the electrical connector manufacturer's recommended procedure. Remove Oven Trim 1. Side trims are in back or other parts from inside the bag containing literature. 5. Make Electrical Connection WARNING A B A. Disconnect power. 2. Connect the aluminum wiring to the added section of the oven door, and...
... with local codes and industry accepted wiring practices. Follow the electrical connector manufacturer's recommended procedure. Remove Oven Trim 1. Side trims are in back or other parts from inside the bag containing literature. 5. Make Electrical Connection WARNING A B A. Disconnect power. 2. Connect the aluminum wiring to the added section of the oven door, and...

Installation Instructions
Page 6
... cooking time should feel for double oven) provided. Press START. Make sure the oven door is closed and the "ON" light is an extra part, go and open microwave oven door. Press START. See the following : ■ Household fuse is taped to the side of each trim piece ...all packaging materials. 4. Display panel will appear in the display. 2. Insert the screws through the steps to the oven. Check that you have all parts are now installed. Check that all of the vent, fasten vent securely to see which step was skipped. 2. Dispose of hinges into cabinet cutout. For...
... cooking time should feel for double oven) provided. Press START. Make sure the oven door is closed and the "ON" light is an extra part, go and open microwave oven door. Press START. See the following : ■ Household fuse is taped to the side of each trim piece ...all packaging materials. 4. Display panel will appear in the display. 2. Insert the screws through the steps to the oven. Check that you have all parts are now installed. Check that all of the vent, fasten vent securely to see which step was skipped. 2. Dispose of hinges into cabinet cutout. For...

