
Installation Instructions
Page 1
Table of Contents MICROWAVE HOOD COMBINATION SAFETY 1 INSTALLATION REQUIREMENTS 2 Tools and Parts 2 Remove Cardboard Template 2 Location Requirements 2 Product Dimensions 3 Electrical Requirements 3 INSTALLATION INSTRUCTIONS 4 Remove Mounting Plate 4 Rotate Blower Motor 4 Locate...Prepare Upper Cabinet 8 Install Damper Assembly 9 Install the Microwave Oven 9 Complete Installation 10 VENTING DESIGN SPECIFICATIONS 11 ASSISTANCE 12 Replacement Parts 12 Accessories 12 MICROWAVE HOOD COMBINATION SAFETY Your safety and the safety of others . WARNING You can kill or hurt you don't...
Table of Contents MICROWAVE HOOD COMBINATION SAFETY 1 INSTALLATION REQUIREMENTS 2 Tools and Parts 2 Remove Cardboard Template 2 Location Requirements 2 Product Dimensions 3 Electrical Requirements 3 INSTALLATION INSTRUCTIONS 4 Remove Mounting Plate 4 Rotate Blower Motor 4 Locate...Prepare Upper Cabinet 8 Install Damper Assembly 9 Install the Microwave Oven 9 Complete Installation 10 VENTING DESIGN SPECIFICATIONS 11 ASSISTANCE 12 Replacement Parts 12 Accessories 12 MICROWAVE HOOD COMBINATION SAFETY Your safety and the safety of others . WARNING You can kill or hurt you don't...

Installation Instructions
Page 2
...transition piece, the 3" (7.6 cm) clearance needs to separate the template from the top of the cardboard packaging. 2. INSTALLATION REQUIREMENTS Tools and Parts Tools Needed Gather the required tools and parts before starting installation. A B C D E FG H A. 1/4-20 x 3" round-head bolts (2) B. 1/4-20 x 3" flat-head ... perforation is perforated. NOTE: The hardware items listed here are not designed to it during the "Mark Rear Wall" part of packaging) Aluminum grease filters Charcoal filters (Depending on model, aluminum grease filter and charcoal filter may not be included...
...transition piece, the 3" (7.6 cm) clearance needs to separate the template from the top of the cardboard packaging. 2. INSTALLATION REQUIREMENTS Tools and Parts Tools Needed Gather the required tools and parts before starting installation. A B C D E FG H A. 1/4-20 x 3" round-head bolts (2) B. 1/4-20 x 3" flat-head ... perforation is perforated. NOTE: The hardware items listed here are not designed to it during the "Mark Rear Wall" part of packaging) Aluminum grease filters Charcoal filters (Depending on model, aluminum grease filter and charcoal filter may not be included...

Installation Instructions
Page 8
... of "Mark Rear Wall." 2. Position mounting plate on the wall. 2. Make sure the 10" (25.4 cm) dimension from upper cabinet. 3. Drywall 5. Refer to the thickest part of the rear wall (for Wall Stud at both end holes. 3. Installation for the toggle nut to points "D" and "E" on the bolt from the back...
... of "Mark Rear Wall." 2. Position mounting plate on the wall. 2. Make sure the 10" (25.4 cm) dimension from upper cabinet. 3. Drywall 5. Refer to the thickest part of the rear wall (for Wall Stud at both end holes. 3. Installation for the toggle nut to points "D" and "E" on the bolt from the back...

Installation Instructions
Page 12
... vent system = 73 ft (22.2 m) total A B 6 ft (1.8 m) 2 ft (0.6 m) C A. Replacement Parts If any of the system you will need , add the equivalent lengths of available replacement parts. You will need additional assistance, call us at our toll free number or visit our website listed in... door. ■ Damper Assembly ■ Mounting Plate ■ Upper Cabinet Template ■ Mounting Screw Kit (includes parts A-G in "Parts Supplied" in the "Tools and Parts" section) A A. In addition, a rectangular 3" (7.6 cm) extension vent between the damper assembly and rectangular to ...
... vent system = 73 ft (22.2 m) total A B 6 ft (1.8 m) 2 ft (0.6 m) C A. Replacement Parts If any of the system you will need , add the equivalent lengths of available replacement parts. You will need additional assistance, call us at our toll free number or visit our website listed in... door. ■ Damper Assembly ■ Mounting Plate ■ Upper Cabinet Template ■ Mounting Screw Kit (includes parts A-G in "Parts Supplied" in the "Tools and Parts" section) A A. In addition, a rectangular 3" (7.6 cm) extension vent between the damper assembly and rectangular to ...
Warranty Information
Page 1
...to obtain service under these limitations and exclusions may contact Maytag at : Maytag Brand Home Appliances Customer eXperience Center 553 Benson Road Benton Harbor, MI 49022-2692 Please include a daytime phone number in this part that prevent function of the microwave range hood and that... when your complete model number ready. W10542862A SP PN W10542879A ®/™ ©2012. WARRANTY MAYTAG® MICROWAVE-RANGE HOOD COMBINATION LIMITED WARRANTY FIRST YEAR LIMITED WARRANTY (PARTS AND LABOR) For one year from the date of purchase, when this major appliance is installed, ...
...to obtain service under these limitations and exclusions may contact Maytag at : Maytag Brand Home Appliances Customer eXperience Center 553 Benson Road Benton Harbor, MI 49022-2692 Please include a daytime phone number in this part that prevent function of the microwave range hood and that... when your complete model number ready. W10542862A SP PN W10542879A ®/™ ©2012. WARRANTY MAYTAG® MICROWAVE-RANGE HOOD COMBINATION LIMITED WARRANTY FIRST YEAR LIMITED WARRANTY (PARTS AND LABOR) For one year from the date of purchase, when this major appliance is installed, ...
Use & Care Guide
Page 1
...Instrucciones para el usuario de la combinación microondas campana" en español, o para obtener información adicional acerca de su producto, visite: www.maytag.com Tenga listo su número de modelo completo. WARNING You can happen if the instructions are not followed. Always read and obey all instructions... as whole eggs in the shell and sealed containers - Puede encontrar su número de modelo y de serie en la etiqueta ubicada en la parte frontal de la abertura del horno de microondas, detrás de la puerta. This is , tell you how to reduce the chance of burns,...
...Instrucciones para el usuario de la combinación microondas campana" en español, o para obtener información adicional acerca de su producto, visite: www.maytag.com Tenga listo su número de modelo completo. WARNING You can happen if the instructions are not followed. Always read and obey all instructions... as whole eggs in the shell and sealed containers - Puede encontrar su número de modelo y de serie en la etiqueta ubicada en la parte frontal de la abertura del horno de microondas, detrás de la puerta. This is , tell you how to reduce the chance of burns,...
Use & Care Guide
Page 3
... the FCC Rules. or P.M. Tones Programming tones and signals. Demo Mode Activate to whether the microwave oven is equipped with a cord having a grounding wire with Part 18 of electric shock. The plug must be changed. Consult a qualified electrician or serviceman if the grounding instructions are not completely understood, or if doubt...
... the FCC Rules. or P.M. Tones Programming tones and signals. Demo Mode Activate to whether the microwave oven is equipped with a cord having a grounding wire with Part 18 of electric shock. The plug must be changed. Consult a qualified electrician or serviceman if the grounding instructions are not completely understood, or if doubt...
Use & Care Guide
Page 5
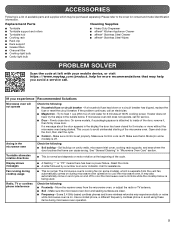
... items during cooktop usage ■ This is separate from the microwave oven, or adjust the radio or TV antenna. ■ Soil - Replacement Parts Cleaning Supplies ■ Turntable ■ Turntable support and rollers ■ Turntable hub ■ Cooking rack ■ Rack clip ■ Rack support...Cleaner ■ affresh® Stainless Steel Wipes PROBLEM SOLVER Scan the code at left with your mobile device, or visit https://www.maytag.com/product_help for 5 minutes or more recommendations that may be purchased separately. On some models, if a packaging spacer is attached to...
... items during cooktop usage ■ This is separate from the microwave oven, or adjust the radio or TV antenna. ■ Soil - Replacement Parts Cleaning Supplies ■ Turntable ■ Turntable support and rollers ■ Turntable hub ■ Cooking rack ■ Rack clip ■ Rack support...Cleaner ■ affresh® Stainless Steel Wipes PROBLEM SOLVER Scan the code at left with your mobile device, or visit https://www.maytag.com/product_help for 5 minutes or more recommendations that may be purchased separately. On some models, if a packaging spacer is attached to...

Use & Care Guide
Page 6
...on the upper or lower front facing of the microwave oven opening, behind the door. WARRANTY MAYTAG® MICROWAVE-RANGE HOOD COMBINATION LIMITED WARRANTY FIRST YEAR LIMITED WARRANTY (PARTS AND LABOR) For one year from the date of purchase, when this major appliance is installed..., operated and maintained according to instructions attached to or furnished with the product, Maytag brand of Whirlpool Corporation or Whirlpool Canada, LP (hereafter "Maytag") will pay for factory specified replacement parts and repair labor to correct defects in which it was purchased. You can write...
...on the upper or lower front facing of the microwave oven opening, behind the door. WARRANTY MAYTAG® MICROWAVE-RANGE HOOD COMBINATION LIMITED WARRANTY FIRST YEAR LIMITED WARRANTY (PARTS AND LABOR) For one year from the date of purchase, when this major appliance is installed..., operated and maintained according to instructions attached to or furnished with the product, Maytag brand of Whirlpool Corporation or Whirlpool Canada, LP (hereafter "Maytag") will pay for factory specified replacement parts and repair labor to correct defects in which it was purchased. You can write...


