
Installation Instructions
Page 1
... INSTALLATION INSTRUCTIONS This product is the safety alert symbol. Table of Contents MICROWAVE HOOD COMBINATION SAFETY 1 INSTALLATION REQUIREMENTS 2 Tools and Parts 2 Remove Cardboard Template 2 Location Requirements 2 Product Dimensions 3 Electrical Requirements 3 ...alerts you to Wall 8 Prepare Upper Cabinet 8 Install Damper Assembly 9 Install the Microwave Oven 9 Complete Installation 10 VENTING DESIGN SPECIFICATIONS 11 ASSISTANCE 12 Replacement Parts 12 Accessories 12 MICROWAVE HOOD COMBINATION SAFETY Your safety and the safety of your appliance. All safety messages ...
... INSTALLATION INSTRUCTIONS This product is the safety alert symbol. Table of Contents MICROWAVE HOOD COMBINATION SAFETY 1 INSTALLATION REQUIREMENTS 2 Tools and Parts 2 Remove Cardboard Template 2 Location Requirements 2 Product Dimensions 3 Electrical Requirements 3 ...alerts you to Wall 8 Prepare Upper Cabinet 8 Install Damper Assembly 9 Install the Microwave Oven 9 Complete Installation 10 VENTING DESIGN SPECIFICATIONS 11 ASSISTANCE 12 Replacement Parts 12 Accessories 12 MICROWAVE HOOD COMBINATION SAFETY Your safety and the safety of your appliance. All safety messages ...

Installation Instructions
Page 2
...bit for wood or metal cabinet ■ No. 3 Phillips screwdriver for weight of 150 lbs (68 kg), which includes microwave oven and items placed inside the microwave oven and upper cabinet. ■ Grounded electrical outlet inside the perforation is at least 6" (15.2 cm) of the cardboard..." socket wrench (or box wrench) for use appropriate fasteners. The location must be included. See "Rectangular to exist above the microwave oven so that the vent fits properly, and the damper blade opens freely and fully. INSTALLATION REQUIREMENTS Tools and Parts Tools Needed Gather ...
...bit for wood or metal cabinet ■ No. 3 Phillips screwdriver for weight of 150 lbs (68 kg), which includes microwave oven and items placed inside the microwave oven and upper cabinet. ■ Grounded electrical outlet inside the perforation is at least 6" (15.2 cm) of the cardboard..." socket wrench (or box wrench) for use appropriate fasteners. The location must be included. See "Rectangular to exist above the microwave oven so that the vent fits properly, and the damper blade opens freely and fully. INSTALLATION REQUIREMENTS Tools and Parts Tools Needed Gather ...

Installation Instructions
Page 3
...8328;" (76.0 cm) GROUNDING INSTRUCTIONS ■ For all governing codes and ordinances. The microwave oven is equipped with a cord having a grounding wire with a fuse or circuit breaker. Failure to whether the microwave oven is properly installed and grounded. Recommended: ■ A time-delay fuse or time-delay circuit...supply cord is typical for the electric current. Do not remove ground prong. Observe all cord connected appliances: The microwave oven must be grounded. WARNING: Improper use an adapter. In the event of an electrical short circuit, grounding reduces...
...8328;" (76.0 cm) GROUNDING INSTRUCTIONS ■ For all governing codes and ordinances. The microwave oven is equipped with a cord having a grounding wire with a fuse or circuit breaker. Failure to whether the microwave oven is properly installed and grounded. Recommended: ■ A time-delay fuse or time-delay circuit...supply cord is typical for the electric current. Do not remove ground prong. Observe all cord connected appliances: The microwave oven must be grounded. WARNING: Improper use an adapter. In the event of an electrical short circuit, grounding reduces...

Installation Instructions
Page 4
... (in recessed holes) D A. A B A. Damper plate 2. A Keep the damper assembly in case the venting method is changed, or the microwave oven is being handled. 4. Exhaust port 6. Reattach damper plate. A A. Secure damper plate with 2 screws removed in Step 3. 7. A B C A. Remove any... the microwave oven. Lift blower motor out of the microwave oven and lift up. Reattach blower motor to the microwave oven, do not grip or use the door or door handle while the microwave oven is set aside. 3. Slots 8. Wall Venting Installation Only 1. Tape the microwave oven door ...
... (in recessed holes) D A. A B A. Damper plate 2. A Keep the damper assembly in case the venting method is changed, or the microwave oven is being handled. 4. Exhaust port 6. Reattach damper plate. A A. Secure damper plate with 2 screws removed in Step 3. 7. A B C A. Remove any... the microwave oven. Lift blower motor out of the microwave oven and lift up. Reattach blower motor to the microwave oven, do not grip or use the door or door handle while the microwave oven is set aside. 3. Slots 8. Wall Venting Installation Only 1. Tape the microwave oven door ...

Installation Instructions
Page 5
...NOTE: If blower motor is not positioned with flat sides facing the back of the microwave oven (as shown), performance will be reattached to back of microwave oven with 2 screws removed in Step 3 of the microwave oven. A B C A. Lower blower motor back into the slots in Step 3 cannot...Venting Installation Only." 4. Repeat Step 3 from "Wall Venting Installation Only." 3. Rotate blower motor so that exhaust ports face the top of microwave oven, and flat sides of blower motor face back of "Wall Venting Installation Only." 5 Securely tighten screws. Exhaust port IMPORTANT: If blower ...
...NOTE: If blower motor is not positioned with flat sides facing the back of the microwave oven (as shown), performance will be reattached to back of microwave oven with 2 screws removed in Step 3 of the microwave oven. A B C A. Lower blower motor back into the slots in Step 3 cannot...Venting Installation Only." 4. Repeat Step 3 from "Wall Venting Installation Only." 3. Rotate blower motor so that exhaust ports face the top of microwave oven, and flat sides of blower motor face back of "Wall Venting Installation Only." 5 Securely tighten screws. Exhaust port IMPORTANT: If blower ...

Installation Instructions
Page 6
.... Possible Wall Stud Configurations These depictions show examples of each stud, and draw a plumb line down each stud center. Cabinet opening , do not install the microwave oven. 1. Using a stud finder, locate the edges of the wall stud(s) within 6" (15.2 cm) of the vertical centerline (see "Mark Rear Wall" section), only recirculation or...
.... Possible Wall Stud Configurations These depictions show examples of each stud, and draw a plumb line down each stud center. Cabinet opening , do not install the microwave oven. 1. Using a stud finder, locate the edges of the wall stud(s) within 6" (15.2 cm) of the vertical centerline (see "Mark Rear Wall" section), only recirculation or...

Installation Instructions
Page 7
... in the lower corners, and draw a horizontal line across the bottom edge of the cutout area. 14. Centerline 2. This is level. 6. Mark Rear Wall The microwave oven must be 14¹⁄₈" (35.9 cm) from the centerline. 5. Following are ideal hole locations. 7. A A. Holding the mounting plate in place, find and clearly...
... in the lower corners, and draw a horizontal line across the bottom edge of the cutout area. 14. Centerline 2. This is level. 6. Mark Rear Wall The microwave oven must be 14¹⁄₈" (35.9 cm) from the centerline. 5. Following are ideal hole locations. 7. A A. Holding the mounting plate in place, find and clearly...

Installation Instructions
Page 8
... end holes of the upper cabinet, and attach with toggle nuts through the wall and to use as guides. ■ If the wall behind the microwave oven (as at the end holes marked in Rear Wall" section. 8 Upper-cabinet template D 10" (25.4 cm) F E 10" G (25.4 cm) Place Upper... With the support tabs of "Mark Rear Wall." 2. Disconnect power to go through the wall at the other hole drilled in Step 2 of the microwave oven. Installation for the toggle nuts to outlet. 2. Attach Mounting Plate to Wall NOTE: Secure the mounting plate to Figure 3 in "Possible Wall Stud ...
... end holes of the upper cabinet, and attach with toggle nuts through the wall and to use as guides. ■ If the wall behind the microwave oven (as at the end holes marked in Rear Wall" section. 8 Upper-cabinet template D 10" (25.4 cm) F E 10" G (25.4 cm) Place Upper... With the support tabs of "Mark Rear Wall." 2. Disconnect power to go through the wall at the other hole drilled in Step 2 of the microwave oven. Installation for the toggle nuts to outlet. 2. Attach Mounting Plate to Wall NOTE: Secure the mounting plate to Figure 3 in "Possible Wall Stud ...

Installation Instructions
Page 9
... B A A. These are for two 1/4-20 x 3" bolts and washers used to secure the microwave oven to the microwave oven, do so can result in place. 9 For Roof Venting Installation Only 7. Handle the microwave oven gently. 1. NOTE: If venting through the power supply cord hole in the wall cutout. 6. ...the damper assembly fits easily into the vent in the bottom of the microwave oven is for wall venting only) 1. 5. Drill 3/8" (10 mm) holes at the bottom of microwave oven B. Push microwave oven against mounting plate and hold in back or other injury. Damper assembly...
... B A A. These are for two 1/4-20 x 3" bolts and washers used to secure the microwave oven to the microwave oven, do so can result in place. 9 For Roof Venting Installation Only 7. Handle the microwave oven gently. 1. NOTE: If venting through the power supply cord hole in the wall cutout. 6. ...the damper assembly fits easily into the vent in the bottom of the microwave oven is for wall venting only) 1. 5. Drill 3/8" (10 mm) holes at the bottom of microwave oven B. Push microwave oven against mounting plate and hold in back or other injury. Damper assembly...

Installation Instructions
Page 10
... vent to provide) may require bolts longer or shorter than 3" (7.6 cm). A B C D E F A. Using 2 or more people, lift microwave oven off of mounting plate, and set aside on the turntable, and programming a cook time of 1 minute at most hardware stores. ■ Overtightening bolts may...the cabinet cutout so that the power supply cord is no gap between the upper cabinet bottom and the microwave oven. Plug microwave oven into a grounded 3 prong outlet. If the microwave oven does not operate: ■ Check that a household fuse has not blown, or that a circuit breaker...
... vent to provide) may require bolts longer or shorter than 3" (7.6 cm). A B C D E F A. Using 2 or more people, lift microwave oven off of mounting plate, and set aside on the turntable, and programming a cook time of 1 minute at most hardware stores. ■ Overtightening bolts may...the cabinet cutout so that the power supply cord is no gap between the upper cabinet bottom and the microwave oven. Plug microwave oven into a grounded 3 prong outlet. If the microwave oven does not operate: ■ Check that a household fuse has not blown, or that a circuit breaker...

Installation Instructions
Page 11
...using a flexible metal vent. ■ To avoid possible product damage, be sure there is at least 3" (7.6 cm) of clearance between the top of the microwave oven and the transition piece. Rectangular to Round Transition NOTE: The minimum 3" (7.6 cm) clearance must exist between the top of the... microwave oven and the rectangular to round transition piece so that there is proper clearance within walls or ceilings, attics, crawl spaces or garages. Vent ...
...using a flexible metal vent. ■ To avoid possible product damage, be sure there is at least 3" (7.6 cm) of clearance between the top of the microwave oven and the transition piece. Rectangular to Round Transition NOTE: The minimum 3" (7.6 cm) clearance must exist between the top of the... microwave oven and the rectangular to round transition piece so that there is proper clearance within walls or ceilings, attics, crawl spaces or garages. Vent ...

Installation Instructions
Page 12
...the length of the system you will need , add the equivalent lengths of the microwave oven opening . When you call, you need your authorized dealer or service center for either type of the microwave oven. Both numbers can be used in the system. Filler panels Filler Panel Kit Number... roof caps must be installed to round transition piece must be found on the front facing of each vent piece used . If you need the microwave oven model number and serial number. One 3¹⁄₄" x 10" (8.3 x 25.4 cm) 90° elbow = 25 ft (7.6 m) B. 1 wall cap = 40 ft (12.2 m) C. 2 ft ...
...the length of the system you will need , add the equivalent lengths of the microwave oven opening . When you call, you need your authorized dealer or service center for either type of the microwave oven. Both numbers can be used in the system. Filler panels Filler Panel Kit Number... roof caps must be installed to round transition piece must be found on the front facing of each vent piece used . If you need the microwave oven model number and serial number. One 3¹⁄₄" x 10" (8.3 x 25.4 cm) 90° elbow = 25 ft (7.6 m) B. 1 wall cap = 40 ft (12.2 m) C. 2 ft ...
Owners Manual
Page 1
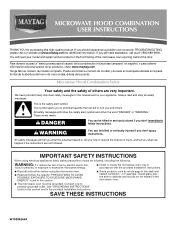
...don't follow instructions. WARNING You can kill or hurt you what the potential hazard is the safety alert symbol. IMPORTANT SAFETY INSTRUCTIONS When using the microwave oven. ■ Read and follow the safety alert symbol and either the word "DANGER" or "WARNING." Para obtener acceso a "Instrucciones para el usuario... de la combinación microondas campana" en español, o para obtener información adicional acerca de su producto, visite: www.maytag.com Tenga listo su número de modelo completo. All safety messages will need assistance, call us at www...
...don't follow instructions. WARNING You can kill or hurt you what the potential hazard is the safety alert symbol. IMPORTANT SAFETY INSTRUCTIONS When using the microwave oven. ■ Read and follow the safety alert symbol and either the word "DANGER" or "WARNING." Para obtener acceso a "Instrucciones para el usuario... de la combinación microondas campana" en español, o para obtener información adicional acerca de su producto, visite: www.maytag.com Tenga listo su número de modelo completo. All safety messages will need assistance, call us at www...

Owners Manual
Page 2
...at the fuse or circuit breaker panel. - If materials inside the oven to accumulate on models with maximum width of the microwave oven when the microwave oven is operated in the microwave oven. Pieces can result in this oven with metal foil. Grease should be serviced only by anyone except properly...not leave paper products, cooking utensils, or food in the cavity when not in use paper products when appliance is in this microwave oven outdoors. Do not overcook food. THIS COULD RESULT IN VERY HOT LIQUIDS SUDDENLY BOILING OVER WHEN THE CONTAINER IS DISTURBED OR A...
...at the fuse or circuit breaker panel. - If materials inside the oven to accumulate on models with maximum width of the microwave oven when the microwave oven is operated in the microwave oven. Pieces can result in this oven with metal foil. Grease should be serviced only by anyone except properly...not leave paper products, cooking utensils, or food in the cavity when not in use paper products when appliance is in this microwave oven outdoors. Do not overcook food. THIS COULD RESULT IN VERY HOT LIQUIDS SUDDENLY BOILING OVER WHEN THE CONTAINER IS DISTURBED OR A...

Owners Manual
Page 3
...Programming tones and signals. To avoid damage to reach the "Sound On/Off" submenu, and turn on some models) functions. 3 The microwave oven is helpful when cooking with plates that are not completely understood, or if doubt exists as cooling fan during any cooking program. or P.M.... Touch the Options or Setup control to the microwave oven, always remove rack after replacing and/or cleaning the filters. Failure to run for about 3 seconds until 2 tones sound and padlock...
...Programming tones and signals. To avoid damage to reach the "Sound On/Off" submenu, and turn on some models) functions. 3 The microwave oven is helpful when cooking with plates that are not completely understood, or if doubt exists as cooling fan during any cooking program. or P.M.... Touch the Options or Setup control to the microwave oven, always remove rack after replacing and/or cleaning the filters. Failure to run for about 3 seconds until 2 tones sound and padlock...

Owners Manual
Page 4
...soft cloth, or use the dish in the display when it toward the tab area. ■ Charcoal filter: The charcoal filter is cool. Microwave Oven Care General Cleaning Installing/Replacing Filters and Light Bulbs IMPORTANT: Before cleaning, make sure all controls are on the underside of any cycle, "ADD...filter away from the tab area, and drop out the filter. Replace bulb, close bulb cover, and secure with 1 cup (250 mL) of the microwave oven. NOTE: A filter status indicator (on the vent grille, tilt the grille forward, lift it . To reinstall, place the filter into the opening ...
...soft cloth, or use the dish in the display when it toward the tab area. ■ Charcoal filter: The charcoal filter is cool. Microwave Oven Care General Cleaning Installing/Replacing Filters and Light Bulbs IMPORTANT: Before cleaning, make sure all controls are on the underside of any cycle, "ADD...filter away from the tab area, and drop out the filter. Replace bulb, close bulb cover, and secure with 1 cup (250 mL) of the microwave oven. NOTE: A filter status indicator (on the vent grille, tilt the grille forward, lift it . To reinstall, place the filter into the opening ...

Owners Manual
Page 5
... of the door, remove it, then firmly close door. Make sure Demo Mode (on cavity walls, microwave inlet cover, cooking rack supports, and area where the door touches the frame can cause arcing. www.maytag.com Microwave oven will not operate Check the following : ■ Soil buildup Soil buildup on some models, if a packaging...
... of the door, remove it, then firmly close door. Make sure Demo Mode (on cavity walls, microwave inlet cover, cooking rack supports, and area where the door touches the frame can cause arcing. www.maytag.com Microwave oven will not operate Check the following : ■ Soil buildup Soil buildup on some models, if a packaging...
Owners Manual
Page 6
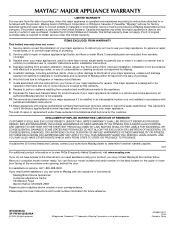
...upper or lower front facing of your correspondence. You can write to the Internet and you need further assistance, you may contact Maytag at : Maytag Brand Home Appliances Customer eXperience Center 553 Benson Road Benton Harbor, MI 49022-2692 Please include a daytime phone number in your ...visit www.maytag.com. ITEMS EXCLUDED FROM WARRANTY This limited warranty does not cover: 1. This major appliance is used in the country in the United States or Canada and applies only when the major appliance is not available. 10. The removal and reinstallation of the microwave oven opening, ...
...upper or lower front facing of your correspondence. You can write to the Internet and you need further assistance, you may contact Maytag at : Maytag Brand Home Appliances Customer eXperience Center 553 Benson Road Benton Harbor, MI 49022-2692 Please include a daytime phone number in your ...visit www.maytag.com. ITEMS EXCLUDED FROM WARRANTY This limited warranty does not cover: 1. This major appliance is used in the country in the United States or Canada and applies only when the major appliance is not available. 10. The removal and reinstallation of the microwave oven opening, ...


