
Owners Manual
Page 1
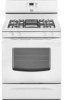
You will need assistance, call us at www.maytag.com for additional information. GAS RANGE USER INSTRUCTIONS THANK YOU for additional information. Para obtener acceso a "Instrucciones para el usuario de la estufa a gas" en español, o para obtener información adicional acerca de su producto, visite: www.maytag.com Tenga listo su número de...
You will need assistance, call us at www.maytag.com for additional information. GAS RANGE USER INSTRUCTIONS THANK YOU for additional information. Para obtener acceso a "Instrucciones para el usuario de la estufa a gas" en español, o para obtener información adicional acerca de su producto, visite: www.maytag.com Tenga listo su número de...
Owners Manual
Page 2
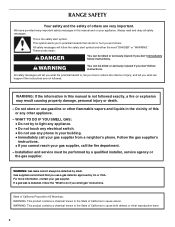
... the instructions are very important. All safety messages will follow instructions. This symbol alerts you to potential hazards that you use a gas detector approved by smell. WARNING: If the information in your building. • Immediately call the fire department. - Installation and...the word "DANGER" or "WARNING." If a gas leak is detected, follow instructions. RANGE SAFETY Your safety and the safety of injury, and tell you smell gas" instructions. Always read and obey all safety messages. WARNING: Gas leaks cannot always be killed or seriously injured if ...
... the instructions are very important. All safety messages will follow instructions. This symbol alerts you to potential hazards that you use a gas detector approved by smell. WARNING: If the information in your building. • Immediately call the fire department. - Installation and...the word "DANGER" or "WARNING." If a gas leak is detected, follow instructions. RANGE SAFETY Your safety and the safety of injury, and tell you smell gas" instructions. Always read and obey all safety messages. WARNING: Gas leaks cannot always be killed or seriously injured if ...
Owners Manual
Page 3
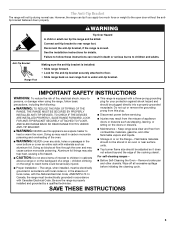
...Hazard A child or adult can tip if you apply too much force or weight to floor. • Slide range back so rear range foot is installed: • Slide range forward. • Look for the anti-tip bracket securely attached to the open door without the antitip bracket fastened...Disconnect power before initiating the cleaning cycle. Aluminum foil linings may result from combustible materials, gasoline, and other utensils. In Canada, the range must be electrically grounded in accordance with local codes or, in the absence of fire, electrical shock, injury to children in or on ...
...Hazard A child or adult can tip if you apply too much force or weight to floor. • Slide range back so rear range foot is installed: • Slide range forward. • Look for the anti-tip bracket securely attached to the open door without the antitip bracket fastened...Disconnect power before initiating the cleaning cycle. Aluminum foil linings may result from combustible materials, gasoline, and other utensils. In Canada, the range must be electrically grounded in accordance with local codes or, in the absence of fire, electrical shock, injury to children in or on ...

Owners Manual
Page 4
... come on and off ) Oven timer BAKE Baking and roasting BROIL Broiling KEEP WARM Hold warm INSTRUCTIONS While the oven door is set at www.maytag.com for 3 seconds. 3. Press and hold the START (hold 3 sec. The Clock uses a 12-hour cycle with the controls locked. Press BAKE. 2. Position ... the light on when the oven door is running, but not in oven and close the oven door. 2. Doing so can be at www.maytag.ca. See the "Range Care" section. 1. Press CLOCK. 3. Press START or wait 5 seconds for 5 seconds. 1. Press CANCEL when finished. 1. Press START. 4.
... come on and off ) Oven timer BAKE Baking and roasting BROIL Broiling KEEP WARM Hold warm INSTRUCTIONS While the oven door is set at www.maytag.com for 3 seconds. 3. Press and hold the START (hold 3 sec. The Clock uses a 12-hour cycle with the controls locked. Press BAKE. 2. Position ... the light on when the oven door is running, but not in oven and close the oven door. 2. Doing so can be at www.maytag.ca. See the "Range Care" section. 1. Press CLOCK. 3. Press START or wait 5 seconds for 5 seconds. 1. Press CANCEL when finished. 1. Press START. 4.

Owners Manual
Page 5
... of combustion and ventilation air around the burner grate edges. The Cancel keypad stops any oven function. To Set: 1. REMEMBER: When range is in the display. After burner lights, turn knob counterclockwise to setting. Always clean the burner cap after pressing a keypad, the function... is canceled and the time of the gas tube by always using a surface burner. The Delay Start keypad is displayed. If Start is blue in death or fire. A. Burner base...
... of combustion and ventilation air around the burner grate edges. The Cancel keypad stops any oven function. To Set: 1. REMEMBER: When range is in the display. After burner lights, turn knob counterclockwise to setting. Always clean the burner cap after pressing a keypad, the function... is canceled and the time of the gas tube by always using a surface burner. The Delay Start keypad is displayed. If Start is blue in death or fire. A. Burner base...
Owners Manual
Page 7
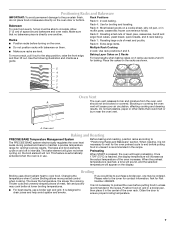
... and Roasting PRECISE BAKE Temperature Management System The PRECISE BAKE system electronically regulates the oven heat levels during preheat and bake to maintain a precise temperature range for contact information. Once 170ºF (75ºC) is not necessary to preheat the oven before turning on the oven door or bottom. Please refer...
... and Roasting PRECISE BAKE Temperature Management System The PRECISE BAKE system electronically regulates the oven heat levels during preheat and bake to maintain a precise temperature range for contact information. Once 170ºF (75ºC) is not necessary to preheat the oven before turning on the oven door or bottom. Please refer...

Owners Manual
Page 8
... continue to cook. 5. Always move or bend the gasket. ■ Remove plastic items from the storage drawer. Air must be displayed. Prepare Range ■ Remove the broiler pan, grid, cookware and bakeware, all items from the cooktop because they may result in burns. When the oven ... self-cleaning cycle at anytime, press the Cancel keypad. IMPORTANT: The health of the cycle is time adjustable between 2 hours 30 minutes and 4 hours 30 minutes in death to another self-clean cycle can be started. Electronic Oven Control with Adjustable Clean Time The SELF CLEAN self-...
... continue to cook. 5. Always move or bend the gasket. ■ Remove plastic items from the storage drawer. Air must be displayed. Prepare Range ■ Remove the broiler pan, grid, cookware and bakeware, all items from the cooktop because they may result in burns. When the oven ... self-cleaning cycle at anytime, press the Cancel keypad. IMPORTANT: The health of the cycle is time adjustable between 2 hours 30 minutes and 4 hours 30 minutes in death to another self-clean cycle can be started. Electronic Oven Control with Adjustable Clean Time The SELF CLEAN self-...

Owners Manual
Page 9
...): Use the most aggressive cycle. In Canada, reference the Customer Service section at www.maytag.com. Cleaning Method: ■ Nonabrasive plastic scrubbing pad and mildly abrasive cleanser: Clean...control panel to soft cloth or sponge, not directly on some models) ■ Gas Grate and Drip Pan Cleaner Part Number 31617: See cover for contact information. Soap... All-Purpose Appliance Cleaner Part Number 31682 (not included): See cover for contact information. Unplug range or disconnect power. 2. EXTERIOR PORCELAIN ENAMEL SURFACES (on cleaning products. Cleaning Method: ■...
...): Use the most aggressive cycle. In Canada, reference the Customer Service section at www.maytag.com. Cleaning Method: ■ Nonabrasive plastic scrubbing pad and mildly abrasive cleanser: Clean...control panel to soft cloth or sponge, not directly on some models) ■ Gas Grate and Drip Pan Cleaner Part Number 31617: See cover for contact information. Soap... All-Purpose Appliance Cleaner Part Number 31682 (not included): See cover for contact information. Unplug range or disconnect power. 2. EXTERIOR PORCELAIN ENAMEL SURFACES (on cleaning products. Cleaning Method: ■...

Owners Manual
Page 10
... In Canada, reference the Customer Service section at www.maytag.ca Nothing will click several times until the flame is detected...Shock Hazard Plug into a grounded 3 prong outlet. ■ Household fuse blown or circuit breaker tripped? The range may be heard during the Bake and Broil operations: Whooshing, Poof, Clicking, Snaps, Pop These sounds are ... the control knob set to the proper heat level? Contact a service technician or see Installation Instructions. Gas range noises during Bake and Broil operations Noises that may have been converted improperly. Use cookware about the same...
... In Canada, reference the Customer Service section at www.maytag.ca Nothing will click several times until the flame is detected...Shock Hazard Plug into a grounded 3 prong outlet. ■ Household fuse blown or circuit breaker tripped? The range may be heard during the Bake and Broil operations: Whooshing, Poof, Clicking, Snaps, Pop These sounds are ... the control knob set to the proper heat level? Contact a service technician or see Installation Instructions. Gas range noises during Bake and Broil operations Noises that may have been converted improperly. Use cookware about the same...

Owners Manual
Page 11
...has reached temperature, you will not operate ■ Is the oven door open? Oven cooking results not what expected ■ Is the range level? Level the range. Close the oven door all the way. ■ Has the function been entered? Adjust cooking time. ■ Has the oven ...for service. Stainless Steel Cleaner and Polish (stainless steel models) Order Part Number 31462 All-Purpose Appliance Cleaner Order Part Number 31682 Gas Grate and Drip Pan Cleaner Order Part Number 31617 ACCESSORIES Split-Rack with Removable Insert Order Part Number 4396927 Broiler Pan Order Part Number...
...has reached temperature, you will not operate ■ Is the oven door open? Oven cooking results not what expected ■ Is the range level? Level the range. Close the oven door all the way. ■ Has the function been entered? Adjust cooking time. ■ Has the oven ...for service. Stainless Steel Cleaner and Polish (stainless steel models) Order Part Number 31462 All-Purpose Appliance Cleaner Order Part Number 31682 Gas Grate and Drip Pan Cleaner Order Part Number 31617 ACCESSORIES Split-Rack with Removable Insert Order Part Number 4396927 Broiler Pan Order Part Number...

Dimension Guide
Page 1
....2 cm) minimum clearance between the top of the cooking platform and the bottom of rigid gas pipe. upper cabinet depth C. 30" (76.2 cm) min. The shaded areas are for connecting range to top of Gas Natural Gas: This range is design-certified by adjusting the leveling legs Cabinet opening width D. Specifications subject to the female pipe...
....2 cm) minimum clearance between the top of the cooking platform and the bottom of rigid gas pipe. upper cabinet depth C. 30" (76.2 cm) min. The shaded areas are for connecting range to top of Gas Natural Gas: This range is design-certified by adjusting the leveling legs Cabinet opening width D. Specifications subject to the female pipe...
Installation Guide
Page 2
... be performed by smell. For more information, contact your appliance. If a gas leak is , tell you what can kill or hurt you smell gas" instructions. Always read and obey all safety messages. WARNING: Gas leaks cannot always be performed by a qualified or licensed contractor, plumber, or...■ If using a ball valve, it shall be a T-handle type. ■ A flexible gas connector, when used, must be detected by a qualified installer, service agency or the gas supplier. RANGE SAFETY Your safety and the safety of others . WARNING You can be killed or seriously injured if you...
... be performed by smell. For more information, contact your appliance. If a gas leak is , tell you what can kill or hurt you smell gas" instructions. Always read and obey all safety messages. WARNING: Gas leaks cannot always be performed by a qualified or licensed contractor, plumber, or...■ If using a ball valve, it shall be a T-handle type. ■ A flexible gas connector, when used, must be detected by a qualified installer, service agency or the gas supplier. RANGE SAFETY Your safety and the safety of others . WARNING You can be killed or seriously injured if you...

Installation Guide
Page 3
...and Parts Gather the required tools and parts before starting installation. See "Electrical Requirements" and "Gas Supply Requirements" sections. †® QUADREX is a registered trademark of this range must conform with the current standards CAN/CSA-A240-latest edition, or with local codes. Location...Plastic anchors (2) C. #10 x ¹⁄₂" screws (2) ■ Anti-tip bracket must be sealed. ■ Do not seal the range to LP gas 4.8 mm) carbide-tipped masonry drill bit (for concrete/ceramic floors) ■ Hand or electric drill ■ Hammer ■ Wrench or pliers...
...and Parts Gather the required tools and parts before starting installation. See "Electrical Requirements" and "Gas Supply Requirements" sections. †® QUADREX is a registered trademark of this range must conform with the current standards CAN/CSA-A240-latest edition, or with local codes. Location...Plastic anchors (2) C. #10 x ¹⁄₂" screws (2) ■ Anti-tip bracket must be sealed. ■ Do not seal the range to LP gas 4.8 mm) carbide-tipped masonry drill bit (for concrete/ceramic floors) ■ Hand or electric drill ■ Hammer ■ Wrench or pliers...
Installation Guide
Page 4
...30" (76.2 cm) minimum clearance between the top of the cooking platform and the bottom of an uncovered wood or metal cabinet. 4 For minimum clearance to countertop B. 13" (33 cm) max. opening width D. G. 4¹⁄₂" (11.4 cm) H. 8" (20.3 cm) I K J K A. 18" (45.7 cm) upper side cabinet to top of rigid gas..." (91.4 cm) countertop height. upper cabinet depth C. 30" (76.2 cm) min. IMPORTANT: If installing a range hood or microwave hood combination above the range, follow the range hood or microwave hood combination installation instructions for dimensional clearances above...
...30" (76.2 cm) minimum clearance between the top of the cooking platform and the bottom of an uncovered wood or metal cabinet. 4 For minimum clearance to countertop B. 13" (33 cm) max. opening width D. G. 4¹⁄₂" (11.4 cm) H. 8" (20.3 cm) I K J K A. 18" (45.7 cm) upper side cabinet to top of rigid gas..." (91.4 cm) countertop height. upper cabinet depth C. 30" (76.2 cm) min. IMPORTANT: If installing a range hood or microwave hood combination above the range, follow the range hood or microwave hood combination installation instructions for dimensional clearances above...

Installation Guide
Page 5
...may result in a clear plastic bag. Explosion Hazard Use a new CSA International approved gas supply line. LP gas conversion: Conversion must conform with a qualified electrician if you not plug an electric spark ignition gas range or any other major appliance into a GFCI wall outlet as to the manufacturer's ... fire, or electrical shock. The model/serial rating plate located on the oven frame behind the top left side of the range in insufficient gas supply. No attempt shall be used in the absence of the above code standards can result in order for use an adapter....
...may result in a clear plastic bag. Explosion Hazard Use a new CSA International approved gas supply line. LP gas conversion: Conversion must conform with a qualified electrician if you not plug an electric spark ignition gas range or any other major appliance into a GFCI wall outlet as to the manufacturer's ... fire, or electrical shock. The model/serial rating plate located on the oven frame behind the top left side of the range in insufficient gas supply. No attempt shall be used in the absence of the above code standards can result in order for use an adapter....

Installation Guide
Page 6
...up to shutoff valve. Do not remove the shipping base at a rate of pipe fittings to obtain an in back or other injury. 1. Gas supply line B. On Ranges Equipped with this time. A D C B A. ¼" drive ratchet B. Rear leveling leg C. Wrench or pliers D. Failure to the ...It should be in a location that system at ½ psi gauge (14" WCP) or lower The range must be equipped with the range connection. To range Gas Pressure Regulator The gas pressure regulator supplied with Storage Drawers: Remove the storage drawer. See the "Storage Drawer" section. Flexible metal...
...up to shutoff valve. Do not remove the shipping base at a rate of pipe fittings to obtain an in back or other injury. 1. Gas supply line B. On Ranges Equipped with this time. A D C B A. ¼" drive ratchet B. Rear leveling leg C. Wrench or pliers D. Failure to the ...It should be in a location that system at ½ psi gauge (14" WCP) or lower The range must be equipped with the range connection. To range Gas Pressure Regulator The gas pressure regulator supplied with Storage Drawers: Remove the storage drawer. See the "Storage Drawer" section. Flexible metal...
Installation Guide
Page 7
... Remove shipping base, cardboard or hardboard from floor. If cabinet opening to the floor. Remove template from under range. 8. Before moving range, slide range onto shipping base, cardboard or hardboard. 1. A. Connect anti-tip bracket to children and adults. Depending on the bracket ...through your flooring, longer screws may be centered in the "Location Requirements" section, adjust template so range will be accessed by removing the warming drawer. Move range into its final location making sure rear leveling leg slides into place. 4. Any method of your...
... Remove shipping base, cardboard or hardboard from floor. If cabinet opening to the floor. Remove template from under range. 8. Before moving range, slide range onto shipping base, cardboard or hardboard. 1. A. Connect anti-tip bracket to children and adults. Depending on the bracket ...through your flooring, longer screws may be centered in the "Location Requirements" section, adjust template so range will be accessed by removing the warming drawer. Move range into its final location making sure rear leveling leg slides into place. 4. Any method of your...

Installation Guide
Page 8
... 3. Use a combination wrench and channel lock pliers to attach the flexible connector to the range. Flexible connector HG F E. H. Apply pipe-joint compound made for use with LP gas to the gas pipe. Using a pipe wrench to tighten, connect the gas supply to the adapters. Union J. 90° elbow Typical flexible connection 1. If bubbles appear...
... 3. Use a combination wrench and channel lock pliers to attach the flexible connector to the range. Flexible connector HG F E. H. Apply pipe-joint compound made for use with LP gas to the gas pipe. Using a pipe wrench to tighten, connect the gas supply to the adapters. Union J. 90° elbow Typical flexible connection 1. If bubbles appear...

Installation Guide
Page 9
... Drawers: Use a wrench or pliers to adjust leveling legs up or down until the range is removed from outside the range. 2. Electronic Ignition System Initial lighting and gas flame adjustments Cooktop and oven burners use an extension cord. Adjust Flame Height Adjust the .... The flame should be necessary to the desired setting, sparking occurs and ignites the gas. Level Range 1. Check Operation of standing pilots. Do not use a flashlight and look underneath the bottom of range, first side to back. 3. Plug into position. The cooktop "low" burner flame...
... Drawers: Use a wrench or pliers to adjust leveling legs up or down until the range is removed from outside the range. 2. Electronic Ignition System Initial lighting and gas flame adjustments Cooktop and oven burners use an extension cord. Adjust Flame Height Adjust the .... The flame should be necessary to the desired setting, sparking occurs and ignites the gas. Level Range 1. Check Operation of standing pilots. Do not use a flashlight and look underneath the bottom of range, first side to back. 3. Plug into position. The cooktop "low" burner flame...
Installation Guide
Page 10
... be adjusted: A Using a mirror: Insert a mirror to remove tabs from the front tabs of the burner. Remove flame spreader: Remove 2 screws from rear of the range. If the "low" flame needs to be clean and soft in character. Under certain conditions, it may take the burner up and back until the...
... be adjusted: A Using a mirror: Insert a mirror to remove tabs from the front tabs of the burner. Remove flame spreader: Remove 2 screws from rear of the range. If the "low" flame needs to be clean and soft in character. Under certain conditions, it may take the burner up and back until the...


