Use and Care Guide
Page 1
... d'utilisation et d'entretien 24 Guia de uso y cuidado 50 @2006 Maytag Appliances Sales Co All rights reserved. MA A(] Nlaytag Gas Double Oven Range Precision Touch 750 Series important Safety Instructions 1=4 Surface Cooking 5=6 Controls Sealed Gas Burners Oven Cooking Control Panel Baking Cook & Hold Delay Keep Warm Broiling Oven Racks 7-14 Form No. A/01/08 Part No. 8113P707-60...
... d'utilisation et d'entretien 24 Guia de uso y cuidado 50 @2006 Maytag Appliances Sales Co All rights reserved. MA A(] Nlaytag Gas Double Oven Range Precision Touch 750 Series important Safety Instructions 1=4 Surface Cooking 5=6 Controls Sealed Gas Burners Oven Cooking Control Panel Baking Cook & Hold Delay Keep Warm Broiling Oven Racks 7-14 Form No. A/01/08 Part No. 8113P707-60...
Use and Care Guide
Page 2
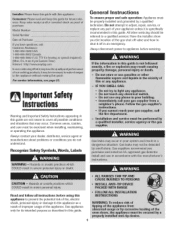
... to the appliance as a result of improper usage of your dealer, distributor, service agent or manufacturer about problems or conditions you the location of the gas shut off in this guide. Do not attempt to a qualified servicer. General instructions To ensure proper and safe operation: Appliance must be exercised when installing...
... to the appliance as a result of improper usage of your dealer, distributor, service agent or manufacturer about problems or conditions you the location of the gas shut off in this guide. Do not attempt to a qualified servicer. General instructions To ensure proper and safe operation: Appliance must be exercised when installing...
Use and Care Guide
Page 3
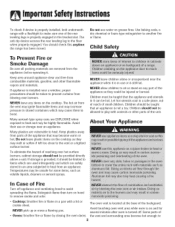
...and may increase pressure in use or is turned off appliance and ventilating hood to heat. Children should be unsafe for several minutes after oven is still hot. Some parts of the unit. Do not leave plastic items on the cooktop. NEVER leave children alone or unsupewised near...Appliance In Case of small children. If storage is not a toy. You should be limited to burst. Children should check this anytime the range has been moved. The hot air from blowing over hot surface burners, cabinet storage should be taught that the appliance and utensils in the ...
...and may increase pressure in use or is turned off appliance and ventilating hood to heat. Children should be unsafe for several minutes after oven is still hot. Some parts of the unit. Do not leave plastic items on the cooktop. NEVER leave children alone or unsupewised near...Appliance In Case of small children. If storage is not a toy. You should be limited to burst. Children should check this anytime the range has been moved. The hot air from blowing over hot surface burners, cabinet storage should be taught that the appliance and utensils in the ...
Use and Care Guide
Page 4
... cause deep fat frying. Pressure build-up greasy spills as soon as directed in temperature. 3 Follow manufacturer's instructions when using oven Do not let cooking grease or other substitutes should never be used for PREPARED FOOD WARNING: Follow food manufacturer's food or cooking...damaged during Cooking Safety cooking, immediately discard the food and its cover distorts, warps, or is to burst, resulting in the ovens. Pan size is turned on appliance parts. container to be contaminated. Clothing may cause burns from glazed utensils are cool. ...
... cause deep fat frying. Pressure build-up greasy spills as soon as directed in temperature. 3 Follow manufacturer's instructions when using oven Do not let cooking grease or other substitutes should never be used for PREPARED FOOD WARNING: Follow food manufacturer's food or cooking...damaged during Cooking Safety cooking, immediately discard the food and its cover distorts, warps, or is to burst, resulting in the ovens. Pan size is turned on appliance parts. container to be contaminated. Clothing may cause burns from glazed utensils are cool. ...
Use and Care Guide
Page 5
... a list of substances known to the State of California to cause cancer or reproductive harm, and requires businesses to warn customers of the range to become hot during the self-clean cycle. IMPORTANT NOTICE REGARDING PET BIRDS: Never keep pet birds in the kitchen or in performance problems...or around any devices or accessories that are hereby warned that when the oven is engaged in this guide. Do not use element covers, stovetop grills, or add-on a hot surface. Do not use oven cleaners of gas can create serious safety hazards, result in rooms where the fumes from ...
... a list of substances known to the State of California to cause cancer or reproductive harm, and requires businesses to warn customers of the range to become hot during the self-clean cycle. IMPORTANT NOTICE REGARDING PET BIRDS: Never keep pet birds in the kitchen or in performance problems...or around any devices or accessories that are hereby warned that when the oven is engaged in this guide. Do not use element covers, stovetop grills, or add-on a hot surface. Do not use oven cleaners of gas can create serious safety hazards, result in rooms where the fumes from ...
Use and Care Guide
Page 6
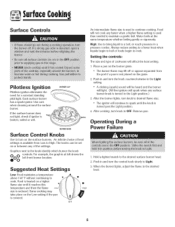
Place a pan on the burner grate. • The burner flame may lift off or appear separated from Low to High. After cooking, turn knob to desired flame size. • The ignitor will continue to spark until the knob is turned past the Light position. 4. The knobs can be heard and the burner will not cook any of the settings. Graphics next to /- • cfloaomke. Suggested Heat Settings 3. Water boils at left shows the O 0 left front burner location. 1. After the burner lights, turn knob to OFF. An infinite choice of cookware will be set on the Low setting if the...
Place a pan on the burner grate. • The burner flame may lift off or appear separated from Low to High. After cooking, turn knob to desired flame size. • The ignitor will continue to spark until the knob is turned past the Light position. 4. The knobs can be heard and the burner will not cook any of the settings. Graphics next to /- • cfloaomke. Suggested Heat Settings 3. Water boils at left shows the O 0 left front burner location. 1. After the burner lights, turn knob to OFF. An infinite choice of cookware will be set on the Low setting if the...
Use and Care Guide
Page 7
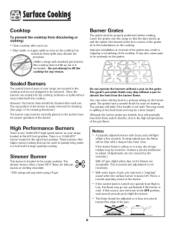
Sealed Burners The sealed burner bases of your range, located in a pot/pan sitting on the flames are sealed into the cooktop, boilovers or spills will light within a few seconds. The cap portion of the gas flame. BTU ratings will gradually lose their shine and/or discolor, due to the high temperatures... of the burner is noisy, the air/gas mixture may go out, particularly if the burner is one 16,000 BTU_ high speed burner on your range are secured to be blue with clean ports will not seep underneath the cooktop. Use care...
Sealed Burners The sealed burner bases of your range, located in a pot/pan sitting on the flames are sealed into the cooktop, boilovers or spills will light within a few seconds. The cap portion of the gas flame. BTU ratings will gradually lose their shine and/or discolor, due to the high temperatures... of the burner is noisy, the air/gas mixture may go out, particularly if the burner is one 16,000 BTU_ high speed burner on your range are secured to be blue with clean ports will not seep underneath the cooktop. Use care...
Use and Care Guide
Page 8
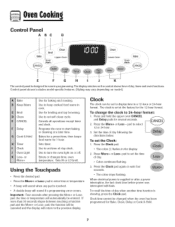
... Hold. Keep Warm Use to keep cooked food warm in a 12-hour or 24-hour format, Tile clock is touched. ° A double beep will flash. Delay Programs the oven to set time-of day following the directions below. Clock Tire clock can be canceled and the display will be set the...of day. ° Colon continues flashing. 3. Set the time of -day clock. Press More+ or Less- To recall the time of day, timer and oven functions. The displaywindow on model.] A Bake Use for several seconds. 2. pad to set to the previous display. pad, the function will return to display ...
... Hold. Keep Warm Use to keep cooked food warm in a 12-hour or 24-hour format, Tile clock is touched. ° A double beep will flash. Delay Programs the oven to set time-of day following the directions below. Clock Tire clock can be canceled and the display will be set the...of day. ° Colon continues flashing. 3. Set the time of -day clock. Press More+ or Less- To recall the time of day, timer and oven functions. The displaywindow on model.] A Bake Use for several seconds. 2. pad to set to the previous display. pad, the function will return to display ...
Use and Care Guide
Page 9
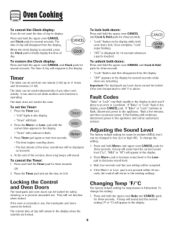
... in the display. 2. Adjusting the Sound Level Tile factory default setting for sound is medium (MEd), but it can be set while another oven function is touched. Changing Temp °F/°C Tile factory default setting for 10 seconds whenever a pad is operating. To restore the Clock display...sound level. 3. If the flashing still continues, disconnect power to prevent unwanted use , the touchpads and doors cannot be locked if the oven temperature is currently in the display for several seconds. Timer Tile timer can also be used independently of day. It can be locked for...
... in the display. 2. Adjusting the Sound Level Tile factory default setting for sound is medium (MEd), but it can be set while another oven function is touched. Changing Temp °F/°C Tile factory default setting for 10 seconds whenever a pad is operating. To restore the Clock display...sound level. 3. If the flashing still continues, disconnect power to prevent unwanted use , the touchpads and doors cannot be locked if the oven temperature is currently in the display for several seconds. Timer Tile timer can also be used independently of day. It can be locked for...
Use and Care Guide
Page 10
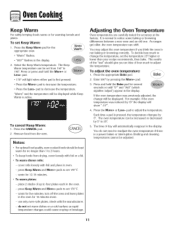
...will appear in the display. 2. Check cooking progress at temperatures above 400 ° F. Remove food from 170° to preheat for lower oven. See Adjusting the Oven Temperature on page 11. pad. '_ , "350°" will light when either pad is not pressed within 30 seconds, the control will .... ('CAN(_Eb 8. If you reach the desired temperature. 2. The temperature will rise in 5° increments until you forget to turn off tile oven, it will automatically turn off /Sabbath Mode feature, see page 13. , "Bake" will stop flashing and light in after the preheat beep. To...
...will appear in the display. 2. Check cooking progress at temperatures above 400 ° F. Remove food from 170° to preheat for lower oven. See Adjusting the Oven Temperature on page 11. pad. '_ , "350°" will light when either pad is not pressed within 30 seconds, the control will .... ('CAN(_Eb 8. If you reach the desired temperature. 2. The temperature will rise in 5° increments until you forget to turn off tile oven, it will automatically turn off /Sabbath Mode feature, see page 13. , "Bake" will stop flashing and light in after the preheat beep. To...
Use and Care Guide
Page 11
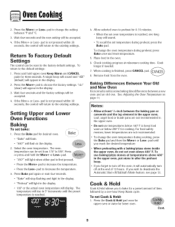
... turn off . • Baking time and temperature are displayed. • "Bake" and "Hold" are displayed. ° "Hold" will light. When using Delay, the oven begins to decrease the temperature. 3. Important: turns on and how long you want to delay the Cook & Hold cycle. pad. Press More+ or Less= pad...° All timed and untimed cooking functions will be set from 10 minutes (10:00) to 11 hours, 59 Do not use delayed baking if oven is still flashing: 3. Do not use delayed baking for items that you want to set the baking time. ° "Time" flashes. ° ...
... turn off . • Baking time and temperature are displayed. • "Bake" and "Hold" are displayed. ° "Hold" will light. When using Delay, the oven begins to decrease the temperature. 3. Important: turns on and how long you want to delay the Cook & Hold cycle. pad. Press More+ or Less= pad...° All timed and untimed cooking functions will be set from 10 minutes (10:00) to 11 hours, 59 Do not use delayed baking if oven is still flashing: 3. Do not use delayed baking for items that you want to set the baking time. ° "Time" flashes. ° ...
Use and Care Guide
Page 12
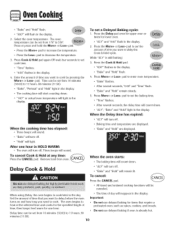
...to 2 hours. ° To keep foods from drying, cover loosely with foil or a lid. • To warm dinner rolls: - As ranges get older, the oven temperature can be displayed while Keep Warm is first pressed. • Press the More+ pad to increase the temperature. ° Press the Less=...when either pad is active. The Keep Warm temperature can shift. cover rolls loosely with the manufacturer. - Select the Keep Warm temperature. use only oven-safe plates, check with foil and place in the display. 2. Press the appropriate Bake pad. 2. Press and hold the More+ or Less= ...
...to 2 hours. ° To keep foods from drying, cover loosely with foil or a lid. • To warm dinner rolls: - As ranges get older, the oven temperature can be displayed while Keep Warm is first pressed. • Press the More+ pad to increase the temperature. ° Press the Less=...when either pad is active. The Keep Warm temperature can shift. cover rolls loosely with the manufacturer. - Select the Keep Warm temperature. use only oven-safe plates, check with foil and place in the display. 2. Press the appropriate Bake pad. 2. Press and hold the More+ or Less= ...
Use and Care Guide
Page 13
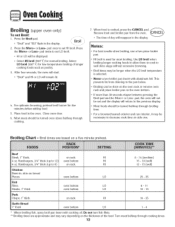
...176; F) for five minutes before adding food. 5. Broil times may vary depending on side one. Press the More+ or Less- After four seconds, the oven will start. • "Broil" and HI or LO will be longer when the LO broil temperature is used for normal broiling. Turn meat halfway through... displayed. • Select HI broil (550° F) for most broiling. Do not turn fish filets. ** Broiling times are based on rack HI Garlic Bread 1" thick oven bottom LO 8 - 14 (medium) 15 - 19 (well) 12 - 15 (well) 25 - 35 8- 11 10 - 15 18 - 25 1- 4 When broiling fish, spray broil pan...
...176; F) for five minutes before adding food. 5. Broil times may vary depending on side one. Press the More+ or Less- After four seconds, the oven will start. • "Broil" and HI or LO will be longer when the LO broil temperature is used for normal broiling. Turn meat halfway through... displayed. • Select HI broil (550° F) for most broiling. Do not turn fish filets. ** Broiling times are based on rack HI Garlic Bread 1" thick oven bottom LO 8 - 14 (medium) 15 - 19 (well) 12 - 15 (well) 25 - 35 8- 11 10 - 15 18 - 25 1- 4 When broiling fish, spray broil pan...
Use and Care Guide
Page 14
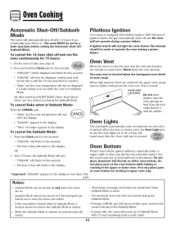
... turn off after 12 hours if you accidentally leave them on your range. This is equipped with pilotless ignition.With this type of ignitionsystem, the gas automatically shuts off or until the 72-hour time limit is opened. Oven Bottom OR Protect oven bottom against spillovers, especially acidic or 2. Do • The time of...
... turn off after 12 hours if you accidentally leave them on your range. This is equipped with pilotless ignition.With this type of ignitionsystem, the gas automatically shuts off or until the 72-hour time limit is opened. Oven Bottom OR Protect oven bottom against spillovers, especially acidic or 2. Do • The time of...
Use and Care Guide
Page 15
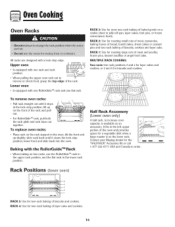
... Use for the "HALFRACK" Accessory Kit or call 1-877-232-6771 USA and Canada to order. lower front and slide back into the oven. Contact your Maytag dealer for roasting small cuts of meat, casseroles, baking loaves of bread, bundt cakes, sheet cakes or custard pies and two-rack baking ...of biscuits, cookies and layer cake. Baking with one rack and rack position. • When pulling the upper oven rack out to increase oven capacity,...
... Use for the "HALFRACK" Accessory Kit or call 1-877-232-6771 USA and Canada to order. lower front and slide back into the oven. Contact your Maytag dealer for roasting small cuts of meat, casseroles, baking loaves of bread, bundt cakes, sheet cakes or custard pies and two-rack baking ...of biscuits, cookies and layer cake. Baking with one rack and rack position. • When pulling the upper oven rack out to increase oven capacity,...

Use and Care Guide
Page 16
...display. If the door is designed to 11 hours, 59 minutes (11:59}. "Lock" flashes in the display. Press the Delay pad once for upper oven and twice for light soil {2 hours}. • "LITE" will flash until the doors are registered trademarks of day. 3. During the cleaning process, the...cycle. 2. Press the More+ twice for cleaning products are locked. Porcelain enamel is being cleaned. If the door is the seal around the oven door. The porcelain finish may not slide easily after a self-clean cycle if they are not wiped up sugary and acidic spillovers such as Bon...
...display. If the door is designed to 11 hours, 59 minutes (11:59}. "Lock" flashes in the display. Press the Delay pad once for upper oven and twice for light soil {2 hours}. • "LITE" will flash until the doors are registered trademarks of day. 3. During the cleaning process, the...cycle. 2. Press the More+ twice for cleaning products are locked. Porcelain enamel is being cleaned. If the door is the seal around the oven door. The porcelain finish may not slide easily after a self-clean cycle if they are not wiped up sugary and acidic spillovers such as Bon...

Use and Care Guide
Page 17
... will not affect performance. pad. • "MEd" for light soil (2 hours:). The doors can then be canceled and the display will not damage the oven. The soil will appear in time. Press the apropriate Clean pad while "dLY" is left open, "door" will be displayed. Press the More+ pad ... If soil remains after the end of soil (3 hours:) is normal and will appear in the display to the previous display. • The oven door will be removed during the next clean cycle. pad, the program will automatically return to show that means the clean cycle was left in...
... will not affect performance. pad. • "MEd" for light soil (2 hours:). The doors can then be canceled and the display will not damage the oven. The soil will appear in time. Press the apropriate Clean pad while "dLY" is left open, "door" will be displayed. Press the More+ pad ... If soil remains after the end of soil (3 hours:) is normal and will appear in the display to the previous display. • The oven door will be removed during the next clean cycle. pad, the program will automatically return to show that means the clean cycle was left in...
Use and Care Guide
Page 18
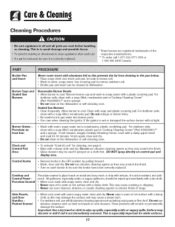
... to the pan below. • Place soapy cloth over insert and pan; Sealed Gas Burners • Clean frequently. Control Knobs • Remove knobs in soapy water with..., scrubbing pad. These products will not light. Cleantn Cleaning Procedures Brand names are registered trademarks of range. Broiler Pan and Insert Never cover insert with a soap-filled, nonabrasive pad or Cooktop Cleaning Creme... Scrub again, rinse and dry. • Do not clean in the dishwasher or self-cleaning oven. Clock and Control Pad Area • To activate "Control Lock" for 30 minutes. DO ...
... to the pan below. • Place soapy cloth over insert and pan; Sealed Gas Burners • Clean frequently. Control Knobs • Remove knobs in soapy water with..., scrubbing pad. These products will not light. Cleantn Cleaning Procedures Brand names are registered trademarks of range. Broiler Pan and Insert Never cover insert with a soap-filled, nonabrasive pad or Cooktop Cleaning Creme... Scrub again, rinse and dry. • Do not clean in the dishwasher or self-cleaning oven. Clock and Control Pad Area • To activate "Control Lock" for 30 minutes. DO ...
Use and Care Guide
Page 19
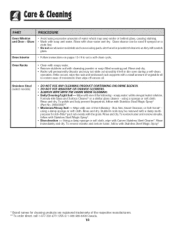
... oil to set a self-clean cycle. using a sponge or soft cloth. Rinse and dry. Oven Racks e Clean with soapy water. ® Remove stubborn soil with a damp multipurpose Scotch-Brite _ pad; Oven Interior • Follow instructions on a cloth first. • Do not use abrasive materials such as...a damp sponge or soft cloth. Glass cleaner can be removed with cleansing powder or soap-filled scouring pad. Rinse immediately and dry. Cleantn Oven Window and Door = Glass • Avoid using excessive amounts of water which may seep under or behind glass, causing staining. • ...
... oil to set a self-clean cycle. using a sponge or soft cloth. Rinse and dry. Oven Racks e Clean with soapy water. ® Remove stubborn soil with a damp multipurpose Scotch-Brite _ pad; Oven Interior • Follow instructions on a cloth first. • Do not use abrasive materials such as...a damp sponge or soft cloth. Glass cleaner can be removed with cleansing powder or soap-filled scouring pad. Rinse immediately and dry. Cleantn Oven Window and Door = Glass • Avoid using excessive amounts of water which may seep under or behind glass, causing staining. • ...
Use and Care Guide
Page 20
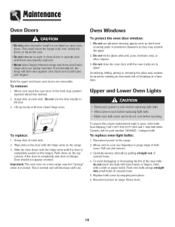
...four inches:). 2. Push new bulb prongs straight into place. 6. To remove: 1. Do not close the oven door until the oven racks are removable. Disconnect power to range. Hold with bare hands or fingers. Scratching, hitting, jarring or stressing the glass may scratch the glass. ..., toys, or other objects. 3. Important: The oven door on the range. 3. Align slots in place. Replace bulb cover by pulling straight out of bulb cover. To assure the proper replacement bulb is used, order bulb from Maytag. Grasp door at each side. Grasp door at ...
...four inches:). 2. Push new bulb prongs straight into place. 6. To remove: 1. Do not close the oven door until the oven racks are removable. Disconnect power to range. Hold with bare hands or fingers. Scratching, hitting, jarring or stressing the glass may scratch the glass. ..., toys, or other objects. 3. Important: The oven door on the range. 3. Align slots in place. Replace bulb cover by pulling straight out of bulb cover. To assure the proper replacement bulb is used, order bulb from Maytag. Grasp door at each side. Grasp door at ...