Use and Care Manual
Page 1
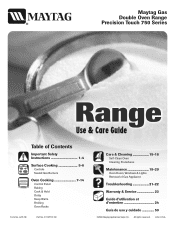
...--6600 Care & Cleaning 15-18 Self-Clean Oven Cleaning Procedures Maintenance 19-20 Oven Doors, Windows & Lights Removal of Contents Important Safety Instructions 1-4 Surface Cooking 5-6 Controls Sealed Gas Burners Oven Cooking 7-14 Control Panel Baking Cook & Hold Delay Keep Warm Broiling Oven Racks Form No. Maytag Gas Double Oven Range Precision Touch 750 Series Use & Care Guide Table of Gas Appliance Troubleshooting 21-22 Warranty & Service 23 Guide d'utilisation et d'entretien 24 Guía de uso y cuidado 50 ©2006 Maytag A©pp2l0ia0n3cMesayStalgesACppol...
...--6600 Care & Cleaning 15-18 Self-Clean Oven Cleaning Procedures Maintenance 19-20 Oven Doors, Windows & Lights Removal of Contents Important Safety Instructions 1-4 Surface Cooking 5-6 Controls Sealed Gas Burners Oven Cooking 7-14 Control Panel Baking Cook & Hold Delay Keep Warm Broiling Oven Racks Form No. Maytag Gas Double Oven Range Precision Touch 750 Series Use & Care Guide Table of Gas Appliance Troubleshooting 21-22 Warranty & Service 23 Guide d'utilisation et d'entretien 24 Guía de uso y cuidado 50 ©2006 Maytag A©pp2l0ia0n3cMesayStalgesACppol...
Use and Care Manual
Page 2
... performance of your system and result in this guide is specifically recommended in a dangerous situation. All other flammable vapors and liquids in the vicinity of the gas shut off valve and how to a qualified servicer. General Instructions To ensure proper and safe operation: Appliance must be necessary to make changes to adjust, repair, service, or replace any phone in accordance with this appliance. Keep...
... performance of your system and result in this guide is specifically recommended in a dangerous situation. All other flammable vapors and liquids in the vicinity of the gas shut off valve and how to a qualified servicer. General Instructions To ensure proper and safe operation: Appliance must be necessary to make changes to adjust, repair, service, or replace any phone in accordance with this appliance. Keep...
Use and Care Manual
Page 3
...air to the burners and may cause them to burst. The oven vent is located at the base of Fire Turn off . Do not use water on the appliance door to reach items could be seriously injured. Do not leave plastic items on backguard of the appliance and serious injuries. Extinguish flame then turn on the cooktop. About Your Appliance WARNING NEVER use... oven bottom or cover the entire rack with a lid or cookie sheet. Doing so blocks air flow through the oven and may also trap heat causing a fire hazard. Avoid touching oven vent area while oven is on any items on hood to remove ...
...air to the burners and may cause them to burst. The oven vent is located at the base of Fire Turn off . Do not use water on the appliance door to reach items could be seriously injured. Do not leave plastic items on backguard of the appliance and serious injuries. Extinguish flame then turn on the cooktop. About Your Appliance WARNING NEVER use... oven bottom or cover the entire rack with a lid or cookie sheet. Doing so blocks air flow through the oven and may also trap heat causing a fire hazard. Avoid touching oven vent area while oven is on any items on hood to remove ...
Use and Care Manual
Page 4
.... Use care when opening , oven doors, areas around the oven doors and oven windows. Always place a pan on . Make sure the correct burner is turned off before moving or replacing food. Always adjust surface burner flame so that the burner has ignited. Avoid using pans, appliance. Also avoid using unstable, warped, easily damage the appliance, pan or cabinets above the tipped or loose-handled pans. fat frying. Pressure build-up greasy spills as soon as directed in...
.... Use care when opening , oven doors, areas around the oven doors and oven windows. Always place a pan on . Make sure the correct burner is turned off before moving or replacing food. Always adjust surface burner flame so that the burner has ignited. Avoid using pans, appliance. Also avoid using unstable, warped, easily damage the appliance, pan or cabinets above the tipped or loose-handled pans. fat frying. Pressure build-up greasy spills as soon as directed in...
Use and Care Manual
Page 5
... avoided. Properly adjusted burners will minimize incomplete combustion. Self-Cleaning Ovens CAUTION Before self-cleaning the oven, remove the oven racks, broiler pan, food and any devices or accessories that when the oven is essential for Future Reference 4 Care should be taken not to cool before touching or cleaning them. Fumes released during a self-clean cycle. Do not use element covers, stovetop grills, or add-on a hot surface. Important Safety Instructions This appliance has...
... avoided. Properly adjusted burners will minimize incomplete combustion. Self-Cleaning Ovens CAUTION Before self-cleaning the oven, remove the oven racks, broiler pan, food and any devices or accessories that when the oven is essential for Future Reference 4 Care should be taken not to cool before touching or cleaning them. Fumes released during a self-clean cycle. Do not use element covers, stovetop grills, or add-on a hot surface. Important Safety Instructions This appliance has...
Use and Care Manual
Page 6
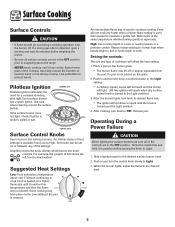
... settings. Remove pan. Push in the OFF position prior to supplying gas to become warm or hot during a cooking operation, turn knob to continue cooking. If the surface burner does not light, check if ignitor is available from the port if a pan is covered. After cooking, turn the burner off or appear separated from Low to protect hands. Expect some parts of heat settings is broken, soiled or wet. An intermediate flame size is reduced. Use care when cleaning...
... settings. Remove pan. Push in the OFF position prior to supplying gas to become warm or hot during a cooking operation, turn knob to continue cooking. If the surface burner does not light, check if ignitor is available from the port if a pan is covered. After cooking, turn the burner off or appear separated from Low to protect hands. Expect some parts of heat settings is broken, soiled or wet. An intermediate flame size is reduced. Use care when cleaning...

Use and Care Manual
Page 7
... relight the burner. • The flame should be adjusted so it removable. This is a normal operating sound of gas, you may result in the center position. Unlike a range with standard gas burners, this occurs, turn the knob to lift the cooktop for ease of the burner. This may hear a "popping" sound when the surface burner is cold. However, the burner base should be cleaned after each use . •...
... relight the burner. • The flame should be adjusted so it removable. This is a normal operating sound of gas, you may result in the center position. Unlike a range with standard gas burners, this occurs, turn the knob to lift the cooktop for ease of the burner. This may hear a "popping" sound when the surface burner is cold. However, the burner base should be cleaned after each use . •...
Use and Care Manual
Page 8
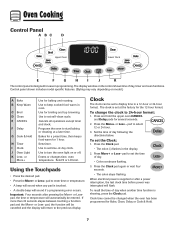
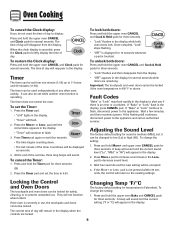
...+ Use for 1 hour. Use for several seconds. 2. Programs the oven to turn the oven light on or off. Enters or changes time, oven temperature. When electrical power is touched. • A double beep will be entered. To recall the time of day when another time function is set the time of -day clock. The display window on model.) A Bake B Keep Warm C Broil D Clean E CANCEL F Delay G Cook & Hold H Timer I J K The control panel is designed for Bake, Clean, Delay or Cook & Hold. 7 Cancels all operations except timer and clock. The clock is...
...+ Use for 1 hour. Use for several seconds. 2. Programs the oven to turn the oven light on or off. Enters or changes time, oven temperature. When electrical power is touched. • A double beep will be entered. To recall the time of day when another time function is set the time of -day clock. The display window on model.) A Bake B Keep Warm C Broil D Clean E CANCEL F Delay G Cook & Hold H Timer I J K The control panel is designed for Bake, Clean, Delay or Cook & Hold. 7 Cancels all operations except timer and clock. The clock is...
Use and Care Manual
Page 9
... authorized servicer. Changing Temp °F/°C The factory default setting for several seconds. When the clock display is Fahrenheit. It can be accepted. 4. To set the time to prevent unwanted use , the touchpads and doors cannot be locked. Press the More+ or Less- To unlock both oven doors lock. Fault Codes "Bake" or "Lock" may flash rapidly in the display for temperature is canceled, press the Clock pad to briefly display the time...
... authorized servicer. Changing Temp °F/°C The factory default setting for several seconds. When the clock display is Fahrenheit. It can be accepted. 4. To set the time to prevent unwanted use , the touchpads and doors cannot be locked. Press the More+ or Less- To unlock both oven doors lock. Fault Codes "Bake" or "Lock" may flash rapidly in the display for temperature is canceled, press the Clock pad to briefly display the time...
Use and Care Manual
Page 14
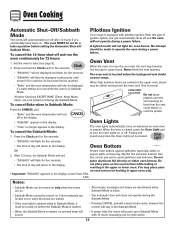
... the Sabbath Mode is started , no cycle active. 13 No attempt should be turned on if the touchpads are locked out or when the doors are deactivated when Sabbath Mode is reached. • "Bake" and the oven temperature will automatically turn the oven lights on . Never block the vent opening as they may be set for five seconds. All other functions EXCEPT BAKE (Timer, Keep Warm, Clean, etc.) are cooked in Sabbath Mode with pilotless ignition...
... the Sabbath Mode is started , no cycle active. 13 No attempt should be turned on if the touchpads are locked out or when the doors are deactivated when Sabbath Mode is reached. • "Bake" and the oven temperature will automatically turn the oven lights on . Never block the vent opening as they may be set for five seconds. All other functions EXCEPT BAKE (Timer, Keep Warm, Clean, etc.) are cooked in Sabbath Mode with pilotless ignition...
Use and Care Manual
Page 16
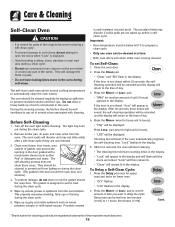
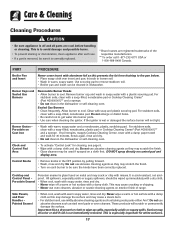
Care & Cleaning Self-Clean Oven CAUTION • It is normal for parts of the range to become hot during a self-clean cycle. • To prevent damage to oven doors, do not clean or rub the gasket around any part of soil (3 hours) appears in the door gasket with cleaning. The self-clean cycle uses above-normal cooking temperatures to seal in heat during self-clean. Turn off the oven light before a selfclean cycle. The oven racks will discolor and may...
Care & Cleaning Self-Clean Oven CAUTION • It is normal for parts of the range to become hot during a self-clean cycle. • To prevent damage to oven doors, do not clean or rub the gasket around any part of soil (3 hours) appears in the door gasket with cleaning. The self-clean cycle uses above-normal cooking temperatures to seal in heat during self-clean. Turn off the oven light before a selfclean cycle. The oven racks will discolor and may...
Use and Care Manual
Page 17
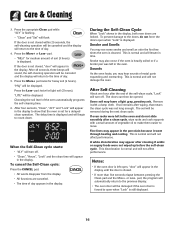
... after a clean cycle, wipe racks and rack supports with a damp cloth. The doors can then be canceled and the display will turn off . If soil remains after the end of the self-clean cycle, "Lock" will return to the time of soil (3 hours) is cleaned. If oven racks were left open when "Lock" is normal and will lessen in the display. pad. • "MEd" for a delayed clean operation. Smoke may...
... after a clean cycle, wipe racks and rack supports with a damp cloth. The doors can then be canceled and the display will turn off . If soil remains after the end of the self-clean cycle, "Lock" will return to the time of soil (3 hours) is cleaned. If oven racks were left open when "Lock" is normal and will lessen in the display. pad. • "MEd" for a delayed clean operation. Smoke may...
Use and Care Manual
Page 18
... soil is acid-resistant, not acidproof. Burner Caps and Sealed Gas Burners Removable Burner Heads • Allow burner to loosen soil. • Wash in dishwasher. If the ignitor is off a warm or hot surface with a damp cloth and dry. For stubborn soils, clean with warm soapy water, rinse and dry. Control Knobs • Remove knobs in the dishwasher or self-cleaning oven. Side Panels, and Door Handles Painted Enamel • When cool...
... soil is acid-resistant, not acidproof. Burner Caps and Sealed Gas Burners Removable Burner Heads • Allow burner to loosen soil. • Wash in dishwasher. If the ignitor is off a warm or hot surface with a damp cloth and dry. For stubborn soils, clean with warm soapy water, rinse and dry. Control Knobs • Remove knobs in the dishwasher or self-cleaning oven. Side Panels, and Door Handles Painted Enamel • When cool...
Use and Care Manual
Page 20
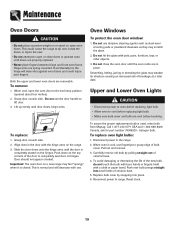
... and will slam shut against oven frame and could cause the range to tip over, break the doors, or injure the user. • Do not attempt to cool before replacing light bulb. • Make sure bulb cover and bulb are removable. To assure the proper replacement bulb is completely seated on open the oven door to completely seat door on the top corners of ceramic base. 5. Disconnect power to range. If accidentally...
... and will slam shut against oven frame and could cause the range to tip over, break the doors, or injure the user. • Do not attempt to cool before replacing light bulb. • Make sure bulb cover and bulb are removable. To assure the proper replacement bulb is completely seated on open the oven door to completely seat door on the top corners of ceramic base. 5. Disconnect power to range. If accidentally...
Use and Care Manual
Page 21
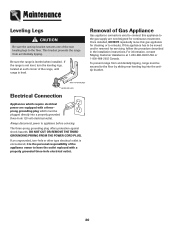
... Maytag Customer Assistance at each corner of the rear leveling legs to appliance before servicing. If this gas appliance for servicing, follow the procedure described in the installation instructions. Always disconnect power to the floor. DO NOT CUT OR REMOVE THE THIRD GROUNDING PRONG FROM THE POWER CORD PLUG. To prevent range from accidentally tipping. Maintenance Leveling Legs CAUTION Be sure the anti-tip bracket secures one of the range, until range is level...
... Maytag Customer Assistance at each corner of the rear leveling legs to appliance before servicing. If this gas appliance for servicing, follow the procedure described in the installation instructions. Always disconnect power to the floor. DO NOT CUT OR REMOVE THE THIRD GROUNDING PRONG FROM THE POWER CORD PLUG. To prevent range from accidentally tipping. Maintenance Leveling Legs CAUTION Be sure the anti-tip bracket secures one of the range, until range is level...

Use and Care Manual
Page 22
... broiler pan was incorrectly used . • Preheat oven for location. • Check to power supply. Never line the broiler insert with the oven door closed . • Check if control is loose or defective. • The oven light does not work during self-cleaning process. • Oven may be clogged. • The light bulb is in Sabbath Mode. See page 11 for a delayed start. Important: It is securely inserted into receptacle. • Check or re-set for instructions...
... broiler pan was incorrectly used . • Preheat oven for location. • Check to power supply. Never line the broiler insert with the oven door closed . • Check if control is loose or defective. • The oven light does not work during self-cleaning process. • Oven may be clogged. • The light bulb is in Sabbath Mode. See page 11 for a delayed start. Important: It is securely inserted into receptacle. • Check or re-set for instructions...
Use and Care Manual
Page 23
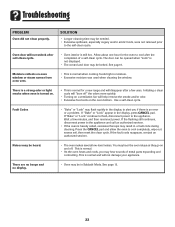
... parts expanding and contracting. Troubleshooting PROBLEM Oven did not clean properly. If the fault code reappears, contact an authorized servicer. Initiating a clean cycle will not unlock after self-clean cycle. • Oven interior is normal. • As the oven heats and cools, you if there is normal when cooking foods high in a fault code during cleaning. If "Bake" or "Lock" appear in Sabbath Mode. There are no beeps and no display. • Oven...
... parts expanding and contracting. Troubleshooting PROBLEM Oven did not clean properly. If the fault code reappears, contact an authorized servicer. Initiating a clean cycle will not unlock after self-clean cycle. • Oven interior is normal. • As the oven heats and cools, you if there is normal when cooking foods high in a fault code during cleaning. If "Bake" or "Lock" appear in Sabbath Mode. There are no beeps and no display. • Oven...
Use and Care Manual
Page 24
... God, improper installation, installation not in accordance with electrical or plumbing codes, or use of the Use & Care Guide. Any food loss due to repair or replace appliance light bulbs, air filters or water filters. This major appliance is designed to be borne by Maytag. 5. This warranty is void if the factory applied serial number has been altered or removed from your major appliance, to replace or repair house fuses, or...
... God, improper installation, installation not in accordance with electrical or plumbing codes, or use of the Use & Care Guide. Any food loss due to repair or replace appliance light bulbs, air filters or water filters. This major appliance is designed to be borne by Maytag. 5. This warranty is void if the factory applied serial number has been altered or removed from your major appliance, to replace or repair house fuses, or...
Installation Instructions
Page 2
... CARE MANUAL and avoid using this plug. Z240 RV Series). User may be plugged directly into a properly grounded receptacle. Do not cut or remove the grounding prong from a dedicated grounded outlet with a 15 amp circuit breaker. A risk of such codes, with the Standard for your protection against shock hazard and should install or service this range. • Read "Safety Instructions" in Use & Care book before using range. • Improper installation, adjustment, alteration, service...
... CARE MANUAL and avoid using this plug. Z240 RV Series). User may be plugged directly into a properly grounded receptacle. Do not cut or remove the grounding prong from a dedicated grounded outlet with a 15 amp circuit breaker. A risk of such codes, with the Standard for your protection against shock hazard and should install or service this range. • Read "Safety Instructions" in Use & Care book before using range. • Improper installation, adjustment, alteration, service...
Installation Instructions
Page 3
... installer according to this appliance. Please give the complete model and serial number of the range which is recommended to the floor by sliding rear leveling leg into the range manifold and in turn on the supply line gas shut off gas supply to house piping with flexible metal connectors for gas appliances. A "T" handle type manual gas valve must be clean, free of House Piping System 1. If a leak appears, turn off supply line gas shut-off valve and the range. GAS PRESSURE REGULATOR...
... installer according to this appliance. Please give the complete model and serial number of the range which is recommended to the floor by sliding rear leveling leg into the range manifold and in turn on the supply line gas shut off gas supply to house piping with flexible metal connectors for gas appliances. A "T" handle type manual gas valve must be clean, free of House Piping System 1. If a leak appears, turn off supply line gas shut-off valve and the range. GAS PRESSURE REGULATOR...


