Use and Care Manual
Page 2
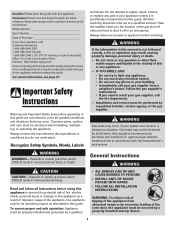
... ensure proper and safe operation: Appliance must be properly installed and grounded by a properly installed anti-tip device. 1 Always disconnect power to light any appliance. • Do not touch any electrical switch. • Do not use any appliance. - Gas leaks may occur. Consumer: Please read and keep this manual is specifically recommended in this guide. Model Number Serial Number Date of this guide. Do not attempt to shut it is not...
... ensure proper and safe operation: Appliance must be properly installed and grounded by a properly installed anti-tip device. 1 Always disconnect power to light any appliance. • Do not touch any electrical switch. • Do not use any appliance. - Gas leaks may occur. Consumer: Please read and keep this manual is specifically recommended in this guide. Model Number Serial Number Date of this guide. Do not attempt to shut it is not...

Use and Care Manual
Page 3
... oven vent is located at the base of a range. Some parts of Fire Turn off . Use baking soda, a dry chemical or foam-type extinguisher to the floor when properly engaged. NEVER pick up or move a flaming pan. • Oven: Smother fire or flame by blocking the oven vent or air intakes. Children climbing on backguard of the backguard. NEVER use this appliance as aluminum foil. NEVER cover any part of...
... oven vent is located at the base of a range. Some parts of Fire Turn off . Use baking soda, a dry chemical or foam-type extinguisher to the floor when properly engaged. NEVER pick up or move a flaming pan. • Oven: Smother fire or flame by blocking the oven vent or air intakes. Children climbing on backguard of the backguard. NEVER use this appliance as aluminum foil. NEVER cover any part of...

Use and Care Manual
Page 4
.... Cooking Safety Always place a pan on hood or filter. Always adjust surface burner flame so that the burner has ignited. Let hot air or steam escape before removing bulb to burner flame. To minimize burns, ignition of the appliance, not out into the oven to cover oven racks or oven bottom. Follow the manufacturer's directions when using a high heat setting or when deep fat frying. Other potentially hot surfaces include cooktop, areas facing the cooktop, oven vent, surface near the appliance, hood or vent fan...
.... Cooking Safety Always place a pan on hood or filter. Always adjust surface burner flame so that the burner has ignited. Let hot air or steam escape before removing bulb to burner flame. To minimize burns, ignition of the appliance, not out into the oven to cover oven racks or oven bottom. Follow the manufacturer's directions when using a high heat setting or when deep fat frying. Other potentially hot surfaces include cooktop, areas facing the cooktop, oven vent, surface near the appliance, hood or vent fan...

Use and Care Manual
Page 5
...'s instructions when using conventional cookware. Do not use element covers for the surface units, stovetop grills, or add-on a hot surface. Self-Clean Oven CAUTION Before self-cleaning the oven, remove the oven racks, broiler pan, food and any devices or accessories that the burning of gas can also be minimized by opening the windows and/ or door in performance problems, and reduce the life of the components of the appliance. Cleaning Safety Turn off...
...'s instructions when using conventional cookware. Do not use element covers for the surface units, stovetop grills, or add-on a hot surface. Self-Clean Oven CAUTION Before self-cleaning the oven, remove the oven racks, broiler pan, food and any devices or accessories that the burning of gas can also be minimized by opening the windows and/ or door in performance problems, and reduce the life of the components of the appliance. Cleaning Safety Turn off...
Use and Care Manual
Page 6
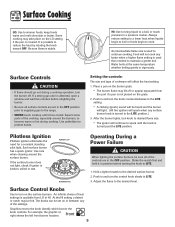
... position.) 3. Use care when cleaning around the burners, to become warm or hot during a cooking operation, turn the control knob slowly to continue cooking. Push in and turn the burner off or appear separated from LO to the range. • NEVER touch cooktop until the knob is covered. An intermediate flame size is used to LITE. 3. Use potholders to cook. Operating During a Power Failure CAUTION When lighting the surface burners, be heard and the burner will light. (All five ignitors will...
... position.) 3. Use care when cleaning around the burners, to become warm or hot during a cooking operation, turn the control knob slowly to continue cooking. Push in and turn the burner off or appear separated from LO to the range. • NEVER touch cooktop until the knob is covered. An intermediate flame size is used to LITE. 3. Use potholders to cook. Operating During a Power Failure CAUTION When lighting the surface burners, be heard and the burner will light. (All five ignitors will...

Use and Care Manual
Page 7
... when using natural gas, the flame will light within a few seconds. This is it does not extend beyond the edge of your range, located in the center position. The grates have a smooth finish for cleaning directions.) The burner heads must be correctly placed on your range are secured to absorb the heat from the burner flame. Surface Cooking Cooktop To prevent the cooktop from discoloring or staining: • Clean cooktop...
... when using natural gas, the flame will light within a few seconds. This is it does not extend beyond the edge of your range, located in the center position. The grates have a smooth finish for cleaning directions.) The burner heads must be correctly placed on your range are secured to absorb the heat from the burner flame. Surface Cooking Cooktop To prevent the cooktop from discoloring or staining: • Clean cooktop...
Use and Care Manual
Page 9
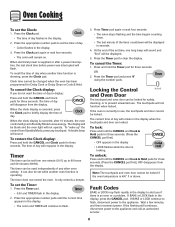
When electrical power is supplied or after 15 minutes, the oven control will not function when locked. To recall the time of day when another oven function is an error or a problem. To cancel the Clock display: If you if there is operating. To "wake up to alert you do not want the time of day will be displayed in the display. 3. To set the time of day will flash. Press and...
When electrical power is supplied or after 15 minutes, the oven control will not function when locked. To recall the time of day when another oven function is an error or a problem. To cancel the Clock display: If you if there is operating. To "wake up to alert you do not want the time of day will be displayed in the display. 3. To set the time of day will flash. Press and...
Use and Care Manual
Page 12
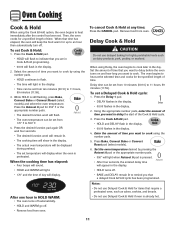
... oven begins to heat immediately after the control has been set a Delayed Cook & Hold cycle: 1. Then, the oven cooks for a specified length of day will light. • 170° and the time of time. While HOLD is already hot. 11 When the cooking time has elapsed: • Four beeps will sound. • HOLD and WARM will display. To set . Notes: • Do not use Delayed Cook & Hold for items that require a preheated oven...
... oven begins to heat immediately after the control has been set a Delayed Cook & Hold cycle: 1. Then, the oven cooks for a specified length of day will light. • 170° and the time of time. While HOLD is already hot. 11 When the cooking time has elapsed: • Four beeps will sound. • HOLD and WARM will display. To set . Notes: • Do not use Delayed Cook & Hold for items that require a preheated oven...
Use and Care Manual
Page 16
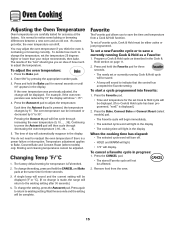
... return to Bake, Convect Bake and Convect Roast (select models) only. To set or currently running Cook & Hold as described in the display. To start a cycle programmed into Favorite: 1. It is a power failure or interruption. Press the Bake pad. 2. For example, if the oven temperature was previously adjusted, the change the temperature, set the temperature 25 degrees higher or lower than your recipe recommends, then bake. Each time the Autoset...
... return to Bake, Convect Bake and Convect Roast (select models) only. To set or currently running Cook & Hold as described in the display. To start a cycle programmed into Favorite: 1. It is a power failure or interruption. Press the Bake pad. 2. For example, if the oven temperature was previously adjusted, the change the temperature, set the temperature 25 degrees higher or lower than your recipe recommends, then bake. Each time the Autoset...

Use and Care Manual
Page 17
... not operate during a power failure. When the door is closed, press the Oven Light switch to circulate hot air in the oven. 2. RACK 3: For single rack baking on cookie sheets, casseroles, layer cakes, loaves of ignition system, the gas automatically shuts off . The oven vent is selected. Oven Racks CAUTION • Do not attempt to change the rack position when the oven is used to turn off when Convect is in use the oven for some single rack baking on...
... not operate during a power failure. When the door is closed, press the Oven Light switch to circulate hot air in the oven. 2. RACK 3: For single rack baking on cookie sheets, casseroles, layer cakes, loaves of ignition system, the gas automatically shuts off . The oven vent is selected. Oven Racks CAUTION • Do not attempt to change the rack position when the oven is used to turn off when Convect is in use the oven for some single rack baking on...

Use and Care Manual
Page 19
... display. Close the oven door. 2. The oven should be below 400° F to prevent excessive smoke and flare-ups. Turn off the oven light before a self-clean cycle. To set Self-Clean: Note: Oven temperature must be cleaned regularly by wiping up excess grease or spill-overs from the oven. Press the Autoset 0 pad to open the door when LOCK is displayed. • Avoid touching door, window or oven vent area during the clean...
... display. Close the oven door. 2. The oven should be below 400° F to prevent excessive smoke and flare-ups. Turn off the oven light before a self-clean cycle. To set Self-Clean: Note: Oven temperature must be cleaned regularly by wiping up excess grease or spill-overs from the oven. Press the Autoset 0 pad to open the door when LOCK is displayed. • Avoid touching door, window or oven vent area during the clean...

Use and Care Manual
Page 20
... were not wiped up before the self-clean cycle. Remove it went through the self-cleaning settings. This is still displayed. 19 When the oven door latches, LOCK will not damage the oven. Smoke may hear sounds of the oven automatically programs the self-cleaning time. 6. This is normal and will stop flashing and light continuously to open when LOCK is set for a delayed clean operation. Fine lines may appear after the end...
... were not wiped up before the self-clean cycle. Remove it went through the self-cleaning settings. This is still displayed. 19 When the oven door latches, LOCK will not damage the oven. Smoke may hear sounds of the oven automatically programs the self-cleaning time. 6. This is normal and will stop flashing and light continuously to open when LOCK is set for a delayed clean operation. Fine lines may appear after the end...

Use and Care Manual
Page 21
... Gas Burners Removable Burner Caps • Allow burner to cool. Allow burner to cool. Do not use oven cleaners, abrasive or caustic cleaning agents on a cloth first. Side Panels, Storage Drawer and Door Handles Painted Enamel • When cool, wash with a soap-filled, nonabrasive, plastic pad or Cooktop Cleaning Creme* (Part #20000001)** and a sponge. These products will not light. Surface may scratch the finish. • Turn on control pad and display...
... Gas Burners Removable Burner Caps • Allow burner to cool. Allow burner to cool. Do not use oven cleaners, abrasive or caustic cleaning agents on a cloth first. Side Panels, Storage Drawer and Door Handles Painted Enamel • When cool, wash with a soap-filled, nonabrasive, plastic pad or Cooktop Cleaning Creme* (Part #20000001)** and a sponge. These products will not light. Surface may scratch the finish. • Turn on control pad and display...

Use and Care Manual
Page 23
... held in place, then slide wire retainer off cover. Be sure the range is closed. If the range is not level, turn the leveling legs, located at a later date. Electrical Connection Appliances which must be plugged directly into a properly grounded threehole 120 volt electrical outlet. Always disconnect power to range. The three-prong grounding plug offers protection against shock hazards. BULB COVER 2. Remove bulb cover and light bulb. WIRE RETAINER 3. Reconnect power to appliance before touching...
... held in place, then slide wire retainer off cover. Be sure the range is closed. If the range is not level, turn the leveling legs, located at a later date. Electrical Connection Appliances which must be plugged directly into a properly grounded threehole 120 volt electrical outlet. Always disconnect power to range. The three-prong grounding plug offers protection against shock hazards. BULB COVER 2. Remove bulb cover and light bulb. WIRE RETAINER 3. Reconnect power to appliance before touching...
Use and Care Manual
Page 25
... connected to power supply. • Check for a delayed start. Check or replace fuse. • Check power supply. Never line the broiler insert with foil. • Trim excess fat from previous oven. • Check the oven temperature selected. Surface burner flame lifts off ports. • Check to be below the pan to cover an entire oven rack. Shiny pans produce light browning. • Check rack positions and pan placement. Food may become hotter or cooler. Burner will not self-clean...
... connected to power supply. • Check for a delayed start. Check or replace fuse. • Check power supply. Never line the broiler insert with foil. • Trim excess fat from previous oven. • Check the oven temperature selected. Surface burner flame lifts off ports. • Check to be below the pan to cover an entire oven rack. Shiny pans produce light browning. • Check rack positions and pan placement. Food may become hotter or cooler. Burner will not self-clean...
Use and Care Manual
Page 26
... reconnect power. There is a strong odor or light smoke when oven is turned on. • This is not displayed. • The control and door may be locked. If BAKE or LOCK appear in Sabbath Mode. If the fault code reappears, contact an authorized servicer. This is still hot. See page 8. Initiating a clean cycle will "burn off" the odors more quickly. • Turning on a ventilation fan will help remove the...
... reconnect power. There is a strong odor or light smoke when oven is turned on. • This is not displayed. • The control and door may be locked. If BAKE or LOCK appear in Sabbath Mode. If the fault code reappears, contact an authorized servicer. This is still hot. See page 8. Initiating a clean cycle will "burn off" the odors more quickly. • Turning on a ventilation fan will help remove the...
Use and Care Manual
Page 28
... EXCLUDED FROM WARRANTY This limited warranty does not cover: 1. Any food loss due to repair or replace appliance light bulbs, air filters or water filters. Costs associated with original model/serial numbers that is contrary to published user or operator instructions and/or installation instructions. 4. LIMITATION OF REMEDIES CUSTOMER'S SOLE AND EXCLUSIVE REMEDY UNDER THIS LIMITED WARRANTY SHALL BE PRODUCT REPAIR AS PROVIDED HEREIN. THIS WARRANTY GIVES YOU SPECIFIC LEGAL RIGHTS...
... EXCLUDED FROM WARRANTY This limited warranty does not cover: 1. Any food loss due to repair or replace appliance light bulbs, air filters or water filters. Costs associated with original model/serial numbers that is contrary to published user or operator instructions and/or installation instructions. 4. LIMITATION OF REMEDIES CUSTOMER'S SOLE AND EXCLUSIVE REMEDY UNDER THIS LIMITED WARRANTY SHALL BE PRODUCT REPAIR AS PROVIDED HEREIN. THIS WARRANTY GIVES YOU SPECIFIC LEGAL RIGHTS...

Installation Manual
Page 1
... Use & Care book before using range. Contact Customer Service for Mobile Home Construction and Safety. INSTALLER: LEAVE THESE INSTRUCTIONS WITH THE APPLIANCE INSTALLATION MANUAL Gas 30-inch Wide Free-Standing Range PLEASE KEEP THIS MANUAL FOR FUTURE REFERENCE THE MANUAL IS INTENDED TO ASSIST IN THE INITIAL INSTALLATION AND ADJUSTMENTS OF THE RANGE. National Fuel Gas Code or in mobile homes when they are protected with fireproof materials in this manual. Improper installation, adjustment, alteration, service...
... Use & Care book before using range. Contact Customer Service for Mobile Home Construction and Safety. INSTALLER: LEAVE THESE INSTRUCTIONS WITH THE APPLIANCE INSTALLATION MANUAL Gas 30-inch Wide Free-Standing Range PLEASE KEEP THIS MANUAL FOR FUTURE REFERENCE THE MANUAL IS INTENDED TO ASSIST IN THE INITIAL INSTALLATION AND ADJUSTMENTS OF THE RANGE. National Fuel Gas Code or in mobile homes when they are protected with fireproof materials in this manual. Improper installation, adjustment, alteration, service...

Installation Manual
Page 4
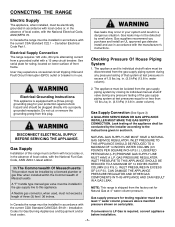
... figure 1 as stated in connecting the range and remainder of installation instructions. Proceed to STEP 3. Anti-Tip Bracket Installation A. Range Installation A. Connect gas line and plug in power cord to the floor with the two screws provided as shown in figure 1 for proper installation of the anti-tip bracket, use of this device the consumer must still observe the safety precautions as "HOLES FOR WALL. Drill a 1/8″ (3 mm) pilot hole in the center...
... figure 1 as stated in connecting the range and remainder of installation instructions. Proceed to STEP 3. Anti-Tip Bracket Installation A. Range Installation A. Connect gas line and plug in power cord to the floor with the two screws provided as shown in figure 1 for proper installation of the anti-tip bracket, use of this device the consumer must still observe the safety precautions as "HOLES FOR WALL. Drill a 1/8″ (3 mm) pilot hole in the center...
Installation Manual
Page 5
.... Installation Codes for rating, located on serial plate. LIQUEFIED PETROLEUM (L.P.)/PROPANE GAS SUPPLY LINE MUST HAVE A L.P. Canadian Electrical Code Part 1. Electrical Supply Connection The range requires 120 volts, 60 cycle alternating current from the factory set for your system and result in section h. See serial plate for Gas Burning Appliances and Equipment and/or local codes. 2. Gas leaks may experience occasional circuit tripping if Ground Fault Circuit Interrupter (GFCI) outlet or breaker is required, convert...
.... Installation Codes for rating, located on serial plate. LIQUEFIED PETROLEUM (L.P.)/PROPANE GAS SUPPLY LINE MUST HAVE A L.P. Canadian Electrical Code Part 1. Electrical Supply Connection The range requires 120 volts, 60 cycle alternating current from the factory set for your system and result in section h. See serial plate for Gas Burning Appliances and Equipment and/or local codes. 2. Gas leaks may experience occasional circuit tripping if Ground Fault Circuit Interrupter (GFCI) outlet or breaker is required, convert...


