
Owners Manual
Page 4
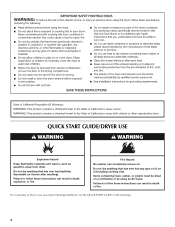
... has ever had anything that has ever had any type of how to follow these instructions can completely remove oil. Failure to use your dryer following installation, see the QUICK START GUIDE on it (including cooking oils). For a summary of oil on a clothesline or by using an... Air Cycle. Do not dry anything flammable on the next page. 4 Fire Hazard No washer can result in death, explosion, or fire. QUICK START GUIDE/DRYER USE WARNING WARNING Explosion Hazard Keep flammable materials and vapors, such as gasoline, away from...
... has ever had anything that has ever had any type of how to follow these instructions can completely remove oil. Failure to use your dryer following installation, see the QUICK START GUIDE on it (including cooking oils). For a summary of oil on a clothesline or by using an... Air Cycle. Do not dry anything flammable on the next page. 4 Fire Hazard No washer can result in death, explosion, or fire. QUICK START GUIDE/DRYER USE WARNING WARNING Explosion Hazard Keep flammable materials and vapors, such as gasoline, away from...

Installation Instructions
Page 2
...for information about the accessories available for purchase from the dealer from dryer drum. Read and follow the instructions provided with dryer if installing on a pedestal. Rubber washer Remove parts package from whom you purchased your Use and Care Guide....A B A. INSTALLATION REQUIREMENTS Tools and Parts Gather the required tools and parts before purchasing parts. Check existing electrical supply and venting. Steam Models ■ Flat-blade screwdriver ■ #2 Phillips screwdriver ■ Adjustable wrench that all parts are included. Check that opens ...
...for information about the accessories available for purchase from the dealer from dryer drum. Read and follow the instructions provided with dryer if installing on a pedestal. Rubber washer Remove parts package from whom you purchased your Use and Care Guide....A B A. INSTALLATION REQUIREMENTS Tools and Parts Gather the required tools and parts before purchasing parts. Check existing electrical supply and venting. Steam Models ■ Flat-blade screwdriver ■ #2 Phillips screwdriver ■ Adjustable wrench that all parts are included. Check that opens ...

Installation Instructions
Page 3
... available for purchase from washer using "Y" connector provided. Installation spacing for recessed area or closet installation The following reasons: ■ Consider additional spacing for ease of 200 lbs. (90.7 kg). Do not operate your dryer at least twice as large as dryer exhaust opening. 3 Do...louvered doors are acceptable. ■ Consider spacing for companion appliance. ■ Additional space required for rear exhaust of dryer to bottom of dryer. ■ Steam models only: Cold water faucets located within 2 ft (610 mm) of either side of the door are recommended for...
... available for purchase from washer using "Y" connector provided. Installation spacing for recessed area or closet installation The following reasons: ■ Consider additional spacing for ease of 200 lbs. (90.7 kg). Do not operate your dryer at least twice as large as dryer exhaust opening. 3 Do...louvered doors are acceptable. ■ Consider spacing for companion appliance. ■ Additional space required for rear exhaust of dryer to bottom of dryer. ■ Steam models only: Cold water faucets located within 2 ft (610 mm) of either side of the door are recommended for...

Installation Instructions
Page 12
... space permits, attach the brass female end of the 2 dryer back corners. Attach short hose to dryer location. Use a wrench to finish turning the legs until it is secured to exhaust hood with new rubber washer provided. Determine vent length and elbows needed for best drying ... m) Install Vent System 1. Remove old rubber washer from dryer packaging under the entire back edge of the dryer (not the console panel). Once the exhaust vent connection is no longer visible. 5. CONNECT INLET HOSE (STEAM MODELS) The dryer must be connected to the cold water faucet using...
... space permits, attach the brass female end of the 2 dryer back corners. Attach short hose to dryer location. Use a wrench to finish turning the legs until it is secured to exhaust hood with new rubber washer provided. Determine vent length and elbows needed for best drying ... m) Install Vent System 1. Remove old rubber washer from dryer packaging under the entire back edge of the dryer (not the console panel). Once the exhaust vent connection is no longer visible. 5. CONNECT INLET HOSE (STEAM MODELS) The dryer must be connected to the cold water faucet using...

Installation Instructions
Page 13
... seated on coupling by hand until it is recommended to control the buildup of "Y" connector. Remove the blue film on connector. 6. Attach washer cold inlet hose to cold water NOTE: Do not overtighten. Inlet to other end of scale through the steps to see which will reduce ...thirds turn . For power supply cord installation, plug into a grounded outlet. NOTE: Do not overtighten. Check that the water faucets are on the dryer. 7. Steam Models Only: 10. Use a wrench to fill valve at bottom of lime scale may lead to remove any tape remaining on . 11. Dispose of...
... seated on coupling by hand until it is recommended to control the buildup of "Y" connector. Remove the blue film on connector. 6. Attach washer cold inlet hose to cold water NOTE: Do not overtighten. Inlet to other end of scale through the steps to see which will reduce ...thirds turn . For power supply cord installation, plug into a grounded outlet. NOTE: Do not overtighten. Check that the water faucets are on the dryer. 7. Steam Models Only: 10. Use a wrench to fill valve at bottom of lime scale may lead to remove any tape remaining on . 11. Dispose of...


