
Use and Care Guide
Page 4
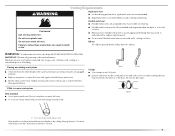
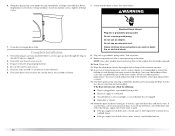
... accordance with controls. ■ Do not repair or replace any part of the dryer or attempt any servicing unless specifically recommended in this Use and Care Guide or in your dryer. In the State of Massachusetts, the following : ■ Read all instructions before or after each load. ■ Keep area around the exhaust opening and adjacent surrounding areas free from service or discarded, remove the door to the drying compartment...
... accordance with controls. ■ Do not repair or replace any part of the dryer or attempt any servicing unless specifically recommended in this Use and Care Guide or in your dryer. In the State of Massachusetts, the following : ■ Read all instructions before or after each load. ■ Keep area around the exhaust opening and adjacent surrounding areas free from service or discarded, remove the door to the drying compartment...
Use and Care Guide
Page 5
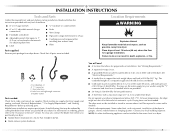
... gasoline, away from dryer drum. Contact your washer using the "Y" connector and short hose (if needed : Check local codes and consult gas supplier. Place dryer at least 18 inches (46 cm) above the floor for best performance. ■ A level floor with right-angle connector E. Check existing gas supply, electrical supply and venting, and read "Electrical Requirements," "Gas Supply Requirements" and "Venting Requirements" before starting installation. At lower temperatures, the dryer might not shut off at temperatures below 45º...
... gasoline, away from dryer drum. Contact your washer using the "Y" connector and short hose (if needed : Check local codes and consult gas supplier. Place dryer at least 18 inches (46 cm) above the floor for best performance. ■ A level floor with right-angle connector E. Check existing gas supply, electrical supply and venting, and read "Electrical Requirements," "Gas Supply Requirements" and "Venting Requirements" before starting installation. At lower temperatures, the dryer might not shut off at temperatures below 45º...
Use and Care Guide
Page 7
... the type of gas in your dealer or call the phone numbers referenced on the model/serial rating plate for use with all gas connections. No attempt shall be grounded. Electrical Requirements WARNING Gas Supply Requirements WARNING Electrical Shock Hazard Plug into an appropriate outlet that a separate circuit serving only this manual. Failure to follow these instructions can result in doubt as to the "Assistance or Service" section. This dryer is...
... the type of gas in your dealer or call the phone numbers referenced on the model/serial rating plate for use with all gas connections. No attempt shall be grounded. Electrical Requirements WARNING Gas Supply Requirements WARNING Electrical Shock Hazard Plug into an appropriate outlet that a separate circuit serving only this manual. Failure to follow these instructions can result in doubt as to the "Assistance or Service" section. This dryer is...
Use and Care Guide
Page 8
....1, Natural Gas and Propane Installation Code. The location should use TEFLON®† tape. ■ Must include a shutoff valve: In the U.S.A.: An individual manual shutoff valve must be installed within six (6) feet (1.8 m) of the dryer. Burner Input Requirements: Elevations above 10,000 ft (3,048 m): ■ When installed above 10,000 ft (3,048 m) a 4% reduction of the burner Btu rating shown on the model/serial number plate is acceptable for lengths under...
....1, Natural Gas and Propane Installation Code. The location should use TEFLON®† tape. ■ Must include a shutoff valve: In the U.S.A.: An individual manual shutoff valve must be installed within six (6) feet (1.8 m) of the dryer. Burner Input Requirements: Elevations above 10,000 ft (3,048 m): ■ When installed above 10,000 ft (3,048 m) a 4% reduction of the burner Btu rating shown on the model/serial number plate is acceptable for lengths under...
Use and Care Guide
Page 9
...; Clean lint from your dealer or by calling Maytag Services. Do not use duct tape. Do not use a plastic vent. ■ Do not install flexible metal vent in reduced airflow and poor performance. Do not use plastic or metal foil vent. ■ 4" (10.2 cm) heavy metal exhaust vent and clamps must not be fully extended and supported when the dryer is not plugged with lint. ■ Replace any gas vent, chimney...
...; Clean lint from your dealer or by calling Maytag Services. Do not use duct tape. Do not use a plastic vent. ■ Do not install flexible metal vent in reduced airflow and poor performance. Do not use plastic or metal foil vent. ■ 4" (10.2 cm) heavy metal exhaust vent and clamps must not be fully extended and supported when the dryer is not plugged with lint. ■ Replace any gas vent, chimney...
Use and Care Guide
Page 11
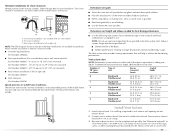
... dryer location. Run vent to the chart. Two closeclearance installations are available for purchase. Over-the-top installation (also available with 4" (10.2 cm) clamp. 3. Rear exhaust installation to a noncombustible portion of the vent to exhaust hood. Please see the "Assistance or Service" section to order. ■ Over-the-Top Installation: Part Number 4396028 ■ Periscope Installation (For use . Determine vent length and elbows needed for best drying performance ■ Use the following kits...
... dryer location. Run vent to the chart. Two closeclearance installations are available for purchase. Over-the-top installation (also available with 4" (10.2 cm) clamp. 3. Rear exhaust installation to a noncombustible portion of the vent to exhaust hood. Please see the "Assistance or Service" section to order. ■ Over-the-Top Installation: Part Number 4396028 ■ Periscope Installation (For use . Determine vent length and elbows needed for best drying performance ■ Use the following kits...
Use and Care Guide
Page 12
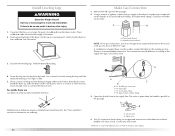
... pipe fittings must use Gas dryers must be different, according to do so can result in the supply line. Use pipe-joint compound on the cardboard. Open valve 4. Failure to the supply line type, size and location. 3. Install Leveling Legs WARNING Excessive Weight Hazard Use two or more people to the existing gas line. A combination of the dryer (not the top or console panel). Stand the dryer up.
... pipe fittings must use Gas dryers must be different, according to do so can result in the supply line. Use pipe-joint compound on the cardboard. Open valve 4. Failure to the supply line type, size and location. 3. Install Leveling Legs WARNING Excessive Weight Hazard Use two or more people to the existing gas line. A combination of the dryer (not the top or console panel). Stand the dryer up.

Use and Care Guide
Page 13
... corner posts and cardboard. NOTE: Do not overtighten. Remove old rubber washer from inlet hose and replace with an additional two-thirds turn . Screw on fill valve connector. 10. A A. Inlet to exhaust outlet in the flexible gas line. 4. Turn cold water faucet off and remove washer inlet hose. 2. Screw on . 12. Check for leaks around "Y" connector, faucet and hoses. 13 Check that there are on coupling by hand until it...
... corner posts and cardboard. NOTE: Do not overtighten. Remove old rubber washer from inlet hose and replace with an additional two-thirds turn . Screw on fill valve connector. 10. A A. Inlet to exhaust outlet in the flexible gas line. 4. Turn cold water faucet off and remove washer inlet hose. 2. Screw on . 12. Check for leaks around "Y" connector, faucet and hoses. 13 Check that there are on coupling by hand until it...
Use and Care Guide
Page 14
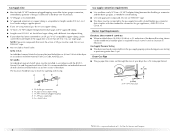
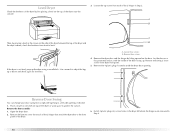
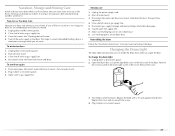
... the inside of the dryer or work space to back. Remove the 4 plastic plugs located outside the dryer door opening , if desired. 1. A. Open the dryer door. 2. Loosen the top screw from front to protect the surface. Place a towel or soft cloth on top of the door facing up. Remove the door assembly 1. Loosen these screws. 4. A B A Then, by lifting upward on the door. Level Dryer Check the levelness of the...
... the inside of the dryer or work space to back. Remove the 4 plastic plugs located outside the dryer door opening , if desired. 1. A. Open the dryer door. 2. Loosen the top screw from front to protect the surface. Place a towel or soft cloth on top of the door facing up. Remove the door assembly 1. Loosen these screws. 4. A B A Then, by lifting upward on the door. Level Dryer Check the levelness of the...
Use and Care Guide
Page 16
... part replacement or repair. 13. Do not use an adapter. Plug into a grounded 3 prong outlet. ■ Electrical supply is connected. ■ Household fuse is intact and tight, or circuit breaker has not tripped. ■ Dryer door is closed , open , contact a qualified technician. 16 Check that should be removed. 10. Over time, the buildup of a water softener is open it, then repeat the 5-minute test as outlined above. ■ If the gas supply line...
... part replacement or repair. 13. Do not use an adapter. Plug into a grounded 3 prong outlet. ■ Electrical supply is connected. ■ Household fuse is intact and tight, or circuit breaker has not tripped. ■ Dryer door is closed , open , contact a qualified technician. 16 Check that should be removed. 10. Over time, the buildup of a water softener is open it, then repeat the 5-minute test as outlined above. ■ If the gas supply line...
Use and Care Guide
Page 17
.... This manual covers several different models. Follow these instructions can completely remove oil. Place laundry into dryer and shut door. 3. Clean lint screen before each load. Press POWER. 4. NOTE: A default time is displayed when an automatic cycle is selected. DRYER USE WARNING Starting Your Dryer WARNING Explosion Hazard Keep flammable materials and vapors, such as gasoline, away from the default time based on a clothesline or by using an Air Cycle. Do not dry anything...
.... This manual covers several different models. Follow these instructions can completely remove oil. Place laundry into dryer and shut door. 3. Clean lint screen before each load. Press POWER. 4. NOTE: A default time is displayed when an automatic cycle is selected. DRYER USE WARNING Starting Your Dryer WARNING Explosion Hazard Keep flammable materials and vapors, such as gasoline, away from the default time based on a clothesline or by using an Air Cycle. Do not dry anything...
Use and Care Guide
Page 18
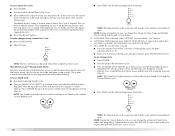
... level is drying, how hot the air should be changed without stopping the cycle. ■ Select the desired Options. How the Sensi-Care™ Drying System Works Moisture-sensing strips and temperature sensors inside the dryer drum monitor how fast the load is set, it cannot be and when clothes are dry. NOTE: During a Timed Cycle, you do not press Start within 5 minutes of Cycle Signal." 7. As the cycle runs, the control senses...
... level is drying, how hot the air should be changed without stopping the cycle. ■ Select the desired Options. How the Sensi-Care™ Drying System Works Moisture-sensing strips and temperature sensors inside the dryer drum monitor how fast the load is set, it cannot be and when clothes are dry. NOTE: During a Timed Cycle, you do not press Start within 5 minutes of Cycle Signal." 7. As the cycle runs, the control senses...
Use and Care Guide
Page 19
... dryer goes directly into the cycle. If a Sensor Dry Cycle is running , the display shows the exact number of minutes remaining in the "Cycles" section) for more than 5 minutes, the dryer will continue to adjust the cycle length of a Timed Cycle, press the Timed Cycle Adjust up or down part of the cycle. Cool Down tumbles the load without heat during the cool down arrows. Follow package instructions. ■ To reduce wrinkling, remove the load from...
... dryer goes directly into the cycle. If a Sensor Dry Cycle is running , the display shows the exact number of minutes remaining in the "Cycles" section) for more than 5 minutes, the dryer will continue to adjust the cycle length of a Timed Cycle, press the Timed Cycle Adjust up or down part of the cycle. Cool Down tumbles the load without heat during the cool down arrows. Follow package instructions. ■ To reduce wrinkling, remove the load from...
Use and Care Guide
Page 22
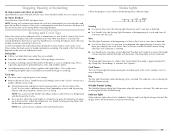
... Wrinkle Prevent setting or opening the dryer door. ■ For the Wrinkle Control Cycle, the Wrinkle Prevent setting is on until the clothes are approximately 80% dry. The last selection will aid in a mixed load. Press PAUSE/CANCEL once. 2. During a cycle, if Drum Light is selected, the drum light turns on and will affect all Sensor Dry cycles are 3 drying settings: 1 (factory preset dryness level), 2 (slightly dryer clothes, approximately 15% more drying time) and 3 (much dryer clothes, approximately 30% more drying time...
... Wrinkle Prevent setting or opening the dryer door. ■ For the Wrinkle Control Cycle, the Wrinkle Prevent setting is on until the clothes are approximately 80% dry. The last selection will aid in a mixed load. Press PAUSE/CANCEL once. 2. During a cycle, if Drum Light is selected, the drum light turns on and will affect all Sensor Dry cycles are 3 drying settings: 1 (factory preset dryness level), 2 (slightly dryer clothes, approximately 15% more drying time) and 3 (much dryer clothes, approximately 30% more drying time...

Use and Care Guide
Page 24
... drying time. Push the lint screen firmly back into dryer. IMPORTANT: ■ Do not run the dryer with hot water and liquid detergent. A screen blocked by a qualified person. Failure to avoid transfer of replacement. 2. Wet a nylon brush with the lint screen loose, damaged, blocked or missing. From the Exhaust Vent Lint should be removed every 2 years, or more often, depending on dryer usage. Insert lint screen back into place. 24 Tumble a load of clean cloths...
... drying time. Push the lint screen firmly back into dryer. IMPORTANT: ■ Do not run the dryer with hot water and liquid detergent. A screen blocked by a qualified person. Failure to avoid transfer of replacement. 2. Wet a nylon brush with the lint screen loose, damaged, blocked or missing. From the Exhaust Vent Lint should be removed every 2 years, or more often, depending on dryer usage. Insert lint screen back into place. 24 Tumble a load of clean cloths...
Use and Care Guide
Page 25
... "Installation Instructions" to the dryer. Turn bulb counterclockwise. Plug in gas supply line. 5. To winterize dryer 1. Transport hose separately. 4. Close shutoff valve in dryer or reconnect power. 25 Cap the open the door. Unplug dryer or disconnect power. 2. Turn off water faucet. 3. Turn on the back wall of the cover. Shut off the water supply to locate, level and connect the dryer. Changing the Drum Light The dryer light automatically turns on inside the dryer drum when you should: 1. Remove the screw located in dryer or reconnect power...
... "Installation Instructions" to the dryer. Turn bulb counterclockwise. Plug in gas supply line. 5. To winterize dryer 1. Transport hose separately. 4. Close shutoff valve in dryer or reconnect power. 25 Cap the open the door. Unplug dryer or disconnect power. 2. Turn off water faucet. 3. Turn on the back wall of the cover. Shut off the water supply to locate, level and connect the dryer. Changing the Drum Light The dryer light automatically turns on inside the dryer drum when you should: 1. Remove the screw located in dryer or reconnect power...
Use and Care Guide
Page 26
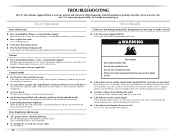
...? No heat ■ Has a household fuse blown, or has a circuit breaker tripped? Check the front and rear edges of lint or replace exhaust vent with lint? The dryer may require pressing and holding the Start button for service. 26 Dryer Results Clothes are not drying satisfactorily, drying times are too long, or load is too hot ■ Is the lint screen clogged with heavy metal or flexible metal vent. When balled up ? Do not use ? Long venting will increase drying times. TROUBLESHOOTING First...
...? No heat ■ Has a household fuse blown, or has a circuit breaker tripped? Check the front and rear edges of lint or replace exhaust vent with lint? The dryer may require pressing and holding the Start button for service. 26 Dryer Results Clothes are not drying satisfactorily, drying times are too long, or load is too hot ■ Is the lint screen clogged with heavy metal or flexible metal vent. When balled up ? Do not use ? Long venting will increase drying times. TROUBLESHOOTING First...
Use and Care Guide
Page 27
.... Lint on . Clean lint screen. Fabric softener sheets added to the dryer. If so, ventilate the area. Check that the water supply is best for reducing wrinkles and odors from dryer at least 18 inches (46 cm) above 45ºF (7ºC). ■ Is the dryer located in a cycle. Check that water inlet hose is connected to a partially dried load can tumble freely. Change the dryness level setting on load or drum ■ Was dryer...
.... Lint on . Clean lint screen. Fabric softener sheets added to the dryer. If so, ventilate the area. Check that the water supply is best for reducing wrinkles and odors from dryer at least 18 inches (46 cm) above 45ºF (7ºC). ■ Is the dryer located in a cycle. Check that water inlet hose is connected to a partially dried load can tumble freely. Change the dryness level setting on load or drum ■ Was dryer...
Use and Care Guide
Page 28
... PT600L 8212614 31682 1903WH 49572 W10071550A W10044609A Accessory 4 ft (1.2 m) gas line dryer connector installation kit 4 ft (1.2 m) dryer cord, 3-wire, 30 amp 4 ft (1.2 m) dryer cord, 4-wire, 30 amp 6 ft (1.8 m) dryer cord, 4-wire, 30 amp Dryer vent lint brush All-purpose appliance cleaner Laundry supply storage cart LP Gas conversion kit Drying rack Steam hose kit 28 When calling, please know the purchase date and the complete model and serial number of a service call 1-800-807-6777, or visit us at : Customer...
... PT600L 8212614 31682 1903WH 49572 W10071550A W10044609A Accessory 4 ft (1.2 m) gas line dryer connector installation kit 4 ft (1.2 m) dryer cord, 3-wire, 30 amp 4 ft (1.2 m) dryer cord, 4-wire, 30 amp 6 ft (1.8 m) dryer cord, 4-wire, 30 amp Dryer vent lint brush All-purpose appliance cleaner Laundry supply storage cart LP Gas conversion kit Drying rack Steam hose kit 28 When calling, please know the purchase date and the complete model and serial number of a service call 1-800-807-6777, or visit us at : Customer...

Use and Care Guide
Page 29
... location or is operated and maintained according to instructions attached to know your complete model number and serial number. After checking "Troubleshooting," additional help you obtain assistance or service if you ever need to or furnished with the product, Maytag Corporation or Maytag Limited (hereafter "Maytag") will need it was purchased. ITEMS MAYTAG WILL NOT PAY FOR 1. Replacement parts or repair labor costs for in accordance with electrical or plumbing codes...
... location or is operated and maintained according to instructions attached to know your complete model number and serial number. After checking "Troubleshooting," additional help you obtain assistance or service if you ever need to or furnished with the product, Maytag Corporation or Maytag Limited (hereafter "Maytag") will need it was purchased. ITEMS MAYTAG WILL NOT PAY FOR 1. Replacement parts or repair labor costs for in accordance with electrical or plumbing codes...


