
Installation Instructions
Page 2
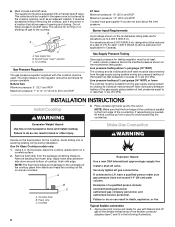
...; Do not touch any electrical switch. • Do not use gasoline or other appliance. - All safety messages will follow instructions. WARNING: Gas leaks cannot always be a T-handle type. ■ A flexible gas connector, when used, must not exceed 3 feet. 2 In the State of Massachusetts. ■ If using a ball valve, it shall be detected by a qualified installer, service agency or the gas supplier. All safety...
...; Do not touch any electrical switch. • Do not use gasoline or other appliance. - All safety messages will follow instructions. WARNING: Gas leaks cannot always be a T-handle type. ■ A flexible gas connector, when used, must not exceed 3 feet. 2 In the State of Massachusetts. ■ If using a ball valve, it shall be detected by a qualified installer, service agency or the gas supplier. All safety...
Installation Instructions
Page 3
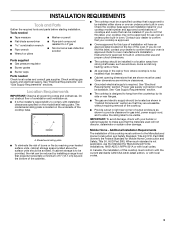
... Standard for use and proper cutout dimensions. ■ The cooktop should be installed in "Cabinet Dimensions" section so that is approved to LP gas ■ Noncorrosive leak-detection solution Parts supplied ■ Gas pressure regulator ■ Burner grates ■ Burner caps Parts needed Check local codes and consult gas supplier. When such standard is located on the model/serial rating plate. INSTALLATION REQUIREMENTS Tools and Parts Gather the required tools and parts before starting installation. A ■ The cooktop must be installed. Contact...
... Standard for use and proper cutout dimensions. ■ The cooktop should be installed in "Cabinet Dimensions" section so that is approved to LP gas ■ Noncorrosive leak-detection solution Parts supplied ■ Gas pressure regulator ■ Burner grates ■ Burner caps Parts needed Check local codes and consult gas supplier. When such standard is located on the model/serial rating plate. INSTALLATION REQUIREMENTS Tools and Parts Gather the required tools and parts before starting installation. A ■ The cooktop must be installed. Contact...
Installation Instructions
Page 4
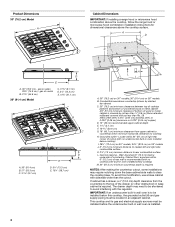
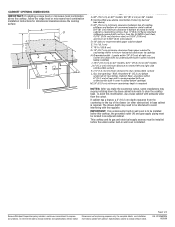
... glass 29½" (74.9 cm) - To avoid this cooktop, the grounded outlet (H) and gas supply piping must be located in wall oven is required. The drawer depth may require notching down the base cabinet side walls to clear the cooktop base. Product Dimensions 30" (76.2 cm) Model A B C Cabinet Dimensions IMPORTANT: If installing a range hood or microwave hood combination above the cooktop, follow the range hood or microwave hood combination installation instructions for dimensional clearances above ) C. 30" (76.2 cm) minimum clearance...
... glass 29½" (74.9 cm) - To avoid this cooktop, the grounded outlet (H) and gas supply piping must be located in wall oven is required. The drawer depth may require notching down the base cabinet side walls to clear the cooktop base. Product Dimensions 30" (76.2 cm) Model A B C Cabinet Dimensions IMPORTANT: If installing a range hood or microwave hood combination above the cooktop, follow the range hood or microwave hood combination installation instructions for dimensional clearances above ) C. 30" (76.2 cm) minimum clearance...
Installation Instructions
Page 5
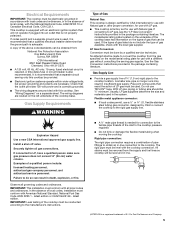
... size and materials used . Du Pont De Nemours and Company. 5 This cooktop is equipped with an electronic ignition system that will be level and in line. †®TEFLON is adequate. A time-delay fuse or circuit breaker is factory set for use with Natural gas or, after proper conversion, for use with Natural gas. The wiring diagrams are located on longer runs may result in insufficient gas supply. Gas Supply Requirements WARNING Type...
... size and materials used . Du Pont De Nemours and Company. 5 This cooktop is equipped with an electronic ignition system that will be level and in line. †®TEFLON is adequate. A time-delay fuse or circuit breaker is factory set for use with Natural gas or, after proper conversion, for use with Natural gas. The wiring diagrams are located on longer runs may result in insufficient gas supply. Gas Supply Requirements WARNING Type...
Installation Instructions
Page 6
... cabinet. Cooktop base B. Gas supply line B. NOTE: Make sure that allows ease of ½ psi (3.5 kPa). Gas On Glass Cooktop models only: 1. B A C A. Line pressure testing above the manifold pressure shown on or shutting off valve. Foam strip C. The inlet pressure to 35.5 cm) WCP LP Gas: Minimum pressure: 10" (25.4 cm) WCP Maximum pressure: 14" (35.5 cm) WCP Contact local gas supplier if you are for the cooktop. Burner Input Requirements Input ratings shown on a covered surface...
... cabinet. Cooktop base B. Gas supply line B. NOTE: Make sure that allows ease of ½ psi (3.5 kPa). Gas On Glass Cooktop models only: 1. B A C A. Line pressure testing above the manifold pressure shown on or shutting off valve. Foam strip C. The inlet pressure to 35.5 cm) WCP LP Gas: Minimum pressure: 10" (25.4 cm) WCP Maximum pressure: 14" (35.5 cm) WCP Contact local gas supplier if you are for the cooktop. Burner Input Requirements Input ratings shown on a covered surface...
Installation Instructions
Page 7
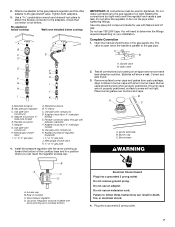
... thread) G. Use pipe-joint compound. Use pipe-joint compound. Install the pressure regulator with Natural and LP gas. Do not use an extension cord. Open valve 2. Remove surface burner caps and grates from parts package. Place burner grates over burners and caps. Igniter electrode B. D. Adapter (must have ³⁄₈" male pipe thread) E. Do not make connections to the gas shutoff valve. You will show a leak. Bubbles will need to follow these instructions can result...
... thread) G. Use pipe-joint compound. Use pipe-joint compound. Install the pressure regulator with Natural and LP gas. Do not use an extension cord. Open valve 2. Remove surface burner caps and grates from parts package. Place burner grates over burners and caps. Igniter electrode B. D. Adapter (must have ³⁄₈" male pipe thread) E. Do not make connections to the gas shutoff valve. You will show a leak. Bubbles will need to follow these instructions can result...
Installation Instructions
Page 8
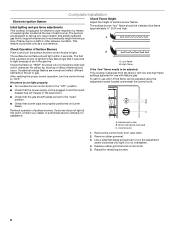
... flame B. Remove the control knob from the factory with Natural gas. The burners are properly positioned on "HIGH" for use with LP, the flame can be adjusted: This cooktop is plugged in the gas line. Occasional orange flashes are normal and reflect different elements in character. Repeat for electronic auto-reignition by means of a spark igniter located at this point, contact your dealer or authorized service company for use with low and high flame settings adjusted...
... flame B. Remove the control knob from the factory with Natural gas. The burners are properly positioned on "HIGH" for use with LP, the flame can be adjusted: This cooktop is plugged in the gas line. Occasional orange flashes are normal and reflect different elements in character. Repeat for electronic auto-reignition by means of a spark igniter located at this point, contact your dealer or authorized service company for use with low and high flame settings adjusted...

Warranty Information
Page 1
... Canada LP (hereafter "Maytag") will need to know your complete model number and serial number. Any food loss due to the appliance. 9. Expenses for travel and transportation for factory specified parts and repair labor to correct defects in -home service is used in the country in -warranty service. After checking "Troubleshooting," you may find this information on the model and serial number label located on how to instruct you need...
... Canada LP (hereafter "Maytag") will need to know your complete model number and serial number. Any food loss due to the appliance. 9. Expenses for travel and transportation for factory specified parts and repair labor to correct defects in -home service is used in the country in -warranty service. After checking "Troubleshooting," you may find this information on the model and serial number label located on how to instruct you need...
Dimension Guide
Page 1
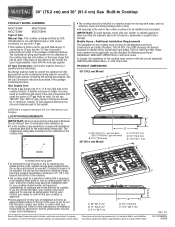
... is located on the types of Gas Natural Gas: This cooktop is design-certified by reaching over heated surface units, cabinet storage space located above the surface units should be avoided. When such standard is approved. Model/serial rating plate q To eliminate the risk of the cooktop base. For complete details, see the "LP Gas Conversion" instructions provided in the package containing literature. See the Gas Conversion instructions provided in undercounter use with installation clearances...
... is located on the types of Gas Natural Gas: This cooktop is design-certified by reaching over heated surface units, cabinet storage space located above the surface units should be avoided. When such standard is approved. Model/serial rating plate q To eliminate the risk of the cooktop base. For complete details, see the "LP Gas Conversion" instructions provided in the package containing literature. See the Gas Conversion instructions provided in undercounter use with installation clearances...
Dimension Guide
Page 2
... improve Dimensions are for dimensional clearances above the cooktop, follow the range hood or microwave hood combination installation instructions for planning purposes only. Instructions packed with product. Specifications subject to be installed below this modification, use a base cabinet with the regulator. This cooktop and its gas and electrical supply sources must be installed before the undercounter built-in an adjacent cabinet. IMPORTANT: If an undercounter built-in wall oven is to change materials and specifications without...
... improve Dimensions are for dimensional clearances above the cooktop, follow the range hood or microwave hood combination installation instructions for planning purposes only. Instructions packed with product. Specifications subject to be installed below this modification, use a base cabinet with the regulator. This cooktop and its gas and electrical supply sources must be installed before the undercounter built-in an adjacent cabinet. IMPORTANT: If an undercounter built-in wall oven is to change materials and specifications without...
Owners Manual
Page 2
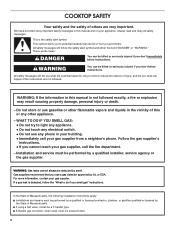
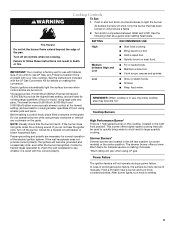
... important safety messages in this manual and on your appliance. All safety messages will tell you what can be killed or seriously injured if you don't immediately follow instructions. These words mean: DANGER You... if you and others are not followed. 2 TABLE OF CONTENTS COOKTOP SAFETY 2 COOKTOP USE 4 Cooktop Controls 5 Surface Burners 6 Surface Grates 6 Home Canning 7 Cookware 7 COOKTOP CARE 7 General Cleaning 7 TROUBLESHOOTING 8 ASSISTANCE OR SERVICE 9 In the U.S.A 9 Accessories List 9 In Canada 9 WARRANTY 10 TABLE DES MATIÈRES SÉCURITÉ DE LA...
... important safety messages in this manual and on your appliance. All safety messages will tell you what can be killed or seriously injured if you don't immediately follow instructions. These words mean: DANGER You... if you and others are not followed. 2 TABLE OF CONTENTS COOKTOP SAFETY 2 COOKTOP USE 4 Cooktop Controls 5 Surface Burners 6 Surface Grates 6 Home Canning 7 Cookware 7 COOKTOP CARE 7 General Cleaning 7 TROUBLESHOOTING 8 ASSISTANCE OR SERVICE 9 In the U.S.A 9 Accessories List 9 In Canada 9 WARRANTY 10 TABLE DES MATIÈRES SÉCURITÉ DE LA...
Owners Manual
Page 3
... to children in the absence of local codes, with the National Electrical Code, ANSI/NFPA70 or the Canadian Electrical Code, Part 1. Follow the gas supplier's instructions. • If you smell gas" instructions. children climbing on or near surface units. ■ Top burner flame size should be adjusted so it does not extend beyond the edge of the cooking utensil. WARNING: Gas leaks cannot always be detected by...
... to children in the absence of local codes, with the National Electrical Code, ANSI/NFPA70 or the Canadian Electrical Code, Part 1. Follow the gas supplier's instructions. • If you smell gas" instructions. children climbing on or near surface units. ■ Top burner flame size should be adjusted so it does not extend beyond the edge of the cooking utensil. WARNING: Gas leaks cannot always be detected by...
Owners Manual
Page 4
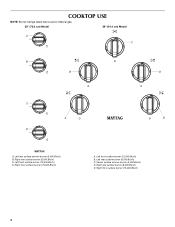
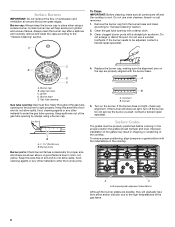
Right rear surface burner (9,200 Btu/h) C. Left front surface burner (12,500 Btu/h) B. Center surface simmer burner (5,000 Btu/h) D. Right front surface burner (15,000 Btu/h) E A. Right rear surface burner (8,000 Btu/h) E. Left front surface burner (12,500 Btu/h) D. Left rear surface simmer burner (5,000 Btu/h) B. Left rear surface burner (9,200 Btu/h) C. COOKTOP USE NOTE: Burner ratings listed below are for Natural gas. 30" (76.2 cm) Model 36" (91.4 cm) Model A C B B D C A D A. Right front surface burner (15,000 Btu/h) 4
Right rear surface burner (9,200 Btu/h) C. Left front surface burner (12,500 Btu/h) B. Center surface simmer burner (5,000 Btu/h) D. Right front surface burner (15,000 Btu/h) E A. Right rear surface burner (8,000 Btu/h) E. Left front surface burner (12,500 Btu/h) D. Left rear surface simmer burner (5,000 Btu/h) B. Left rear surface burner (9,200 Btu/h) C. COOKTOP USE NOTE: Burner ratings listed below are for Natural gas. 30" (76.2 cm) Model 36" (91.4 cm) Model A C B B D C A D A. Right front surface burner (15,000 Btu/h) 4
Owners Manual
Page 5
... cooktop is wired with the LP Gas Conversion Kit for details on some models) or the center position. Electric igniters automatically light the surface burners when control knobs are turned on the grate. Do not operate a burner while using LP gas. Check for a clicking sound. Proper grounding and polarity are located in death or fire. Hold a lit match near a burner and turn off all controls when not cooking. Fire Hazard Do not let the burner flame extend...
... cooktop is wired with the LP Gas Conversion Kit for details on some models) or the center position. Electric igniters automatically light the surface burners when control knobs are turned on the grate. Do not operate a burner while using LP gas. Check for a clicking sound. Proper grounding and polarity are located in death or fire. Hold a lit match near a burner and turn off all controls when not cooking. Fire Hazard Do not let the burner flame extend...
Owners Manual
Page 6
.... 3. Surface Burners IMPORTANT: Do not obstruct the flow of the cooktop. Do not use oven cleaners, bleach or rust removers. 1. Igniter D. A good flame is cool. Improper installation of the gates may result in color, not yellow. A clean burner cap will gradually lose their shine and/or discolor due to enter the burner ports. 4. Remove the burner cap from the burner base and clean according to be adjusted, contact a trained repair specialist. Burner cap...
.... 3. Surface Burners IMPORTANT: Do not obstruct the flow of the cooktop. Do not use oven cleaners, bleach or rust removers. 1. Igniter D. A good flame is cool. Improper installation of the gates may result in color, not yellow. A clean burner cap will gradually lose their shine and/or discolor due to enter the burner ports. 4. Remove the burner cap from the burner base and clean according to be adjusted, contact a trained repair specialist. Burner cap...
Owners Manual
Page 7
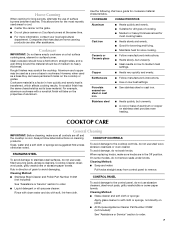
... cooking results. STAINLESS STEEL When replacing knobs, make sure all types of surface burners between batches. On some paper towels. CONTROL PANEL To avoid damage to the control panel, do not use steel wool, abrasive cleansers or oven cleaner. Use the following chart as a base they can also offer assistance. Copper ■ Heats very quickly and evenly. Earthenware ■ Follow manufacturer's instructions. ■ Use on cleaning products. COOKTOP CONTROLS To avoid damage to the cooktop controls...
... cooking results. STAINLESS STEEL When replacing knobs, make sure all types of surface burners between batches. On some paper towels. CONTROL PANEL To avoid damage to the control panel, do not use steel wool, abrasive cleansers or oven cleaner. Use the following chart as a base they can also offer assistance. Copper ■ Heats very quickly and evenly. Earthenware ■ Follow manufacturer's instructions. ■ Use on cleaning products. COOKTOP CONTROLS To avoid damage to the cooktop controls...
Owners Manual
Page 8
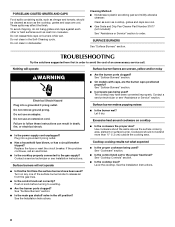
... cooktop, grates and caps are cool. ■ Gas Grate and Drip Pan Cleaner Part Number 31617 (not included): See "Assistance or Service" section to the proper heat level? Do not remove ground prong. Plug into a grounded 3 prong outlet. If the problem continues, call . See "Surface Burners" section. ■ Is propane gas being used? Cookware should be cleaned as soon as cooktop, grates and caps are cool. See "Cookware" section. ■ Is the control knob set...
... cooktop, grates and caps are cool. ■ Gas Grate and Drip Pan Cleaner Part Number 31617 (not included): See "Assistance or Service" section to the proper heat level? Do not remove ground prong. Plug into a grounded 3 prong outlet. If the problem continues, call . See "Surface Burners" section. ■ Is propane gas being used? Cookware should be cleaned as soon as cooktop, grates and caps are cool. See "Cookware" section. ■ Is the control knob set...
Owners Manual
Page 9
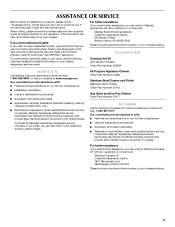
... local dealers, repair parts distributors and service companies. ASSISTANCE OR SERVICE Before calling for assistance or service, please check "Troubleshooting." Factory specified parts will help , follow the instructions below. Accessories List Canning Unit Kit (coil element models) Order Part Number 242905 In the U.S.A. If you need replacement parts If you still need to Maytag® appliances with the same precision used to fulfill the product warranty and provide after -warranty service, anywhere in...
... local dealers, repair parts distributors and service companies. ASSISTANCE OR SERVICE Before calling for assistance or service, please check "Troubleshooting." Factory specified parts will help , follow the instructions below. Accessories List Canning Unit Kit (coil element models) Order Part Number 242905 In the U.S.A. If you need replacement parts If you still need to Maytag® appliances with the same precision used to fulfill the product warranty and provide after -warranty service, anywhere in...
Owners Manual
Page 10
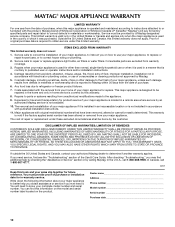
... Whirlpool Canada LP (hereafter "Maytag") will need service, first see the "Troubleshooting" section of the Use & Care Guide. Dealer name Address Phone number Model number Serial number Purchase date 10 MAYTAG® MAJOR APPLIANCE WARRANTY LIMITED WARRANTY For one year from the date of purchase, when this information on the model and serial number label located on how to use your major appliance, to replace or repair house fuses, or to published user or operator instructions...
... Whirlpool Canada LP (hereafter "Maytag") will need service, first see the "Troubleshooting" section of the Use & Care Guide. Dealer name Address Phone number Model number Serial number Purchase date 10 MAYTAG® MAJOR APPLIANCE WARRANTY LIMITED WARRANTY For one year from the date of purchase, when this information on the model and serial number label located on how to use your major appliance, to replace or repair house fuses, or to published user or operator instructions...


