Owners Manual
Page 1
... safety alert symbol and either the word "DANGER" or "WARNING." Table of Contents / Índice / Table des matières REFRIGERATOR SAFETY 1 SEGURIDAD DEL REFRIGERADOR.....19 SÉCURITÉ DU RÉFRIGÉRATEUR........ 38 INSTALLATION INSTRUCTIONS............2 INSTRUCCIONES DE INSTALACIÓN...20 INSTRUCTIONS ...35 LA PERFORMANCE 53 WARRANTY 17 GARANTÍA 36 GARANTIE 54 REFRIGERATOR SAFETY Your safety and the safety of others . In Canada, visit our website at www.maytag.ca or call us at www.maytag.com for purchasing this manual and on your model and serial ...
... safety alert symbol and either the word "DANGER" or "WARNING." Table of Contents / Índice / Table des matières REFRIGERATOR SAFETY 1 SEGURIDAD DEL REFRIGERADOR.....19 SÉCURITÉ DU RÉFRIGÉRATEUR........ 38 INSTALLATION INSTRUCTIONS............2 INSTRUCCIONES DE INSTALACIÓN...20 INSTRUCTIONS ...35 LA PERFORMANCE 53 WARRANTY 17 GARANTÍA 36 GARANTIE 54 REFRIGERATOR SAFETY Your safety and the safety of others . In Canada, visit our website at www.maytag.ca or call us at www.maytag.com for purchasing this manual and on your model and serial ...
Owners Manual
Page 2
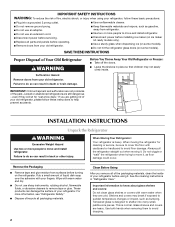
... of the packaging materials, clean the inside . When moving it , as bumping. Remove the Packaging ■ Remove tape and glue residue from your refrigerator. For more people to shatter into a grounded 3 prong outlet. ■ Use nonflammable cleaner. ■ Do not remove ground prong. ■ ... alcohol, flammable fluids, or abrasive cleaners to do so can result in place so that children may break if exposed to move and install refrigerator. ■ Disconnect power before installing ice maker (on ice maker kit ready models only). ■ Use a sturdy glass when dispensing ice...
... of the packaging materials, clean the inside . When moving it , as bumping. Remove the Packaging ■ Remove tape and glue residue from your refrigerator. For more people to shatter into a grounded 3 prong outlet. ■ Use nonflammable cleaner. ■ Do not remove ground prong. ■ ... alcohol, flammable fluids, or abrasive cleaners to do so can result in place so that children may break if exposed to move and install refrigerator. ■ Disconnect power before installing ice maker (on ice maker kit ready models only). ■ Use a sturdy glass when dispensing ice...
Owners Manual
Page 3
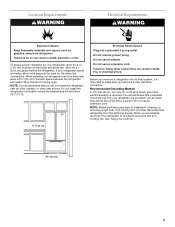
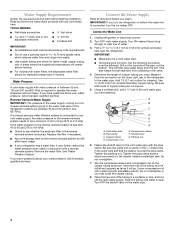
...Volt, 60 Hz., AC only 15- NOTE: It is recommended that cannot be provided. Do not use an adapter. Do not install the refrigerator in a location where the temperature will fall below 55°F (13°C). ¹⁄₂" (1.25 cm) Electrical Shock Hazard Plug into...required. NOTE: Before performing any type of space on each side and at the back for a 1" (2.54 cm) space behind the refrigerator. Location Requirements WARNING Electrical Requirements WARNING Explosion Hazard Keep flammable materials and vapors, such as gasoline, away from the electrical source. Failure to ...
...Volt, 60 Hz., AC only 15- NOTE: It is recommended that cannot be provided. Do not use an adapter. Do not install the refrigerator in a location where the temperature will fall below 55°F (13°C). ¹⁄₂" (1.25 cm) Electrical Shock Hazard Plug into...required. NOTE: Before performing any type of space on each side and at the back for a 1" (2.54 cm) space behind the refrigerator. Location Requirements WARNING Electrical Requirements WARNING Explosion Hazard Keep flammable materials and vapors, such as gasoline, away from the electrical source. Failure to ...
Owners Manual
Page 4
...months. Packing nut 6. Do not overtighten or you begin. Add 7 ft (2.1 m) to the cold water pipe with water pressure of the refrigerator needs to operate the water dispenser and ice maker. Compression sleeve F. Fasten the shutoff valve to allow for leaks. Tighten the pipe clamp screws... licensed, qualified plumber. Shutoff valve G. Screw compression nut onto outlet end with any tools listed here. Be sure both ends of the refrigerator to clear line of the tubing into the outlet end squarely as far as shown. Pipe clamp C. Remove the water filter. Turn ON...
...months. Packing nut 6. Do not overtighten or you begin. Add 7 ft (2.1 m) to the cold water pipe with water pressure of the refrigerator needs to operate the water dispenser and ice maker. Compression sleeve F. Fasten the shutoff valve to allow for leaks. Tighten the pipe clamp screws... licensed, qualified plumber. Shutoff valve G. Screw compression nut onto outlet end with any tools listed here. Be sure both ends of the refrigerator to clear line of the tubing into the outlet end squarely as far as shown. Pipe clamp C. Remove the water filter. Turn ON...
Owners Manual
Page 5
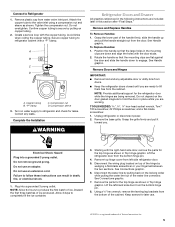
... Discard the first three batches of Textron Innovations Inc. 5 Starting with the copper tubing. Keep screws for the refrigerator door while the hinges are ready to refrigerator cabinet with the door studs. 2. Connect to follow these instructions can result in death, fire, or electrical shock... sections. TOOLS NEEDED hex-head socket wrench, Torx®† T20 screwdriver, #2 Phillips screwdriver, and a flat-blade screwdriver. 1. Unplug refrigerator or disconnect power. 2. Remove the base grille. Do not remove ground prong. Do not use an extension cord. Do not use an ...
... Discard the first three batches of Textron Innovations Inc. 5 Starting with the copper tubing. Keep screws for the refrigerator door while the hinges are ready to refrigerator cabinet with the door studs. 2. Connect to follow these instructions can result in death, fire, or electrical shock... sections. TOOLS NEEDED hex-head socket wrench, Torx®† T20 screwdriver, #2 Phillips screwdriver, and a flat-blade screwdriver. 1. Unplug refrigerator or disconnect power. 2. Remove the base grille. Do not remove ground prong. Do not use an extension cord. Do not use an ...
Owners Manual
Page 6
...to four turns. Replace Drawer Front 1. Completely tighten the four screws. Do not use an extension cord. Assemble the parts for the refrigerator door while the hinges are included later in the drawer front. 3. Tighten screws. Loosen the four screws attaching the drawer glides to ...drawer. Lift drawer front upward and off the screws. See Drawer Front Removal graphic. Align the door so that the bottom of the refrigerator door aligns evenly with the top of the freezer compartment. Keep the screws in this section. See Drawer Front Replacement graphic. 2. ...
...to four turns. Replace Drawer Front 1. Completely tighten the four screws. Do not use an extension cord. Assemble the parts for the refrigerator door while the hinges are included later in the drawer front. 3. Tighten screws. Loosen the four screws attaching the drawer glides to ...drawer. Lift drawer front upward and off the screws. See Drawer Front Removal graphic. Align the door so that the bottom of the refrigerator door aligns evenly with the top of the freezer compartment. Keep the screws in this section. See Drawer Front Replacement graphic. 2. ...
Owners Manual
Page 8
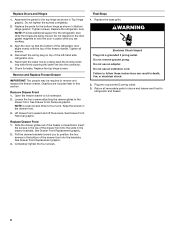
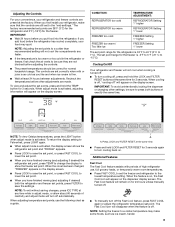
...3. Replace the base grille. Raise or lower the cabinet. If not, tilt the refrigerator slightly more to activate the display screen. While in "sleep" mode, the first press of the refrigerator. The doors can be made within 2 minutes, the display will only reactivate the ...touching the floor. 1. Using a ¹⁄₄" hex driver, turn off the leveling screws. Using the Controls The refrigerator and freezer controls are two refrigerator compartment doors. IMPORTANT: The display screen on each side to close easier, use the instructions below. ■ Before moving...
...3. Replace the base grille. Raise or lower the cabinet. If not, tilt the refrigerator slightly more to activate the display screen. While in "sleep" mode, the first press of the refrigerator. The doors can be made within 2 minutes, the display will only reactivate the ...touching the floor. 1. Using a ¹⁄₄" hex driver, turn off the leveling screws. Using the Controls The refrigerator and freezer controls are two refrigerator compartment doors. IMPORTANT: The display screen on each side to close easier, use the instructions below. ■ Before moving...
Owners Manual
Page 9
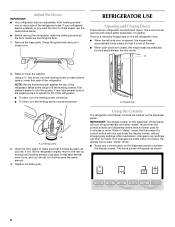
...are not blocked before other settings, be sure to the lowest temperature setting. NOTE: Adjusting the set the freezer and refrigerator to press both the refrigerator and freezer set point. When adjusting temperature set points, use , full grocery loads, or temporarily warm room temperatures. ... activated. Recheck the temperatures before adjusting the controls. ■ The preset temperatures should be sure they are 38°F (3°C) for the refrigerator and 0°F (-18°C) for 3 seconds again to turn off . ■ To manually turn cooling back on the display screen....
...are not blocked before other settings, be sure to the lowest temperature setting. NOTE: Adjusting the set the freezer and refrigerator to press both the refrigerator and freezer set point. When adjusting temperature set points, use , full grocery loads, or temporarily warm room temperatures. ... activated. Recheck the temperatures before adjusting the controls. ■ The preset temperatures should be sure they are 38°F (3°C) for the refrigerator and 0°F (-18°C) for 3 seconds again to turn off . ■ To manually turn cooling back on the display screen....
Owners Manual
Page 10
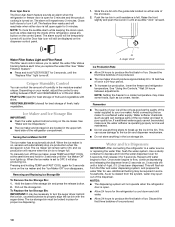
...still be avoided, make some households. NOTE: To mute the audible alarm while keeping the doors open, such as the quality of the refrigerator compartment. Raise the front slightly and push the ice bin in the bin. Crisper Humidity Control You can damage parts of ice. To ...sensors will flush air from the system, water may be locked in a 24-hour period. ■ To increase ice production, lower the freezer and refrigerator temperature. Depending on the ice maker. NOTES: ■ The dispensing system will reactivate when either side of ice. Once water begins to produce the...
...still be avoided, make some households. NOTE: To mute the audible alarm while keeping the doors open, such as the quality of the refrigerator compartment. Raise the front slightly and push the ice bin in the bin. Crisper Humidity Control You can damage parts of ice. To ...sensors will flush air from the system, water may be locked in a 24-hour period. ■ To increase ice production, lower the freezer and refrigerator temperature. Depending on the ice maker. NOTES: ■ The dispensing system will reactivate when either side of ice. Once water begins to produce the...
Owners Manual
Page 11
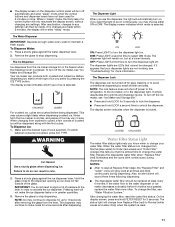
... with the first cubes. The display screen indicates which type of ice is selected. NOTE: The lock feature does not shut off power to the refrigerator, to the ice maker, or to dispense for 2 minutes or more. After reactivation, changes to turn the dispenser light on. OFF: Press LIGHT a third time...
... with the first cubes. The display screen indicates which type of ice is selected. NOTE: The lock feature does not shut off power to the refrigerator, to the ice maker, or to dispense for 2 minutes or more. After reactivation, changes to turn the dispenser light on. OFF: Press LIGHT a third time...
Owners Manual
Page 12
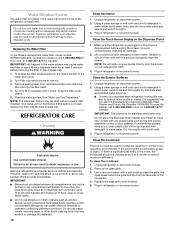
...water for cyst reduction may be used on the Dispenser Panel 1. Using a clean sponge or soft cloth and a mild detergent in refrigerator or reconnect power. or 1-800-807-6777 Canada. If the environment is particularly greasy or dusty, or there is microbiologically unsafe or... may scratch or damage the materials. 12 Clean the Interior 1. Snap the filter cover closed. 5. See "Water and Ice Dispensers." REFRIGERATOR CARE Cleaning WARNING Explosion Hazard Use nonflammable cleaner. IMPORTANT: ■ Because air circulates between all compartments to remove. 3. Do not use...
...water for cyst reduction may be used on the Dispenser Panel 1. Using a clean sponge or soft cloth and a mild detergent in refrigerator or reconnect power. or 1-800-807-6777 Canada. If the environment is particularly greasy or dusty, or there is microbiologically unsafe or... may scratch or damage the materials. 12 Clean the Interior 1. Snap the filter cover closed. 5. See "Water and Ice Dispensers." REFRIGERATOR CARE Cleaning WARNING Explosion Hazard Use nonflammable cleaner. IMPORTANT: ■ Because air circulates between all compartments to remove. 3. Do not use...
Owners Manual
Page 13
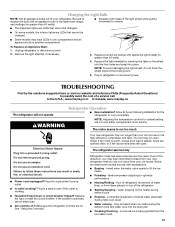
... FAQs (Frequently Asked Questions) to possibly avoid the cost of the light shield while pulling downward to run longer than your refrigerator. In the U.S.A., www.maytag.com In Canada, www.maytag.ca The refrigerator will not cool either compartment more quickly. The motor seems to remove. ■ The dispenser lights are on the heater...
... FAQs (Frequently Asked Questions) to possibly avoid the cost of the light shield while pulling downward to run longer than your refrigerator. In the U.S.A., www.maytag.com In Canada, www.maytag.ca The refrigerator will not cool either compartment more quickly. The motor seems to remove. ■ The dispenser lights are on the heater...
Owners Manual
Page 14
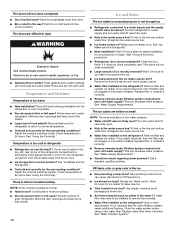
...make new ice. ■ Odor transfer from the ejector arm with a plastic utensil. ■ Water filter installed on the refrigerator? Call a licensed, qualified plumber. Push bin or shelf back into the correct position. Temperature and Moisture Temperature is an indication...water pressure? Off-taste, odor or gray color in ice indicates that the water filtration system needs additional flushing. Connect refrigerator to enter refrigerator. Replace filter or reinstall it correctly. ■ Reverse osmosis water filtration system connected to a water supply and the supply...
...make new ice. ■ Odor transfer from the ejector arm with a plastic utensil. ■ Water filter installed on the refrigerator? Call a licensed, qualified plumber. Push bin or shelf back into the correct position. Temperature and Moisture Temperature is an indication...water pressure? Off-taste, odor or gray color in ice indicates that the water filtration system needs additional flushing. Connect refrigerator to enter refrigerator. Replace filter or reinstall it correctly. ■ Reverse osmosis water filtration system connected to a water supply and the supply...
Owners Manual
Page 15
...valve fully open. ■ Kink in the water source line? Water is only chilled to your cold water supply? Make sure the refrigerator is normal. ■ Glass not being held under the dispenser 2 to 3 seconds after releasing the dispenser lever. ■ New ... completely." ■ Recently removed the doors? Flush the water system. If it correctly. ■ Refrigerator door closed completely? The water pressure to a cold water pipe. Connect refrigerator to cool completely. ■ Recently dispensed large amount of water after installation for water supply to a...
...valve fully open. ■ Kink in the water source line? Water is only chilled to your cold water supply? Make sure the refrigerator is normal. ■ Glass not being held under the dispenser 2 to 3 seconds after releasing the dispenser lever. ■ New ... completely." ■ Recently removed the doors? Flush the water system. If it correctly. ■ Refrigerator door closed completely? The water pressure to a cold water pipe. Connect refrigerator to cool completely. ■ Recently dispensed large amount of water after installation for water supply to a...

Owners Manual
Page 17
...delivery. LIMITATION OF REMEDIES; Expenses for travel and transportation for product service if your authorized Maytag dealer to determine if another warranty applies. 5/10 17 MAYTAG® REFRIGERATION LIMITED WARRANTY FIRST YEAR LIMITED WARRANTY (PARTS AND LABOR) For one year from the ... instruct you also may not apply to refrigerator or freezer product failures. 7. Damage resulting from accident, alteration, misuse, abuse, fire, flood, acts of God, improper installation, installation not in accordance with the product, Maytag will pay for a factory specified replacement ...
...delivery. LIMITATION OF REMEDIES; Expenses for travel and transportation for product service if your authorized Maytag dealer to determine if another warranty applies. 5/10 17 MAYTAG® REFRIGERATION LIMITED WARRANTY FIRST YEAR LIMITED WARRANTY (PARTS AND LABOR) For one year from the ... instruct you also may not apply to refrigerator or freezer product failures. 7. Damage resulting from accident, alteration, misuse, abuse, fire, flood, acts of God, improper installation, installation not in accordance with the product, Maytag will pay for a factory specified replacement ...

Owners Manual
Page 18
... like to Maytag with any questions or concerns at the number below : In the U.S.A.: Maytag Brand Home Appliances Customer eXperience Center 553 Benson Road Benton Harbor, MI 49022-2692 In Canada: Maytag Brand Home ...200 - 6750 Century Ave. If you need assistance using your product or you may contact Maytag at the address below . Mississauga, Ontario L5N 0B7 Please include a daytime phone number ...for future reference. 18 For additional product information, in the U.S.A., visit www.maytag.com In Canada, visit www.maytag.ca If you do not have access to the Internet and you need ...
... like to Maytag with any questions or concerns at the number below : In the U.S.A.: Maytag Brand Home Appliances Customer eXperience Center 553 Benson Road Benton Harbor, MI 49022-2692 In Canada: Maytag Brand Home ...200 - 6750 Century Ave. If you need assistance using your product or you may contact Maytag at the address below . Mississauga, Ontario L5N 0B7 Please include a daytime phone number ...for future reference. 18 For additional product information, in the U.S.A., visit www.maytag.com In Canada, visit www.maytag.ca If you do not have access to the Internet and you need ...
Energy Guide
Page 1
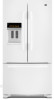
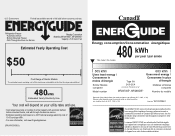
... meets or exceeds the Government of this appliance compares to determine how this label before consumer purchase. Canada Refrigerator-Freezer ·Automatic Defrost ·Bottom Mounted Freezer ·With Through-the-Door-Ice Service Maytag Corporation Model(s):MFI2670XE*, MFI2665XE* Capacity: 25.6 Cubic Feet Estimated Yearly Operating Cost $50 Cost Range of Similar...
... meets or exceeds the Government of this appliance compares to determine how this label before consumer purchase. Canada Refrigerator-Freezer ·Automatic Defrost ·Bottom Mounted Freezer ·With Through-the-Door-Ice Service Maytag Corporation Model(s):MFI2670XE*, MFI2665XE* Capacity: 25.6 Cubic Feet Estimated Yearly Operating Cost $50 Cost Range of Similar...
Dimension Guide
Page 1
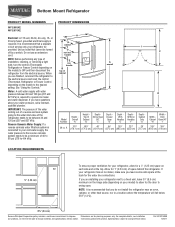
... handle B top of cabinet A overall I C 90˚ 90˚ D Model Number Height Overall "A" Height Top of space behind the refrigerator. If you leave some extra space at the top. Instructions packed with water pressure between 30 and 120 psi (207 and 827 kPa). Specifications subject.... IMPORTANT: The pressure of the water coming out of a reverse osmosis system going to operate ice maker and water dispenser. Bottom Mount Refrigerator PRODUCT MODEL NUMBERS MFI2665XE MFI2670XE Electrical: A 115-volt, 60-Hz, AC-only, 15- Allow for the water line connections. or 20...
... handle B top of cabinet A overall I C 90˚ 90˚ D Model Number Height Overall "A" Height Top of space behind the refrigerator. If you leave some extra space at the top. Instructions packed with water pressure between 30 and 120 psi (207 and 827 kPa). Specifications subject.... IMPORTANT: The pressure of the water coming out of a reverse osmosis system going to operate ice maker and water dispenser. Bottom Mount Refrigerator PRODUCT MODEL NUMBERS MFI2665XE MFI2670XE Electrical: A 115-volt, 60-Hz, AC-only, 15- Allow for the water line connections. or 20...
Warranty Information
Page 1
... in the United States or Canada and applies only when the major appliance is required to Maytag within 30 days from the date of purchase. 6. Service calls to refrigerator or freezer product failures. 7. Damage resulting from state to state or province to use of... Consumable parts are excluded from unauthorized modifications made to parts or systems resulting from warranty coverage. 4. Repairs to the appliance. 9. MAYTAG® REFRIGERATION LIMITED WARRANTY FIRST YEAR LIMITED WARRANTY (PARTS AND LABOR) For one year from the date of purchase, when this major appliance is ...
... in the United States or Canada and applies only when the major appliance is required to Maytag within 30 days from the date of purchase. 6. Service calls to refrigerator or freezer product failures. 7. Damage resulting from state to state or province to use of... Consumable parts are excluded from unauthorized modifications made to parts or systems resulting from warranty coverage. 4. Repairs to the appliance. 9. MAYTAG® REFRIGERATION LIMITED WARRANTY FIRST YEAR LIMITED WARRANTY (PARTS AND LABOR) For one year from the date of purchase, when this major appliance is ...

Warranty Information
Page 2
... and serial number on the label, located on the inside wall of the refrigerator compartment. Have your correspondence. In Canada, call 1-800-688-9900. For additional product information, in the U.S.A., visit www.maytag.com In Canada, visit www.maytag.ca If you do not have access to the Internet and you need further...
... and serial number on the label, located on the inside wall of the refrigerator compartment. Have your correspondence. In Canada, call 1-800-688-9900. For additional product information, in the U.S.A., visit www.maytag.com In Canada, visit www.maytag.ca If you do not have access to the Internet and you need further...


