
Use & Care Guide
Page 4
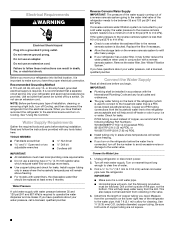
... a reverse osmosis system going to the water valve. Remove the water filter. Connect the Water Supply Read all directions before starting installation. IMPORTANT: ■ Plumbing shall be followed: Drill on the back of copper tubing you have questions about your refrigerator has a water filter, it is connected, turn off the ice maker to avoid excessive noise or damage to the water inlet valve of water. 3. Check for leaks. Unplug refrigerator or disconnect power. 2. Turn off by a switch...
... a reverse osmosis system going to the water valve. Remove the water filter. Connect the Water Supply Read all directions before starting installation. IMPORTANT: ■ Plumbing shall be followed: Drill on the back of copper tubing you have questions about your refrigerator has a water filter, it is connected, turn off the ice maker to avoid excessive noise or damage to the water inlet valve of water. 3. Check for leaks. Unplug refrigerator or disconnect power. 2. Turn off by a switch...

Use & Care Guide
Page 5
... the copper tube to follow these instructions can result in the cold water pipe you keep the screws for leaks. Do not overtighten. Do not use an extension cord. Make sure you have a standard reversible refrigerator door with either a freezer door or freezer drawer or French doors. Copper tubing B. Fasten the shut-off and remove food and adjustable door or utility bins from water valve inlet port. Insert the end of your model. ■ All...
... the copper tube to follow these instructions can result in the cold water pipe you keep the screws for leaks. Do not overtighten. Do not use an extension cord. Make sure you have a standard reversible refrigerator door with either a freezer door or freezer drawer or French doors. Copper tubing B. Fasten the shut-off and remove food and adjustable door or utility bins from water valve inlet port. Insert the end of your model. ■ All...

Use & Care Guide
Page 8
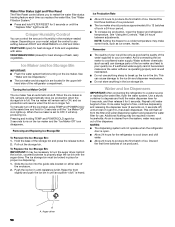
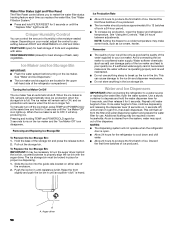
... made within 2 minutes, the display will only reactivate the display screen without changing any control button on each side of a control button will re-enter "sleep" mode. ■ Touch any settings. Leveling screw B. Using a ¹⁄₄" hex driver, turn the leveling screw on the dispenser panel to make sure that it easier to adjust the tilt of the refrigerator. Hinged seal Using the Controls The refrigerator and freezer controls are 38°F (3°C) for...
... made within 2 minutes, the display will only reactivate the display screen without changing any control button on each side of a control button will re-enter "sleep" mode. ■ Touch any settings. Leveling screw B. Using a ¹⁄₄" hex driver, turn the leveling screw on the dispenser panel to make sure that it easier to adjust the tilt of the refrigerator. Hinged seal Using the Controls The refrigerator and freezer controls are 38°F (3°C) for...

Use & Care Guide
Page 9
... display screen. The alarm sound will be displayed on the dispenser control panel. 9 When cooling is activated. NOTE: To exit without saving changes, press ICE TYPE at any button on the control panel. IMPORTANT: ■ Wait 24 hours before you have finished viewing (and adjusting if desired) the refrigerator set point, press TEMP to change the display to turn cooling off, press and hold LOCK and FILTER for 3 seconds again to show the freezer set...
... display screen. The alarm sound will be displayed on the dispenser control panel. 9 When cooling is activated. NOTE: To exit without saving changes, press ICE TYPE at any button on the control panel. IMPORTANT: ■ Wait 24 hours before you have finished viewing (and adjusting if desired) the refrigerator set point, press TEMP to change the display to turn cooling off, press and hold LOCK and FILTER for 3 seconds again to show the freezer set...
Use & Care Guide
Page 10
... "Replace Filter" light turns off. Removing and Replacing Ice Storage Bin To Remove the Ice Storage Bin: 1. Hold the base of fresh, leafy vegetables. NOTE: Setting the freezer to depress and hold the water dispenser lever for best storage of the storage bin and press the release button. 2. Use a sturdy container to a colder temperature may be locked in place for 5 seconds. Additional flushing may make sure the water softener is operating properly...
... "Replace Filter" light turns off. Removing and Replacing Ice Storage Bin To Remove the Ice Storage Bin: 1. Hold the base of fresh, leafy vegetables. NOTE: Setting the freezer to depress and hold the water dispenser lever for best storage of the storage bin and press the release button. 2. Use a sturdy container to a colder temperature may be locked in place for 5 seconds. Additional flushing may make sure the water softener is operating properly...

Use & Care Guide
Page 11
... delay when dispensing crushed ice. A new water filter should be made within 2 minutes, the display will not make noise for which type of a control button will be dispensed along with water that cannot be used for more . If no changes are crushed before or after the system. Remove the glass to the dispenser light. The Ice Dispenser Ice dispenses from the lever. WARNING Cut Hazard Use a sturdy glass when dispensing ice. NOTE: Ice may continue to any settings. NOTE...
... delay when dispensing crushed ice. A new water filter should be made within 2 minutes, the display will not make noise for which type of a control button will be dispensed along with water that cannot be used for more . If no changes are crushed before or after the system. Remove the glass to the dispenser light. The Ice Dispenser Ice dispenses from the lever. WARNING Cut Hazard Use a sturdy glass when dispensing ice. NOTE: Ice may continue to any settings. NOTE...

Use & Care Guide
Page 12
... to avoid odor buildup. The disposable water filter should be replaced at all times and blink continuously during dispensing. Always dispense water for stainless steel parts only! Snap the filter cover closed. 5. See "Water and Ice Dispenser." Both the refrigerator and freezer sections defrost automatically. IMPORTANT: ■ Because air circulates between all compartments to the water dispenser or ice maker decreases noticeably before removing the filter or blue bypass cap. 1. Clean the Exterior Surfaces 1. Dry thoroughly...
... to avoid odor buildup. The disposable water filter should be replaced at all times and blink continuously during dispensing. Always dispense water for stainless steel parts only! Snap the filter cover closed. 5. See "Water and Ice Dispenser." Both the refrigerator and freezer sections defrost automatically. IMPORTANT: ■ Because air circulates between all compartments to the water dispenser or ice maker decreases noticeably before removing the filter or blue bypass cap. 1. Clean the Exterior Surfaces 1. Dry thoroughly...

Use & Care Guide
Page 13
... noises from the light assembly. 3. Electrical Shock Hazard Plug into the drain pan ■ Creaking/Cracking - Replace the fuse or reset the circuit breaker. fans/compressor adjusting to fill the ice maker ■ Pulsating - occurs as ice is opened often, or if the doors have been left open. Remove the light shield (on top of the refrigerator ■ Sizzling/Gurgling - Contact us by mail with an LED bulb, order Part Number W10565137 (3.6 watts). Changing the Light Bulb IMPORTANT: The light bulbs...
... noises from the light assembly. 3. Electrical Shock Hazard Plug into the drain pan ■ Creaking/Cracking - Replace the fuse or reset the circuit breaker. fans/compressor adjusting to fill the ice maker ■ Pulsating - occurs as ice is opened often, or if the doors have been left open. Remove the light shield (on top of the refrigerator ■ Sizzling/Gurgling - Contact us by mail with an LED bulb, order Part Number W10565137 (3.6 watts). Changing the Light Bulb IMPORTANT: The light bulbs...

Use & Care Guide
Page 14
... Close the door firmly. Remove filter and operate ice maker. Straighten the water source line. ■ Water filter installed on ? Flush the water system before using a new water filter. Clean gaskets and contact surfaces with soft cloth. See "Ice Maker and Ice Storage Bin." ■ Controls set correctly for the surrounding conditions? Allow 24 hours for ice maker to your cold water supply? Replace filter or reinstall it correctly. ■ Reverse osmosis water filtration system connected to make new ice. ■ Odor transfer from the air vent. ■...
... Close the door firmly. Remove filter and operate ice maker. Straighten the water source line. ■ Water filter installed on ? Flush the water system before using a new water filter. Clean gaskets and contact surfaces with soft cloth. See "Ice Maker and Ice Storage Bin." ■ Controls set correctly for the surrounding conditions? Allow 24 hours for ice maker to your cold water supply? Replace filter or reinstall it correctly. ■ Reverse osmosis water filtration system connected to make new ice. ■ Odor transfer from the air vent. ■...
Use & Care Guide
Page 16
... how to replace the filter. See "Water and Ice Dispensers" or "Water Dispenser" in the User Instructions or User Guide. These contaminants are those compounds that passes through the filter and alerts you when it is for the Manufacturer's limited warranty, name and telephone number. The product is time to Application Guidelines/Water Supply Parameters check the water filter status, see "Using the Controls" or "Water Filtration System" in the User Instructions or User Guide.
... how to replace the filter. See "Water and Ice Dispensers" or "Water Dispenser" in the User Instructions or User Guide. These contaminants are those compounds that passes through the filter and alerts you when it is for the Manufacturer's limited warranty, name and telephone number. The product is time to Application Guidelines/Water Supply Parameters check the water filter status, see "Using the Controls" or "Water Filtration System" in the User Instructions or User Guide.

Use & Care Guide
Page 4
... your cold water supply, the water pressure to the reverse osmosis system needs to be a minimum of copper, we recommend the following procedure must meet local plumbing code requirements. ■ Do not use an extension cord. See "Using the Controls." Water Supply Requirements Gather the required tools and parts before the water line is connected, turn off the ice maker to avoid excessive noise or damage to clear line of the refrigerator needs...
... your cold water supply, the water pressure to the reverse osmosis system needs to be a minimum of copper, we recommend the following procedure must meet local plumbing code requirements. ■ Do not use an extension cord. See "Using the Controls." Water Supply Requirements Gather the required tools and parts before the water line is connected, turn off the ice maker to avoid excessive noise or damage to clear line of the refrigerator needs...

Use & Care Guide
Page 5
... the main water supply. A B C D Complete the Installation WARNING Electrical Shock Hazard Plug into a grounded 3 prong outlet. Do not use an adapter. See Style 1 Handle, graphic 1. ■ To replace the handles, reverse the directions. "P" clamp C. Turn on the side of ice. Correct any leaks. 5 Compression sleeve F. Tighten the packing nut. Connect to the valve inlet using a compression nut and sleeve as shown. Follow the instructions specific to refrigerator and check...
... the main water supply. A B C D Complete the Installation WARNING Electrical Shock Hazard Plug into a grounded 3 prong outlet. Do not use an adapter. See Style 1 Handle, graphic 1. ■ To replace the handles, reverse the directions. "P" clamp C. Turn on the side of ice. Correct any leaks. 5 Compression sleeve F. Tighten the packing nut. Connect to the valve inlet using a compression nut and sleeve as shown. Follow the instructions specific to refrigerator and check...

Use & Care Guide
Page 8
...;₄" A B A. Using a ¹⁄₄" hex driver, turn off the leveling screws. Open the door again to raise or lower that it toward you first install your refrigerator and freezer controls are two refrigerator compartment doors. Replace the base grille. While in "sleep" mode, the first press of the refrigerator base. A 2. Leveling screw B. IMPORTANT: The display screen on the dispenser control panel will re-enter "sleep" mode. ■ Touch any settings can...
...;₄" A B A. Using a ¹⁄₄" hex driver, turn off the leveling screws. Open the door again to raise or lower that it toward you first install your refrigerator and freezer controls are two refrigerator compartment doors. Replace the base grille. While in "sleep" mode, the first press of the refrigerator base. A 2. Leveling screw B. IMPORTANT: The display screen on the dispenser control panel will re-enter "sleep" mode. ■ Touch any settings can...

Use & Care Guide
Page 9
... changed, "FREEZER" appears on the dispenser control panel. 9 Press LOCK and FILTER RESET at least 24 hours between adjustments. Door Ajar Alarm The Door Ajar Alarm feature sounds an alarm when the refrigerator or freezer door is open for 5 minutes and the product cooling is activated, adjusting information will appear on the display screen. NOTE: To mute the audible alarm while keeping the doors open again for 3 seconds. NOTE: Adjusting the set point. When Adjust mode is turned...
... changed, "FREEZER" appears on the dispenser control panel. 9 Press LOCK and FILTER RESET at least 24 hours between adjustments. Door Ajar Alarm The Door Ajar Alarm feature sounds an alarm when the refrigerator or freezer door is open for 5 minutes and the product cooling is activated, adjusting information will appear on the display screen. NOTE: To mute the audible alarm while keeping the doors open again for 3 seconds. NOTE: Adjusting the set point. When Adjust mode is turned...
Use & Care Guide
Page 10
... driver. Water Filter Status Light and Filter Reset The Filter Reset control allows you to 12 batches of ice in a 24-hour period. ■ To increase ice production, lower the freezer and refrigerator temperature. Removing and Replacing Ice Storage Bin To Remove the Ice Storage Bin: 1. When the ice maker is ON, sensors will not operate when the refrigerator door is full. When the ice maker is set to a colder temperature may be only as good as ice cream, harder. Ice Production Rate...
... driver. Water Filter Status Light and Filter Reset The Filter Reset control allows you to 12 batches of ice in a 24-hour period. ■ To increase ice production, lower the freezer and refrigerator temperature. Removing and Replacing Ice Storage Bin To Remove the Ice Storage Bin: 1. When the ice maker is ON, sensors will not operate when the refrigerator door is full. When the ice maker is set to a colder temperature may be only as good as ice cream, harder. Ice Production Rate...

Use & Care Guide
Page 11
... be turned off for 3 seconds, a second time to any settings. The Ice Dispenser Ice dispenses from Normal (blue water) to cubed, a few seconds after removing the glass from the ice crusher is rated has passed through the filter OR 6 months have not been used on disinfected waters that your water filter. ■ The water filter status icon changes will change from the ice maker storage bin in "sleep" mode, the first press of a control button will...
... be turned off for 3 seconds, a second time to any settings. The Ice Dispenser Ice dispenses from Normal (blue water) to cubed, a few seconds after removing the glass from the ice crusher is rated has passed through the filter OR 6 months have not been used on disinfected waters that your water filter. ■ The water filter status icon changes will change from the ice maker storage bin in "sleep" mode, the first press of a control button will...
Use & Care Guide
Page 12
...-807-6777 Canada. Replacing the Water Filter To purchase a replacement water filter, model number UKF8001AXX-200, contact your stainless steel refrigerator looking like new and to clean the grille, the open areas behind the grille, and the front surface area of food, wrap or cover foods tightly. ■ Do not use abrasive or harsh cleaners, such as the trim pieces, dispenser covers, or door gaskets. IMPORTANT: Air trapped in the...
...-807-6777 Canada. Replacing the Water Filter To purchase a replacement water filter, model number UKF8001AXX-200, contact your stainless steel refrigerator looking like new and to clean the grille, the open areas behind the grille, and the front surface area of food, wrap or cover foods tightly. ■ Do not use abrasive or harsh cleaners, such as the trim pieces, dispenser covers, or door gaskets. IMPORTANT: Air trapped in the...

Use & Care Guide
Page 13
... refrigerator and freezer compartments of LED bulb other than your old one due to run too much Your new refrigerator may run longer than the recommended LED bulb, before installation, read and follow these instructions can result in refrigerator or reconnect power. Do not remove ground prong. Plug into the drain pan ■ Creaking/Cracking - Replace the fuse or reset the circuit breaker. fans/compressor adjusting to fill the ice maker ■ Pulsating - Replace...
... refrigerator and freezer compartments of LED bulb other than your old one due to run too much Your new refrigerator may run longer than the recommended LED bulb, before installation, read and follow these instructions can result in refrigerator or reconnect power. Do not remove ground prong. Plug into the drain pan ■ Creaking/Cracking - Replace the fuse or reset the circuit breaker. fans/compressor adjusting to fill the ice maker ■ Pulsating - Replace...

Use & Care Guide
Page 14
... away from door. ■ Bin or shelf in the way? Adjust the controls a setting warmer. Contributes to cool completely. ■ Door(s) opened often or left , rear corner of the refrigerator compartment is an indication of low water pressure. ■ Water shut-off valve not fully open . ■ Kink in the ice maker ejector arm? Make sure ice maker is too warm ■ New installation? Replace filter or reinstall it correctly. ■ Reverse osmosis water filtration system connected to your cold water supply? Replace filter or...
... away from door. ■ Bin or shelf in the way? Adjust the controls a setting warmer. Contributes to cool completely. ■ Door(s) opened often or left , rear corner of the refrigerator compartment is an indication of low water pressure. ■ Water shut-off valve not fully open . ■ Kink in the ice maker ejector arm? Make sure ice maker is too warm ■ New installation? Replace filter or reinstall it correctly. ■ Reverse osmosis water filtration system connected to your cold water supply? Replace filter or...

Use & Care Guide
Page 16
... to the "Warranty" section (in the User Instructions or User Guide) for the Manufacturer's limited warranty, name and telephone number. Emerging compounds/incidental contaminants are not necessarily in compliance with water that passes through the filter and alerts you when it is important that operational, maintenance, and filter replacement Do not use only. It is time to replace the filter. Systems certified for cold water use with state...
... to the "Warranty" section (in the User Instructions or User Guide) for the Manufacturer's limited warranty, name and telephone number. Emerging compounds/incidental contaminants are not necessarily in compliance with water that passes through the filter and alerts you when it is important that operational, maintenance, and filter replacement Do not use only. It is time to replace the filter. Systems certified for cold water use with state...


