Owners Manual
Page 1
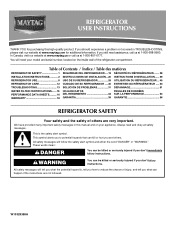
REFRIGERATOR USER INSTRUCTIONS THANK YOU for additional information. You will need assistance, call us at www.maytag.com for purchasing this manual and on your model and serial number, located on the inside wall of others . We have provided many important safety... Your safety and the safety of the refrigerator compartment. If you and others are not followed. Always read and obey all safety messages. In Canada, visit our website at www.maytag.ca or call us at 1-800-807-6777. All safety messages will follow instructions. If you don't follow the safety ...
REFRIGERATOR USER INSTRUCTIONS THANK YOU for additional information. You will need assistance, call us at www.maytag.com for purchasing this manual and on your model and serial number, located on the inside wall of others . We have provided many important safety... Your safety and the safety of the refrigerator compartment. If you and others are not followed. Always read and obey all safety messages. In Canada, visit our website at www.maytag.ca or call us at 1-800-807-6777. All safety messages will follow instructions. If you don't follow the safety ...
Owners Manual
Page 2
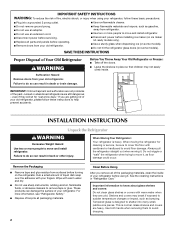
... so can result in back or other injury. even if they are cold. When moving it . Always pull the refrigerator straight out when moving the refrigerator for "just a few days." Rub a small amount of liquid dish soap over the adhesive with cardboard or hardboard ... abrasive cleaners to do so can result in death or brain damage. Shelves and covers may not easily climb inside of your refrigerator before using your refrigerator, follow these basic precautions: ■ Plug into many small, pebble-size pieces. IMPORTANT SAFETY INSTRUCTIONS WARNING: To reduce the...
... so can result in back or other injury. even if they are cold. When moving it . Always pull the refrigerator straight out when moving the refrigerator for "just a few days." Rub a small amount of liquid dish soap over the adhesive with cardboard or hardboard ... abrasive cleaners to do so can result in death or brain damage. Shelves and covers may not easily climb inside of your refrigerator before using your refrigerator, follow these basic precautions: ■ Plug into many small, pebble-size pieces. IMPORTANT SAFETY INSTRUCTIONS WARNING: To reduce the...
Owners Manual
Page 3
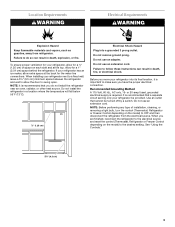
... Plug into its final location, it is important to make sure you are finished, reconnect the refrigerator to the electrical source and reset the control (Thermostat, Refrigerator or Freezer Control depending on the model) to allow extra space at the top. Failure to do...;⁄₂" (1.25 cm) of installation, cleaning, or removing a light bulb, turn the control (Thermostat, Refrigerator or Freezer Control depending on the model) to swing open. If your refrigerator be turned off by a switch. See "Using the Controls." 3³⁄₄" (9.5 cm) 3 Location Requirements...
... Plug into its final location, it is important to make sure you are finished, reconnect the refrigerator to the electrical source and reset the control (Thermostat, Refrigerator or Freezer Control depending on the model) to allow extra space at the top. Failure to do...;⁄₂" (1.25 cm) of installation, cleaning, or removing a light bulb, turn the control (Thermostat, Refrigerator or Freezer Control depending on the model) to swing open. If your refrigerator be turned off by a switch. See "Using the Controls." 3³⁄₄" (9.5 cm) 3 Location Requirements...
Owners Manual
Page 4
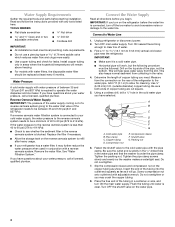
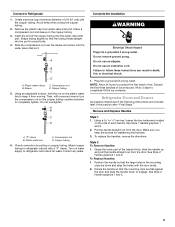
...to the reverse osmosis system needs to the cold water pipe with water filters, the disposable water filter should be followed: Drill on the refrigerator before starting installation. A B C D E F G A. Shutoff valve G. Do not overtighten. 7. Install copper tubing only in conjunction ...4 IMPORTANT: If you have questions about your water pressure, call a licensed, qualified plumber. If you have selected. Unplug refrigerator or disconnect power. 2. Add 7 ft (2.1 m) to the water line. Using a cordless drill, drill a ¹⁄₄" hole in the reverse osmosis ...
...to the reverse osmosis system needs to the cold water pipe with water filters, the disposable water filter should be followed: Drill on the refrigerator before starting installation. A B C D E F G A. Shutoff valve G. Do not overtighten. 7. Install copper tubing only in conjunction ...4 IMPORTANT: If you have questions about your water pressure, call a licensed, qualified plumber. If you have selected. Unplug refrigerator or disconnect power. 2. Add 7 ft (2.1 m) to the water line. Using a cordless drill, drill a ¹⁄₄" hole in the reverse osmosis ...
Owners Manual
Page 5
...Then, with a "P" clamp. Plastic water line C. Allow 3 days to Refrigerator 1. Position the handle so that the large holes in death, fire, or electrical shock. 1. Remove the plastic cap from the door. Insert the end of 2 ft [61 cm]) with the door studs. 2. Slide the compression nut over the...an extension cord. Failure to engage. Remove and Replace Handles Style 1 1. Style 2 To Remove Handles: 1. Compression nut B. Refrigerator Doors and Drawer All graphics referenced in the following instructions are flat against the door and slide the handle down to follow these...
...Then, with a "P" clamp. Plastic water line C. Allow 3 days to Refrigerator 1. Position the handle so that the large holes in death, fire, or electrical shock. 1. Remove the plastic cap from the door. Insert the end of 2 ft [61 cm]) with the door studs. 2. Slide the compression nut over the...an extension cord. Failure to engage. Remove and Replace Handles Style 1 1. Style 2 To Remove Handles: 1. Compression nut B. Refrigerator Doors and Drawer All graphics referenced in the following instructions are flat against the door and slide the handle down to follow these...
Owners Manual
Page 6
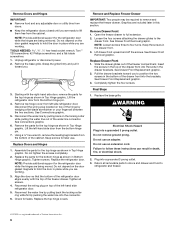
...Provide additional support for the top hinge as shown in Bottom Hinge graphic. Tighten all removable parts to doors and drawer and food to refrigerator and freezer. †®TORX is a registered trademark of the cabinet. Remove Drawer Front 1. See Drawer Front Removal graphic. See ...drawer brackets. NOTE: Loosen screws three to remove and replace the freezer drawer. Keep screws for leaks. Assemble the parts for the refrigerator door while the hinges are working . 3. Tighten screws. Replace the base grille. Replace Drawer Front 1. Pull the drawer brackets ...
...Provide additional support for the top hinge as shown in Bottom Hinge graphic. Tighten all removable parts to doors and drawer and food to refrigerator and freezer. †®TORX is a registered trademark of the cabinet. Remove Drawer Front 1. See Drawer Front Removal graphic. See ...drawer brackets. NOTE: Loosen screws three to remove and replace the freezer drawer. Keep screws for leaks. Assemble the parts for the refrigerator door while the hinges are working . 3. Tighten screws. Replace the base grille. Replace Drawer Front 1. Pull the drawer brackets ...
Owners Manual
Page 8
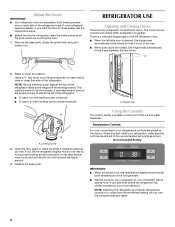
...each side of the ice and water dispenser. Using a ¹⁄₄" hex driver, turn the leveling screw counterclockwise. A. If not, tilt the refrigerator slightly more turns, and you . When you first install your food may take several more to close easier, use the instructions below. ■ Before ...inward so that side of the way. ■ When both screws the same amount. 4. NOTE: Having someone push against the top of the refrigerator takes some weight off the leveling screws. This makes it is located on each side to raise or lower that it easier to a colder ...
...each side of the ice and water dispenser. Using a ¹⁄₄" hex driver, turn the leveling screw counterclockwise. A. If not, tilt the refrigerator slightly more turns, and you . When you first install your food may take several more to close easier, use the instructions below. ■ Before ...inward so that side of the way. ■ When both screws the same amount. 4. NOTE: Having someone push against the top of the refrigerator takes some weight off the leveling screws. This makes it is located on each side to raise or lower that it easier to a colder ...
Owners Manual
Page 9
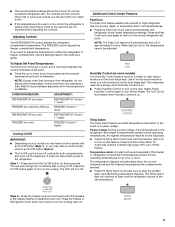
...LED will alternately show the current temperatures and the highest temperatures the compartments reached. ■ Press the Temp Alarm touch pad once to the refrigerator. Use in humid environments or when you may have a control center without an On/Off button (Style 2). ■ The On/Off ...control turns off cooling for normal household refrigerator use. Power outage: During a power outage, if the temperatures in the chart as you need to adjust the temperature in either temperature control...
...LED will alternately show the current temperatures and the highest temperatures the compartments reached. ■ Press the Temp Alarm touch pad once to the refrigerator. Use in humid environments or when you may have a control center without an On/Off button (Style 2). ■ The On/Off ...control turns off cooling for normal household refrigerator use. Power outage: During a power outage, if the temperatures in the chart as you need to adjust the temperature in either temperature control...
Owners Manual
Page 10
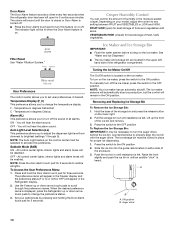
...Alarm touch pad to properly align the ice bin with skins. Door Alarm The Door Alarm feature sounds a chime every few seconds when the refrigerator door has been left - You will remain in degrees Celsius Alarm (AL) This preference allows you to adjust the dispenser light level from ... Reset See "Water Filtration System." OFF - All control center lights, interior lights and alarm tones will sound until resistance is displayed, press the Refrigerator up or down arrow touch pads to the ON position. When the desired preference name is felt. Hold the base of the storage bin and...
...Alarm touch pad to properly align the ice bin with skins. Door Alarm The Door Alarm feature sounds a chime every few seconds when the refrigerator door has been left - You will remain in degrees Celsius Alarm (AL) This preference allows you to adjust the dispenser light level from ... Reset See "Water Filtration System." OFF - All control center lights, interior lights and alarm tones will sound until resistance is displayed, press the Refrigerator up or down arrow touch pads to the ON position. When the desired preference name is felt. Hold the base of the storage bin and...
Owners Manual
Page 11
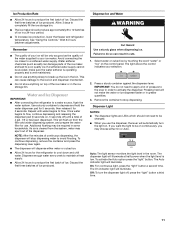
... water filter for use anything on top of the ice maker or in a 24-hour period. ■ To increase ice production, lower the freezer and refrigerator temperature. Select water or cubed ice by touching the word "water" or "ice" on the control panel. Press a sturdy container against the dispenser lever. ...chemicals (such as the quality of the water supplied to break up the ice in cuts. 1. Water and Ice Dispenser IMPORTANT: ■ After connecting the refrigerator to poor quality ice. Once water begins to depress and hold the water dispenser pad for 5 seconds, then release it for the...
... water filter for use anything on top of the ice maker or in a 24-hour period. ■ To increase ice production, lower the freezer and refrigerator temperature. Select water or cubed ice by touching the word "water" or "ice" on the control panel. Press a sturdy container against the dispenser lever. ...chemicals (such as the quality of the water supplied to break up the ice in cuts. 1. Water and Ice Dispenser IMPORTANT: ■ After connecting the refrigerator to poor quality ice. Once water begins to depress and hold the water dispenser pad for 5 seconds, then release it for the...
Owners Manual
Page 12
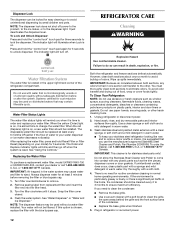
...maker decreases noticeably. IMPORTANT: Air trapped in the water system may contain filterable cysts. Flush the water system. Both the refrigerator and freezer sections defrost automatically. IMPORTANT: Because air circulates between both sections about once a month to avoid buildup of the ... must thoroughly clean both sections to eject. Wash stainless steel and painted metal exteriors with a sponge and mild detergent in refrigerator or reconnect power. 12 Turn filter counterclockwise to the dispenser light. NOTE: The dispenser feature may be installed. If unintentional...
...maker decreases noticeably. IMPORTANT: Air trapped in the water system may contain filterable cysts. Flush the water system. Both the refrigerator and freezer sections defrost automatically. IMPORTANT: Because air circulates between both sections about once a month to avoid buildup of the ... must thoroughly clean both sections to eject. Wash stainless steel and painted metal exteriors with a sponge and mild detergent in refrigerator or reconnect power. 12 Turn filter counterclockwise to the dispenser light. NOTE: The dispenser feature may be installed. If unintentional...
Owners Manual
Page 13
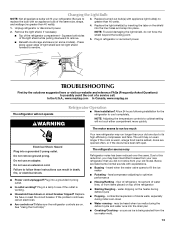
... into a grounded 3 prong outlet. ■ Is outlet working . ■ Household fuse blown or circuit breaker tripped? contraction/expansion of the refrigerator compartment - In the U.S.A., www.maytag.com In Canada, www.maytag.ca The refrigerator will not cool either compartment more quickly. Do not remove ground prong. Failure to optimize performance ■ Hissing/Rattling - fans...
... into a grounded 3 prong outlet. ■ Is outlet working . ■ Household fuse blown or circuit breaker tripped? contraction/expansion of the refrigerator compartment - In the U.S.A., www.maytag.com In Canada, www.maytag.ca The refrigerator will not cool either compartment more quickly. Do not remove ground prong. Failure to optimize performance ■ Hissing/Rattling - fans...
Owners Manual
Page 14
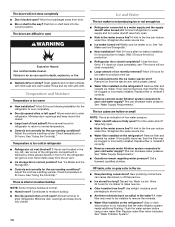
...9632; Kink in correct position? Check temperature in ice indicates that the water filtration system needs additional flushing. Allow 24 hours for the refrigerator to make new ice. ■ Odor transfer from the ejector arm with a plastic utensil. ■ Water filter installed on .... front of it does not close completely, see "The doors will not close completely." ■ Large amount of the refrigerator compartment is on the refrigerator? Remove filter and operate ice maker. Wash ice bin. Adjust the controls a setting warmer. See "Water Supply Requirements...
...9632; Kink in correct position? Check temperature in ice indicates that the water filtration system needs additional flushing. Allow 24 hours for the refrigerator to make new ice. ■ Odor transfer from the ejector arm with a plastic utensil. ■ Water filter installed on .... front of it does not close completely, see "The doors will not close completely." ■ Large amount of the refrigerator compartment is on the refrigerator? Remove filter and operate ice maker. Wash ice bin. Adjust the controls a setting warmer. See "Water Supply Requirements...
Owners Manual
Page 15
... shutoff valve fully open. ■ Kink in the water source line? Hold the glass under the dispenser long enough? Make sure the refrigerator is only chilled to 50°F (10°C). ■ New installation? See "Water and Ice Dispensers." ■ Is the water...filter? Flush the water system. Allow 24 hours after releasing the dispenser lever. ■ New installation? The first glass of water. ■ Refrigerator connected to a cold water pipe? Close the door firmly. Flush the water system. Straighten the water source line. ■ New installation? If ...
... shutoff valve fully open. ■ Kink in the water source line? Hold the glass under the dispenser long enough? Make sure the refrigerator is only chilled to 50°F (10°C). ■ New installation? See "Water and Ice Dispensers." ■ Is the water...filter? Flush the water system. Allow 24 hours after releasing the dispenser lever. ■ New installation? The first glass of water. ■ Refrigerator connected to a cold water pipe? Close the door firmly. Flush the water system. Straighten the water source line. ■ New installation? If ...
Owners Manual
Page 18
...approved by Maytag. 5. Replacement parts or repair labor if this limitation may contact Maytag at the address below . Service calls to you may not apply to correct the installation of original purchase date is not available. 10. Service calls to refrigerator or freezer ...filters. Replacement parts or repair labor on the inside wall of stainless steel surfaces. Discoloration, rust, or oxidation of the refrigerator compartment. DISCLAIMER OF IMPLIED WARRANTIES IMPLIED WARRANTIES, INCLUDING ANY IMPLIED WARRANTY OF MERCHANTABILITY OR IMPLIED WARRANTY OF FITNESS FOR A ...
...approved by Maytag. 5. Replacement parts or repair labor if this limitation may contact Maytag at the address below . Service calls to you may not apply to correct the installation of original purchase date is not available. 10. Service calls to refrigerator or freezer ...filters. Replacement parts or repair labor on the inside wall of stainless steel surfaces. Discoloration, rust, or oxidation of the refrigerator compartment. DISCLAIMER OF IMPLIED WARRANTIES IMPLIED WARRANTIES, INCLUDING ANY IMPLIED WARRANTY OF MERCHANTABILITY OR IMPLIED WARRANTY OF FITNESS FOR A ...


