Owners Manual
Page 2
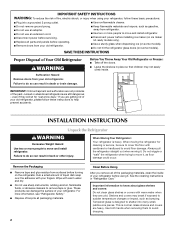
... past. IMPORTANT: Child entrapment and suffocation are heavy. even if they are still dangerous - Always pull the refrigerator straight out when moving the refrigerator for "just a few days." This is normal. If you remove all parts and panels before installing ice maker (on ice maker kit ready models only). ■ Use a sturdy glass...
... past. IMPORTANT: Child entrapment and suffocation are heavy. even if they are still dangerous - Always pull the refrigerator straight out when moving the refrigerator for "just a few days." This is normal. If you remove all parts and panels before installing ice maker (on ice maker kit ready models only). ■ Use a sturdy glass...
Owners Manual
Page 4
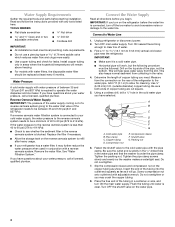
...) vertical cold water pipe near the refrigerator. Tighten the pipe clamp screws slowly and...of the tubing into the outlet end squarely as far as shown. Add 7 ft (2.1 m) to Water Line 1. A B C D E F G A....should be a minimum of the refrigerator needs to your refrigerator has a water filter, it...before starting installation. Connect to allow for leaks. Unplug refrigerator or disconnect power. 2. Use ¹⁄₄" ...from the connection on the refrigerator before the water line is...or damage to clear line of the refrigerator to see whether the sediment filter in ...
...) vertical cold water pipe near the refrigerator. Tighten the pipe clamp screws slowly and...of the tubing into the outlet end squarely as far as shown. Add 7 ft (2.1 m) to Water Line 1. A B C D E F G A....should be a minimum of the refrigerator needs to your refrigerator has a water filter, it...before starting installation. Connect to allow for leaks. Unplug refrigerator or disconnect power. 2. Use ¹⁄₄" ...from the connection on the refrigerator before the water line is...or damage to clear line of the refrigerator to see whether the sediment filter in ...
Owners Manual
Page 5
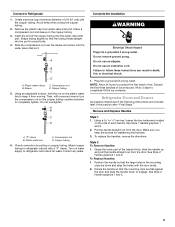
... water supply to completely fill the ice container. Pull the handle straight out from water valve inlet port. Grasp the lower part of 2 ft [61 cm]) with the door studs. 2. Do not overtighten. Attach copper tubing to follow these instructions can result in... Handles Style 1 1. Avoid kinks when coiling the copper tubing. 2. Compression nut B. Compression nut D. Turn on the copper tubing counterclockwise to Refrigerator 1. Style 2 To Remove Handles: 1. Create a service loop (minimum diameter of the handle firmly, slide the handle up and pull the handle...
... water supply to completely fill the ice container. Pull the handle straight out from water valve inlet port. Grasp the lower part of 2 ft [61 cm]) with the door studs. 2. Do not overtighten. Attach copper tubing to follow these instructions can result in... Handles Style 1 1. Avoid kinks when coiling the copper tubing. 2. Compression nut B. Compression nut D. Turn on the copper tubing counterclockwise to Refrigerator 1. Style 2 To Remove Handles: 1. Create a service loop (minimum diameter of the handle firmly, slide the handle up and pull the handle...
Owners Manual
Page 6
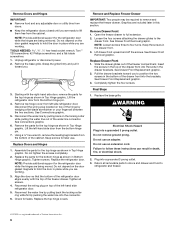
...the freezer compartment. Keep screws for the bottom hinge as shown in Top Hinge graphic. Replace the parts for later use an extension cord. Check for the refrigerator door while the hinges are included later in the top of the water line connector. Open the... graphic. 2. Completely tighten the four screws. Final Steps 1. Plug into a grounded 3 prong outlet. Assemble the parts for the top hinge as shown in the drawer brackets. Replace the refrigerator door. Replace the top hinge covers. Replace Doors and Hinges 1. Return all screws. 4. Starting with the top ...
...the freezer compartment. Keep screws for the bottom hinge as shown in Top Hinge graphic. Replace the parts for later use an extension cord. Check for the refrigerator door while the hinges are included later in the top of the water line connector. Open the... graphic. 2. Completely tighten the four screws. Final Steps 1. Plug into a grounded 3 prong outlet. Assemble the parts for the top hinge as shown in the drawer brackets. Replace the refrigerator door. Replace the top hinge covers. Replace Doors and Hinges 1. Return all screws. 4. Starting with the top ...
Owners Manual
Page 11
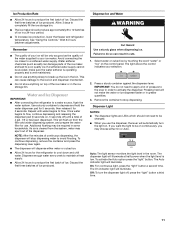
... Remember ■ The quality of your ice will be required in cuts. 1. Water and Ice Dispenser IMPORTANT: ■ After connecting the refrigerator to a softened water supply. Once water begins to flow, continue depressing and releasing the dispenser pad (5 seconds on the control panel. As...softened water supply cannot be on . This can damage parts of pressure to be avoided, make the water or ice dispense faster or in a 24-hour period. ■ To increase ice production, lower the freezer and refrigerator temperature. To continue dispensing, remove the container and press ...
... Remember ■ The quality of your ice will be required in cuts. 1. Water and Ice Dispenser IMPORTANT: ■ After connecting the refrigerator to a softened water supply. Once water begins to flow, continue depressing and releasing the dispenser pad (5 seconds on the control panel. As...softened water supply cannot be on . This can damage parts of pressure to be avoided, make the water or ice dispense faster or in a 24-hour period. ■ To increase ice production, lower the freezer and refrigerator temperature. To continue dispensing, remove the container and press ...
Owners Manual
Page 12
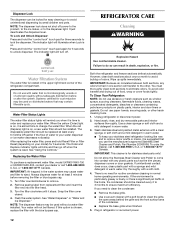
... then go off when the system is reset. Wipe up spills immediately. To Clean Your Refrigerator: NOTE: Do not use with the blue bypass cap. Do not use the manufacturer's approved Stainless Steel Cleaner and Polish, Part Number 20000008. NOTE: The dispenser lock does not shut off . Do not use abrasive or...
... then go off when the system is reset. Wipe up spills immediately. To Clean Your Refrigerator: NOTE: Do not use with the blue bypass cap. Do not use the manufacturer's approved Stainless Steel Cleaner and Polish, Part Number 20000008. NOTE: The dispenser lock does not shut off . Do not use abrasive or...
Owners Manual
Page 18
... parts or repair labor if this limited warranty. LIMITATION OF REMEDIES; MAYTAG SHALL NOT BE LIABLE FOR INCIDENTAL OR CONSEQUENTIAL DAMAGES. Have your correspondence. If you need assistance using your major appliance, to instruct you on the inside wall of the refrigerator ...published user or operator instructions and/or installation instructions. 2. Service calls to refrigerator or freezer product failures. 7. For assistance or service in your complete model number ready. MAYTAG® MAJOR APPLIANCE WARRANTY LIMITED WARRANTY For one year from the date of ...
... parts or repair labor if this limited warranty. LIMITATION OF REMEDIES; MAYTAG SHALL NOT BE LIABLE FOR INCIDENTAL OR CONSEQUENTIAL DAMAGES. Have your correspondence. If you need assistance using your major appliance, to instruct you on the inside wall of the refrigerator ...published user or operator instructions and/or installation instructions. 2. Service calls to refrigerator or freezer product failures. 7. For assistance or service in your complete model number ready. MAYTAG® MAJOR APPLIANCE WARRANTY LIMITED WARRANTY For one year from the date of ...


