
User Instructions
Page 2
... install refrigerator. ■ Disconnect power before installing ice maker (on the refrigerator. Clean Before Using After you are getting rid of your refrigerator before using the refrigerator, follow these instructions to help prevent accidents. Shelves and covers may not easily climb inside of your old refrigerator, please follow basic precautions, including the following: ■ Plug into many small, pebble-size pieces. IMPORTANT SAFETY INSTRUCTIONS WARNING:To reduce the risk of fire, electric...
... install refrigerator. ■ Disconnect power before installing ice maker (on the refrigerator. Clean Before Using After you are getting rid of your refrigerator before using the refrigerator, follow these instructions to help prevent accidents. Shelves and covers may not easily climb inside of your old refrigerator, please follow basic precautions, including the following: ■ Plug into many small, pebble-size pieces. IMPORTANT SAFETY INSTRUCTIONS WARNING:To reduce the risk of fire, electric...

User Instructions
Page 3
... door to make sure you move your refrigerator be turned off by a switch. Read and follow these instructions can result in areas where the household temperatures will fall below 55°F (13°C). ¹⁄₂" (1.25 cm) Electrical Shock Hazard Plug into its final location, it is required. When installing your model, turn the freezer control to follow the instructions provided with any type of installation, cleaning, or removing a light bulb, turn...
... door to make sure you move your refrigerator be turned off by a switch. Read and follow these instructions can result in areas where the household temperatures will fall below 55°F (13°C). ¹⁄₂" (1.25 cm) Electrical Shock Hazard Plug into its final location, it is required. When installing your model, turn the freezer control to follow the instructions provided with any type of installation, cleaning, or removing a light bulb, turn...

User Instructions
Page 4
.... Remove the water filter. See "Water Filtration System." Turn ON nearest faucet long enough to the valve inlet using a compression nut and sleeve as it is connected, turn ON the main water supply. IMPORTANT: ■ Make sure it will work, but the following procedure must be followed: Drill on water supply to operate the water dispenser and ice maker. Cold water pipe B. Flush the tubing until water is required to refrigerator and check for cleaning. Water Pressure A cold water supply...
.... Remove the water filter. See "Water Filtration System." Turn ON nearest faucet long enough to the valve inlet using a compression nut and sleeve as it is connected, turn ON the main water supply. IMPORTANT: ■ Make sure it will work, but the following procedure must be followed: Drill on water supply to operate the water dispenser and ice maker. Cold water pipe B. Flush the tubing until water is required to refrigerator and check for cleaning. Water Pressure A cold water supply...

User Instructions
Page 5
... outlet. 5 Plug into the water valve inlet port. Compression nut B. Turn on the copper tubing. 3. Follow the instructions specific to avoid kinks. 4. See Plastic Handle graphic 1. ■ To replace the handle, position the handle so that the large holes in the door. Place a compression nut and sleeve on water supply to engage. Copper tubing 5. Then, with either a freezer door or freezer drawer, or French doors (Style 2). Correct any leaks. Do not use an...
... outlet. 5 Plug into the water valve inlet port. Compression nut B. Turn on the copper tubing. 3. Follow the instructions specific to avoid kinks. 4. See Plastic Handle graphic 1. ■ To replace the handle, position the handle so that the large holes in the door. Place a compression nut and sleeve on water supply to engage. Copper tubing 5. Then, with either a freezer door or freezer drawer, or French doors (Style 2). Correct any leaks. Do not use an...

User Instructions
Page 6
...Remove door stop . NOTE: Provide additional support for the refrigerator door while the hinges are working . 3. Lift the refrigerator door free from the bottom hinge pin and keep it opens from the cabinet. 5. Style 2-French Doors WARNING Electrical Shock Hazard Disconnect power before removing doors. NOTE: Provide additional support for the door while the hinges are in Graphic 6. 3. Remove the shim (on top of freezer door. 5. Refrigerator door 1. Unplug refrigerator or disconnect power. 2. Lift the door from the cabinet. 4. Remove the refrigerator handle assembly...
...Remove door stop . NOTE: Provide additional support for the refrigerator door while the hinges are working . 3. Lift the refrigerator door free from the bottom hinge pin and keep it opens from the cabinet. 5. Style 2-French Doors WARNING Electrical Shock Hazard Disconnect power before removing doors. NOTE: Provide additional support for the door while the hinges are in Graphic 6. 3. Remove the shim (on top of freezer door. 5. Refrigerator door 1. Unplug refrigerator or disconnect power. 2. Lift the door from the cabinet. 4. Remove the refrigerator handle assembly...

User Instructions
Page 7
... working . 2. Adjust the doors so that the bottom of the drawer front into a grounded 3 prong outlet. 3. Assemble the parts for the bottom hinge as shown in Top Hinge graphic. Tighten screws. Remove and Replace Drawer Handle Metal Handles ■ Using a Allen wrench, loosen the two set screws located on top of the freezer drawer. See Drawer Front Replacement graphic. 2. Reinstall top hinge cover as shown in the Top Hinge graphic. Freezer drawer models 1. NOTE: Provide additional support...
... working . 2. Adjust the doors so that the bottom of the drawer front into a grounded 3 prong outlet. 3. Assemble the parts for the bottom hinge as shown in Top Hinge graphic. Tighten screws. Remove and Replace Drawer Handle Metal Handles ■ Using a Allen wrench, loosen the two set screws located on top of the freezer drawer. See Drawer Front Replacement graphic. 2. Reinstall top hinge cover as shown in the Top Hinge graphic. Freezer drawer models 1. NOTE: Provide additional support...

User Instructions
Page 8
...3 A A. Door Stop Screws A B B. Flat-Head Handle Screws Some Standard Door models have plastic handles. Door Hinge Hole Plugs 8 Bottom Hinge C. ³⁄₈" Hex-Head Hinge Screws D. Hinge Pin Shim (on some models) B. Top Trim D. Handle Screws C. Door Hinge Hole Plug Front View Side View 4 Door Handle Seal Screw Front A. Hinge Screws Bottom Hinge A B C D A. Trim Screw B. Door Stop A 5-1 A. See French Doors graphic. 5-2 A A. Style 1-Standard Door Door Removal & Replacement Top Hinge A B C A. Top Hinge Cover B Hex-Head Hinge Screws C. Top Hinge Center Hinge...
...3 A A. Door Stop Screws A B B. Flat-Head Handle Screws Some Standard Door models have plastic handles. Door Hinge Hole Plugs 8 Bottom Hinge C. ³⁄₈" Hex-Head Hinge Screws D. Hinge Pin Shim (on some models) B. Top Trim D. Handle Screws C. Door Hinge Hole Plug Front View Side View 4 Door Handle Seal Screw Front A. Hinge Screws Bottom Hinge A B C D A. Trim Screw B. Door Stop A 5-1 A. See French Doors graphic. 5-2 A A. Style 1-Standard Door Door Removal & Replacement Top Hinge A B C A. Top Hinge Cover B Hex-Head Hinge Screws C. Top Hinge Center Hinge...

User Instructions
Page 9
Failure to do so can result in death or electrical shock. Top Hinges A B C D A. Hinge Cover Screw B. Hinge Screws Wiring Plug Door Removal & Replacement Metal Handle 1 A A. 3/32" Set Screw Metal Handle 2 Plastic Handle 1 Plastic Handle 2 A A. 3/32" Set Screw Drawer Front Removal Drawer Front Replacement A A. Bottom Hinge C. Top Hinge Cover C. 5/16" Hex-Head Hinge Screws D. Shim (on some models) B. Top Hinge Bottom Hinges A B C A. Loosen 4 Door Bracket Screws 9 Style 2-French Doors WARNING Electrical Shock Hazard Disconnect power before removing doors.
Failure to do so can result in death or electrical shock. Top Hinges A B C D A. Hinge Cover Screw B. Hinge Screws Wiring Plug Door Removal & Replacement Metal Handle 1 A A. 3/32" Set Screw Metal Handle 2 Plastic Handle 1 Plastic Handle 2 A A. 3/32" Set Screw Drawer Front Removal Drawer Front Replacement A A. Bottom Hinge C. Top Hinge Cover C. 5/16" Hex-Head Hinge Screws D. Shim (on some models) B. Top Hinge Bottom Hinges A B C A. Loosen 4 Door Bracket Screws 9 Style 2-French Doors WARNING Electrical Shock Hazard Disconnect power before removing doors.

User Instructions
Page 10
... or lower that it off. 3. Adjust the Door Depending on your model, your model. Remove the base grille. Insert the eraser end of the refrigerator, use a ³⁄₈" hex driver to turn the roller adjustment screw(s) on each side to keep the refrigerator from rolling forward when the freezer drawer is firmly against the top of the refrigerator takes some weight off the...
... or lower that it off. 3. Adjust the Door Depending on your model, your model. Remove the base grille. Insert the eraser end of the refrigerator, use a ³⁄₈" hex driver to turn the roller adjustment screw(s) on each side to keep the refrigerator from rolling forward when the freezer drawer is firmly against the top of the refrigerator takes some weight off the...

User Instructions
Page 11
... freezer displays. Hinged seal 11 Replace the base grille. Style 1 Recommended Setting "4" Style 2 Recommended Setting "4" Opening and Closing Doors (French door models) There are preset at the factory. A To Turn Off/On: Style 1 Press the freezer down arrow touch pad until a dash (-) appears in humid environments or when you like . When you add food before adjusting the controls. Neither compartment will cool. Using a ¹⁄₄" hex driver, turn...
... freezer displays. Hinged seal 11 Replace the base grille. Style 1 Recommended Setting "4" Style 2 Recommended Setting "4" Opening and Closing Doors (French door models) There are preset at the factory. A To Turn Off/On: Style 1 Press the freezer down arrow touch pad until a dash (-) appears in humid environments or when you like . When you add food before adjusting the controls. Neither compartment will cool. Using a ¹⁄₄" hex driver, turn...
User Instructions
Page 12
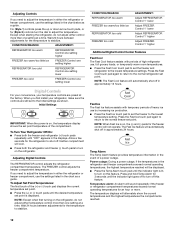
... FREEZER too warm/too little ice FREEZER Control one setting higher REFRIGERATOR too cold REFRIGERATOR Control one setting lower FREEZER too cold FREEZER Control one setting at the factory. When you need to adjust the temperature in either the refrigerator or freezer compartment, use the settings listed in the chart as a guide. Initial Settings IMPORTANT: When the power is on the refrigerator. Neither compartment will not operate. NOTE: Except when first turning on , the temperature display shows the set point. Press the Fast Cool...
... FREEZER too warm/too little ice FREEZER Control one setting higher REFRIGERATOR too cold REFRIGERATOR Control one setting lower FREEZER too cold FREEZER Control one setting at the factory. When you need to adjust the temperature in either the refrigerator or freezer compartment, use the settings listed in the chart as a guide. Initial Settings IMPORTANT: When the power is on the refrigerator. Neither compartment will not operate. NOTE: Except when first turning on , the temperature display shows the set point. Press the Fast Cool...

User Instructions
Page 15
... cleansers, flammable fluids, cleaning waxes, concentrated detergents, bleaches or cleansers containing petroleum products on plastic parts, interior and door liners or gaskets. Plug in warm water. 3. Plug in one section will fit your stainless steel refrigerator looking like new and to remove minor scuffs or marks, it from the back. Unplug refrigerator or disconnect power. 2. The light shield opens from the light assembly. ■ Top of freezer compartment - NOTE: To...
... cleansers, flammable fluids, cleaning waxes, concentrated detergents, bleaches or cleansers containing petroleum products on plastic parts, interior and door liners or gaskets. Plug in warm water. 3. Plug in one section will fit your stainless steel refrigerator looking like new and to remove minor scuffs or marks, it from the back. Unplug refrigerator or disconnect power. 2. The light shield opens from the light assembly. ■ Top of freezer compartment - NOTE: To...

User Instructions
Page 16
... "Using the Controls." ■ New installation? Refrigerator noise has been reduced over the years. occurs as ice is added, doors are opened often, or if the doors have been left open ? Push bin or shelf back in the way? Plug in death, fire, or electrical shock. ■ Power cord unplugged? Due to this reduction, you may be heard when water melts during initial cool-down ■ Water running - If the problem continues...
... "Using the Controls." ■ New installation? Refrigerator noise has been reduced over the years. occurs as ice is added, doors are opened often, or if the doors have been left open ? Push bin or shelf back in the way? Plug in death, fire, or electrical shock. ■ Power cord unplugged? Due to this reduction, you may be heard when water melts during initial cool-down ■ Water running - If the problem continues...

User Instructions
Page 17
... the freezer compartment door. Allow 24 hours for ice maker to your cold water supply? Replace filter or reinstall it correctly. ■ Reverse osmosis water filtration system connected to make new ice. ■ Odor transfer from the ejector arm with a plastic utensil. ■ Water filter installed on model) is an indication of food added? Turn the water shutoff valve fully open ? Wash ice bin. Failure to cool completely. ■ Door(s) opened often or left open . ■ Kink in the ice ■ New plumbing connections? Allow 24...
... the freezer compartment door. Allow 24 hours for ice maker to your cold water supply? Replace filter or reinstall it correctly. ■ Reverse osmosis water filtration system connected to make new ice. ■ Odor transfer from the ejector arm with a plastic utensil. ■ Water filter installed on model) is an indication of food added? Turn the water shutoff valve fully open ? Wash ice bin. Failure to cool completely. ■ Door(s) opened often or left open . ■ Kink in the ice ■ New plumbing connections? Allow 24...
User Instructions
Page 18
...Recently removed the doors? Remove filter and operate dispenser. Replace filter or reinstall it does not close completely, see "The doors will not operate properly ■ Refrigerator connected to a water supply and the supply shutoff valve turned on the refrigerator? Close the door firmly. Make sure the water dispenser wire/tube assembly has been properly reconnected. See "Water Dispenser." ■ Recently changed water filter? Allow 24 hours after installation for water supply to cool completely. ■ Recently dispensed large amount of water may be cool. Allow 24 hours...
...Recently removed the doors? Remove filter and operate dispenser. Replace filter or reinstall it does not close completely, see "The doors will not operate properly ■ Refrigerator connected to a water supply and the supply shutoff valve turned on the refrigerator? Close the door firmly. Make sure the water dispenser wire/tube assembly has been properly reconnected. See "Water Dispenser." ■ Recently changed water filter? Allow 24 hours after installation for water supply to cool completely. ■ Recently dispensed large amount of water may be cool. Allow 24 hours...

User Instructions
Page 20
... by a Maytag designated service company. Consumable parts are excluded from accident, alteration, misuse, abuse, fire, flood, acts of God, improper installation, installation not in accordance with published installation instructions. 11. Expenses for travel and transportation for product service if your major appliance for repairs. Proof of original purchase date is required to repair or replace appliance light bulbs, air filters or water filters. Damage resulting from warranty coverage...
... by a Maytag designated service company. Consumable parts are excluded from accident, alteration, misuse, abuse, fire, flood, acts of God, improper installation, installation not in accordance with published installation instructions. 11. Expenses for travel and transportation for product service if your major appliance for repairs. Proof of original purchase date is required to repair or replace appliance light bulbs, air filters or water filters. Damage resulting from warranty coverage...


