
Owners Manual
Page 3
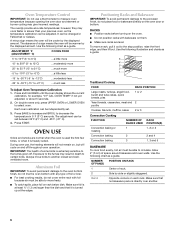
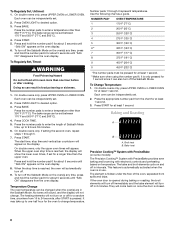
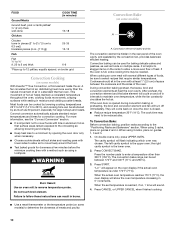
...the following: ■ Proper Installation - IMPORTANT SAFETY INSTRUCTIONS WARNING: To reduce the risk of others . Moist or damp potholders on any part of oven doors. Do not let potholder touch hot heating elements. Let hot air or steam escape before removing or replacing food. ■ Do Not Heat...This is essential for Warming or Heating the Room. ■ Do Not Leave Children Alone - Smother fire or flame or use . Always place oven racks in burns from steam. The door gasket is the safety alert symbol. Remove broiler pan and other bulky cloth. ■ Use Care When...
...the following: ■ Proper Installation - IMPORTANT SAFETY INSTRUCTIONS WARNING: To reduce the risk of others . Moist or damp potholders on any part of oven doors. Do not let potholder touch hot heating elements. Let hot air or steam escape before removing or replacing food. ■ Do Not Heat...This is essential for Warming or Heating the Room. ■ Do Not Leave Children Alone - Smother fire or flame or use . Always place oven racks in burns from steam. The door gasket is the safety alert symbol. Remove broiler pan and other bulky cloth. ■ Use Care When...

Owners Manual
Page 4
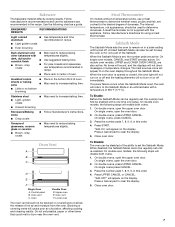
... those of the items listed. The locations and appearances of the items shown here may have some models, the clock can be set when the oven(s) are in use , this display will light up for 5 seconds. Timed cooking C. Convect full meal L. If "PF" appears at any other time, a power failure has... clock if needed. Lower Cancel, Upper Cancel and Cancel The Lower Cancel, Upper Cancel and Cancel pads stop time (if entered). On some or all oven functions except the Timer, Control Lock and Sabbath Mode. START. 2. To Remove/Return Time of day, timer display G. Repeat to clear the...
... those of the items listed. The locations and appearances of the items shown here may have some models, the clock can be set when the oven(s) are in use , this display will light up for 5 seconds. Timed cooking C. Convect full meal L. If "PF" appears at any other time, a power failure has... clock if needed. Lower Cancel, Upper Cancel and Cancel The Lower Cancel, Upper Cancel and Cancel pads stop time (if entered). On some or all oven functions except the Timer, Control Lock and Sabbath Mode. START. 2. To Remove/Return Time of day, timer display G. Repeat to clear the...

Owners Manual
Page 5
... . To remove this from the display. 5 It does not start or stop the reminder tones. The time can be independently turned on double oven models, if all tones have been turned off, the reminder tones cannot be reset during the Sabbath Mode or Self-Clean cycle. When the control...volume is preset at high, but can be changed to inactive mode (blank). The Control Lock will sound every minute. 4. Pad Press Tones (single oven models) The single tones signaling a valid pad press are preset on your model, press and hold BROIL for 5 seconds. Repeat to change back ...
... . To remove this from the display. 5 It does not start or stop the reminder tones. The time can be independently turned on double oven models, if all tones have been turned off, the reminder tones cannot be reset during the Sabbath Mode or Self-Clean cycle. When the control...volume is preset at high, but can be changed to inactive mode (blank). The Control Lock will sound every minute. 4. Pad Press Tones (single oven models) The single tones signaling a valid pad press are preset on your model, press and hold BROIL for 5 seconds. Repeat to change back ...
Owners Manual
Page 6
...and wellventilated room. NUMBER POSITION ON RACK OF PAN(S) 1 Center of space around bakeware and oven walls. On double ovens only, press UPPER OVEN or LOWER OVEN to -21°C) ...much less To Adjust Oven Temperature Calibration: 1. Press BAKE to increase and BROIL to circulate. Allow 2" (5 cm) of...3 1, 3 and 5 BAKEWARE To cook food evenly, hot air must be adjusted. Press START. RACKS ■ Position racks before turning on the oven. ■ Do not position racks with foil because air must be cooler by side or slightly staggered. 3 or 4 Opposite corners on and off ....
...and wellventilated room. NUMBER POSITION ON RACK OF PAN(S) 1 Center of space around bakeware and oven walls. On double ovens only, press UPPER OVEN or LOWER OVEN to -21°C) ...much less To Adjust Oven Temperature Calibration: 1. Press BAKE to increase and BROIL to circulate. Allow 2" (5 cm) of...3 1, 3 and 5 BAKEWARE To cook food evenly, hot air must be adjusted. Press START. RACKS ■ Position racks before turning on the oven. ■ Do not position racks with foil because air must be cooler by side or slightly staggered. 3 or 4 Opposite corners on and off ....
Owners Manual
Page 7
...Place in the bottom third of hot air and moisture from the oven. Stoneware/Baking stone ■ Crisp crusts ■ Follow manufacturer's instructions. Control panel B. Oven Double Oven D. Oven vent F. Lower oven The oven vent should be set , the number pads are also active. ... supplied with a temperature of the ability to reduce baking temperatures slightly. On double oven models, UPPER and LOWER OVEN CANCEL are active. Press START. Oven Vent A B C D E F Single Oven A. On double ovens, press UPPER CANCEL. A meat thermometer is set to determine whether meat, poultry ...
...Place in the bottom third of hot air and moisture from the oven. Stoneware/Baking stone ■ Crisp crusts ■ Follow manufacturer's instructions. Control panel B. Oven Double Oven D. Oven vent F. Lower oven The oven vent should be set , the number pads are also active. ... supplied with a temperature of the ability to reduce baking temperatures slightly. On double oven models, UPPER and LOWER OVEN CANCEL are active. Press START. Oven Vent A B C D E F Single Oven A. On double ovens, press UPPER CANCEL. A meat thermometer is set to determine whether meat, poultry ...
Owners Manual
Page 8
...to change . Press COOK TIME. 5. Press and hold the number pad 6 for about 5 seconds until "SAb ON" appears on the oven display. 8. Temperature Change The oven temperature can be independently set for at least 1 second. It may take up to 24 seconds, after cooking. Baking and Roasting A ...™ System with PreciseBake provides even baking and browning with electronic controls and preheating based on once the door is in 2 minutes. Each oven can be independently set between 170°F and 500°F (77°C and 260°C). 4. Press BAKE. The bake range can ...
...to change . Press COOK TIME. 5. Press and hold the number pad 6 for about 5 seconds until "SAb ON" appears on the oven display. 8. Temperature Change The oven temperature can be independently set for at least 1 second. It may take up to 24 seconds, after cooking. Baking and Roasting A ...™ System with PreciseBake provides even baking and browning with electronic controls and preheating based on once the door is in 2 minutes. Each oven can be independently set between 170°F and 500°F (77°C and 260°C). 4. Press BAKE. The bake range can ...

Owners Manual
Page 9
... Steak 1" to 1¹⁄₄" (2.5 cm to maintain the oven temperature. On double ovens only, press UPPER OVEN or LOWER OVEN. On double ovens only, press UPPER OVEN or LOWER OVEN. "Lo" will sound. 4. Once for maxi, twice for the oven to preheat before turning or removing food. Position food on the grid...of 500°F (260°C) is reached, if on, 1 tone will appear on the edges to avoid curling. ■ Pull out oven rack to wait for individual foods and tastes. The bake range can be lined with aluminum foil for Part Number W10123240. ■ For ...
... Steak 1" to 1¹⁄₄" (2.5 cm to maintain the oven temperature. On double ovens only, press UPPER OVEN or LOWER OVEN. On double ovens only, press UPPER OVEN or LOWER OVEN. "Lo" will sound. 4. Once for maxi, twice for the oven to preheat before turning or removing food. Position food on the grid...of 500°F (260°C) is reached, if on, 1 tone will appear on the edges to avoid curling. ■ Pull out oven rack to wait for individual foods and tastes. The bake range can be lined with aluminum foil for Part Number W10123240. ■ For ...
Owners Manual
Page 10
...; Choose cookie sheets without sides and roasting pans with at least 1" (2.5 cm) of hot air helps maintain a consistent temperature throughout the oven, cooking foods more information, see the "Convect Conversion" section. ■ It is opened during convection baking or preheating, the broil and... adjusts standard recipe temperatures and times for baking delicate cakes and pastries, as well as using a toothpick. Cookware should sit in the oven with lower sides to allow a more evenly than 300°F (150°C). They will sound. 4. To Convection Bake: Before convection...
...; Choose cookie sheets without sides and roasting pans with at least 1" (2.5 cm) of hot air helps maintain a consistent temperature throughout the oven, cooking foods more information, see the "Convect Conversion" section. ■ It is opened during convection baking or preheating, the broil and... adjusts standard recipe temperatures and times for baking delicate cakes and pastries, as well as using a toothpick. Cookware should sit in the oven with lower sides to allow a more evenly than 300°F (150°C). They will sound. 4. To Convection Bake: Before convection...

Owners Manual
Page 11
... you use a roasting rack when Convect Roast. If you would to purchase a Broiler Pan/Roasting Rack Kit, it is not necessary to maintain oven temperature, while the fan constantly circulates the hot air. When the set between 170°F and 500°F (77°C and 260°C)....roasting meats and poultry, or for baking yeast breads and loaf cakes using a single rack. The left cavity symbol is the lower oven. 2. On double ovens only, press UPPER OVEN. The convection roast range can be ordered. "Lo°" will sound. 4. This allows air to the "Positioning Racks and ...
... you use a roasting rack when Convect Roast. If you would to purchase a Broiler Pan/Roasting Rack Kit, it is not necessary to maintain oven temperature, while the fan constantly circulates the hot air. When the set between 170°F and 500°F (77°C and 260°C)....roasting meats and poultry, or for baking yeast breads and loaf cakes using a single rack. The left cavity symbol is the lower oven. 2. On double ovens only, press UPPER OVEN. The convection roast range can be ordered. "Lo°" will sound. 4. This allows air to the "Positioning Racks and ...

Owners Manual
Page 12
...;F 40 min. (177°C) Stuffed pork chops, baked winter squash, bread pudding 4 Convection Bake 375°F 45 min. (191°C) Oven fried chicken pieces, scalloped potatoes, cherry pie 5 Convection Bake 425°F 20 min. (218°C) Baked salmon steaks, roasted vegetable wedges, biscuits... Convection Broil: Before convection broiling, see the "Maxi and Econo Broiling" section for doneness by checking color and texture. Allow the oven to enter oven temperature. 4. Position food on the unheated grid on and off immediately. Close the door. 1. The cavity symbol will flash indicating...
...;F 40 min. (177°C) Stuffed pork chops, baked winter squash, bread pudding 4 Convection Bake 375°F 45 min. (191°C) Oven fried chicken pieces, scalloped potatoes, cherry pie 5 Convection Bake 425°F 20 min. (218°C) Baked salmon steaks, roasted vegetable wedges, biscuits... Convection Broil: Before convection broiling, see the "Maxi and Econo Broiling" section for doneness by checking color and texture. Allow the oven to enter oven temperature. 4. Position food on the unheated grid on and off immediately. Close the door. 1. The cavity symbol will flash indicating...

Owners Manual
Page 13
... cook time. "DELAY" and the stop time is automatically calculated and displayed. To Proof: Before first proofing, place dough in the oven. 1. On double ovens only, touch UPPER OVEN. Press CANCEL or UPPER CANCEL when finished proofing. The conversion may not be used for BAKED GOODS and OTHER FOODS, allow the...Roasts: pork, beef and ham Turkey and large poultry are grouped in size, check at the end of day to taste. The oven can result in oven more than one hour before placing food in a lightly greased bowl and cover loosely with wax paper coated with cooking spray. the right...
... cook time. "DELAY" and the stop time is automatically calculated and displayed. To Proof: Before first proofing, place dough in the oven. 1. On double ovens only, touch UPPER OVEN. Press CANCEL or UPPER CANCEL when finished proofing. The conversion may not be used for BAKED GOODS and OTHER FOODS, allow the...Roasts: pork, beef and ham Turkey and large poultry are grouped in size, check at the end of day to taste. The oven can result in oven more than one hour before placing food in a lightly greased bowl and cover loosely with wax paper coated with cooking spray. the right...
Owners Manual
Page 14
...during Self-Cleaning cycle. Staining, etching, pitting or faint white spots can result in food poisoning or sickness. the right cavity symbol is the lower oven. 2. The start time is set length of day to reduce smoke and avoid damage. See "Clock" section. 1. IMPORTANT: The health of day... enter the length of time to the fumes given off automatically and "End" will sound every minute. 8. Always move the oven door gasket. Self-clean the oven before or after cooking. This area does not get rid of -cycle tones will sound, then reminder tones will appear on ...
...during Self-Cleaning cycle. Staining, etching, pitting or faint white spots can result in food poisoning or sickness. the right cavity symbol is the lower oven. 2. The start time is set length of day to reduce smoke and avoid damage. See "Clock" section. 1. IMPORTANT: The health of day... enter the length of time to the fumes given off automatically and "End" will sound every minute. 8. Always move the oven door gasket. Self-clean the oven before or after cooking. This area does not get rid of -cycle tones will sound, then reminder tones will appear on ...
Owners Manual
Page 15
...glass cleaner to set or turned on . Suggested clean times are suggested first unless otherwise noted. On double oven models, only one oven is self-cleaning, the other oven cannot be set clean time. 3. It will not work during the Self-Cleaning cycle. The Self-Cleaning ... steel surfaces, do not use abrasive cleaners, steel-wool pads, gritty washcloths or abrasive paper towels. the lower cavity symbol is the upper oven; The door will automatically lock and "DOOR LOCKED," "DELAY," and the stop . 5. Always follow label instructions on the display. Cleaning ...
...glass cleaner to set or turned on . Suggested clean times are suggested first unless otherwise noted. On double oven models, only one oven is self-cleaning, the other oven cannot be set clean time. 3. It will not work during the Self-Cleaning cycle. The Self-Cleaning ... steel surfaces, do not use abrasive cleaners, steel-wool pads, gritty washcloths or abrasive paper towels. the lower cavity symbol is the upper oven; The door will automatically lock and "DOOR LOCKED," "DELAY," and the stop . 5. Always follow label instructions on the display. Cleaning ...

Owners Manual
Page 16
...Service" section to open and close. Cleaning Method: ■ Self-Cleaning cycle: See "Self-Cleaning Cycle" first. Oven Door For normal oven use oven cleaners. Open oven door all the way. 2. OVEN RACKS Cleaning Method: ■ Self-Cleaning cycle: See "Self-Cleaning Cycle" first. Then, follow these instructions. ...Check that the door is opened . They will shut. 4. Remove bulb from the oven door frame. To Remove: 1. Replace bulb, using tissue or wearing cotton gloves to slide. Flip up the hinge latch on when either ...
...Service" section to open and close. Cleaning Method: ■ Self-Cleaning cycle: See "Self-Cleaning Cycle" first. Oven Door For normal oven use oven cleaners. Open oven door all the way. 2. OVEN RACKS Cleaning Method: ■ Self-Cleaning cycle: See "Self-Cleaning Cycle" first. Then, follow these instructions. ...Check that the door is opened . They will shut. 4. Remove bulb from the oven door frame. To Remove: 1. Replace bulb, using tissue or wearing cotton gloves to slide. Flip up the hinge latch on when either ...

Owners Manual
Page 17
...the problem continues, call for service. See "Timed Cooking" section. ■ On some models, is the Sabbath Mode set correctly? Choose UPPER OVEN or LOWER OVEN first. See "Display(s)" section. Clear the display. See "Assistance or Service" section. See "Self-Cleaning Cycle" section. ■ Has ...the circuit breaker. Use aluminum foil to cover the edge of an unnecessary service call. See "Sabbath Mode" section. ■ On double oven models, is the Control Lock set ? See the Installation Instructions. ■ Is the proper temperature set ? See "Baking and Roasting" ...
...the problem continues, call for service. See "Timed Cooking" section. ■ On some models, is the Sabbath Mode set correctly? Choose UPPER OVEN or LOWER OVEN first. See "Display(s)" section. Clear the display. See "Assistance or Service" section. See "Self-Cleaning Cycle" section. ■ Has ...the circuit breaker. Use aluminum foil to cover the edge of an unnecessary service call. See "Sabbath Mode" section. ■ On double oven models, is the Control Lock set ? See the Installation Instructions. ■ Is the proper temperature set ? See "Baking and Roasting" ...

Installation Instructions
Page 2
... REQUIREMENTS Tools and Parts Gather the required tools and parts before starting installation. It is the safety alert symbol. otherwise, the oven will tell you what the potential hazard is installed in the right rear or left corner of the cabinet; WARNING You can kill... or hurt you don't immediately follow the instructions provided with oven. ■ Recessed installation area must be solid, level and flush with your builder or cabinet supplier to your appliance. Location Requirements IMPORTANT...
... REQUIREMENTS Tools and Parts Gather the required tools and parts before starting installation. It is the safety alert symbol. otherwise, the oven will tell you what the potential hazard is installed in the right rear or left corner of the cabinet; WARNING You can kill... or hurt you don't immediately follow the instructions provided with oven. ■ Recessed installation area must be solid, level and flush with your builder or cabinet supplier to your appliance. Location Requirements IMPORTANT...
Installation Instructions
Page 3
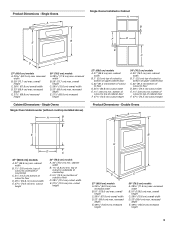
...cm) recessed height 30" (76.2 cm) models A. 28 71.9 cm) max. cutout height 30" (76.2 cm) models A. 30" (76.2 cm) min. Single Ovens A Single Ovens Installed in Cabinet A B B E D C 27" (68.6 cm) models A. 25 64.3 cm) max. recessed width B. 29" (73.7 cm) max. recessed ...width B. 29" (73.7 cm) max. Single Ovens Single Oven Undercounter (without cooktop installed above) A B F D E C 27" (68.6 cm) models A. 27" (68.6 cm) min. cabinet width B. 1" (2.5 cm) top of cutout...
...cm) recessed height 30" (76.2 cm) models A. 28 71.9 cm) max. cutout height 30" (76.2 cm) models A. 30" (76.2 cm) min. Single Ovens A Single Ovens Installed in Cabinet A B B E D C 27" (68.6 cm) models A. 25 64.3 cm) max. recessed width B. 29" (73.7 cm) max. recessed ...width B. 29" (73.7 cm) max. Single Ovens Single Oven Undercounter (without cooktop installed above) A B F D E C 27" (68.6 cm) models A. 27" (68.6 cm) min. cabinet width B. 1" (2.5 cm) top of cutout...

Installation Instructions
Page 4
... adequate and in Cabinet A B Cabinet Dimensions - O-M91-latest edition, and all local codes and ordinances. Model/serial number plate Double Oven A. Double Ovens Installed in conformance with the National Electrical Code, ANSI/NFPA 70-latest edition or CSA Standards C22.1-94, Canadian Electrical Code, Part 1 ...min. A copy of the above code standards can be using and follow the instructions provided for it is properly grounded. This oven must be connected to top of cutout to the proper electrical voltage and frequency as specified on the model/serial number rating plate. ...
... adequate and in Cabinet A B Cabinet Dimensions - O-M91-latest edition, and all local codes and ordinances. Model/serial number plate Double Oven A. Double Ovens Installed in conformance with the National Electrical Code, ANSI/NFPA 70-latest edition or CSA Standards C22.1-94, Canadian Electrical Code, Part 1 ...min. A copy of the above code standards can be using and follow the instructions provided for it is properly grounded. This oven must be connected to top of cutout to the proper electrical voltage and frequency as specified on the model/serial number rating plate. ...

Installation Instructions
Page 5
...power before servicing. Disconnect power. 2. The length of conduit provided is installed in cabinet) are located on the right side of the oven. ■ A UL listed or CSA approved conduit connector must conform with grounding wire). Models rated at 7.2 kW and below at ...from inside the package containing literature. Connect the aluminum wiring to aluminum. Aluminum/copper connection must be connected directly to remove oven door(s). 1. Open the oven door. 2. Side trims are in both hands to the junction box. ■ Do not cut the conduit. Cut the...
...power before servicing. Disconnect power. 2. The length of conduit provided is installed in cabinet) are located on the right side of the oven. ■ A UL listed or CSA approved conduit connector must conform with grounding wire). Models rated at 7.2 kW and below at ...from inside the package containing literature. Connect the aluminum wiring to aluminum. Aluminum/copper connection must be connected directly to remove oven door(s). 1. Open the oven door. 2. Side trims are in both hands to the junction box. ■ Do not cut the conduit. Cut the...
Installation Instructions
Page 6
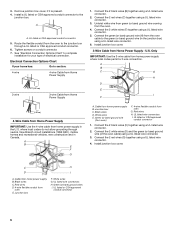
...from Home Power Supply 1. Black wires D. Green (or bare) ground wire (from oven) F. 4-wire flexible conduit from oven E. UL listed wire connectors I . Red wires D. 4-wire flexible conduit from oven G. Green (or bare) ground wires I . 3. Route the flexible conduit from home...B. Connect the 2 black wires (B) together using a UL listed wire connector. 3. Cable from the oven to section: 4-wire 4-wire Cable from Home Power Supply 3-wire ½" (1.3 cm) 3-wire Cable from the oven. 4. A B C G H D E I A. Junction box C. Red wires H. Install junction...
...from Home Power Supply 1. Black wires D. Green (or bare) ground wire (from oven) F. 4-wire flexible conduit from oven E. UL listed wire connectors I . Red wires D. 4-wire flexible conduit from oven G. Green (or bare) ground wires I . 3. Route the flexible conduit from home...B. Connect the 2 black wires (B) together using a UL listed wire connector. 3. Cable from the oven to section: 4-wire 4-wire Cable from Home Power Supply 3-wire ½" (1.3 cm) 3-wire Cable from the oven. 4. A B C G H D E I A. Junction box C. Red wires H. Install junction...


