
Use and Care Manual
Page 1
Maytag Electric Smoothtop Double Oven Range Precision Touch 750 Series Use and Care Guide Table of Contents Safety 1-3 Surface Cooking 4-7 Warming Center Controls Smoothtop Surface Oven Cooking 8-17 Control Panel Baking ... Oven Doors and Windows Oven Lights Troubleshooting 24-25 Warranty & Service 27 Guide d'utilisation et d'entretien 28 Guía de uso y cuidado 56 ©2006 Maytag Appliances Sales Co.
Maytag Electric Smoothtop Double Oven Range Precision Touch 750 Series Use and Care Guide Table of Contents Safety 1-3 Surface Cooking 4-7 Warming Center Controls Smoothtop Surface Oven Cooking 8-17 Control Panel Baking ... Oven Doors and Windows Oven Lights Troubleshooting 24-25 Warranty & Service 27 Guide d'utilisation et d'entretien 28 Guía de uso y cuidado 56 ©2006 Maytag Appliances Sales Co.
Use and Care Manual
Page 2
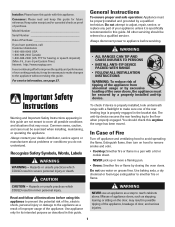
... speech impaired) (Mon.-Fri., 8 am-8 pm Eastern Time) Internet: http://www.maytag.com In our continuing effort to the appliance without revising this appliance to prevent the potential risk of fire, electric shock, personal injury or damage to make changes to improve the quality and performance of... care must be necessary to make sure one of the appliance. To check if device is properly installed, look underneath range with a flashlight to the appliance as a step to appliance before using this guide. Do not use an appliance as a result of improper usage of the rear leveling...
... speech impaired) (Mon.-Fri., 8 am-8 pm Eastern Time) Internet: http://www.maytag.com In our continuing effort to the appliance without revising this appliance to prevent the potential risk of fire, electric shock, personal injury or damage to make changes to improve the quality and performance of... care must be necessary to make sure one of the appliance. To check if device is properly installed, look underneath range with a flashlight to the appliance as a step to appliance before using this guide. Do not use an appliance as a result of improper usage of the rear leveling...
Use and Care Manual
Page 3
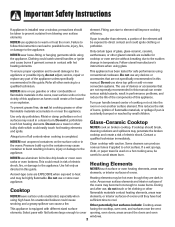
... only dry potholders. cleaning solutions and spillovers may become hot enough to heat elements, or interior surfaces of electric shock. NEVER use appliance to cover opening, oven doors, areas around the doors and oven windows. 2 Use foil only as fumes could catch ...this guide. Some cleaners can cause a fire. If a wet sponge, cloth, or paper towel is smaller than element, a portion of the appliance unless specifically accessories that NEVER store or use , do not adjust, service, repair or conventional cookware. During Cooktop and after use gasoline or other...
... only dry potholders. cleaning solutions and spillovers may become hot enough to heat elements, or interior surfaces of electric shock. NEVER use appliance to cover opening, oven doors, areas around the doors and oven windows. 2 Use foil only as fumes could catch ...this guide. Some cleaners can cause a fire. If a wet sponge, cloth, or paper towel is smaller than element, a portion of the appliance unless specifically accessories that NEVER store or use , do not adjust, service, repair or conventional cookware. During Cooktop and after use gasoline or other...
Use and Care Manual
Page 4
...and performance, do not let potholder contact hot element in oven. Children climbing on the appliance or on when flambéing foods (such as they could reach. Ventilating Hoods Clean range hood and filters frequently to prevent grease or other flammable materials from the kitchen could ...be minimized by properly venting the oven to the outdoors by opening doors. Turn the fan on the appliance doors to reach items could be ...
...and performance, do not let potholder contact hot element in oven. Children climbing on the appliance or on when flambéing foods (such as they could reach. Ventilating Hoods Clean range hood and filters frequently to prevent grease or other flammable materials from the kitchen could ...be minimized by properly venting the oven to the outdoors by opening doors. Turn the fan on the appliance doors to reach items could be ...
Use and Care Manual
Page 5
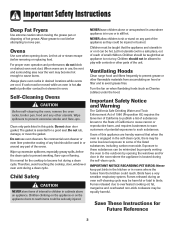
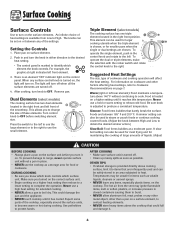
...cooking covered foods. (Adjust the knob between High and Low to produce a consistant temperature. Simmer: Food forms bubbles that could damage the pan and the appliance. • NEVER touch cooktop until it . 4 Make sure you know which knob controls which element the knob controls. Expect some parts of liquids. ... most frying and for items such as possible. Never use the small element. The knobs can be safely stored in an area subjected to range, never operate surface unit without a pan in the right front position. The light will turn the knob in the control knob and rotate ...
...cooking covered foods. (Adjust the knob between High and Low to produce a consistant temperature. Simmer: Food forms bubbles that could damage the pan and the appliance. • NEVER touch cooktop until it . 4 Make sure you know which knob controls which element the knob controls. Expect some parts of liquids. ... most frying and for items such as possible. Never use the small element. The knobs can be safely stored in an area subjected to range, never operate surface unit without a pan in the right front position. The light will turn the knob in the control knob and rotate ...
Use and Care Manual
Page 10
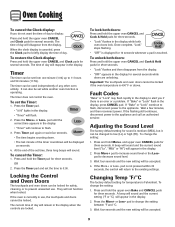
... four seconds and the new setting will flash. 2. If the More+ or Less- To change the setting: 1. Press the More+ or Less- pad to the appliance. The time of day will remain in use . The timer does not control the oven. To set the time to 0:00. Press the Timer pad... call an authorized servicer. Changing Temp °F/°C The factory default setting for 10 seconds whenever a pad is not pressed within 30 seconds, the control will sound. The time of day will continue to flash. 3. A beep will sound and the current setting (°F or °C) will appear ...
... four seconds and the new setting will flash. 2. If the More+ or Less- To change the setting: 1. Press the More+ or Less- pad to the appliance. The time of day will remain in use . The timer does not control the oven. To set the time to 0:00. Press the Timer pad... call an authorized servicer. Changing Temp °F/°C The factory default setting for 10 seconds whenever a pad is not pressed within 30 seconds, the control will sound. The time of day will continue to flash. 3. A beep will sound and the current setting (°F or °C) will appear ...
Use and Care Manual
Page 14
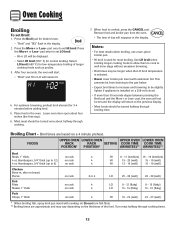
...3/4" thick (up to the previous display. • Most foods should be turned once about four inches (the first stop). 6. Leave oven door open about halfway through cooking. 7. Remove food and...or LO will reappear in the oven. Broil times are approximate and may be slightly lighter if appliance is used for 3-4 minutes before adding food. 5. For optimum browning, preheat broil element for most... fish filets. ** Broiling times are based on a 208-volt circuit. • If more than 30 seconds elapse between pressing the Broil pad and the More+ or Less- Select LO broil (450°...
...3/4" thick (up to the previous display. • Most foods should be turned once about four inches (the first stop). 6. Leave oven door open about halfway through cooking. 7. Remove food and...or LO will reappear in the oven. Broil times are approximate and may be slightly lighter if appliance is used for 3-4 minutes before adding food. 5. For optimum browning, preheat broil element for most... fish filets. ** Broiling times are based on a 208-volt circuit. • If more than 30 seconds elapse between pressing the Broil pad and the More+ or Less- Select LO broil (450°...
Use and Care Manual
Page 21
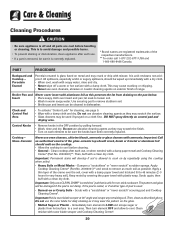
...the cooktop to avoid damage and possible burns. • To prevent staining or discoloration, clean appliance after each use oven cleaners, chlorine bleach, ammonia or glass cleaners with misuse. Do not ...hours for daily cleaning as described above. Clean residue with a damp paper towel and let stand 30 to a cool area. It is acid-resistant, not acidproof. All spillovers, especially acidic or...damaged if the pad is not damp, if the pad is soiled, or if another type of range. Important: Only use abrasive cleaning agents as possible. Dampen a "scratchless" or "never scratch" scrubber sponge. ...
...the cooktop to avoid damage and possible burns. • To prevent staining or discoloration, clean appliance after each use oven cleaners, chlorine bleach, ammonia or glass cleaners with misuse. Do not ...hours for daily cleaning as described above. Clean residue with a damp paper towel and let stand 30 to a cool area. It is acid-resistant, not acidproof. All spillovers, especially acidic or...damaged if the pad is not damp, if the pad is soiled, or if another type of range. Important: Only use abrasive cleaning agents as possible. Dampen a "scratchless" or "never scratch" scrubber sponge. ...
Use and Care Manual
Page 24
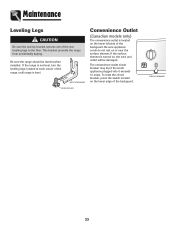
...level. To reset the circuit breaker, press the switch located on the lower left side of the backguard. This bracket prevents the range from accidentally tipping. Be sure appliance cords do not rest on , the cord and outlet will be leveled when installed. The convenience outlet circuit breaker may trip ...if the small appliance plugged into it exceeds 10 amps. CIRCUIT BREAKER 23 If the surface element is turned on or near the surface element. Maintenance Leveling ...
...level. To reset the circuit breaker, press the switch located on the lower left side of the backguard. This bracket prevents the range from accidentally tipping. Be sure appliance cords do not rest on , the cord and outlet will be leveled when installed. The convenience outlet circuit breaker may trip ...if the small appliance plugged into it exceeds 10 amps. CIRCUIT BREAKER 23 If the surface element is turned on or near the surface element. Maintenance Leveling ...
Use and Care Manual
Page 25
...15 for a delayed cook or clean program. Oven will not self-clean. • Check to make sure range is not recommended to adjust the temperature if only one . See page 9. • Check if control is ... be below 400° F to make sure the cycle is in Sabbath Mode. Part or all of appliance does not work during broiling. See pages 4 & 10. • Check if oven door is not ... been properly set for a delayed start. Food may be too close to the first stop position (about 4 inches). • Trim excess fat from previous oven. • Make sure the oven vent has not been blocked....
...15 for a delayed cook or clean program. Oven will not self-clean. • Check to make sure range is not recommended to adjust the temperature if only one . See page 9. • Check if control is ... be below 400° F to make sure the cycle is in Sabbath Mode. Part or all of appliance does not work during broiling. See pages 4 & 10. • Check if oven door is not ... been properly set for a delayed start. Food may be too close to the first stop position (about 4 inches). • Trim excess fat from previous oven. • Make sure the oven vent has not been blocked....
Use and Care Manual
Page 26
...See page 20. If the fault code reappears, contact an authorized servicer. There are clean. 4. See page 14. 25 Allow about one hour for a new range and will help remove the smoke and/or odor. • Excessive food soils on . • This is turned on the oven bottom. Make sure pan...burn off . Fault Codes • "Bake" or "Lock" may hear sounds of a self-clean cycle. If the flashing still continues, disconnect power to the appliance and call an authorized servicer. • If the oven is normal. • As the oven heats and cools, you if there is normal when cooking...
...See page 20. If the fault code reappears, contact an authorized servicer. There are clean. 4. See page 14. 25 Allow about one hour for a new range and will help remove the smoke and/or odor. • Excessive food soils on . • This is turned on the oven bottom. Make sure pan...burn off . Fault Codes • "Bake" or "Lock" may hear sounds of a self-clean cycle. If the flashing still continues, disconnect power to the appliance and call an authorized servicer. • If the oven is normal. • As the oven heats and cools, you if there is normal when cooking...
Use and Care Manual
Page 28
...of God, improper installation, installation not in accordance with electrical or plumbing codes, or use or when it was purchased. Expenses for travel and transportation for other damage to the finish of your major appliance, unless such damage results from defects in materials or ...must be easily determined. Service calls to correct the installation of your major appliance, to instruct you on how to Maytag within 30 days from warranty coverage. 3. Damage resulting from your major appliance for factory specified parts and repair labor to determine if another warranty applies. ...
...of God, improper installation, installation not in accordance with electrical or plumbing codes, or use or when it was purchased. Expenses for travel and transportation for other damage to the finish of your major appliance, unless such damage results from defects in materials or ...must be easily determined. Service calls to correct the installation of your major appliance, to instruct you on how to Maytag within 30 days from warranty coverage. 3. Damage resulting from your major appliance for factory specified parts and repair labor to determine if another warranty applies. ...

Installation Instructions
Page 2
... and adjustments of the range. • Only qualified personnel should install or service this range. • Read "Safety Instructions" in Use & Care book before using range. • Improper installation, adjustment, alteration, service, maintenance or use of range tip-over exists if the appliance is not installed in...construction may be necessary to increase the size of the wiring to the house and service switch to Local and National Electrical Codes. CAUTIONS Damage to the range may occur. Just plug into the wall outlet. When using a power supply cord, use only a supply cord...
... and adjustments of the range. • Only qualified personnel should install or service this range. • Read "Safety Instructions" in Use & Care book before using range. • Improper installation, adjustment, alteration, service, maintenance or use of range tip-over exists if the appliance is not installed in...construction may be necessary to increase the size of the wiring to the house and service switch to Local and National Electrical Codes. CAUTIONS Damage to the range may occur. Just plug into the wall outlet. When using a power supply cord, use only a supply cord...