
Owners Manual
Page 10
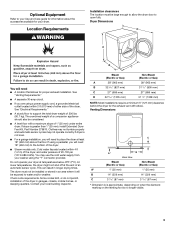
... of purchasing pedestals of different heights separately for Part Number 8558694 (White). To order, call the dealer from whom you planning to stack your PERFORMANCE SERIES washer and dryer and wish to place the 15.5" (394 mm) pedestal at least 9" (229 mm) above the floor. To do so, you will ... do so, you may select a 10" (254 mm) or 15.5" (394 mm) pedestal with the drying rack. Ask for a total height of washer/dryer backguards. These will add to complete drying, if needed. A B A. 10" (254 mm) pedestal B. 15.5" (394 mm) pedestal The pedestals are installing your...
... of purchasing pedestals of different heights separately for Part Number 8558694 (White). To order, call the dealer from whom you planning to stack your PERFORMANCE SERIES washer and dryer and wish to place the 15.5" (394 mm) pedestal at least 9" (229 mm) above the floor. To do so, you will ... do so, you may select a 10" (254 mm) or 15.5" (394 mm) pedestal with the drying rack. Ask for a total height of washer/dryer backguards. These will add to complete drying, if needed. A B A. 10" (254 mm) pedestal B. 15.5" (394 mm) pedestal The pedestals are installing your...
Installation Instructions
Page 2
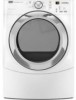
Rubber washer Remove parts package from dryer drum. Parts needed Check local codes. For further information, please refer to 1" (25 mm) or hex-head socket wrench (for adjusting dryer feet) ■ Level ■ Wire stripper (direct wire installations) ■ Vent clamps ■ ...your Use and Care Guide. 2 "Y" connector C. NOTE: Do not use leveling legs supplied with dryer if installing on a pedestal. Check existing electrical supply and venting. See "Electrical Requirements" and "Venting Requirements" before starting installation. Short inlet hose D. NOTE: Do not use ...
Rubber washer Remove parts package from dryer drum. Parts needed Check local codes. For further information, please refer to 1" (25 mm) or hex-head socket wrench (for adjusting dryer feet) ■ Level ■ Wire stripper (direct wire installations) ■ Vent clamps ■ ...your Use and Care Guide. 2 "Y" connector C. NOTE: Do not use leveling legs supplied with dryer if installing on a pedestal. Check existing electrical supply and venting. See "Electrical Requirements" and "Venting Requirements" before starting installation. Short inlet hose D. NOTE: Do not use ...
Installation Instructions
Page 3
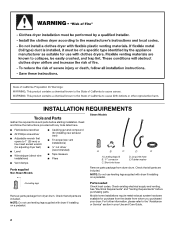
...will need ■ A location that allows for proper exhaust installation. Steam (Electric or Gas) A 38" (965 mm) B 32 9/16" (827 mm) C 27" (686 mm) D 52 9/16" (1335 mm) Non-Steam (Electric or Gas) 38" (965 mm) 31 1/2" (800 mm) 27" (686 mm) 51 1/2" (1308 mm) NOTE: Most installations require a ... Requirements Installation clearances The location must not be installed or stored in longer drying times. Do not operate your washer using a power supply cord, a grounded electrical outlet located within 4 ft (1.2 m) of the dryer, and water pressure of 1" (25 mm) under entire...
...will need ■ A location that allows for proper exhaust installation. Steam (Electric or Gas) A 38" (965 mm) B 32 9/16" (827 mm) C 27" (686 mm) D 52 9/16" (1335 mm) Non-Steam (Electric or Gas) 38" (965 mm) 31 1/2" (800 mm) 27" (686 mm) 51 1/2" (1308 mm) NOTE: Most installations require a ... Requirements Installation clearances The location must not be installed or stored in longer drying times. Do not operate your washer using a power supply cord, a grounded electrical outlet located within 4 ft (1.2 m) of the dryer, and water pressure of 1" (25 mm) under entire...
Installation Instructions
Page 5
... cabinet installation. ■ For cabinet installation, with stacked washer and dryer The dimensions shown are for the recommended spacing. 48 in.2 * (310 cm2) 3"* (76 mm) 24 in.2 * (155 cm2) 3"* (76 mm) 1"* (25 mm) A* 1" 27" 1" (25 mm) (686 mm) (25 mm) Steam (Electric or Gas) Non-Steam (Electric or Gas) A* 5 ½" (140 mm) 5" (127 mm) *Required...
... cabinet installation. ■ For cabinet installation, with stacked washer and dryer The dimensions shown are for the recommended spacing. 48 in.2 * (310 cm2) 3"* (76 mm) 24 in.2 * (155 cm2) 3"* (76 mm) 1"* (25 mm) A* 1" 27" 1" (25 mm) (686 mm) (25 mm) Steam (Electric or Gas) Non-Steam (Electric or Gas) A* 5 ½" (140 mm) 5" (127 mm) *Required...
Installation Instructions
Page 14
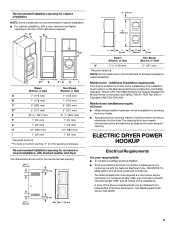
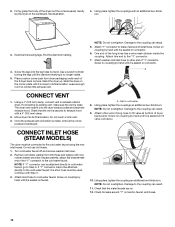
...hose has a wire mesh strainer inside the exhaust hood. A CONNECT VENT 1. Do not crush or kink vent. 3. Remove old rubber washer from dryer packaging under each of "Y" connector. Damage to its final location. See illustration. 4. NOTE: Do not overtighten. If connecting to existing .... NOTE: If "Y" connector can result. 9. Firmly grasp the body of dryer back panel. NOTE: Do not overtighten. Attach this end to exhaust outlet in dryer. Turn cold water faucet off and remove washer inlet hose. 2. NOTE: Do not overtighten. A. Using pliers, tighten the...
...hose has a wire mesh strainer inside the exhaust hood. A CONNECT VENT 1. Do not crush or kink vent. 3. Remove old rubber washer from dryer packaging under each of "Y" connector. Damage to its final location. See illustration. 4. NOTE: Do not overtighten. If connecting to existing .... NOTE: If "Y" connector can result. 9. Firmly grasp the body of dryer back panel. NOTE: Do not overtighten. Attach this end to exhaust outlet in dryer. Turn cold water faucet off and remove washer inlet hose. 2. NOTE: Do not overtighten. A. Using pliers, tighten the...


