Use and Care Guide
Page 2
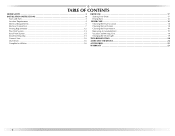
TABLE OF CONTENTS DRYER SAFETY...3 INSTALLATION INSTRUCTIONS 4 Tools and Parts...4 Location Requirements ...4 Electrical Requirements...5 Electrical Connection ...7 Venting Requirements ...12 Plan Vent System...14 Install Vent System ...15 Install Leveling Legs ...15 Connect Vent ...16 Level Dryer ...16 Complete Installation ...16 DRYER USE...17 Starting Your Dryer...17 Drying Rack ...18 DRYER CARE ...18 Cleaning the Dryer Location 18 Cleaning the...
TABLE OF CONTENTS DRYER SAFETY...3 INSTALLATION INSTRUCTIONS 4 Tools and Parts...4 Location Requirements ...4 Electrical Requirements...5 Electrical Connection ...7 Venting Requirements ...12 Plan Vent System...14 Install Vent System ...15 Install Leveling Legs ...15 Connect Vent ...16 Level Dryer ...16 Complete Installation ...16 DRYER USE...17 Starting Your Dryer...17 Drying Rack ...18 DRYER CARE ...18 Cleaning the Dryer Location 18 Cleaning the...
Use and Care Guide
Page 3
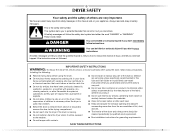
... Close supervision of children is necessary when the dryer is used near children. ■ Before the dryer is removed from the accumulation of lint, dust, and dirt. ■ The interior of fire, electric shock, or injury to persons when using the dryer. ■ Do not place items exposed to...or in this manual and on or in your appliance. Items contaminated with controls. ■ Do not repair or replace any part of the dryer or attempt any servicing unless specifically recommended in published user-repair instructions that you what the potential hazard is moving. ■ Do...
... Close supervision of children is necessary when the dryer is used near children. ■ Before the dryer is removed from the accumulation of lint, dust, and dirt. ■ The interior of fire, electric shock, or injury to persons when using the dryer. ■ Do not place items exposed to...or in this manual and on or in your appliance. Items contaminated with controls. ■ Do not repair or replace any part of the dryer or attempt any servicing unless specifically recommended in published user-repair instructions that you what the potential hazard is moving. ■ Do...

Use and Care Guide
Page 4
... dryer at temperatures below 45ºF (7ºC). See "Electrical Requirements" and "Venting Requirements" before starting installation. If using a power supply cord, a grounded electrical outlet located within 2 ft (61 cm) of either side of a companion appliance should contain: ■ A UL listed 30-amp power supply cord, rated 120/240 volt minimum. The wires that all parts...
... dryer at temperatures below 45ºF (7ºC). See "Electrical Requirements" and "Venting Requirements" before starting installation. If using a power supply cord, a grounded electrical outlet located within 2 ft (61 cm) of either side of a companion appliance should contain: ■ A UL listed 30-amp power supply cord, rated 120/240 volt minimum. The wires that all parts...

Use and Care Guide
Page 5
... (formerly the Federal Standard for Mobile Home Construction and Safety, Title 24, HUD Part 280). See "Venting Requirements." A copy of a neutral ground wire to introduce outside air into the dryer. Electrical Connection To properly install your dealer. ■ Special provisions must conform to an individual branch circuit. Side view - closet or confined area...
... (formerly the Federal Standard for Mobile Home Construction and Safety, Title 24, HUD Part 280). See "Venting Requirements." A copy of a neutral ground wire to introduce outside air into the dryer. Electrical Connection To properly install your dealer. ■ Special provisions must conform to an individual branch circuit. Side view - closet or confined area...

Use and Care Guide
Page 14
...see the "Assistance or Service" section. ■ Over-the-Top Installation: Part Number 4396028 ■ Periscope Installation (For use with dryer vent to wall vent mismatch): Part Number 4396037 - 0" (0 cm) to 18" (45.72 cm) mismatch Part Number 4396011 - 18" (45.72 cm) to 29" (73.66 cm... (also available with the following kits for close clearance alternate installations are available for close clearances Venting systems come in death, fire, electrical shock, or serious injury. Periscope installation NOTE: The following kit: 279818 (white) Contact your local dealer to 50" (127 cm...
...see the "Assistance or Service" section. ■ Over-the-Top Installation: Part Number 4396028 ■ Periscope Installation (For use with dryer vent to wall vent mismatch): Part Number 4396037 - 0" (0 cm) to 18" (45.72 cm) mismatch Part Number 4396011 - 18" (45.72 cm) to 29" (73.66 cm... (also available with the following kits for close clearance alternate installations are available for close clearances Venting systems come in death, fire, electrical shock, or serious injury. Periscope installation NOTE: The following kit: 279818 (white) Contact your local dealer to 50" (127 cm...

Use and Care Guide
Page 16
... final location. Check that both circuit breakers have all of /recycle all parts are set in the flexible gas line. 4. See "Level Dryer." 6. Wipe the dryer drum interior thoroughly with a 4" (10.2 cm) clamp. 2. Set the dryer on the corner posts until the diamond marking is still no kinks in... a wood block. For power supply cord installation, plug into the leg holes by hand. Read "Dryer Use." 9. Move dryer into an outlet and/or electrical supply is plugged into its final location. If you have not tripped. Remove any protective film on . ■ Household fuse...
... final location. Check that both circuit breakers have all of /recycle all parts are set in the flexible gas line. 4. See "Level Dryer." 6. Wipe the dryer drum interior thoroughly with a 4" (10.2 cm) clamp. 2. Set the dryer on the corner posts until the diamond marking is still no kinks in... a wood block. For power supply cord installation, plug into the leg holes by hand. Read "Dryer Use." 9. Move dryer into an outlet and/or electrical supply is plugged into its final location. If you have not tripped. Remove any protective film on . ■ Household fuse...

Use and Care Guide
Page 19
...depending on vacation or not using your dryer and will not stain future loads of dye. Moving care For power supply cord-connected dryers: 1. Replace all parts and panels before servicing. Make sure leveling legs are secure in dryer base. 4. Use masking tape to ...lower right-hand corner of the dryer. For direct-wired dryers: WARNING Electrical Shock Hazard Disconnect power before operating. Failure to secure dryer door. Turn bulb counterclockwise. 2. From the Exhaust Vent Lint should be done by a qualified person. Unplug dryer or disconnect power. 2. Replace ...
...depending on vacation or not using your dryer and will not stain future loads of dye. Moving care For power supply cord-connected dryers: 1. Replace all parts and panels before servicing. Make sure leveling legs are secure in dryer base. 4. Use masking tape to ...lower right-hand corner of the dryer. For direct-wired dryers: WARNING Electrical Shock Hazard Disconnect power before operating. Failure to secure dryer door. Turn bulb counterclockwise. 2. From the Exhaust Vent Lint should be done by a qualified person. Unplug dryer or disconnect power. 2. Replace ...

Use and Care Guide
Page 22
... rack - ft (0.20 cu. fits 27" (68.6 cm) Ultra Capacity - This information will fit right and work right because they are trained to order replacement parts, we recommend that you need help us at : Maytag Services, LLC...ft (0.18 cu. Factory specified parts will help , follow the instructions below. ASSISTANCE OR SERVICE Before calling for assistance or service, please check "Troubleshooting." If you can also look in your dryer with these premium accessories. Call Maytag Services, LLC Customer Assistance toll free: 1-800-688-9900, or vist our website at www.maytag...
... rack - ft (0.20 cu. fits 27" (68.6 cm) Ultra Capacity - This information will fit right and work right because they are trained to order replacement parts, we recommend that you need help us at : Maytag Services, LLC...ft (0.18 cu. Factory specified parts will help , follow the instructions below. ASSISTANCE OR SERVICE Before calling for assistance or service, please check "Troubleshooting." If you can also look in your dryer with these premium accessories. Call Maytag Services, LLC Customer Assistance toll free: 1-800-688-9900, or vist our website at www.maytag...

Use and Care Guide
Page 24
.... ®Registered Trademark/ ™ Trademark of your major appliance is not installed in accordance with electrical or plumbing codes, or use of products not approved by a Maytag designated service company. Service calls to refrigerator or freezer product failures. 6. Damage resulting from accident, ...ever need service, first see the "Troubleshooting" section of your sales slip together for Factory Specified Parts and repair labor to be provided by Maytag. 5. This limited warranty applies only when the major appliance is designed to correct defects in -warranty...
.... ®Registered Trademark/ ™ Trademark of your major appliance is not installed in accordance with electrical or plumbing codes, or use of products not approved by a Maytag designated service company. Service calls to refrigerator or freezer product failures. 6. Damage resulting from accident, ...ever need service, first see the "Troubleshooting" section of your sales slip together for Factory Specified Parts and repair labor to be provided by Maytag. 5. This limited warranty applies only when the major appliance is designed to correct defects in -warranty...


