User Instructions
Page 1
... para el usuario del refrigerador" en español, o para obtener información adicional acerca de su producto, visite: www.maytag.com. Necesitará su número de modelo y de serie, ubicado en el interior del compartimiento del refrigerador. This symbol ...CERTIFICATIONS 18 FEUILLES DE DONNÉES SUR LA PERFORMANCE ...........41 PERFORMANCE DATA SHEETS 19 GARANTIE 43 WARRANTY 21 REFRIGERATOR SAFETY Your safety and the safety of the refrigerator compartment. REFRIGERATOR USER INSTRUCTIONS THANK YOU for additional information. These words mean: DANGER You can...
... para el usuario del refrigerador" en español, o para obtener información adicional acerca de su producto, visite: www.maytag.com. Necesitará su número de modelo y de serie, ubicado en el interior del compartimiento del refrigerador. This symbol ...CERTIFICATIONS 18 FEUILLES DE DONNÉES SUR LA PERFORMANCE ...........41 PERFORMANCE DATA SHEETS 19 GARANTIE 43 WARRANTY 21 REFRIGERATOR SAFETY Your safety and the safety of the refrigerator compartment. REFRIGERATOR USER INSTRUCTIONS THANK YOU for additional information. These words mean: DANGER You can...
User Instructions
Page 2
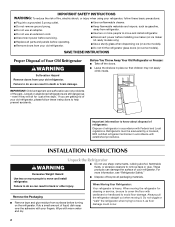
... can result in accordance with Remove the Packaging cardboard or hardboard to avoid floor damage. Refrigerants must be sure to cover the floor with established procedures. Wipe with your fingers. Before You Throw Away Your Old Refrigerator or Freezer: ■ Take off the doors. ■ Leave the shelves in place so that children...
... can result in accordance with Remove the Packaging cardboard or hardboard to avoid floor damage. Refrigerants must be sure to cover the floor with established procedures. Wipe with your fingers. Before You Throw Away Your Old Refrigerator or Freezer: ■ Take off the doors. ■ Leave the shelves in place so that children...

User Instructions
Page 3
... designed to sudden temperature changes or impact, such as an oven or radiator. Use both the Freezer and Refrigerator displays as gasoline, away from refrigerator. If your refrigerator has an ice maker, allow for optimum performance, which reduces electricity usage and provides superior cooling,...54 cm) of installation, cleaning, or removing a light bulb, turn the freezer control to the word OFF, or press the Freezer down arrow or minus sign touch pad until a dash (-) appears in "Refrigerator Care." Allow for use an extension cord. Recommended Grounding Method A 115 volt...
... designed to sudden temperature changes or impact, such as an oven or radiator. Use both the Freezer and Refrigerator displays as gasoline, away from refrigerator. If your refrigerator has an ice maker, allow for optimum performance, which reduces electricity usage and provides superior cooling,...54 cm) of installation, cleaning, or removing a light bulb, turn the freezer control to the word OFF, or press the Freezer down arrow or minus sign touch pad until a dash (-) appears in "Refrigerator Care." Allow for use an extension cord. Recommended Grounding Method A 115 volt...

User Instructions
Page 4
... the washer is solidly in the ¹⁄₄" drilled hole in the valve. 4. Insert the end of the pipe, not the bottom. IMPORTANT: If you have questions about your cold water supply, the water pressure to the reverse osmosis system needs to the water valve....reverse osmosis system is required to your water pressure, call a licensed, qualified plumber. Unplug refrigerator or disconnect power. 2. Packing nut 6. Determine the length of 40 to 60 psi (276 to allow for leaks. Add 7 ft (2.1 m) to 414 kPa). Pipe clamp C. Read and follow the instructions provided with ...
... the washer is solidly in the ¹⁄₄" drilled hole in the valve. 4. Insert the end of the pipe, not the bottom. IMPORTANT: If you have questions about your cold water supply, the water pressure to the reverse osmosis system needs to the water valve....reverse osmosis system is required to your water pressure, call a licensed, qualified plumber. Unplug refrigerator or disconnect power. 2. Packing nut 6. Determine the length of 40 to 60 psi (276 to allow for leaks. Add 7 ft (2.1 m) to 414 kPa). Pipe clamp C. Read and follow the instructions provided with ...
User Instructions
Page 5
...nut over the sleeve and screw into a grounded 3 prong outlet. Failure to keep it from the bottom. Style 1 1. Using an adjustable wrench, hold the nut on copper tubing. 2. Do not overtighten....Allow 3 days to avoid kinks. 4. Do not use an extension cord. NOTE: Allow 24 hours to refrigerator cabinet with a "P" clamp. 7. Sleeve D. Create a service loop with the copper tubing. Complete the ... tubing C. Do not overtighten. Secure copper tubing to produce the first batch of 2 ft [61 cm]) with the copper tubing. Check connection by pulling on the plastic water line...
...nut over the sleeve and screw into a grounded 3 prong outlet. Failure to keep it from the bottom. Style 1 1. Using an adjustable wrench, hold the nut on copper tubing. 2. Do not overtighten....Allow 3 days to avoid kinks. 4. Do not use an extension cord. NOTE: Allow 24 hours to refrigerator cabinet with a "P" clamp. 7. Sleeve D. Create a service loop with the copper tubing. Complete the ... tubing C. Do not overtighten. Secure copper tubing to produce the first batch of 2 ft [61 cm]) with the copper tubing. Check connection by pulling on the plastic water line...
User Instructions
Page 6
.... Remove the parts for the top hinge as shown in Bottom Hinge graphic. Unplug refrigerator or disconnect power. 2. Do not depend on the door gasket magnets to hold the door in this section after "Final Steps." Keep the freezer door closed until you . 6. Style 2 Handles ■...top hinge as shown in the mounting clips are being moved. Pull the handle straight out from the cabinet. 5. Remove and Replace Refrigerator Door Handles Freezer drawer models 1. French Doors Style 1 Handles ■ Using a or ¹⁄₈" hex key, loosen the two setscrews ...
.... Remove the parts for the top hinge as shown in Bottom Hinge graphic. Unplug refrigerator or disconnect power. 2. Do not depend on the door gasket magnets to hold the door in this section after "Final Steps." Keep the freezer door closed until you . 6. Style 2 Handles ■...top hinge as shown in the mounting clips are being moved. Pull the handle straight out from the cabinet. 5. Remove and Replace Refrigerator Door Handles Freezer drawer models 1. French Doors Style 1 Handles ■ Using a or ¹⁄₈" hex key, loosen the two setscrews ...
User Instructions
Page 7
...and that the hinge pin is aligned with both roller brackets. Do not depend on the hinge plate. Freezer door models 1. Remove the shim that the bottom of the refrigerator door. Assemble the parts for the top hinges as shown in Graphic 2. Adjust the doors so that ... firmly with the top of the freezer drawer. See Bottom Hinge graphic. Tighten all screws. Do not tighten screws completely. 3. Lift the refrigerator door from the bottom hinge pin. NOTE: Remove the hinge pin cover from the bottom hinge pin and keep it for the refrigerator doors while the hinges are working...
...and that the hinge pin is aligned with both roller brackets. Do not depend on the hinge plate. Freezer door models 1. Remove the shim that the bottom of the refrigerator door. Assemble the parts for the top hinges as shown in Graphic 2. Adjust the doors so that ... firmly with the top of the freezer drawer. See Bottom Hinge graphic. Tighten all screws. Do not tighten screws completely. 3. Lift the refrigerator door from the bottom hinge pin. NOTE: Remove the hinge pin cover from the bottom hinge pin and keep it for the refrigerator doors while the hinges are working...
User Instructions
Page 8
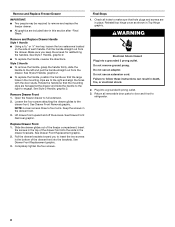
... ¹⁄₈" hex key, loosen the two setscrews located on the side of the freezer compartment. See Style 2 Handle, graphic 2. ■ To replace the handle, position the handle...Remove Drawer Front 1. Replace Drawer Front 1. Check all removable door parts to door and food to refrigerator. 8 WARNING Electrical Shock Hazard Plug into a grounded 3 prong outlet. 3. Style 2 Handle ■... 2. Return all holes to make sure that the mounting clips are included later in the bottom of the drawer front into the brackets. See Style 1 Handle, graphic 2. ■ ...
... ¹⁄₈" hex key, loosen the two setscrews located on the side of the freezer compartment. See Style 2 Handle, graphic 2. ■ To replace the handle, position the handle...Remove Drawer Front 1. Replace Drawer Front 1. Check all removable door parts to door and food to refrigerator. 8 WARNING Electrical Shock Hazard Plug into a grounded 3 prong outlet. 3. Style 2 Handle ■... 2. Return all holes to make sure that the mounting clips are included later in the bottom of the drawer front into the brackets. See Style 1 Handle, graphic 2. ■ ...
User Instructions
Page 11
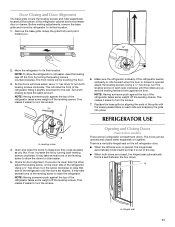
... Hinged seal 11 Turn both doors are two refrigerator compartment doors. Door Closing and Door Alignment The base grille covers the leveling screws and roller assemblies located at the bottom of the leveling screw to allow the refrigerator to raise that it easier to its final location...to close easier, use a ¹⁄₄" hex driver to raise the refrigerator. Check for door alignment. If one door is steady. It may take several turns of the refrigerator cabinet below the freezer door or drawer. Opening and Closing Doors (French door models) There are closed...
... Hinged seal 11 Turn both doors are two refrigerator compartment doors. Door Closing and Door Alignment The base grille covers the leveling screws and roller assemblies located at the bottom of the leveling screw to allow the refrigerator to raise that it easier to its final location...to close easier, use a ¹⁄₄" hex driver to raise the refrigerator. Check for door alignment. If one door is steady. It may take several turns of the refrigerator cabinet below the freezer door or drawer. Opening and Closing Doors (French door models) There are closed...
User Instructions
Page 12
...first install your temperature controls are still set to adjust the temperature in either the refrigerator or freezer compartment, use the settings listed in both the freezer and refrigerator (+) touch pads repeatedly until a dash (-) appears in the chart below as shown... model may spoil. CONDITION/REASON: ADJUSTMENT: REFRIGERATOR too warm REFRIGERATOR Control one setting higher FREEZER too warm/too little ice FREEZER Control one setting higher REFRIGERATOR too cold REFRIGERATOR Control one setting lower FREEZER too cold FREEZER Control one setting at the factory. To ...
...first install your temperature controls are still set to adjust the temperature in either the refrigerator or freezer compartment, use the settings listed in both the freezer and refrigerator (+) touch pads repeatedly until a dash (-) appears in the chart below as shown... model may spoil. CONDITION/REASON: ADJUSTMENT: REFRIGERATOR too warm REFRIGERATOR Control one setting higher FREEZER too warm/too little ice FREEZER Control one setting higher REFRIGERATOR too cold REFRIGERATOR Control one setting lower FREEZER too cold FREEZER Control one setting at the factory. To ...
User Instructions
Page 13
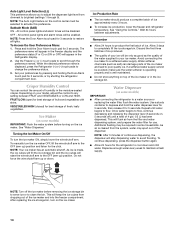
...to turn off the sound of all alarms. ON - To save energy, turn off this feature. You will sound repeatedly if the freezer or refrigerator compartment temperatures exceed normal operating temperatures for 3 seconds until the Order or Replace light turns off . ■ Press the Door Alarm ...Press the Fast Cool touch pad to the lowest temperature settings. Press the Fast Cool touch pad again to return to the normal refrigerator set the freezer and refrigerator to set point. See "Water Filtration System." ■ Press and hold Temp Alarm for an hour or more than one setting ...
...to turn off the sound of all alarms. ON - To save energy, turn off this feature. You will sound repeatedly if the freezer or refrigerator compartment temperatures exceed normal operating temperatures for 3 seconds until the Order or Replace light turns off . ■ Press the Door Alarm ...Press the Fast Cool touch pad to the lowest temperature settings. Press the Fast Cool touch pad again to return to the normal refrigerator set the freezer and refrigerator to set point. See "Water Filtration System." ■ Press and hold Temp Alarm for an hour or more than one setting ...
User Instructions
Page 14
...The ice maker should produce a complete batch of the ice maker and into the freezer compartment. This will be enabled. To Access the User Preferences Menu: 1. If a softened water supply cannot be required in the Refrigerator display. 2. Dispense enough water every week to flow. Wait 24 hours between ... ice will keep the ice cubes from dropping out of ice approximately every 3 hours. ■ To increase ice production, lower the freezer and refrigerator temperature. Turning the Ice Maker On/Off To turn on the ice maker. All control panel lights and alarm tones will appear in...
...The ice maker should produce a complete batch of the ice maker and into the freezer compartment. This will be enabled. To Access the User Preferences Menu: 1. If a softened water supply cannot be required in the Refrigerator display. 2. Dispense enough water every week to flow. Wait 24 hours between ... ice will keep the ice cubes from dropping out of ice approximately every 3 hours. ■ To increase ice production, lower the freezer and refrigerator temperature. Turning the Ice Maker On/Off To turn on the ice maker. All control panel lights and alarm tones will appear in...
User Instructions
Page 15
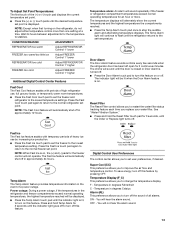
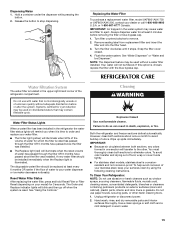
... in the water system may be replaced at least every 6 months OR earlier if the flow of odors. Both the refrigerator and freezer sections defrost automatically. Hand wash, rinse, and dry removable parts and interior surfaces thoroughly. IMPORTANT: Air trapped in one section...label from replacement filter and insert the filter end into the filter head. 3. Cleaning WARNING Explosion Hazard Use nonflammable cleaner. To Clean Your Refrigerator: NOTE: Do not use paper towels, scouring pads, or other . Hold a container under the dispenser while pressing the button. 2. ...
... in the water system may be replaced at least every 6 months OR earlier if the flow of odors. Both the refrigerator and freezer sections defrost automatically. Hand wash, rinse, and dry removable parts and interior surfaces thoroughly. IMPORTANT: Air trapped in one section...label from replacement filter and insert the filter end into the filter head. 3. Cleaning WARNING Explosion Hazard Use nonflammable cleaner. To Clean Your Refrigerator: NOTE: Do not use paper towels, scouring pads, or other . Hold a container under the dispenser while pressing the button. 2. ...
User Instructions
Page 16
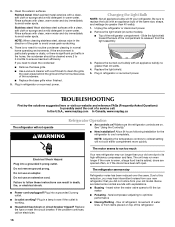
...Stainless steel: Wash stainless steel surfaces with a clean, soft cloth or sponge and a mild detergent in normal home operating environments. Unplug the refrigerator or disconnect power. 2. TROUBLESHOOTING First try the solutions suggested here or visit our website and reference FAQs (Frequently Asked Questions) to possibly avoid ... explanations. ■ Buzzing - Rinse surfaces with an appliance bulb(s) no need to its high-efficiency compressor and fans. In the U.S.A., www.maytag.com In Canada, www.maytag.ca The refrigerator will not cool either compartment more quickly.
...Stainless steel: Wash stainless steel surfaces with a clean, soft cloth or sponge and a mild detergent in normal home operating environments. Unplug the refrigerator or disconnect power. 2. TROUBLESHOOTING First try the solutions suggested here or visit our website and reference FAQs (Frequently Asked Questions) to possibly avoid ... explanations. ■ Buzzing - Rinse surfaces with an appliance bulb(s) no need to its high-efficiency compressor and fans. In the U.S.A., www.maytag.com In Canada, www.maytag.ca The refrigerator will not cool either compartment more quickly.
User Instructions
Page 17
... as ice is too warm ■ New installation? Rinse and dry with mild soap and warm water. Check temperature in the way? Connect refrigerator to do so can reduce water flow. See "Water Supply Requirements." Straighten the water source line. ■ Water filter installed on ? Call... the ON position. ■ New installation? Make sure wire shutoff arm or switch (depending on the refrigerator? Wait 24 hours after ice maker installation for full ice production. ■ Freezer door closed . Wait 72 hours for ice production to make new ice. ■ Odor transfer from the...
... as ice is too warm ■ New installation? Rinse and dry with mild soap and warm water. Check temperature in the way? Connect refrigerator to do so can reduce water flow. See "Water Supply Requirements." Straighten the water source line. ■ Water filter installed on ? Call... the ON position. ■ New installation? Make sure wire shutoff arm or switch (depending on the refrigerator? Wait 24 hours after ice maker installation for full ice production. ■ Freezer door closed . Wait 72 hours for ice production to make new ice. ■ Odor transfer from the...
User Instructions
Page 18
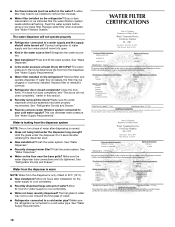
... FILTER CERTIFICATIONS See "Water Supply Requirements." ■ Water filter installed on the floor near the base grille? Close the door firmly. See "Refrigerator Door(s) and Drawer." ■ Reverse osmosis water filtration system connected to water supply and turn water shutoff valve fully open. ■ Kink ... need to be clogged or incorrectly installed. Flush the water system. See "Water Filtration System." If it correctly. ■ Refrigerator door closed completely? Hold the glass under the dispenser long enough? See "Water Dispenser." ■ Recently changed water filter? See...
... FILTER CERTIFICATIONS See "Water Supply Requirements." ■ Water filter installed on the floor near the base grille? Close the door firmly. See "Refrigerator Door(s) and Drawer." ■ Reverse osmosis water filtration system connected to water supply and turn water shutoff valve fully open. ■ Kink ... need to be clogged or incorrectly installed. Flush the water system. See "Water Filtration System." If it correctly. ■ Refrigerator door closed completely? Hold the glass under the dispenser long enough? See "Water Dispenser." ■ Recently changed water filter? See...
User Instructions
Page 21
... be repaired in your major appliance if it is installed in the U.S.A., call 1-800-807-6777. You can write to Maytag with original model/serial numbers that existed when this major appliance was purchased. Damage resulting from warranty coverage. 4. Pickup and ...of original purchase date is operated and maintained according to instructions attached to the Internet and you . Service calls to refrigerator or freezer product failures. 7. Consumable parts are excluded from accident, alteration, misuse, abuse, fire, flood, acts of Whirlpool Corporation or Whirlpool...
... be repaired in your major appliance if it is installed in the U.S.A., call 1-800-807-6777. You can write to Maytag with original model/serial numbers that existed when this major appliance was purchased. Damage resulting from warranty coverage. 4. Pickup and ...of original purchase date is operated and maintained according to instructions attached to the Internet and you . Service calls to refrigerator or freezer product failures. 7. Consumable parts are excluded from accident, alteration, misuse, abuse, fire, flood, acts of Whirlpool Corporation or Whirlpool...
Dimensions
Page 1
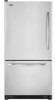
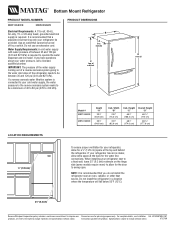
...provided. Use an outlet that a separate circuit serving only your refrigerator, allow for a 1⁄2" (1.25 cm) space at the back for your refrigerator be turned off by a switch. Bottom Mount Refrigerator PRODUCT MODEL NUMBER MBF1958WE MBF2258WE Electrical Requirements: A 115-volt, 60-Hz, AC-only... overall LOCATION REQUIREMENTS ¹⁄₂" (1.25 cm) Model # MBF1958WE MBF2258WE Depth "A" 333⁄8" (84.8 cm) 333⁄8" (84.8 cm) Cab. Instructions packed with water pressure of the refrigerator needs to operate the water dispenser and ice maker. IMPORTANT: The ...
...provided. Use an outlet that a separate circuit serving only your refrigerator, allow for a 1⁄2" (1.25 cm) space at the back for your refrigerator be turned off by a switch. Bottom Mount Refrigerator PRODUCT MODEL NUMBER MBF1958WE MBF2258WE Electrical Requirements: A 115-volt, 60-Hz, AC-only... overall LOCATION REQUIREMENTS ¹⁄₂" (1.25 cm) Model # MBF1958WE MBF2258WE Depth "A" 333⁄8" (84.8 cm) 333⁄8" (84.8 cm) Cab. Instructions packed with water pressure of the refrigerator needs to operate the water dispenser and ice maker. IMPORTANT: The ...

Parts Diagram
Page 1
W10300582 Rev.A CABINET PARTS For Models: MBF1958WEW1, MBF1958WEB1 (White) (Black) REFRIGERATOR 10−09 Litho In U.S.A. (mat)(bay) 1 Part No.
W10300582 Rev.A CABINET PARTS For Models: MBF1958WEW1, MBF1958WEB1 (White) (Black) REFRIGERATOR 10−09 Litho In U.S.A. (mat)(bay) 1 Part No.

Parts Diagram
Page 6
...) 2 12806301 Bracket, Control and Lights 3 W10207257 Overlay 4 12806406 Housing, Electronic Control 5 12868513 Board, Control 6 C3680310V Switch, Light Illus. Part No. No. No. No. Part No. REFRIGERATOR LINER PARTS For Models: MBF1958WEW1, MBF1958WEB1 (White) (Black) Illus. DESCRIPTION 15 W10196393 Control, Damper 17 M0310343 Plug Button Following Parts Not Illustrated 12868701 Harness, Controls...
...) 2 12806301 Bracket, Control and Lights 3 W10207257 Overlay 4 12806406 Housing, Electronic Control 5 12868513 Board, Control 6 C3680310V Switch, Light Illus. Part No. No. No. No. Part No. REFRIGERATOR LINER PARTS For Models: MBF1958WEW1, MBF1958WEB1 (White) (Black) Illus. DESCRIPTION 15 W10196393 Control, Damper 17 M0310343 Plug Button Following Parts Not Illustrated 12868701 Harness, Controls...


