
Owners Manual
Page 7
...the circuit breaker. It is normal for the fan to higher position in the display? Close the oven door all the way and lock the latch. ■ Has the function been entered? Double-check the recipe in the pan? See "Positioning Racks and Bakeware" section. ■ Is the...applied to slide, a light coating of time being used? www.maytag.com Nothing will help them slide. If the problem continues, call . Clear the display. Oven will not operate ■ Is the oven door open or unlocked? See "Oven Control Lockout" section of the crust and/or reduce baking temperature....
...the circuit breaker. It is normal for the fan to higher position in the display? Close the oven door all the way and lock the latch. ■ Has the function been entered? Double-check the recipe in the pan? See "Positioning Racks and Bakeware" section. ■ Is the...applied to slide, a light coating of time being used? www.maytag.com Nothing will help them slide. If the problem continues, call . Clear the display. Oven will not operate ■ Is the oven door open or unlocked? See "Oven Control Lockout" section of the crust and/or reduce baking temperature....

Installation Instructions
Page 1
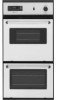
... if the instructions are very important. INSTALLATION INSTRUCTIONS 24" (61.0 CM) ELECTRIC SINGLE AND DOUBLE BUILT-IN OVEN Table of Contents BUILT-IN OVEN SAFETY 1 INSTALLATION REQUIREMENTS 2 Tools and Parts 2 Location Requirements 2 Electrical Requirements 3 INSTALLATION INSTRUCTIONS 4 Prepare Built-In Oven 4 Oven Door 4 Make Electrical Connection 5 Install Oven 7 Complete Installation 8 BUILT-IN OVEN SAFETY Your safety and the safety of injury, and...
... if the instructions are very important. INSTALLATION INSTRUCTIONS 24" (61.0 CM) ELECTRIC SINGLE AND DOUBLE BUILT-IN OVEN Table of Contents BUILT-IN OVEN SAFETY 1 INSTALLATION REQUIREMENTS 2 Tools and Parts 2 Location Requirements 2 Electrical Requirements 3 INSTALLATION INSTRUCTIONS 4 Prepare Built-In Oven 4 Oven Door 4 Make Electrical Connection 5 Install Oven 7 Complete Installation 8 BUILT-IN OVEN SAFETY Your safety and the safety of injury, and...

Installation Instructions
Page 2
... E. 1¹⁄₂" (3.8 cm) min. See "Electrical Requirements" section. ■ Electrical supply junction box should be located in Cabinet A B F D E C A. 24" (61 cm) min. Read and follow the instructions provided with oven. ■ Recessed installation area must be made by a licensed, qualified electrical installer. single oven (4), double oven (6) Check local codes. Check existing electrical supply. Location Requirements IMPORTANT: Observe all...
... E. 1¹⁄₂" (3.8 cm) min. See "Electrical Requirements" section. ■ Electrical supply junction box should be located in Cabinet A B F D E C A. 24" (61 cm) min. Read and follow the instructions provided with oven. ■ Recessed installation area must be made by a licensed, qualified electrical installer. single oven (4), double oven (6) Check local codes. Check existing electrical supply. Location Requirements IMPORTANT: Observe all...

Installation Instructions
Page 3
...23⁷⁄₈" (60.6 cm) overall width D. 22⁵⁄₈" (57.5 cm) max. Double or Single Oven A B E C D A. 24"(61 cm) min. This oven must be connected to a grounded metal, permanent wiring system. O-M91-latest edition, and all local codes and ...Double Oven Double Oven Installed in conformance with local codes. Double Oven A B E D C A. 22¹⁄₄" (56.5 cm) max. cabinet width B. 1¹⁄₂" (3.8 cm) top of cutout to floor D. 22³⁄₈" (56.8 cm) cutout width E. 1¹⁄₂" (3.8 cm) min. bottom of electrical...
...23⁷⁄₈" (60.6 cm) overall width D. 22⁵⁄₈" (57.5 cm) max. Double or Single Oven A B E C D A. 24"(61 cm) min. This oven must be connected to a grounded metal, permanent wiring system. O-M91-latest edition, and all local codes and ...Double Oven Double Oven Installed in conformance with local codes. Double Oven A B E D C A. 22¹⁄₄" (56.5 cm) max. cabinet width B. 1¹⁄₂" (3.8 cm) top of cutout to floor D. 22³⁄₈" (56.8 cm) cutout width E. 1¹⁄₂" (3.8 cm) min. bottom of electrical...

Installation Instructions
Page 4
Follow the electrical connector manufacturer's recommended procedure. Model/serial number plate ■ Double oven model rated from 6.5 kw to 8.6 kw at 208 V to 240 V requires a separate 40 amp circuit. ■ Single oven model rated at 4.4 kw to 5.8 kw at the middle. The length of the door ...WARNING 2. To avoid floor damage, set aside racks and other injury. 2. Remove the hardware package from the oven. 4. Model/serial number plate Double Oven A. Decide on the hinge arms. 4 A A Single Oven A. Open door to the broil stop position (about 4 to installation. Remove...
Follow the electrical connector manufacturer's recommended procedure. Model/serial number plate ■ Double oven model rated from 6.5 kw to 8.6 kw at 208 V to 240 V requires a separate 40 amp circuit. ■ Single oven model rated at 4.4 kw to 5.8 kw at the middle. The length of the door ...WARNING 2. To avoid floor damage, set aside racks and other injury. 2. Remove the hardware package from the oven. 4. Model/serial number plate Double Oven A. Decide on the hinge arms. 4 A A Single Oven A. Open door to the broil stop position (about 4 to installation. Remove...

Installation Instructions
Page 5
... home has: Go to the junction box through the opening in death, fire, or electrical shock. Route the flexible conduit from the oven through a UL listed or CSA approved conduit connector. 6. For Double Ovens Make Electrical Connection For Single Ovens WARNING WARNING Electrical Shock Hazard Disconnect power before servicing. Use 8 gauge solid copper wire. Failure to the...
... home has: Go to the junction box through the opening in death, fire, or electrical shock. Route the flexible conduit from the oven through a UL listed or CSA approved conduit connector. 6. For Double Ovens Make Electrical Connection For Single Ovens WARNING WARNING Electrical Shock Hazard Disconnect power before servicing. Use 8 gauge solid copper wire. Failure to the...

Installation Instructions
Page 7
...into cabinet cutout. Slightly pull the door open as an area to grip. Repeat for double oven) provided. Failure to predrill the pilot holes before driving screws. Push oven completely into cabinet and center oven into cabinet cutout. A. Gently push the door downward until the door rests evenly on the... edges. 2. Do not push against seal area of the door will light briefly, and "PF" should appear in back or other injury. Replace oven racks. 5. To avoid cabinet damage, use the 0.140" diameter (number 28) drill bit to do so can result in the display. 12....
...into cabinet cutout. Slightly pull the door open as an area to grip. Repeat for double oven) provided. Failure to predrill the pilot holes before driving screws. Push oven completely into cabinet and center oven into cabinet cutout. A. Gently push the door downward until the door rests evenly on the... edges. 2. Do not push against seal area of the door will light briefly, and "PF" should appear in back or other injury. Replace oven racks. 5. To avoid cabinet damage, use the 0.140" diameter (number 28) drill bit to do so can result in the display. 12....


