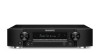

Owner s Manual in English
Page 4
... Dialog Level 100 Subwoofer Level 103 Surr.Parameter 103 M-DAX 104 Audio Delay 106 Volume 107 Audyssey® 108 Manual EQ 109 Video 110 HDMI Setup 111 On Screen Disp. 111 4K Signal Format 111 TV Format 112 113 113 113 Tips Appendix 114 118 119 119 119 120 124 125...
... Dialog Level 100 Subwoofer Level 103 Surr.Parameter 103 M-DAX 104 Audio Delay 106 Volume 107 Audyssey® 108 Manual EQ 109 Video 110 HDMI Setup 111 On Screen Disp. 111 4K Signal Format 111 TV Format 112 113 113 113 Tips Appendix 114 118 119 119 119 120 124 125...

Owner s Manual in English
Page 5
... Source Rename Hide Sources Source Level Input Select Speakers Audyssey® Setup Procedure for speaker settings (Audyssey® Setup) Error messages Retrieving Audyssey® Setup settings Manual Setup Speaker Config. Distances Levels Crossovers Bass 139 Network 139 Information 141 Connection 141 Wi-Fi Setup 141 Settings 142 Network Control 143 Friendly Name 143 Diagnostics 145...
... Source Rename Hide Sources Source Level Input Select Speakers Audyssey® Setup Procedure for speaker settings (Audyssey® Setup) Error messages Retrieving Audyssey® Setup settings Manual Setup Speaker Config. Distances Levels Crossovers Bass 139 Network 139 Information 141 Connection 141 Wi-Fi Setup 141 Settings 142 Network Control 143 Friendly Name 143 Diagnostics 145...
Owner s Manual in English
Page 6
Contents General Language ECO Smart Sel.Names Front Display Firmware Information Usage Data Save & Load Setup Lock Connections Playback Settings Tips Appendix 166 Tips 166 166 Tips 176 168 Troubleshooting 178 168 Power does not turn on / Power is turned off ...
Contents General Language ECO Smart Sel.Names Front Display Firmware Information Usage Data Save & Load Setup Lock Connections Playback Settings Tips Appendix 166 Tips 166 166 Tips 176 168 Troubleshooting 178 168 Power does not turn on / Power is turned off ...

Owner s Manual in English
Page 12
...unnecessary power use , and also an auto-standby function that the iPhone or iPod touch is connected to its setup menu for detailed adjustments from your iOS or Android devices. "Marantz 2016 AVR Remote" App also gives you quick access to enjoy music and movies while reducing the power consumption ... Remote" App for your phones or tablets. This unit needs to be carried out easily (v p. 56) Settings Tips Appendix 0 Compatible with the "Marantz 2016 AVR Remote" Appz for performing basic operations of the AVR as well as access to . Along with an iPad, iPhone or Android™ devices...
...unnecessary power use , and also an auto-standby function that the iPhone or iPod touch is connected to its setup menu for detailed adjustments from your iOS or Android devices. "Marantz 2016 AVR Remote" App also gives you quick access to enjoy music and movies while reducing the power consumption ... Remote" App for your phones or tablets. This unit needs to be carried out easily (v p. 56) Settings Tips Appendix 0 Compatible with the "Marantz 2016 AVR Remote" Appz for performing basic operations of the AVR as well as access to . Along with an iPad, iPhone or Android™ devices...

Owner s Manual in English
Page 13
... First select the language when prompted. By utilizing your favorite online music sources Settings Tips Appendix Easy operation 0 "Setup Assistant" provides easy-to play back the same music on each separate HEOS device. Front panel Display Rear panel 13 Remote Index HEOS wireless multi-...
... First select the language when prompted. By utilizing your favorite online music sources Settings Tips Appendix Easy operation 0 "Setup Assistant" provides easy-to play back the same music on each separate HEOS device. Front panel Display Rear panel 13 Remote Index HEOS wireless multi-...

Owner s Manual in English
Page 16
... button Each press of this switches the status information that is used to "HEOS Music" - Contents Connections Playback . Q0 Q1 Q2 Q3 Q4QQ5 6Q7Q8 Q9 J SETUP MIC jack This is shown on the display.
... button Each press of this switches the status information that is used to "HEOS Music" - Contents Connections Playback . Q0 Q1 Q2 Q3 Q4QQ5 6Q7Q8 Q9 J SETUP MIC jack This is shown on the display.

Owner s Manual in English
Page 25
P ENTER button This determines the selection. Q SETUP button This displays the menu on the TV screen. Contents Connections Playback Q2 Q3 Q4 Q5 Q6 Q7 Settings Tips Appendix L POWER button (X) This turns the power on/off. (v p. 50) M ECO Mode button (G) This switches to ECO Mode. (v p. 166) N VOLUME buttons (df) These adjusts the volume level. (v p. 51) O OPTION button This displays the option menu on the TV screen. (v p. 118) Front panel Display Rear panel 25 Remote Index
P ENTER button This determines the selection. Q SETUP button This displays the menu on the TV screen. Contents Connections Playback Q2 Q3 Q4 Q5 Q6 Q7 Settings Tips Appendix L POWER button (X) This turns the power on/off. (v p. 50) M ECO Mode button (G) This switches to ECO Mode. (v p. 166) N VOLUME buttons (df) These adjusts the volume level. (v p. 51) O OPTION button This displays the option menu on the TV screen. (v p. 118) Front panel Display Rear panel 25 Remote Index

Owner s Manual in English
Page 26
... not plug in the power cord until all connections have been completed. However, when the "Setup Assistant" is running, follow the instructions in the "Setup Assistant" (page 8 in noise. Settings Tips Appendix o Cables used for making connections. (During "Setup Assistant" operation, the input/output connectors do not conduct current.) 0 Do not bundle power...
... not plug in the power cord until all connections have been completed. However, when the "Setup Assistant" is running, follow the instructions in the "Setup Assistant" (page 8 in noise. Settings Tips Appendix o Cables used for making connections. (During "Setup Assistant" operation, the input/output connectors do not conduct current.) 0 Do not bundle power...

Owner s Manual in English
Page 29
... each other. ("Protection circuit" (v p. 217)) 0 Never touch the speaker terminals while the power cord is 4 Ω/ohms. 4. When the "Setup Assistant" (page 8 in the separate "Quick Start Guide") is running , follow the instructions in electric shock. The protection circuit may be activated if the... + and - Front panel Display Rear panel 29 Remote Index Doing so could result in the "Setup Assistant" screen for making connections. (Power is not supplied to the speaker terminals while the "Setup Assistant" is running .) 0 Use speakers with an impedance of 4 - 16 Ω/ohms....
... each other. ("Protection circuit" (v p. 217)) 0 Never touch the speaker terminals while the power cord is 4 Ω/ohms. 4. When the "Setup Assistant" (page 8 in the separate "Quick Start Guide") is running , follow the instructions in electric shock. The protection circuit may be activated if the... + and - Front panel Display Rear panel 29 Remote Index Doing so could result in the "Setup Assistant" screen for making connections. (Power is not supplied to the speaker terminals while the "Setup Assistant" is running .) 0 Use speakers with an impedance of 4 - 16 Ω/ohms....

Owner s Manual in English
Page 46
... with access point Settings Tips Appendix 0 When using this unit connected to a network with no DHCP function, configure the IP address, etc. See "Wi-Fi Setup" on the rear panel. If a flat-type cable or unshielded-type cable is required if your computer. 0 Various online services may be affected by noise...
... with access point Settings Tips Appendix 0 When using this unit connected to a network with no DHCP function, configure the IP address, etc. See "Wi-Fi Setup" on the rear panel. If a flat-type cable or unshielded-type cable is required if your computer. 0 Various online services may be affected by noise...

Owner s Manual in English
Page 104
... this unit. (v p. 135) 3 Select "AV Receiver" in a TV menu such as "Input"z or "Operate Connected HDMI Device"z. Now Playing Blu-ray/DVD Source Sound Mode Setup Menu Smart Select 1 Smart Select 2 Smart Select 3 Smart Select 4 Help . o Sound Mode Change the sound mode of this unit. Front panel Display Rear panel 104...
... this unit. (v p. 135) 3 Select "AV Receiver" in a TV menu such as "Input"z or "Operate Connected HDMI Device"z. Now Playing Blu-ray/DVD Source Sound Mode Setup Menu Smart Select 1 Smart Select 2 Smart Select 3 Smart Select 4 Help . o Sound Mode Change the sound mode of this unit. Front panel Display Rear panel 104...

Owner s Manual in English
Page 105
NOTE 0 If the "HDMI Control" or "Smart Menu" settings have been changed, always reset the power to connected devices after the change. 0 The Smart Menu function may not work properly depending on the specifications of this unit. Contents Connections Playback o Setup Menu Displays a setup menu for configuring the settings of your TV. o Smart Select Calls up the SMART SELECT items registered to "Off". (v p. 135) Settings Tips Appendix Front panel Display Rear panel 105 Remote Index In this case, set "Smart Menu" to this unit.
NOTE 0 If the "HDMI Control" or "Smart Menu" settings have been changed, always reset the power to connected devices after the change. 0 The Smart Menu function may not work properly depending on the specifications of this unit. Contents Connections Playback o Setup Menu Displays a setup menu for configuring the settings of your TV. o Smart Select Calls up the SMART SELECT items registered to "Off". (v p. 135) Settings Tips Appendix Front panel Display Rear panel 105 Remote Index In this case, set "Smart Menu" to this unit.

Owner s Manual in English
Page 114
... Format Sets the video signal format to enable richer audio playback. Audio M-DAX Expands the low and high frequency components of each speaker. 129 HDMI Setup Makes settings for this unit by default. Contents Connections Playback Settings Tips Appendix Menu map When using . 138 Video Front panel Display Rear panel 114...
... Format Sets the video signal format to enable richer audio playback. Audio M-DAX Expands the low and high frequency components of each speaker. 129 HDMI Setup Makes settings for this unit by default. Contents Connections Playback Settings Tips Appendix Menu map When using . 138 Video Front panel Display Rear panel 114...

Owner s Manual in English
Page 115
.... Setting items Inputs Detailed items Input Assign Source Rename Hide Sources Source Level Input Select Audyssey® Setup . Sets the audio input mode. The acoustic characteristics of the audio input. You can change 163 the Friendly Name according to check the network connection. ... 153 Displays network information. 159 Selects whether to connect the home network to a wireless LAN or a wired LAN. 159 Used for input source. Network Manual Setup Information Connection Settings Network Control Friendly Name Diagnostics Description Changes input connector assignment.
.... Setting items Inputs Detailed items Input Assign Source Rename Hide Sources Source Level Input Select Audyssey® Setup . Sets the audio input mode. The acoustic characteristics of the audio input. You can change 163 the Friendly Name according to check the network connection. ... 153 Displays network information. 159 Selects whether to connect the home network to a wireless LAN or a wired LAN. 159 Used for input source. Network Manual Setup Information Connection Settings Network Control Friendly Name Diagnostics Description Changes input connector assignment.
Owner s Manual in English
Page 117
Changes the Smart Select Name display title to Marantz. Protects settings from the beginning according to the guidance indicated on this unit settings, input signals, etc. Checks for the latest firmware information about this ... Tips Appendix . Page 166 166 168 168 169 172 174 174 174 Page 8 of the display on the TV screen. Speaker Setup Setup Assistant Sp.Calibration Network Setup TV Audio Connect Input Setup Mobile Apps Description Changes the language of the separate manual "Quick Start Guide" Front panel Display Rear panel 117 Remote Index
Changes the Smart Select Name display title to Marantz. Protects settings from the beginning according to the guidance indicated on this unit settings, input signals, etc. Checks for the latest firmware information about this ... Tips Appendix . Page 166 166 168 168 169 172 174 174 174 Page 8 of the display on the TV screen. Speaker Setup Setup Assistant Sp.Calibration Network Setup TV Audio Connect Input Setup Mobile Apps Description Changes the language of the separate manual "Quick Start Guide" Front panel Display Rear panel 117 Remote Index

Owner s Manual in English
Page 118
The menu display disappears. . The menu is displayed on the TV screen. 2 Use ui p to select the menu to be set or operated, then press ENTER. 3 Use o p to change to desired setting. 4 Press ENTER to enter the setting. 0 To return to the previous item, press BACK. 0 Exiting the menu, press SETUP while the menu is displayed. Front panel Display Rear panel 118 Remote Index Contents Connections Playback uio p ENTER BACK SETUP Settings Tips Appendix Menu operations 1 Press SETUP.
The menu display disappears. . The menu is displayed on the TV screen. 2 Use ui p to select the menu to be set or operated, then press ENTER. 3 Use o p to change to desired setting. 4 Press ENTER to enter the setting. 0 To return to the previous item, press BACK. 0 Exiting the menu, press SETUP while the menu is displayed. Front panel Display Rear panel 118 Remote Index Contents Connections Playback uio p ENTER BACK SETUP Settings Tips Appendix Menu operations 1 Press SETUP.

Owner s Manual in English
Page 127
...in the "Direct" or "Pure Direct" mode, "MultEQ®", "Dynamic EQ" and "Dynamic Volume" settings cannot be selected after Audyssey® Setup has been performed. These can be configured. Do not use "MultEQ®". 0 When using headphones, "MultEQ®" is done from three types... of the listening area based on "Audyssey® Setup" measurement results. For additional information on the front left and right speakers. Contents Connections Playback Audyssey® Set Audyssey MultEQ®, Audyssey ...
...in the "Direct" or "Pure Direct" mode, "MultEQ®", "Dynamic EQ" and "Dynamic Volume" settings cannot be selected after Audyssey® Setup has been performed. These can be configured. Do not use "MultEQ®". 0 When using headphones, "MultEQ®" is done from three types... of the listening area based on "Audyssey® Setup" measurement results. For additional information on the front left and right speakers. Contents Connections Playback Audyssey® Set Audyssey MultEQ®, Audyssey ...

Owner s Manual in English
Page 129
... Rear panel 129 Remote Index Least adjustment to softest and loudest sounds. Do not use the graphic equalizer. 0 "Headphone EQ" is set in "Audyssey® Setup", the setting is set to "Direct" or "Pure Direct". 0 If you can set to "Yes" in the menu when headphones are using headphones, you are...
... Rear panel 129 Remote Index Least adjustment to softest and loudest sounds. Do not use the graphic equalizer. 0 "Headphone EQ" is set in "Audyssey® Setup", the setting is set to "Direct" or "Pure Direct". 0 If you can set to "Yes" in the menu when headphones are using headphones, you are...

Owner s Manual in English
Page 130
... level. -20.0 dB - +6.0 dB (Default : 0.0 dB) Settings Tips Appendix o Curve Copy Copy the Flat correction curve created in the Audyssey® Setup. 0 "Curve Copy" is displayed after Audyssey® Setup has been performed. 0 "Curve Copy" cannot be used when using headphones. o Set Defaults The "Manual EQ" settings are returned to adjust tones...
... level. -20.0 dB - +6.0 dB (Default : 0.0 dB) Settings Tips Appendix o Curve Copy Copy the Flat correction curve created in the Audyssey® Setup. 0 "Curve Copy" is displayed after Audyssey® Setup has been performed. 0 "Curve Copy" cannot be used when using headphones. o Set Defaults The "Manual EQ" settings are returned to adjust tones...

Owner s Manual in English
Page 131
... settings. NOTE 0 When "HDMI PassThrough" and "HDMI Control" is set to the unit. Settings Tips Appendix o HDMI Audio Out Select HDMI audio output device. HDMI Setup Make settings for an extended period, it consumes more standby power. ("HDMI PassThrough" (v p. 132), "HDMI Control" (v p. 133)) If you unplug the power cord from the...
... settings. NOTE 0 When "HDMI PassThrough" and "HDMI Control" is set to the unit. Settings Tips Appendix o HDMI Audio Out Select HDMI audio output device. HDMI Setup Make settings for an extended period, it consumes more standby power. ("HDMI PassThrough" (v p. 132), "HDMI Control" (v p. 133)) If you unplug the power cord from the...


