

User manual, English (US)
Page 4
... 36 SmartPicture™ and SmartSound™ are a few of the special features of your TV features. Copyright © 2003 Magnavox. Remote Control: Works your new Color Television. allows reception of the TV so it cannot be operated accidentally by young children. On-Timer: Turns on the... Control 22 Parental Control Secret Code 23 Blocking Programming with Movie Ratings 24 Blocking Programming with TV Ratings 25 Parental Control Blocking Options 26 Child Lock 27 Here are registered trademarks of Philips Consumer Electronics North America. Parental Control: Allows you set ...
... 36 SmartPicture™ and SmartSound™ are a few of the special features of your TV features. Copyright © 2003 Magnavox. Remote Control: Works your new Color Television. allows reception of the TV so it cannot be operated accidentally by young children. On-Timer: Turns on the... Control 22 Parental Control Secret Code 23 Blocking Programming with Movie Ratings 24 Blocking Programming with TV Ratings 25 Parental Control Blocking Options 26 Child Lock 27 Here are registered trademarks of Philips Consumer Electronics North America. Parental Control: Allows you set ...

User manual, English (US)
Page 5
... jack on the Cable Box and to the 75 OHM ANTENNA INPUT jack on the rear of the TV. 3 Plug the TV's power cord into a power outlet and turn on the TV. Details are on the TV's remote control to set up your Cable Box if applicable). In either case, the connection to channel 3 or... 4 (the same as detailed on the rear of the TV. Set TV/CABLE to CABLE as detailed on page 11. 4 Set the TV to the TV is not supplied...
... jack on the Cable Box and to the 75 OHM ANTENNA INPUT jack on the rear of the TV. 3 Plug the TV's power cord into a power outlet and turn on the TV. Details are on the TV's remote control to set up your Cable Box if applicable). In either case, the connection to channel 3 or... 4 (the same as detailed on the rear of the TV. Set TV/CABLE to CABLE as detailed on page 11. 4 Set the TV to the TV is not supplied...

User manual, English (US)
Page 7
... S-VIDEO IN jack or the VIDEO IN 1 jack. If you connect the DVD Player to the DVD jacks, set the TV to the DVD channel to the jack colors. 3 Turn on the TV. This would interfere with Cable Boxes), refer to the owner's manual of the Cable Box or other Accessories. 1 Connect a... IN 2 OUTPUT VIDEO L L (MONO) AUDIO R R DVD Y Cb Cr IN 2 OUTPUT 75 OHM ANTENNA INPUT VIDEO L (MONO) AUDIO R 4 Press theTV/AV/EXIT button on the TV's remote control until VIDEO 2 appears in this area. To view material playing on the VCR, DVD Player, etc. Do not use both for the same piece...
... S-VIDEO IN jack or the VIDEO IN 1 jack. If you connect the DVD Player to the DVD jacks, set the TV to the DVD channel to the jack colors. 3 Turn on the TV. This would interfere with Cable Boxes), refer to the owner's manual of the Cable Box or other Accessories. 1 Connect a... IN 2 OUTPUT VIDEO L L (MONO) AUDIO R R DVD Y Cb Cr IN 2 OUTPUT 75 OHM ANTENNA INPUT VIDEO L (MONO) AUDIO R 4 Press theTV/AV/EXIT button on the TV's remote control until VIDEO 2 appears in this area. To view material playing on the VCR, DVD Player, etc. Do not use both for the same piece...

User manual, English (US)
Page 8
..., use VOL. 8/9 and CH. 8/9 to see the TV's on the remote to make adjustments or selections. Battery Installation T o load batteries into the remote control: 1. Press in the remote. Reattach the battery compartment lid. CH. STANDBY SENSOR POWER Remote Control 5 Point the remote control toward the remote sensor on the TV. 2 Press VOL. 8 to increase the sound level. Or...
..., use VOL. 8/9 and CH. 8/9 to see the TV's on the remote to make adjustments or selections. Battery Installation T o load batteries into the remote control: 1. Press in the remote. Reattach the battery compartment lid. CH. STANDBY SENSOR POWER Remote Control 5 Point the remote control toward the remote sensor on the TV. 2 Press VOL. 8 to increase the sound level. Or...

User manual, English (US)
Page 9
Remote Control STANDBY y Button Press to turn on the TV by pressing the CH (annel) 8/9 buttons on the front of the TV. Details are on -screen menu. VOL (volume) +/- DISPLAY Button Press to remove a menu from the screen. Press to see the TV's on page 16. STANDBY MUTE SLEEP CALL BOOKMARK SMART PICTURE MTS TV...are on or off . Pressing the volume buttons (VOL 8/9 or VOL +/-) also will turn itself off (standby). Buttons Press to select TV channels or the Audio/Video In channels (VIDEO 1/SVIDEO,VIDEO 2, or DVD). SMART SOUND Button Press to remove a menu from the screen...
Remote Control STANDBY y Button Press to turn on the TV by pressing the CH (annel) 8/9 buttons on the front of the TV. Details are on -screen menu. VOL (volume) +/- DISPLAY Button Press to remove a menu from the screen. Press to see the TV's on page 16. STANDBY MUTE SLEEP CALL BOOKMARK SMART PICTURE MTS TV...are on or off . Pressing the volume buttons (VOL 8/9 or VOL +/-) also will turn itself off (standby). Buttons Press to select TV channels or the Audio/Video In channels (VIDEO 1/SVIDEO,VIDEO 2, or DVD). SMART SOUND Button Press to remove a menu from the screen...

User manual, English (US)
Page 12
...) You can still select non-memorized channels using the Number buttons on the remote control. set your TV to receive local TV channels (from the TV's memory or to see ADD/ERASE on pages fivesix; COLOR 50 BRIGHTNESS 50 CONTRAST 50 SHARPNESS 50 TINT 0 BLUE BACK ON PIC. Press VOL- SND SET TUN. ...to see which channels are available for you.This makes it easy for you to select only the available TV stations when you need to start ...
...) You can still select non-memorized channels using the Number buttons on the remote control. set your TV to receive local TV channels (from the TV's memory or to see ADD/ERASE on pages fivesix; COLOR 50 BRIGHTNESS 50 CONTRAST 50 SHARPNESS 50 TINT 0 BLUE BACK ON PIC. Press VOL- SND SET TUN. ...to see which channels are available for you.This makes it easy for you to select only the available TV stations when you need to start ...

User manual, English (US)
Page 16
All others are set at the factory to automatically adjust the TV's Brightness, Color, Contrast, Sharpness, and Tint. 1 Press SMART PICTURE on the remote control.The current SmartPicture setting will appear on page 15. Each SmartPicture setting is what you can ...PERSONAL, MOVIES, SPORTS, or WEAK SIGNAL. SmartPicture resets your current program. SmartPicture PICTURE PERSONAL 1-2 STANDBY MUTE SLEEP CALL BOOKMARK SMART PICTURE MTS SMART SOUND TV/AV EXIT MENU CH VOL VOL CH 1 3 2 4 6 5 7 DISPLAY 8 9 100 0 PICTURE MOVIES PICTURE SPORTS PICTURE WEAK SIGNAL 16 ...
All others are set at the factory to automatically adjust the TV's Brightness, Color, Contrast, Sharpness, and Tint. 1 Press SMART PICTURE on the remote control.The current SmartPicture setting will appear on page 15. Each SmartPicture setting is what you can ...PERSONAL, MOVIES, SPORTS, or WEAK SIGNAL. SmartPicture resets your current program. SmartPicture PICTURE PERSONAL 1-2 STANDBY MUTE SLEEP CALL BOOKMARK SMART PICTURE MTS SMART SOUND TV/AV EXIT MENU CH VOL VOL CH 1 3 2 4 6 5 7 DISPLAY 8 9 100 0 PICTURE MOVIES PICTURE SPORTS PICTURE WEAK SIGNAL 16 ...

User manual, English (US)
Page 23
COLOR 50 BRIGHTNESS 50 CONTRAST 50 SHARPNESS 50 TINT 0 BLUE BACK ON 3 Press CH+ or CH- SND SET TUN. to highlight SET. PIC. to highlight PARENTAL CONTROL. 4 Press VOL+ or VOL- SND SET TUN. to display the SECRET CODE screen. 5 Press VOL+ (on the remote) and the CH+ button on -screen...few pages you enter it and possibly viewed blocked channels. 23 First, set up a code previously, then "0000" is the default of the TV. PIC. The code will appear next. Also press CH+ on the screen as you 'll learn how to change Parental Control settings without ...
COLOR 50 BRIGHTNESS 50 CONTRAST 50 SHARPNESS 50 TINT 0 BLUE BACK ON 3 Press CH+ or CH- SND SET TUN. to highlight SET. PIC. to highlight PARENTAL CONTROL. 4 Press VOL+ or VOL- SND SET TUN. to display the SECRET CODE screen. 5 Press VOL+ (on the remote) and the CH+ button on -screen...few pages you enter it and possibly viewed blocked channels. 23 First, set up a code previously, then "0000" is the default of the TV. PIC. The code will appear next. Also press CH+ on the screen as you 'll learn how to change Parental Control settings without ...

User manual, English (US)
Page 27
...the screen. CLOSED CAPTION ] PARENTAL CONTROL ] TIMER ] LANGUAGE ] CHILD LOCK OFF 27 SND SET TUN. SND SET TUN. Child Lock Child Lock allows you to lock the buttons on the front of the TV. 1 Press MENU to turn off the TV (not on). repeatedly until SET is highlighted. 3 Press CH+ or CH- ...CHILD LOCK ON will appear briefly on the TV screen each time you press a button on -screen menu. 2 Press VOL+ or VOL- You can still operate the TV with the remote control.You can use the POWER button on the front of the...
...the screen. CLOSED CAPTION ] PARENTAL CONTROL ] TIMER ] LANGUAGE ] CHILD LOCK OFF 27 SND SET TUN. SND SET TUN. Child Lock Child Lock allows you to lock the buttons on the front of the TV. 1 Press MENU to turn off the TV (not on). repeatedly until SET is highlighted. 3 Press CH+ or CH- ...CHILD LOCK ON will appear briefly on the TV screen each time you press a button on -screen menu. 2 Press VOL+ or VOL- You can still operate the TV with the remote control.You can use the POWER button on the front of the...

User manual, English (US)
Page 28
... setting quickly by pressing the SMART SOUND button on -screen menu. 2 Press VOL+ or VOL- When you are watching a movie or video game, your TV has sound settings that match these programming types. 1 Press MENU to highlight SND (Sound). 3 Press CH+ or CH- BALANCE 0 SMART SOUND THEATRE PIC.... SND SET TUN. to show the on the remote control. 28 SmartSound PIC. SND SET TUN. to select PERSONAL,VOICE, MUSIC, or THEATRE. 5 Press TV/AV/EXIT to highlight SMART SOUND. 4 Press VOL+ or VOL- SND SET TUN. SND SET TUN. COLOR 50 BRIGHTNESS 50 CONTRAST 50 SHARPNESS 50 TINT 0...
... setting quickly by pressing the SMART SOUND button on -screen menu. 2 Press VOL+ or VOL- When you are watching a movie or video game, your TV has sound settings that match these programming types. 1 Press MENU to highlight SND (Sound). 3 Press CH+ or CH- BALANCE 0 SMART SOUND THEATRE PIC.... SND SET TUN. to show the on the remote control. 28 SmartSound PIC. SND SET TUN. to select PERSONAL,VOICE, MUSIC, or THEATRE. 5 Press TV/AV/EXIT to highlight SMART SOUND. 4 Press VOL+ or VOL- SND SET TUN. SND SET TUN. COLOR 50 BRIGHTNESS 50 CONTRAST 50 SHARPNESS 50 TINT 0...

User manual, English (US)
Page 30
... options. Press the MTS button to MONO.This should eliminate the noise. CATV 6 AUTO MONO STANDBY MUTE SLEEP CALL BOOKMARK SMART PICTURE MTS SMART SOUND TV/AV EXIT MENU CH VOL VOL CH 1 3 2 4 6 5 7 DISPLAY 8 9 100 0 CATV 22 AUTO MONO STEREO SAP 30 If the broadcast is not ...clear, stereo sound is not available. Channels will not always carry programs that option. If STEREO appears on the remote control to transmit a second language or for the current TV program. Press the MTS button to change to choose SAP and you may hear the program in a different language...
... options. Press the MTS button to MONO.This should eliminate the noise. CATV 6 AUTO MONO STANDBY MUTE SLEEP CALL BOOKMARK SMART PICTURE MTS SMART SOUND TV/AV EXIT MENU CH VOL VOL CH 1 3 2 4 6 5 7 DISPLAY 8 9 100 0 CATV 22 AUTO MONO STEREO SAP 30 If the broadcast is not ...clear, stereo sound is not available. Channels will not always carry programs that option. If STEREO appears on the remote control to transmit a second language or for the current TV program. Press the MTS button to change to choose SAP and you may hear the program in a different language...
User manual, English (US)
Page 31
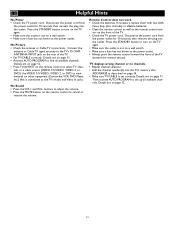
...channels. • Repeat channel selection. • Add the channel number(s) into the outlet. Details are on page 12. • Press TV/AV/EXIT on the remote control to find all available channels. Details are on page 12. 31 If necessary, replace them with two AAA heavy duty (zinc chloride...on a wall switch. • Make sure a fuse has not blown at the power outlet. • Always point the remote control toward the front of the TV (toward the remote sensor). Disconnect the power cord from the power outlet for 10 seconds, then reinsert the plug into the outlet. Connect the...
...channels. • Repeat channel selection. • Add the channel number(s) into the outlet. Details are on page 12. • Press TV/AV/EXIT on the remote control to find all available channels. Details are on page 12. 31 If necessary, replace them with two AAA heavy duty (zinc chloride...on a wall switch. • Make sure a fuse has not blown at the power outlet. • Always point the remote control toward the front of the TV (toward the remote sensor). Disconnect the power cord from the power outlet for 10 seconds, then reinsert the plug into the outlet. Connect the...

User manual, English (US)
Page 33
... jacks 7 Auto Program 12 Balance 29 Battery Installation 8 Blue Back (background 15 Brightness 15 Cable TV Connection 5 Channel Setup 12 Child Lock 27 Cleaning 32 Clock 17 Closed Captions 20 Color 15 Component Video Connections (DVD Player 7 Contrast 15 DVD video in channel 7 DVD (Y Cb ... 30 On-Timer 18 Off-Timer 19 Parental Controls Blocking Options 26 Movie Ratings 24 Secret Code 23 TV Ratings 25 Understanding Parental Control 22 Picture 15 Registration 2 Remote Control 8-9 S-Video 7 Safety 3 Second Audio Program (SAP 30 Sharpness 15 Sleep Timer 21 SmartPicture...
... jacks 7 Auto Program 12 Balance 29 Battery Installation 8 Blue Back (background 15 Brightness 15 Cable TV Connection 5 Channel Setup 12 Child Lock 27 Cleaning 32 Clock 17 Closed Captions 20 Color 15 Component Video Connections (DVD Player 7 Contrast 15 DVD video in channel 7 DVD (Y Cb ... 30 On-Timer 18 Off-Timer 19 Parental Controls Blocking Options 26 Movie Ratings 24 Secret Code 23 TV Ratings 25 Understanding Parental Control 22 Picture 15 Registration 2 Remote Control 8-9 S-Video 7 Safety 3 Second Audio Program (SAP 30 Sharpness 15 Sleep Timer 21 SmartPicture...


