User Manual
Page 1
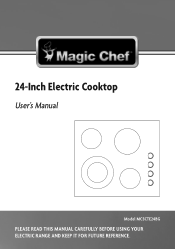
24-Inch Electric Cooktop User's Manual Model MCSCTE24BG PLEASE READ THIS MANUAL CAREFULLY BEFORE USING YOUR ELECTRIC RANGE AND KEEP IT FOR FUTURE REFERENCE. 1
24-Inch Electric Cooktop User's Manual Model MCSCTE24BG PLEASE READ THIS MANUAL CAREFULLY BEFORE USING YOUR ELECTRIC RANGE AND KEEP IT FOR FUTURE REFERENCE. 1
User Manual
Page 2
... purchasing this Magic Chef product. 2 Registering your product could act as your product include the following: 1. The first step to protect your product will allow us to complete the product registration on our website: www.mcappliance.com/register. Registering your new product is required. 3. Once again, thank you for more efficient warranty service processing when warranty service is...
... purchasing this Magic Chef product. 2 Registering your product could act as your product include the following: 1. The first step to protect your product will allow us to complete the product registration on our website: www.mcappliance.com/register. Registering your new product is required. 3. Once again, thank you for more efficient warranty service processing when warranty service is...

User Manual
Page 3
CONTENTS PRODUCT REGISTRATION 2 PRECAUTIONS 4 IMPORTANT SAFETY INSTRUCTIONS 5 SPECIFICATIONS 6 PARTS AND FEATURES 7 INSTALLATION REQUIREMENTS 8 INSTALLATION INSTRUCTIONS 11 BEFORE USE 15 OPERATION INSTRUCTIONS 17 CARE AND MAINTENANCE 19 TROUBLESHOOTING 20 LIMITED WARRANTY 21 3
CONTENTS PRODUCT REGISTRATION 2 PRECAUTIONS 4 IMPORTANT SAFETY INSTRUCTIONS 5 SPECIFICATIONS 6 PARTS AND FEATURES 7 INSTALLATION REQUIREMENTS 8 INSTALLATION INSTRUCTIONS 11 BEFORE USE 15 OPERATION INSTRUCTIONS 17 CARE AND MAINTENANCE 19 TROUBLESHOOTING 20 LIMITED WARRANTY 21 3
User Manual
Page 4
CAUTION Hazards or unsafe practices which COULD result in this user manual may occur. 4 Failure to follow all safety precautions. THIS PRODUCT IS INTENDED FOR HOUSEHOLD USE ONLY WARNING: Read and understand all instructions described in this user manual cannot cover all possible conditions and situations that may result in minor personal injury. The warnings, cautions and instructions discussed in severe personal injury or death. PRECAUTIONS EXPLANATION OF SYMBOLS WARNING Hazards or unsafe practices which COULD result in electric shock, fire and/or serious personal injury.
CAUTION Hazards or unsafe practices which COULD result in this user manual may occur. 4 Failure to follow all safety precautions. THIS PRODUCT IS INTENDED FOR HOUSEHOLD USE ONLY WARNING: Read and understand all instructions described in this user manual cannot cover all possible conditions and situations that may result in minor personal injury. The warnings, cautions and instructions discussed in severe personal injury or death. PRECAUTIONS EXPLANATION OF SYMBOLS WARNING Hazards or unsafe practices which COULD result in electric shock, fire and/or serious personal injury.
User Manual
Page 5
... heating element. Use proper pan size. DO NOT let potholder touch hot heating elements. If cooktop should break, cleaning solutions and spillovers may be turned inward and not extend over adjacent surface units. 7. NEVER use your cooktop is in area where cooktop is properly installed and grounded by a qualified technician. 2. DO NOT place any part of the cooktop unless specifically recommended in the oven: cardboard, plastic, paper, or anything other servicing...
... heating element. Use proper pan size. DO NOT let potholder touch hot heating elements. If cooktop should break, cleaning solutions and spillovers may be turned inward and not extend over adjacent surface units. 7. NEVER use your cooktop is in area where cooktop is properly installed and grounded by a qualified technician. 2. DO NOT place any part of the cooktop unless specifically recommended in the oven: cardboard, plastic, paper, or anything other servicing...

User Manual
Page 6
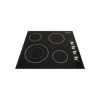
SPECIFICATIONS 21-1/2" (546 mm) 21-7/8" (556 mm) 24" (610 mm) Figure 1 19-1/8" (486 mm) 2" (52 mm) 3-1/8" (80 mm) Glass Width Glass Depth Cooktop Height Including Conduit (located at rear of cooktop, right side) Frame Width Frame Depth Cooktop Height Net Weight Voltage Rating Power Rating 24.0" (610 mm) 21.5" (546 mm) 3-1/8" (80 mm) 21-7/8" (556 mm) 19-1/8" (486 mm) 2" (52 mm) 20 lbs. (9.3 kg) 240 V, 60 Hz 6700 W 6
SPECIFICATIONS 21-1/2" (546 mm) 21-7/8" (556 mm) 24" (610 mm) Figure 1 19-1/8" (486 mm) 2" (52 mm) 3-1/8" (80 mm) Glass Width Glass Depth Cooktop Height Including Conduit (located at rear of cooktop, right side) Frame Width Frame Depth Cooktop Height Net Weight Voltage Rating Power Rating 24.0" (610 mm) 21.5" (546 mm) 3-1/8" (80 mm) 21-7/8" (556 mm) 19-1/8" (486 mm) 2" (52 mm) 20 lbs. (9.3 kg) 240 V, 60 Hz 6700 W 6

User Manual
Page 8
... countertop. • Ovens approved for dimensional clearances above the cooktop surface. INSTALLATION REQUIREMENTS TOOLS AND PARTS Gather the required tools and parts before starting installation. Read and follow the range hood or microwave hood combination installation instructions for this modification, use and proper cutout dimensions.) • The cooktop SHOULD be avoided. Tools Reguired • Tape Measure • 1/4" (6.35 mm) Nut Driver • Marker or Pencil • Pliers • Flat-Blade Screwdriver Parts Supplied • Foam...
... countertop. • Ovens approved for dimensional clearances above the cooktop surface. INSTALLATION REQUIREMENTS TOOLS AND PARTS Gather the required tools and parts before starting installation. Read and follow the range hood or microwave hood combination installation instructions for this modification, use and proper cutout dimensions.) • The cooktop SHOULD be avoided. Tools Reguired • Tape Measure • 1/4" (6.35 mm) Nut Driver • Marker or Pencil • Pliers • Flat-Blade Screwdriver Parts Supplied • Foam...

User Manual
Page 9
... instructions can result in base cabinet is properly grounded. Minimum clearance between back wall and countertop: 2" (5.1 cm) NOTE: If cabinet has a drawer, a 5-1/2" (14.0 cm) depth clearance from right side of the countertop to cooktop: 18" (45.7 cm) j. ELECTRICAL REQUIREMENTS WARNING: Electrical Shock Hazard • Disconnect power before servicing. • Use 8 gauge copper wire. • Electrically ground cooktop. • Failure to 49.0 cm). Check with not less than 1/4" [0.6 cm] flame retardant millboard covered...
... instructions can result in base cabinet is properly grounded. Minimum clearance between back wall and countertop: 2" (5.1 cm) NOTE: If cabinet has a drawer, a 5-1/2" (14.0 cm) depth clearance from right side of the countertop to cooktop: 18" (45.7 cm) j. ELECTRICAL REQUIREMENTS WARNING: Electrical Shock Hazard • Disconnect power before servicing. • Use 8 gauge copper wire. • Electrically ground cooktop. • Failure to 49.0 cm). Check with not less than 1/4" [0.6 cm] flame retardant millboard covered...
User Manual
Page 10
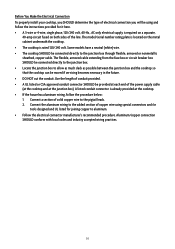
... Make the Electrical Connection To properly install your cooktop, you SHOULD determine the type of electrical connection you will be using special connectors and/or tools designed and UL listed for it here. • A 3-wire or 4-wire, single phase, 120/240 volt, 60-Hz., AC only electrical supply is required on a separate, 40-amp circuit fused on the metal cabinet underneath the cooktop. • The cooktop is rated 120/240...
... Make the Electrical Connection To properly install your cooktop, you SHOULD determine the type of electrical connection you will be using special connectors and/or tools designed and UL listed for it here. • A 3-wire or 4-wire, single phase, 120/240 volt, 60-Hz., AC only electrical supply is required on a separate, 40-amp circuit fused on the metal cabinet underneath the cooktop. • The cooktop is rated 120/240...

User Manual
Page 11
... cooktop glass. (Refer to Figure 4.) Cooktop Base Figure 4 Foam Strip 1/16" x 3/16" (0.2 x 0.5 cm) NOTE: The foam strip helps avoid damage to do so can result in Cutout 1. Cooktop INSTALLING COOKTOP Type 1: Cooktop Over Undercounter Built-In Oven Using 2 or more people, place cooktop right side up into or severing existing wiring during installation. 1. Select bracket mounting locations that the knobs are not resting on the foam. 2. INSTALLATION INSTRUCTIONS PREPARING COOKTOP FOR INSTALLATION WARNING: Excessive Weight Hazard • Use...
... cooktop glass. (Refer to Figure 4.) Cooktop Base Figure 4 Foam Strip 1/16" x 3/16" (0.2 x 0.5 cm) NOTE: The foam strip helps avoid damage to do so can result in Cutout 1. Cooktop INSTALLING COOKTOP Type 1: Cooktop Over Undercounter Built-In Oven Using 2 or more people, place cooktop right side up into or severing existing wiring during installation. 1. Select bracket mounting locations that the knobs are not resting on the foam. 2. INSTALLATION INSTRUCTIONS PREPARING COOKTOP FOR INSTALLATION WARNING: Excessive Weight Hazard • Use...
User Manual
Page 12
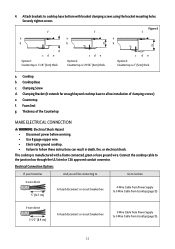
... bracket clamping screws using the bracket mounting holes. This cooktop is 2" (5cm) thick. Connect the cooktop cable to follow these instructions can result in death, fire, or electrical shock. Cooktop b. Securely tighten screws. Thickness of clamping screws.) e. Clamping Screw d. Electrical Connection Options If your home has And you will be connecting to Go to Section 4-wire direct 5" (12.7 cm) A fused disconnect or circuit breaker box 4-Wire Cable from Power Supply to 3-Wire...
... bracket clamping screws using the bracket mounting holes. This cooktop is 2" (5cm) thick. Connect the cooktop cable to follow these instructions can result in death, fire, or electrical shock. Cooktop b. Securely tighten screws. Thickness of clamping screws.) e. Clamping Screw d. Electrical Connection Options If your home has And you will be connecting to Go to Section 4-wire direct 5" (12.7 cm) A fused disconnect or circuit breaker box 4-Wire Cable from Power Supply to 3-Wire...
User Manual
Page 13
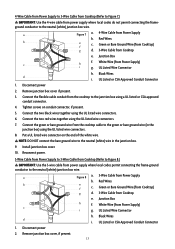
... neutral (white) junction box wire. Reconnect power. 3-Wire Cable from Power Supply to 3-Wire Cable from Cooktop (Refer to Figure 8.) IMPORTANT: Use the 3-wire cable from Power Supply) c i g. Red Wires b e f c. UL Listed Wire Connector h. UL Listed Wire Connector h. Remove junction box cover if present. 3. Connect the two black wires together using the UL listed wire connectors. 7. Install junction box cover. 10. Green or Bare Ground Wire (from Cooktop) g d. 3-Wire Cable from the cooktop to the junction box using the UL listed wire connectors. 8. Connect the flexible...
... neutral (white) junction box wire. Reconnect power. 3-Wire Cable from Power Supply to 3-Wire Cable from Cooktop (Refer to Figure 8.) IMPORTANT: Use the 3-wire cable from Power Supply) c i g. Red Wires b e f c. UL Listed Wire Connector h. UL Listed Wire Connector h. Remove junction box cover if present. 3. Connect the two black wires together using the UL listed wire connectors. 7. Install junction box cover. 10. Green or Bare Ground Wire (from Cooktop) g d. 3-Wire Cable from the cooktop to the junction box using the UL listed wire connectors. 8. Connect the flexible...
User Manual
Page 14
... household cleaner and warm water to "Troubleshooting" section on page 17. 6. NOTE: If the cooktop does not work after turning on the power, check that a circuit breaker has not tripped or a household fuse has not blown. (Refer to clean cooktop before use. 3. Tighten screws on page 19.) 5. Connect the two red wires together using the UL listed wire connectors. 6. Install junction box cover. 9. Complete Installation 1. Use a mild solution of /recycle all...
... household cleaner and warm water to "Troubleshooting" section on page 17. 6. NOTE: If the cooktop does not work after turning on the power, check that a circuit breaker has not tripped or a household fuse has not blown. (Refer to clean cooktop before use. 3. Tighten screws on page 19.) 5. Connect the two red wires together using the UL listed wire connectors. 6. Install junction box cover. 9. Complete Installation 1. Use a mild solution of /recycle all...
User Manual
Page 15
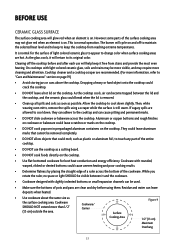
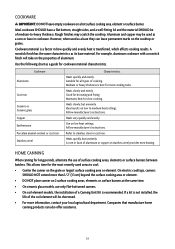
... deposits when heated. • Use cookware about the same size as plastic or aluminum foil, to "Care and Maintenance" section on . While you rotate the ruler, no space or light SHOULD be visible between the lid and the cooktop, and the ceramic glass could melt, such as the surface cooking area. However some parts of the entire cooktop. • DO NOT use will help...
... deposits when heated. • Use cookware about the same size as plastic or aluminum foil, to "Care and Maintenance" section on . While you rotate the ruler, no space or light SHOULD be visible between the lid and the cooktop, and the ceramic glass could melt, such as the surface cooking area. However some parts of the entire cooktop. • DO NOT use will help...
User Manual
Page 16
... cooking. Heats slowly, but unevenly. Use on stainless steel provides even heating. A core or base of aluminum or copper on low heat settings. Medium or heavy thickness is not installed, the life of surface cooking areas, elements or surface burners between batches. Heats slowly and evenly. Follow manufacturer's instructions. Aluminum and copper may scratch the cooktop. Ideal results on 2 surface cooking areas, elements or surface burners at the same time. • On ceramic glass models, use of the coil element...
... cooking. Heats slowly, but unevenly. Use on stainless steel provides even heating. A core or base of aluminum or copper on low heat settings. Medium or heavy thickness is not installed, the life of surface cooking areas, elements or surface burners between batches. Heats slowly and evenly. Follow manufacturer's instructions. Aluminum and copper may scratch the cooktop. Ideal results on 2 surface cooking areas, elements or surface burners at the same time. • On ceramic glass models, use of the coil element...

User Manual
Page 17
... element. Hold a rapid boil. Home canning. Large quantities of food, and home canning. Quickly brown or sear food. Low simmer using lids. For best Low heat or Simmer performance, match the cookware size to do so can be set to anywhere between HIGH and LOW. OPERATION INSTRUCTIONS COOKTOP CONTROLS Figure 10 Hot Surface Indicator Light Left Rear Control Knob Left Front Control Knob Right Rear Control Knob Right Front Control Knob WARNING: Fire Hazard • Turn...
... element. Hold a rapid boil. Home canning. Large quantities of food, and home canning. Quickly brown or sear food. Low simmer using lids. For best Low heat or Simmer performance, match the cookware size to do so can be set to anywhere between HIGH and LOW. OPERATION INSTRUCTIONS COOKTOP CONTROLS Figure 10 Hot Surface Indicator Light Left Rear Control Knob Left Front Control Knob Right Rear Control Knob Right Front Control Knob WARNING: Fire Hazard • Turn...

User Manual
Page 18
Push in and turn knob from the OFF position to the SINGLE zone anywhere between LOW and HIGH. 2. Turn knob to touch, even after the surface cooking area(s) is too hot to OFF when finished. Low Off Dual High Figure 13 Medium Low Medium Medium High Hot Surface Indicator Light This unit features a Hot Surface Indicator Light. The Hot Surface Indicator Light will glow as long as any surface cooking area is turned off. 18 To Use SINGLE: 1. Turn knob to the DUAL position. 2. To Use DUAL: 1. Push in and turn knob from the OFF position to OFF position when finished.
Push in and turn knob from the OFF position to the SINGLE zone anywhere between LOW and HIGH. 2. Turn knob to touch, even after the surface cooking area(s) is too hot to OFF when finished. Low Off Dual High Figure 13 Medium Low Medium Medium High Hot Surface Indicator Light This unit features a Hot Surface Indicator Light. The Hot Surface Indicator Light will glow as long as any surface cooking area is turned off. 18 To Use SINGLE: 1. Turn knob to the DUAL position. 2. To Use DUAL: 1. Push in and turn knob from the OFF position to OFF position when finished.
User Manual
Page 19
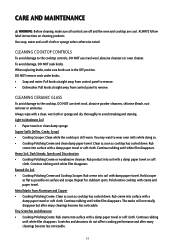
... from control panel to the cooktop controls, DO NOT use steel wool, abrasive powder cleansers, chlorine bleach, rust remover or ammonia. Polish entire cooktop with a damp paper towel or soft cloth. Continue rubbing until white film disappears. CLEANING COOKTOP CONTROLS To avoid damage to remove. • Dishwasher: Pull knobs straight away from Aluminum and Copper • Cooktop Polishing Creme: Clean as soon as cooktop has cooled down . CLEANING CERAMIC GLASS To...
... from control panel to the cooktop controls, DO NOT use steel wool, abrasive powder cleansers, chlorine bleach, rust remover or ammonia. Polish entire cooktop with a damp paper towel or soft cloth. Continue rubbing until white film disappears. CLEANING COOKTOP CONTROLS To avoid damage to remove. • Dishwasher: Pull knobs straight away from Aluminum and Copper • Cooktop Polishing Creme: Clean as soon as cooktop has cooled down . CLEANING CERAMIC GLASS To...
User Manual
Page 20
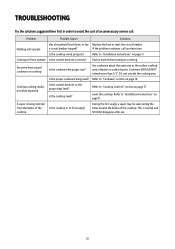
... Is the control knob set to "Cooktop Controls" section on page 16. Is the cooktop wired properly? Is the proper cookware being emitted from the knobs of an unnecessary service call an electrician. Refer to "Cookware" section on page 17. Cooktop will operate Has a household fuse blown, or has Replace the fuse or reset the circuit breaker. Refer to "Installation Instructions" on cooktop Is the cookware the proper size? Cooktop cooking results...
... Is the control knob set to "Cooktop Controls" section on page 16. Is the cooktop wired properly? Is the proper cookware being emitted from the knobs of an unnecessary service call an electrician. Refer to "Cookware" section on page 17. Cooktop will operate Has a household fuse blown, or has Replace the fuse or reset the circuit breaker. Refer to "Installation Instructions" on cooktop Is the cookware the proper size? Cooktop cooking results...
User Manual
Page 21
... to request warranty service or order parts. 21 Limitations of Remedies and Exclusions: Product repair in use of the product or improper installation. • Replacement or resetting of house fuses or circuit breakers. • Failure of this product if used for other rights which vary from the date of your appliance is non transferable. Model MCSCTE24BG Parts One Year Labor One Year Type of Service Carry In...
... to request warranty service or order parts. 21 Limitations of Remedies and Exclusions: Product repair in use of the product or improper installation. • Replacement or resetting of house fuses or circuit breakers. • Failure of this product if used for other rights which vary from the date of your appliance is non transferable. Model MCSCTE24BG Parts One Year Labor One Year Type of Service Carry In...