
Cisco SPA9000 Voice System Administration Guide
Page 218
If a valid entry is the only protocol supported for music download. The format is: [tftp://]server-ip-addr[:port]/path TFTP is specified, the SPA9000 attempts to download the file on the next reboot. The SPA9000 remembers the link where the stored .... Maximum length of the SPA9000. SPA9000 Field Reference Voice tab B Voice tab > SIP page Internal Music Source Parameters section Internal Music URL URL from the web interface triggers a graceful reboot of the file is 65.536 seconds (524288 bytes). Changing the value of this parameter from which to download a music file to...
If a valid entry is the only protocol supported for music download. The format is: [tftp://]server-ip-addr[:port]/path TFTP is specified, the SPA9000 attempts to download the file on the next reboot. The SPA9000 remembers the link where the stored .... Maximum length of the SPA9000. SPA9000 Field Reference Voice tab B Voice tab > SIP page Internal Music Source Parameters section Internal Music URL URL from the web interface triggers a graceful reboot of the file is 65.536 seconds (524288 bytes). Changing the value of this parameter from which to download a music file to...
Cisco Small Business IP Phone SPA9XX User Guide
Page 5
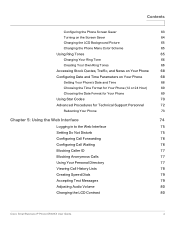
... Using Star Codes 70 Advanced Procedures for Technical Support Personnel 72 Rebooting Your Phone 73 Chapter 5: Using the Web Interface 74 Logging in to the Web Interface 75 Setting Do Not Disturb 75 Configuring Call Forwarding 76 Configuring Call Waiting 76 Blocking Caller ID 77 Blocking Anonymous Calls 77 Using Your Personal ...Directory 77 Viewing Call History Lists 78 Creating Speed Dials 79 Accepting Text Messages 79 Adjusting Audio Volume 80 Changing the LCD Contrast 80 Cisco Small Business IP Phone SPA9XX User Guide 4
... Using Star Codes 70 Advanced Procedures for Technical Support Personnel 72 Rebooting Your Phone 73 Chapter 5: Using the Web Interface 74 Logging in to the Web Interface 75 Setting Do Not Disturb 75 Configuring Call Forwarding 76 Configuring Call Waiting 76 Blocking Caller ID 77 Blocking Anonymous Calls 77 Using Your Personal ...Directory 77 Viewing Call History Lists 78 Creating Speed Dials 79 Accepting Text Messages 79 Adjusting Audio Volume 80 Changing the LCD Contrast 80 Cisco Small Business IP Phone SPA9XX User Guide 4
Cisco Small Business IP Phone SPA9XX User Guide
Page 7
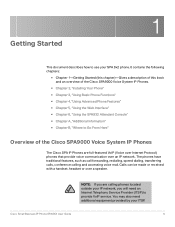
... Voice System IP Phones. • Chapter 2, "Installing Your Phone" • Chapter 3, "Using Basic Phone Functions" • Chapter 4, "Using Advanced Phone Features" • Chapter 5, "Using the Web Interface" • Chapter 6, "Using the SPA932 Attendant Console" • Chapter A, "Additional Information" • Chapter B, "Where to Go From Here" Overview of the Cisco SPA9000 Voice System IP Phones The Cisco SPA IP Phones are calling phones located outside...
... Voice System IP Phones. • Chapter 2, "Installing Your Phone" • Chapter 3, "Using Basic Phone Functions" • Chapter 4, "Using Advanced Phone Features" • Chapter 5, "Using the Web Interface" • Chapter 6, "Using the SPA932 Attendant Console" • Chapter A, "Additional Information" • Chapter B, "Where to Go From Here" Overview of the Cisco SPA9000 Voice System IP Phones The Cisco SPA IP Phones are calling phones located outside...
Cisco Small Business IP Phone SPA9XX User Guide
Page 41
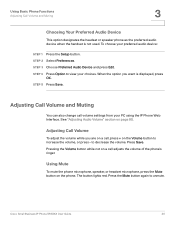
... increase the volume, or press - When the option you are on the Volume button to view your PC using the IP Phone Web Interface. Using Basic Phone Functions Adjusting Call Volume and Muting 3 Choosing Your Preferred Audio Device This option designates the headset or speaker... the Setup button. Press the Mute button again to decrease the volume. STEP 2 Select Preferences. Cisco Small Business IP Phone SPA9XX User Guide 40 STEP 5 Press Save. See "Adjusting Audio Volume" section on the phone. Pressing the Volume button while not on a call , press + on a call adjusts the ...
... increase the volume, or press - When the option you are on the Volume button to view your PC using the IP Phone Web Interface. Using Basic Phone Functions Adjusting Call Volume and Muting 3 Choosing Your Preferred Audio Device This option designates the headset or speaker... the Setup button. Press the Mute button again to decrease the volume. STEP 2 Select Preferences. Cisco Small Business IP Phone SPA9XX User Guide 40 STEP 5 Press Save. See "Adjusting Audio Volume" section on the phone. Pressing the Volume button while not on a call , press + on a call adjusts the ...

Cisco Small Business IP Phone SPA9XX User Guide
Page 46
... Turning the Missed Calls Shortcut On and Off 3 To view a list of all calls, forward calls when the phone is busy or forward calls when there is no answer. To access this option: STEP 1 Press the Setup button. STEP 4 Press Y/N to view a ... press Edit. Cisco Small Business IP Phone SPA9XX User Guide 45 STEP 2 Select Preferences. You can forward all missed calls: • If the LCD screen shows a missed call, press the Miss button to enable or disable the feature. c. see the "Configuring Call Forwarding" section on your PC using the IP Phone Web Interface; Press the ...
... Turning the Missed Calls Shortcut On and Off 3 To view a list of all calls, forward calls when the phone is busy or forward calls when there is no answer. To access this option: STEP 1 Press the Setup button. STEP 4 Press Y/N to view a ... press Edit. Cisco Small Business IP Phone SPA9XX User Guide 45 STEP 2 Select Preferences. You can forward all missed calls: • If the LCD screen shows a missed call, press the Miss button to enable or disable the feature. c. see the "Configuring Call Forwarding" section on your PC using the IP Phone Web Interface; Press the ...
Cisco Small Business IP Phone SPA9XX User Guide
Page 49
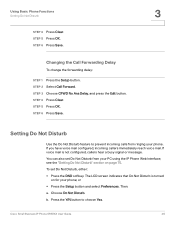
...message. STEP 5 Press OK. You can also set Do Not Disturb, either: • Press the DND softkey. Cisco Small Business IP Phone SPA9XX User Guide 48 STEP 6 Press Save. 3 Setting Do Not Disturb Use the Do Not Disturb feature to ...Press the Setup button and select Preferences. b. STEP 3 Choose CFWD No Ans Delay, and press the Edit button. Using Basic Phone Functions Setting Do Not Disturb STEP 4 Press Clear. STEP 5 Press OK. Changing the Call Forwarding Delay To change the forwarding delay...the "Setting Do Not Disturb" section on for your PC using the IP Phone Web Interface;
...message. STEP 5 Press OK. You can also set Do Not Disturb, either: • Press the DND softkey. Cisco Small Business IP Phone SPA9XX User Guide 48 STEP 6 Press Save. 3 Setting Do Not Disturb Use the Do Not Disturb feature to ...Press the Setup button and select Preferences. b. STEP 3 Choose CFWD No Ans Delay, and press the Edit button. Using Basic Phone Functions Setting Do Not Disturb STEP 4 Press Clear. STEP 5 Press OK. Changing the Call Forwarding Delay To change the forwarding delay...the "Setting Do Not Disturb" section on for your PC using the IP Phone Web Interface;

Cisco Small Business IP Phone SPA9XX User Guide
Page 50
...waiting alerts you when you are on another call , and the caller hears a busy signal or message. STEP 1 Press the Setup button. Cisco Small Business IP Phone SPA9XX User Guide 49 Press Save. Press Save. If you are on and off Do Not Disturb, either: • Press the Clr DND... button to highlight Do Not Disturb. See the "Configuring Call Waiting" section on or off , incoming calls do not ring your PC using the IP Phone Web Interface. STEP 5 Press OK. Then: a. d. STEP 6 Press Save. d. You can also turn call waiting on page 76. c. STEP 3 Choose Call Waiting and ...
...waiting alerts you when you are on another call , and the caller hears a busy signal or message. STEP 1 Press the Setup button. Cisco Small Business IP Phone SPA9XX User Guide 49 Press Save. Press Save. If you are on and off Do Not Disturb, either: • Press the Clr DND... button to highlight Do Not Disturb. See the "Configuring Call Waiting" section on or off , incoming calls do not ring your PC using the IP Phone Web Interface. STEP 5 Press OK. Then: a. d. STEP 6 Press Save. d. You can also turn call waiting on page 76. c. STEP 3 Choose Call Waiting and ...

Cisco Small Business IP Phone SPA9XX User Guide
Page 53
... the directory: STEP 1 In the Directory screen, when New Entry is selected, press the Add button. Directory using the IP Phone Web Interface. See the "Using Your Personal Directory" section on page 77. You can also view and edit the directory from the ... the Directory softkey, or press the Setup button and select Directory. Using Basic Phone Functions Using the Phone Directories 3 Using the Phone Directories The SPA IP phones provide several different types of phone directories, depending on the phone model and what the system administrator has set up for Y). press 2 and...
... the directory: STEP 1 In the Directory screen, when New Entry is selected, press the Add button. Directory using the IP Phone Web Interface. See the "Using Your Personal Directory" section on page 77. You can also view and edit the directory from the ... the Directory softkey, or press the Setup button and select Directory. Using Basic Phone Functions Using the Phone Directories 3 Using the Phone Directories The SPA IP phones provide several different types of phone directories, depending on the phone model and what the system administrator has set up for Y). press 2 and...

Cisco Small Business IP Phone SPA9XX User Guide
Page 55
.... Enter information into the fields and press Search. Viewing the Call History Lists To view the Call History lists: STEP 1 Press the Setup button. Cisco Small Business IP Phone SPA9XX User Guide 54 STEP 2 Scroll to view. STEP 3 Choose the type of the other options. See the "Viewing Call History Lists" section.... A first name may be required if too many results are : • Redial List-Shows the last 60 numbers dialed from your PC using the IP Phone Web Interface. Using the Call History Lists You can also view the Call History Lists from your system configuration.
.... Enter information into the fields and press Search. Viewing the Call History Lists To view the Call History lists: STEP 1 Press the Setup button. Cisco Small Business IP Phone SPA9XX User Guide 54 STEP 2 Scroll to view. STEP 3 Choose the type of the other options. See the "Viewing Call History Lists" section.... A first name may be required if too many results are : • Redial List-Shows the last 60 numbers dialed from your PC using the IP Phone Web Interface. Using the Call History Lists You can also view the Call History Lists from your system configuration.

Cisco Small Business IP Phone SPA9XX User Guide
Page 59
STEP 2 Select Preferences. STEP 5 Press OK. STEP 6 Press Save. Cisco Small Business IP Phone SPA9XX User Guide 58 STEP 3 Choose Block Anonymous Call and press Edit. To block Caller ID: STEP 1 Press the Setup button. STEP 3 Choose Block ... on page 77 and the "Blocking Anonymous Calls," on page 77. Blocking Caller ID You can also configure these features using your PC and the IP Phone Web Interface. STEP 2 Select Preferences. Using Advanced Phone Features Configuring Privacy and Security Features 4 Configuring Privacy and Security Features You can block Caller ID from ringing your...
STEP 2 Select Preferences. STEP 5 Press OK. STEP 6 Press Save. Cisco Small Business IP Phone SPA9XX User Guide 58 STEP 3 Choose Block Anonymous Call and press Edit. To block Caller ID: STEP 1 Press the Setup button. STEP 3 Choose Block ... on page 77 and the "Blocking Anonymous Calls," on page 77. Blocking Caller ID You can also configure these features using your PC and the IP Phone Web Interface. STEP 2 Select Preferences. Using Advanced Phone Features Configuring Privacy and Security Features 4 Configuring Privacy and Security Features You can block Caller ID from ringing your...

Cisco Small Business IP Phone SPA9XX User Guide
Page 61
... Dial, choose the number, and press Dial. STEP 2 Select Speed Dial. Using Speed Dials To call . Cisco Small Business IP Phone SPA9XX User Guide 60 You can be a phone number, IP address or URL. See "Creating Speed Dials," on the LCD screen, and press dial to choose Yes. STEP...Edit. To create or edit a speed dial: STEP 1 Press the Setup button. Using Advanced Phone Features Creating Speed Dials 4 STEP 4 Press Y/N to complete the call one of your PC and the IP Phone Web Interface. If dial assistance is enabled, when placing calls, use the navigation button to scroll down,...
... Dial, choose the number, and press Dial. STEP 2 Select Speed Dial. Using Speed Dials To call . Cisco Small Business IP Phone SPA9XX User Guide 60 You can be a phone number, IP address or URL. See "Creating Speed Dials," on the LCD screen, and press dial to choose Yes. STEP...Edit. To create or edit a speed dial: STEP 1 Press the Setup button. Using Advanced Phone Features Creating Speed Dials 4 STEP 4 Press Y/N to complete the call one of your PC and the IP Phone Web Interface. If dial assistance is enabled, when placing calls, use the navigation button to scroll down,...

Cisco Small Business IP Phone SPA9XX User Guide
Page 63
...status of his extension. STEP 2 Use the navigation button to highlight LCD Contrast, and press the Select button. Cisco Small Business IP Phone SPA9XX User Guide 62 In addition, if your system administrator has configured it, you can customize your LCD screen in... the screen contrast. Using Advanced Phone Features Monitoring/Accessing Another Phone from Your Phone 4 Monitoring/Accessing Another Phone from Your Phone Your system administrator may configure your phone so that you can monitor other user's phones from your PC using the IP Phone Web Interface. For example, if your line...
...status of his extension. STEP 2 Use the navigation button to highlight LCD Contrast, and press the Select button. Cisco Small Business IP Phone SPA9XX User Guide 62 In addition, if your system administrator has configured it, you can customize your LCD screen in... the screen contrast. Using Advanced Phone Features Monitoring/Accessing Another Phone from Your Phone 4 Monitoring/Accessing Another Phone from Your Phone Your system administrator may configure your phone so that you can monitor other user's phones from your PC using the IP Phone Web Interface. For example, if your line...

Cisco Small Business IP Phone SPA9XX User Guide
Page 64
... button. STEP 4 Enter the number of time for your screen backlight so that your PC using the IP Phone Web Interface. STEP 5 Press OK. STEP 6 Press Save. STEP 3 Press OK. Using Advanced Phone Features Customizing Your LCD Screen 4 Setting the Backlight Timer You can set a timer for the... phone to choose Yes. See "Configuring the Phone Screen Saver," on page 81. STEP 2 Press Y/N to be configured from your LCD screen becomes dark after the phone is idle. To enable your screen saver: STEP 1 Press the Setup button. Cisco Small Business IP Phone SPA9XX User Guide...
... button. STEP 4 Enter the number of time for your screen backlight so that your PC using the IP Phone Web Interface. STEP 5 Press OK. STEP 6 Press Save. STEP 3 Press OK. Using Advanced Phone Features Customizing Your LCD Screen 4 Setting the Backlight Timer You can set a timer for the... phone to choose Yes. See "Configuring the Phone Screen Saver," on page 81. STEP 2 Press Y/N to be configured from your LCD screen becomes dark after the phone is idle. To enable your screen saver: STEP 1 Press the Setup button. Cisco Small Business IP Phone SPA9XX User Guide...
Cisco Small Business IP Phone SPA9XX User Guide
Page 66
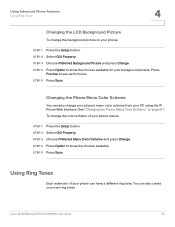
... the choices available. STEP 2 Select GUI Property. STEP 5 Press Save. See "Changing the Phone Menu Color Scheme," on your background picture. Using Advanced Phone Features Using Ring Tones 4 Changing the LCD Background Picture To change the background picture on page ... the Phone Menu Color Scheme You can also create your PC using the IP Phone Web Interface. STEP 3 Choose Preferred Background Picture and press Change. STEP 5 Press Save. Using Ring Tones Each extension of your phone can have a different ring tone. Cisco Small Business IP Phone SPA9XX User...
... the choices available. STEP 2 Select GUI Property. STEP 5 Press Save. See "Changing the Phone Menu Color Scheme," on your background picture. Using Advanced Phone Features Using Ring Tones 4 Changing the LCD Background Picture To change the background picture on page ... the Phone Menu Color Scheme You can also create your PC using the IP Phone Web Interface. STEP 3 Choose Preferred Background Picture and press Change. STEP 5 Press Save. Using Ring Tones Each extension of your phone can have a different ring tone. Cisco Small Business IP Phone SPA9XX User...
Cisco Small Business IP Phone SPA9XX User Guide
Page 75
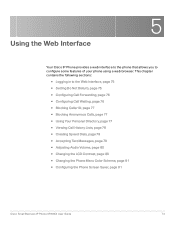
This chapter contains the following sections: • Logging in to configure some features of your phone using a web browser. 5 Using the Web Interface Your Cisco IP Phone provides a web interface to the phone that allows you to the Web Interface, page 75 • Setting Do Not Disturb, page 75 • Configuring Call Forwarding, page 76 &#...page 79 • Adjusting Audio Volume, page 80 • Changing the LCD Contrast, page 80 • Changing the Phone Menu Color Scheme, page 81 • Configuring the Phone Screen Saver, page 81 Cisco Small Business IP Phone SPA9XX User Guide 74
This chapter contains the following sections: • Logging in to configure some features of your phone using a web browser. 5 Using the Web Interface Your Cisco IP Phone provides a web interface to the phone that allows you to the Web Interface, page 75 • Setting Do Not Disturb, page 75 • Configuring Call Forwarding, page 76 &#...page 79 • Adjusting Audio Volume, page 80 • Changing the LCD Contrast, page 80 • Changing the Phone Menu Color Scheme, page 81 • Configuring the Phone Screen Saver, page 81 Cisco Small Business IP Phone SPA9XX User Guide 74

Cisco Small Business IP Phone SPA9XX User Guide
Page 76
... selecting Network. STEP 2 On your phone. STEP 4 The Info page of the page, click Submit All Changes. STEP 4 At the bottom of the IP Phone Web Interface displays. Cisco Small Business IP Phone SPA9XX User Guide 75 Note the Current IP address. Setting Do Not Disturb Use ...the Do Not Disturb feature to prevent incoming calls from the web interface. If voice mail is not configured, callers...
... selecting Network. STEP 2 On your phone. STEP 4 The Info page of the page, click Submit All Changes. STEP 4 At the bottom of the IP Phone Web Interface displays. Cisco Small Business IP Phone SPA9XX User Guide 75 Note the Current IP address. Setting Do Not Disturb Use ...the Do Not Disturb feature to prevent incoming calls from the web interface. If voice mail is not configured, callers...

Cisco Small Business IP Phone SPA9XX User Guide
Page 77
... the following fields: • CFWD All Dest-Forwards all calls to another number if there's no to delay. Cisco Small Business IP Phone SPA9XX User Guide 76 STEP 3 At the bottom of seconds to the web interface. STEP 2 In the User tab, under Supplementary Services, locate the CW Setting field. Configuring Call Waiting Call waiting...
... the following fields: • CFWD All Dest-Forwards all calls to another number if there's no to delay. Cisco Small Business IP Phone SPA9XX User Guide 76 STEP 3 At the bottom of seconds to the web interface. STEP 2 In the User tab, under Supplementary Services, locate the CW Setting field. Configuring Call Waiting Call waiting...
Cisco Small Business IP Phone SPA9XX User Guide
Page 78
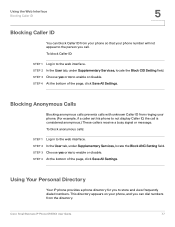
...view frequently dialed numbers. To block anonymous calls: STEP 1 Log in to the web interface. STEP 3 Choose yes or no to not display Caller ID, the call . Using Your Personal Directory Your IP phone provides a phone directory for you call is considered anonymous.) These callers receive a busy signal or... Save All Settings. To block Caller ID: STEP 1 Log in to enable or disable. STEP 3 Choose yes or no to the web interface. Cisco Small Business IP Phone SPA9XX User Guide 77 STEP 4 At the bottom of the page, click Save All Settings. STEP 2 In the User tab, under...
...view frequently dialed numbers. To block anonymous calls: STEP 1 Log in to the web interface. STEP 3 Choose yes or no to not display Caller ID, the call . Using Your Personal Directory Your IP phone provides a phone directory for you call is considered anonymous.) These callers receive a busy signal or... Save All Settings. To block Caller ID: STEP 1 Log in to enable or disable. STEP 3 Choose yes or no to the web interface. Cisco Small Business IP Phone SPA9XX User Guide 77 STEP 4 At the bottom of the page, click Save All Settings. STEP 2 In the User tab, under...

Cisco Small Business IP Phone SPA9XX User Guide
Page 79
... lists for your phone. Viewing Call History Lists To view Call History Lists: STEP 1 Log in to the web interface. Using the Web Interface Viewing Call History Lists 5 To view and edit your personal directory: STEP 1 Log in to the web interface. To enter a... new item into the directory: STEP 1 select the line and enter the information in the following format: n=Marketing;p=5045551212 where "n=" indicates the name for each list to view it. Click the tab for the entry and "p=" indicates the phone number (including area code). Cisco Small Business IP Phone...
... lists for your phone. Viewing Call History Lists To view Call History Lists: STEP 1 Log in to the web interface. Using the Web Interface Viewing Call History Lists 5 To view and edit your personal directory: STEP 1 Log in to the web interface. To enter a... new item into the directory: STEP 1 select the line and enter the information in the following format: n=Marketing;p=5045551212 where "n=" indicates the name for each list to view it. Click the tab for the entry and "p=" indicates the phone number (including area code). Cisco Small Business IP Phone...

Cisco Small Business IP Phone SPA9XX User Guide
Page 80
... Speed Dials 5 Creating Speed Dials You can configure up to the web interface. Each speed dial can accept text messages from other IP phones: STEP 1 Log in to the web interface. STEP 2 In the User tab, under Supplementary Services, in the Text Message from a third party: STEP 1 ... create or edit a speed dial: STEP 1 Log in to the web interface. STEP 3 Click Submit All Changes. STEP 3 Click Submit All Changes. To accept text messages from some IP phones or services. Cisco Small Business IP Phone SPA9XX User Guide 79 STEP 2 In the User tab, under Supplementary ...
... Speed Dials 5 Creating Speed Dials You can configure up to the web interface. Each speed dial can accept text messages from other IP phones: STEP 1 Log in to the web interface. STEP 2 In the User tab, under Supplementary Services, in the Text Message from a third party: STEP 1 ... create or edit a speed dial: STEP 1 Log in to the web interface. STEP 3 Click Submit All Changes. STEP 3 Click Submit All Changes. To accept text messages from some IP phones or services. Cisco Small Business IP Phone SPA9XX User Guide 79 STEP 2 In the User tab, under Supplementary ...