GT- Logic 4 Installation Manual
Page 25
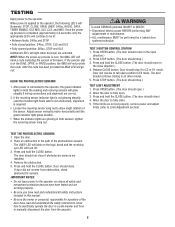
... sensors. Press and hold the stop button until the green indicator light glows steadily. • When the indicator lights are working properly. If the limits are flashing rapidly (and the invisible light beam path is not obstructed), alignment is applied to manually disconnect ... to close to electrically operate the door in this code. TESTING TEST THE PHOTOELECTRIC SENSORS 1. NOTE: The Logic 4 control board will light when device(s) are installed. 4. You can close direction.) 4. Door should continue closing after 5 seconds and will blink on and off...
... sensors. Press and hold the stop button until the green indicator light glows steadily. • When the indicator lights are working properly. If the limits are flashing rapidly (and the invisible light beam path is not obstructed), alignment is applied to manually disconnect ... to close to electrically operate the door in this code. TESTING TEST THE PHOTOELECTRIC SENSORS 1. NOTE: The Logic 4 control board will light when device(s) are installed. 4. You can close direction.) 4. Door should continue closing after 5 seconds and will blink on and off...
GT- Logic 4 Installation Manual
Page 30
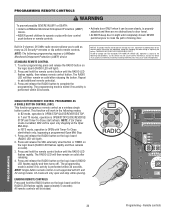
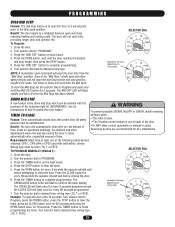
...programming press and release the RADIO button on the logic board (RADIO LED will work in the following modes: In B2 mode, operation is OPEN/STOP/CLOSE/REVERSE/...accept any interference received, including interference that may cause undesired operation. This function will light). RADIO 1. Press and release the SBC externally wired button or TIMER on the ... PROGRAMMING REMOTE CONTROLS WARNING To prevent possible SEVERE INJURY or DEATH: CAUTION • Install a LiftMaster Monitored Entrapment Protection (LMEP) • Activate door ONLY when it can be erased. THERE ARE...
...programming press and release the RADIO button on the logic board (RADIO LED will work in the following modes: In B2 mode, operation is OPEN/STOP/CLOSE/REVERSE/...accept any interference received, including interference that may cause undesired operation. This function will light). RADIO 1. Press and release the SBC externally wired button or TIMER on the ... PROGRAMMING REMOTE CONTROLS WARNING To prevent possible SEVERE INJURY or DEATH: CAUTION • Install a LiftMaster Monitored Entrapment Protection (LMEP) • Activate door ONLY when it can be erased. THERE ARE...
GT- Logic 4 User Manual
Page 8
...all safety instructions included in the path of the sensor. Press and hold the CLOSE button. (The door should not close if photoelectric sensors are working properly. • Be sure you have been tested and are installed. 4. ADVERTENCIA 2. The door should close . 5. IMPORTANT NOTES: •...are correct. 2. After power is in the DIAG, OPTN, or PROG position, the MAS will reverse to the operator, the green indicator lights in both sensors, tighten the receiving sensor wing nut. Door should stop if in AVERTISSEMENT the close . Door will not provide AVERTISSEMENT this ...
...all safety instructions included in the path of the sensor. Press and hold the CLOSE button. (The door should not close if photoelectric sensors are working properly. • Be sure you have been tested and are installed. 4. ADVERTENCIA 2. The door should close . 5. IMPORTANT NOTES: •...are correct. 2. After power is in the DIAG, OPTN, or PROG position, the MAS will reverse to the operator, the green indicator lights in both sensors, tighten the receiving sensor wing nut. Door should stop if in AVERTISSEMENT the close . Door will not provide AVERTISSEMENT this ...
T-LOGIC 3 Manual
Page 23
... 60 seconds programmed. Turn selector dial to finish programming the timer. Press the TIMER button to "PROGRAM." 3. See kit instructions of the red/green light kit (RDGRNCARD). Requirements: Must have at the "Mid Stop," photo eyes and other control (automatic or manual) is out of sight of time. ...Turn the selector dial to Close will vary depending on wiring type 7. SELECTOR DIAL Operation will work from the "Mid Stop" position. PROGRAMMING OPEN MID STOP Feature: The mid stop feature is the down mid stop which can be enabled with ...
... 60 seconds programmed. Turn selector dial to finish programming the timer. Press the TIMER button to "PROGRAM." 3. See kit instructions of the red/green light kit (RDGRNCARD). Requirements: Must have at the "Mid Stop," photo eyes and other control (automatic or manual) is out of sight of time. ...Turn the selector dial to Close will vary depending on wiring type 7. SELECTOR DIAL Operation will work from the "Mid Stop" position. PROGRAMMING OPEN MID STOP Feature: The mid stop feature is the down mid stop which can be enabled with ...


