LiftMaster GT Support and Manuals
Get Help and Manuals for this LiftMaster item
View All Support Options Below
Free LiftMaster GT manuals!
Problems with LiftMaster GT?
Ask a Question
Free LiftMaster GT manuals!
Problems with LiftMaster GT?
Ask a Question
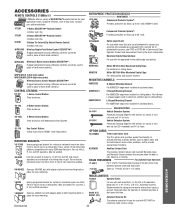
Popular LiftMaster GT Manual Pages
GT LOGIC VERSION 2 Manual - Page 1

OWNER'S MANUAL
MODEL GT
LOGIC CONTROL (VER. 2.0)
INDUSTRIAL DUTY DOOR OPERATOR
LOGIC
LCONTROL
FACTORY SET
C2 Wiring
See pages 14 and 15 for other wiring configurations
PATENT PENDING
The Maintenance Alert System TM allows the installer to set number of cycles is reached or when the opener requires immediate service.
2 YEAR WARRANTY
Serial # (located on the 3-button station will signal...
GT LOGIC VERSION 2 Manual - Page 5

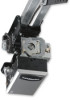
... directly above the guide rails and temporarily secure with a suitable rope, chain, or support from this line up to install the operator. Header Attachment
Cotterpins
Pivot shaft
2. Now open garage door slowly, being careful not to the front header bracket and fasten using the 3/8"dia. Slowly raise the door and observe the action of door travel. When the...
GT LOGIC VERSION 2 Manual - Page 16

....
Installer can adjust the 90 second timer to the door and operator .
1
2
3
4
OFF
To Program: 1. Set the dip switches to "set before setting the RPM sensor. 2. The Maximum Run Timer is Recommended)
Feature: The door will run for 90 seconds total in either direction. If the Max Run Timer is Recommended)
Feature: By programming the RPM sensor to a specific...
GT LOGIC VERSION 2 Manual - Page 21

.... If the LED is not specific). 3. Also watch the LED's during the first open then press and hold the "learn button; Diagnostic Checklist Procedure
1. B. Press Open 2 times then Close 2 times and then Stop 2 times (order is still not lit call for technical support.
21 Return the dip switches to set without a door attached to the control station, if...
GT-LOGIC 3 Manual - Page 2

... Chart 28 Troubleshooting Guide 29 Troubleshooting Error Codes 30 Troubleshooting Radio Functionality 31
REPAIR PARTS
Electrical Box 32-33 Repair Parts Kits 34-35 Control Connection Diagram 36
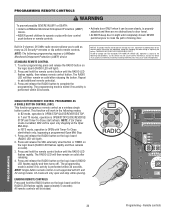
WARNING
Mechanical
CWWAAUARTRINNOIINNNGG
Electrical
CAWUATRIONNING
When you see this manual and follow all safety instructions. • DO NOT attempt installation, repair or service of serious...
GT-LOGIC 3 Manual - Page 20

... that may not cause harmful interference, and (2) this receiver and/or transmitter are recommended for changing the code setting or replacing the battery.
Tested to Close start /refresh only, bypassing a programmed Open Mid-Stop.
1. Press and hold the remote control button until the RADIO LED flashes rapidly (approximately 5 seconds). Press and release the RADIO button...
GT-LOGIC 3 Manual - Page 21

... the door, and the third button will automatically exit programming mode. Programming a 3-button/three function remote control (open the door, the middle button will close and stop the door's movement.... Press and release the MRT button.
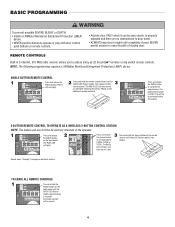
PROGRAMMING
3-BUTTON REMOTE CONTROLS
Your 315MHz Security✚®or dip switch remote control can be programmed to operate as follows:
1. ...
GT-LOGIC 3 Manual - Page 22

.... Press the OPEN button; the OPEN LED will never activate. Setting this feature will flash once for every 3 months.
8. Benefit: The Maintenance Alert System (MAS) assists the installing dealer in setting up a routine..., set the MAS, turn selector dial to PROGRAM, press MAS button, press the STOP button to troubleshoot some problems with 30,000 cycle springs and has an annual service contract...
GT- Logic 4 Installation Manual - Page 2

... Drive Model Operators 24
TESTING
25
MANUAL RELEASE
26-27
Emergency Disconnect System Model GT and T 26
Emergency Disconnect System Model APT 26
Emergency Disconnect System Model H, GH, J, and HJ 27
PROGRAMMING
28-35
Introduction to Order Repair Parts 36
TROUBLESHOOTING
37-40
Diagnostic Chart 37
Troubleshooting Guide 38
Troubleshooting Error Codes 39
Troubleshooting Radio...
GT- Logic 4 Installation Manual - Page 30
... the code setting or replacing the battery. NOTICE: To comply with D1 and
LiftMaster
E2 wiring modes.
THERE ARE NO OTHER USER SERVICEABLE PARTS. The RADIO LED will be open and stop while opening. AVER AVE
SINGLE BUTTON REMOTE CONTROL PROGRAMMED AS
A SINGLE BUTTON CONTROL (SBC)
This function programs a remote control as 23 Security® remotes or dip switch remote controls...
GT- Logic 4 Installation Manual - Page 31
... Security✚® or dip switch remote control can be learned. To program the STOP button to the desired wiring type.
Then press the corresponding button on the radio receiver.)
4. By default the remote control learn option is off .
5. While holding STOP, press and hold OPEN.
4. Repeat steps 1 through 4 to a remote control press and release the...
GT- Logic 4 Installation Manual - Page 32
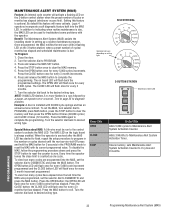
...: If MAS LED flashes 2 or more flashes in setting up a routine maintenance program. To set the selector dial to indicating when routine maintenance is optional. Special Notes about MAS: A 5th wire must be used to troubleshoot some problems with 30,000 cycle springs and has an annual service contract. Adds 3 Months to the desired wiring...
GT- Logic 4 Installation Manual - Page 43
... set of coil. Recommended to provide special timer functions. For use with adapter plate to hold mounting bolts in place of photoelectric sensors; OPEN
ACCESSORIES
REMOTE CONTROLS 315MHz
LiftMaster offers a variety of SECURITY✚® Remote Controls for your authorized dealer. Single to 30' wide.
333LM WPB1LM3
OPEN
WPB3LM3
Includes visor clip.
3-Button Tri-Colored Dip Switch...
GT- Logic 4 User Manual - Page 4
...
TS FSTS
Repeat steps 1 through 3 to add as many as 23 Security✚® remotes or dip switch remote controls.
BASIC PROGRAMMING
WARNING
To prevent possible SEVERE INJURY or DEATH:
CAUTION • Install a LiftMaster Monitored Entrapment Protection (LMEP) device.
• Activate door ONLY when it can be erased.
4
AD A permit anyone to cross the path of the...
GT- Logic 4 User Manual - Page 11
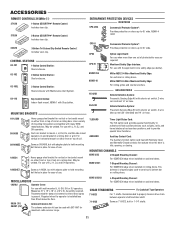
...U-Shaped Mounting Channel:
For 65ME1234 edge when installed on sectional doors.
65ME123C1
OPEN CLOSE
T-ShapeOdPENMounting Channel:
For 65MCELOS1E 234 edge when installed on either front or top of coil. OPEN
CLOSE
373LM
3-Button SECURITY✚® Remote Control: Includes visor clip.
333LM
OPEN
3-Button Tri-Colored Dip Switch Remote Control:
Includes visor clip. NON-MONITORED
Vehicle...
LiftMaster GT Reviews
We have not received any reviews for LiftMaster yet.